
Migrating TinyMCE plugins to version 5
- Last Modified:
- 24 Apr 2025
- User Level:
- Administrator
From version 8.3.12, Terminalfour has been upgraded to use v5.8.2 of the TinyMCE editor.
The majority of Terminalfour’s TinyMCE plugins are built on top of an existing Tiny plugin. There are two ways to go about it:
- Rewrite an existing plugin – add existing code on top of an existing plugin to add more features on either of their dev or compiled versions of the code (a good understanding of JavaScript is required). Download the dev package here.
- Create a brand new plugin from scratch by following the steps on Tiny’s website
In this article, we'll be looking at ways to rewrite an existing plugin.
Rewriting an existing plugin
The following is a summary of things to consider when rewriting an existing TinyMCE4 plugin.
Context menus
The context menu can be added in a custom plugin through this new method:
editor.ui.registry.addContextMenu();UI configuration settings
The API methods for registering UI components (toolbar button, menu item, etc) have moved and there are new and changed methods.
Here's an example of how to register a menu item:
editor.ui.registry.addMenuItem('t4media', {
 text: 'Insert file link or image',
icon: 'image',
 onAction: function () {
 //Your method
}
});
Here's an example of how to register a toolbar menu:
editor.ui.registry.addButton('t4media', {
   text: '',
   icon: 'image',
   onAction: function () {
     //Your method
   }
 });
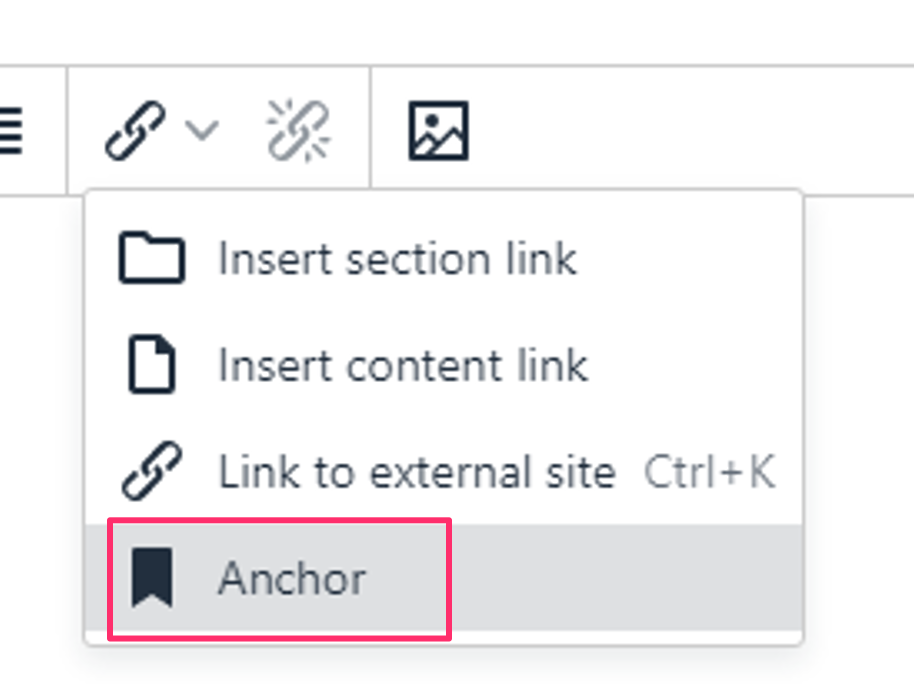
Here's an example of how to register a nested menu:
editor.ui.registry.addNestedMenuItem('link', {
   icon: 'link',
   text: 'Insert link',
   getSubmenuItems: function() {
     return [
       {
         type: 'menuitem',
         icon: 'folder',
         text: 'title',
         onAction: function () {
           //Your method
         }
       },
       {
         type: 'menuitem',
         icon: 'new-document',
         text: 'title',
         onAction: function () {
           //Your method
         }
       },      //Add more objects here to populate the dropdown
     ];
   }
 });
Dialog components
There are also changes to how custom dialogs are added to a custom plugin.
Here's an example of how a dialog box was registered in TinyMCE4:
editor.windowManager.open({
   title: 'Some title',

data: data, //Some JSON data
   bodyType: 'tabpanel',
   body: [
    {
      title: 'General',
      type: 'form',
      items: [      {
         type: 'form',
         layout: 'grid',
         columns: 2,
         defaults: {
           type: 'textbox'
         },
         items: buildForm(data)
       }     ]
    } ],
   onsubmit: function () {

   }
 });
Here's how that looks in TinyMCE5:
editor.windowManager.open({
   title: 'Some title',

initialData: updatedData, //Some JSON data

body: {     type: 'panel',
     items: [
       {
         type: 'grid',
         columns: 2,
         items: buildForm(updatedData) //updatedData is some JSON data
       }
     ]
   },
   buttons: [
     {
       type: 'cancel',
       name: 'closeButton',
       text: 'Cancel'
     },
     {
       type: 'submit',
       name: 'submitButton',
       text: 'Save',
       primary: true
     }
   ],
   onCancel: (dialogApi)=> {

   },
   onSubmit: function (dialogApi) {

   }
 });
You can learn more about customizing the body of a modal at the TinyMCE page on dialog components.
How to rewrite your plugin for TinyMCE5
- The base of a typical TinyMCE5 plugin method should look like the following code and will have to be written in a file – plugin.js.
tinymce.PluginManager.add('yourCustomPluginName_CP', function (editor) {
  // Code to add contextmenu, dialogs, UI components go here
});
When naming your custom plugin, the suffix _CP must be added for our system to recognize that it is a custom plugin. Otherwise, the plugin will be ignored.
Ensure the plugin name begins with a lower case letter.
- The logic of the plugin can be written inside the function as shown below:
tinymce.PluginManager.add('yourCustomPluginName_CP', function (editor) {
  // Code to add contextmenu, dialogs, UI components go here

  // Adding a custom button on the menubar
  editor.ui.registry.addMenuItem('yourCustomPluginName', {
    text: 'My Custom Menu Item',
    onAction: function() {
      alert('Menu item clicked');
    }
  });

  // Adding a custom button on the toolbar
  editor.ui.registry.addButton('yourCustomPluginName', {
    text: 'My Custom Toolbar Item',
    onAction: function() {
      alert('Toolbar item clicked');
    }
  });
});- The code above shows a simple way to add UI components for your custom plugin. The name of the menubar and toolbar, for e.g. yourCustomPluginName will determine the value that you have to add in the htmlconfig settings in the system for the custom button to show on the HTML editor in the content.
- Once you are happy with the code, ensure the js and also a minified version of the file, plugin.min.js, are located in a folder, for e.g. yourCustomPluginName. Compress the folder into a .zip file.
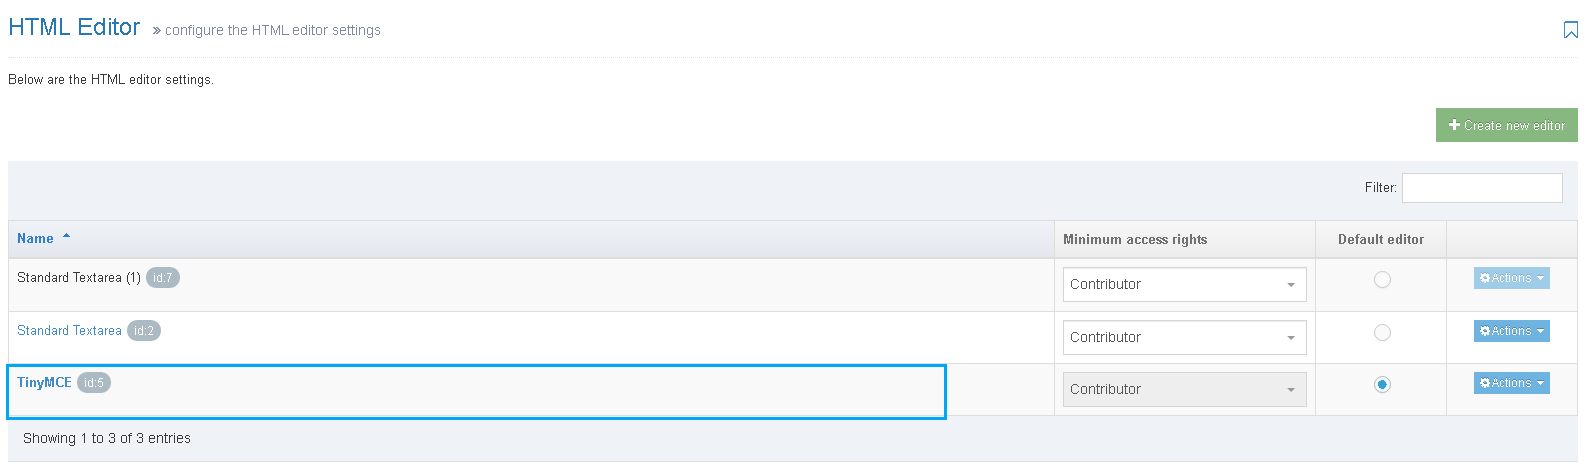
- Go to your htmlconfig settings in the product and select TinyMCE:
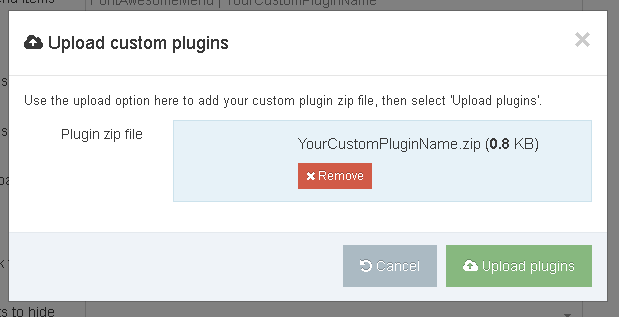
- Click Add custom plugin and upload your yourCustomPluginName.zip there.

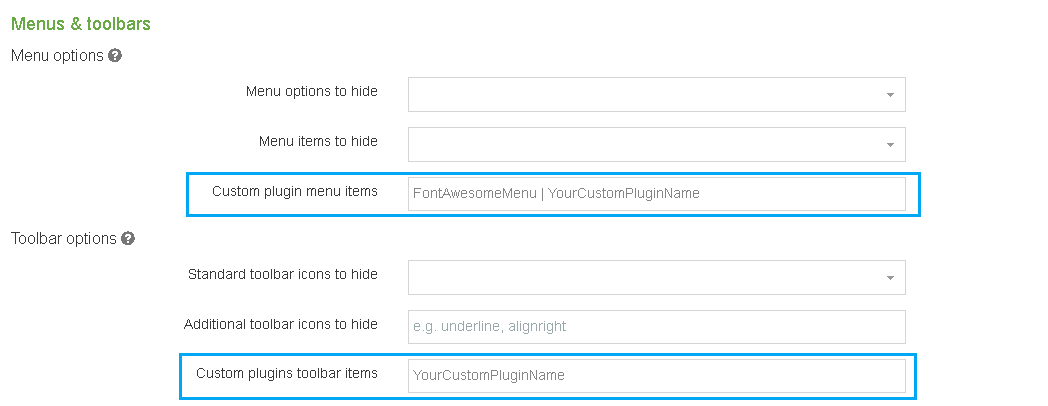
- Depending on the name that was defined in the code, you can add your custom plugin button on the menubar and toolbar here:
- All custom plugins will get populated on the Extra option on the menubar as shown below:

- The pipe (|) adds a horizontal line over the next custom plugin, as seen on the dropdown menu in the screen above.