HTML Editor
- Last Modified:
- 22 Jul 2025
- User Level:
- Contributor
Description
From version 8.3.12, Terminalfour now uses TinyMCE v5.
When you create or edit HTML content in Terminalfour, the default WYSIWYG HTML Editor is TinyMCE. With TinyMCE, all content editors, regardless of their HTML or CSS expertise, can apply advanced formatting to text content in Content Elements whose type is set to HTML. TinyMCE is compatible with the most popular browsers; there's a complete list of compatible browsers here.
In our testing, we have discovered some issues with TinyMCE and Firefox so we’d recommend using Chrome or Edge.
Instances of the HTML Editor can be configured for users based on their requirements.
TinyMCE will feel familiar to anyone who has used a popular word-processing application. To apply formatting or add a link to text, select the text and choose the relevant option from the toolbar. TinyMCE generates the corresponding, standards-based HTML. If the option is enabled, an editor with HTML knowledge can even amend the source code directly within the editor (via Tools > Source Code in the Toolbar).
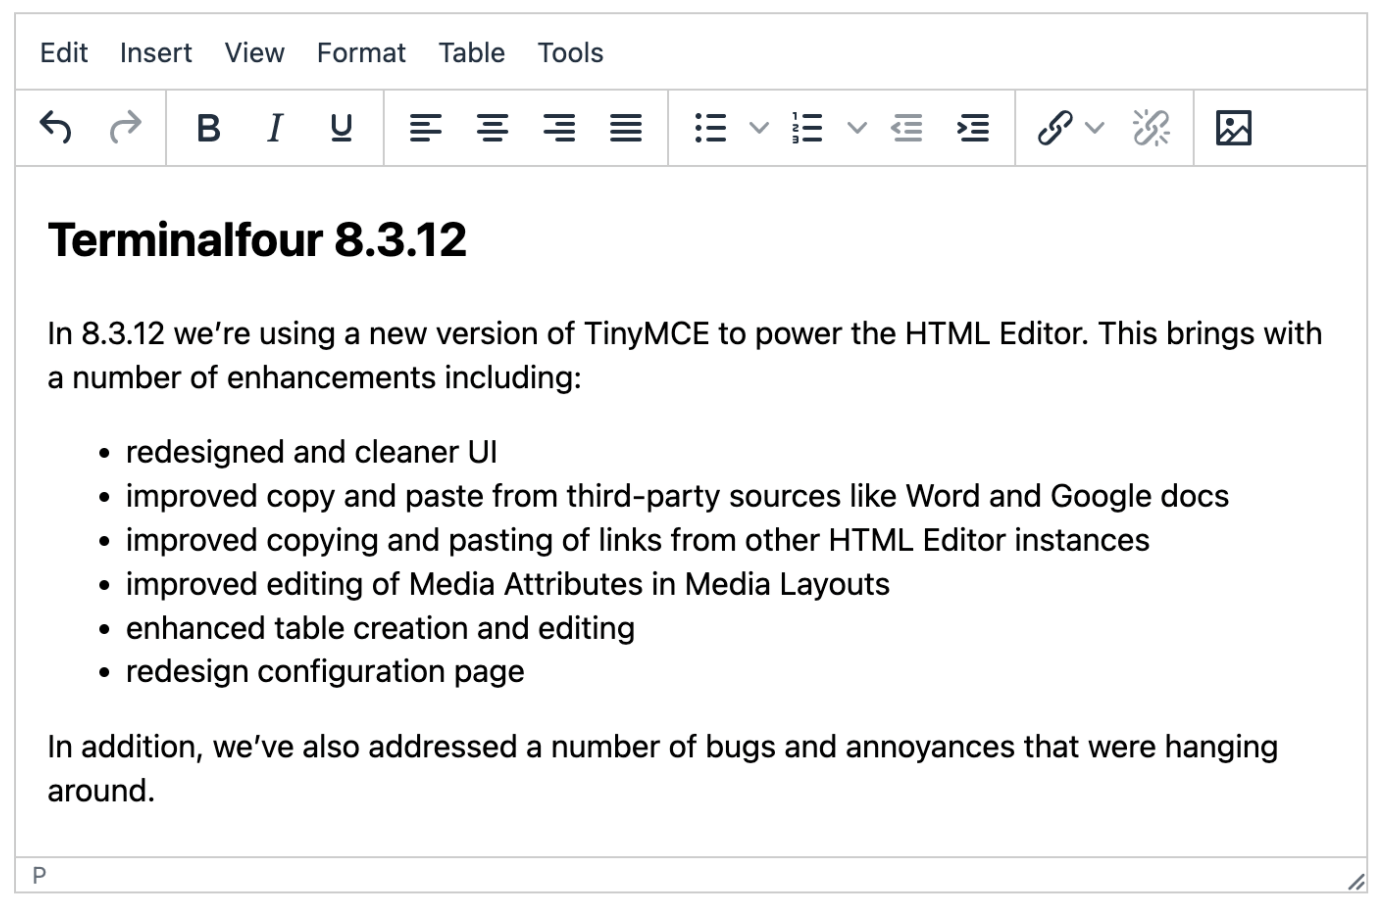
An Administrator can use the HTML Editor Settings to add and remove menu and tool items and enable plugins. If your menus and toolbar look slightly different to the screenshot above your Editor may be configured differently.
HTML Editor toolbar
The controls comprise a top menu and icons on the toolbar. The toolbar setup here shows the basic icons and menus.

Menus and corresponding icons
Not all functions have toolbar icons. Most functions are listed in the drop-down menus.
| Menu | Item | Icon | Subitem | Further subitem | Description / Shortcut |
|---|---|---|---|---|---|
| Edit | Undo |  |
Undoes the last operation. | ||
| Redo |  |
Redoes the last 'Undo' operation | |||
| Cut | Cuts the current selection into the clipboard. Ctrl+X |
||||
| Copy | Copies the current selection into the clipboard. Ctrl+C |
||||
| Paste | Pastes the clipboard contents into the editor. Ctrl+V |
||||
| Paste as text | Removes formatting from clipboard text and pastes as plain text. | ||||
| Select all | Selects all the editor contents. Ctrl+A |
||||
| Find and replace | Search and/or Replaces contents within the editor. Ctrl+F | ||||
| Insert | |||||
| Insert file link or image |  |
Insert a Media Item from the Media Library. When selected, a Media Library dialogue box is opened where you can search for a Media Item. Images are placed into the HTML Editor and can be resized if necessary. When other file types are selected (e.g., a Word document or PDF ), a link to the file is added. |
|||
| Insert link |  |
Insert Section link | Inserts a link to a Section. | ||
| Insert Content link | Inserts a link to a Content item. | ||||
| Insert/edit external link | Inserts a link to an external URL. | ||||
| Insert anchor | Inserts an anchor to link to a specific part of a page. | ||||
| Insert date/time | Inserts the current date/time. | ||||
| Horizontal line | Inserts a horizontal rule into the editor. | ||||
| View | |||||
| Show blocks | Toggles the visibility of block elements. | ||||
| Show invisible characters | Toggles the visibility of non-breaking character elements. | ||||
| Visual aids | Toggles the visual aids for invisible elements. | ||||
| Fullscreen | Toggles fullscreen mode. Ctrl+Alt+F |
||||
| Format | |||||
| Bold |  |
Bolds the current selection. Ctrl+B |
|||
| Italic |  |
Italicises the current selection. |
|||
| Underline |  |
Underlines the current selection. | |||
| Strikethrough | Applies strike though format to the current selection. | ||||
| Superscript | Applies superscript format to the current selection. | ||||
| Subscript | Applies subscript format to the current selection. | ||||
| Formats | Headings | Heading 1 | Changes text to Heading 1. Ctrl + 1 | ||
| Heading 2 | Changes text to Heading 2. Ctrl + 2 | ||||
| Heading 3 | Changes text to Heading 3. Ctrl + 3 | ||||
| Heading 4 | Changes text to Heading 4. Ctrl + 4 | ||||
| Heading 5 | Changes text to Heading 5. Ctrl + 5 | ||||
| Heading 6 | Changes text to Heading 6. Ctrl + 6 | ||||
| |
Inline | Bold | Applies the bold format to the current selection. Ctrl+B |
||
| |
Italic | Applies the italic format to the current selection. Ctrl+I |
|||
| |
Underline | Applies the underline format to the current selection. Ctrl+U |
|||
| Strikethrough | Applies strikethrough format to the current selection. | ||||
| Superscript | Applies superscript format to the current selection. | ||||
| Subscript | Applies subscript format to the current selection. | ||||
| Code | Applies a monospaced font to the current selection. | ||||
| Blocks | Paragraph | Applies a paragraph format to the current block-level element. | |||
| Blockquote | Applies block quote format to the current block-level element. | ||||
| Div | Adds a div tag or wraps the selection with a div to create a block level element. | ||||
| Pre | Adds pre and code tags around the current selection to create a code block. | ||||
 |
Alignment | Left | Left-aligns the current block or image. | ||
 |
Center | Center-aligns the current block or image. | |||
 |
Right | Right-aligns the current block or image. | |||
 |
Justify | Justifies the current block or image. | |||
| Clear formatting | Removes the inline styles and formatting from the current selection. | ||||
| Table | |||||
| Insert table with column headings | See Insert Table | ||||
| Insert table with column and row headings | |||||
| Table properties |
Change table layout and appearance properties like width, height, padding and border. Under the advanced settings, you can add CSS styles. See the documentation on Table Properties below. |
||||
| Delete table | |||||
| Cell | Cell properties | ||||
| Merge cells | |||||
| Split cell | |||||
| Row | Insert row before | ||||
| Insert row after | |||||
| Delete row | |||||
| Row properties | |||||
| Cut row | |||||
| Copy row | |||||
| Paste row before | |||||
| Paste row after | |||||
| Column | Insert column before | ||||
| Insert column after | |||||
| Delete column | |||||
| Tools | |||||
| Source code | Opens the source code viewer. |
Icons that don't have a menu option
| Item | Icon | Description |
|---|---|---|
| bullet list |  |
Formats the current selection as an unordered bullet list. |
| number list |  |
Formats the current selection as an ordered number list. |
| outdent |  |
Outdents the current list item or block element. |
| indent |  |
Indents the current list item or block element. |
| unlink |  |
Removes links from the current selection. |
| Insert file link or image |
Insert a Media Item from the Media Library. When selected, a Media Library dialogue box is opened where you can search for a Media Item. Images are placed into the HTML Editor and can be resized if necessary. When other file types are selected (e.g., a Word document or PDF ), a link to the file is added. |
Keyboard Shortcuts
You can also use keyboard shortcuts to add formatting in the HTML Editor.
The keyboard shortcuts have changed since TinyMCE 4.
Imported formats
When copying and pasting content from an external source (such as MS Word or Excel), all proprietary formatting and tags are changed to their HTML equivalent. When there is no HTML equivalent the formatting is removed.
Formatting is especially important for people using a screen reader. If not applied correctly, screen readers might not interpret the content as intended.
Have a look at this primer on HTML and Accessibility.
Adding a link
There are two types of links – internal and external.
Internal links
To link to a Terminalfour Section or Content Item select text or an image and go to Insert > Insert link > Insert section link or Insert content link (or select the link icon from the menu).
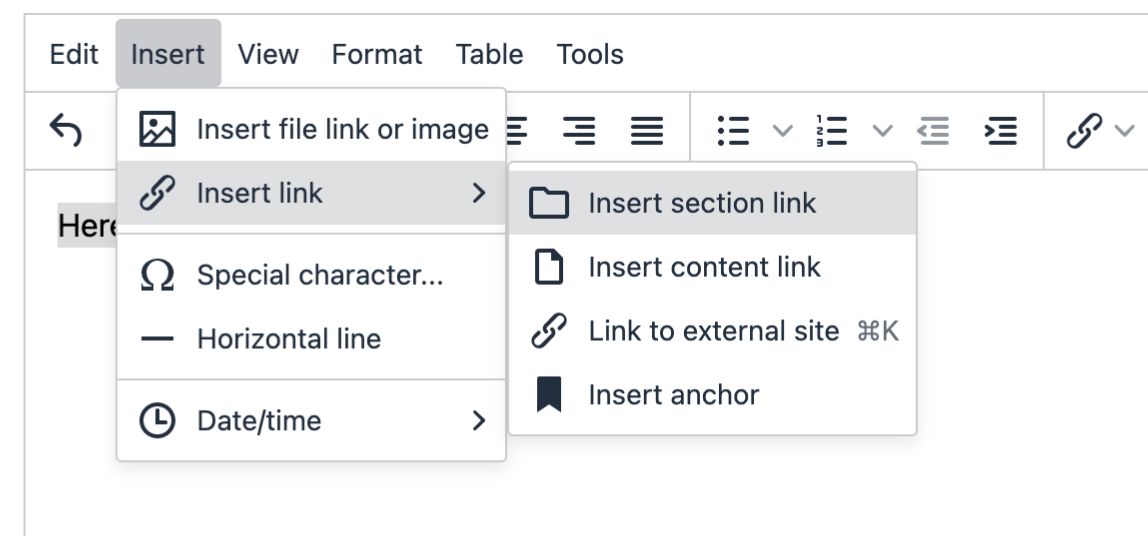
When you click “Insert section link” or “Insert content link”, a modal will be displayed to link to the section and/or the content. Depending on your Hierarchy Configuration, editors may either have access to link to the sections to which they have been granted access, or they may have access to link to the any section (regardless of whether they have edit rights to that section).
Section filtering
From 8.3.15, you can find the Section or Content Item you want to link to with the Section Filtering input:
Editing an internal link
To edit an internal link, double-click on the text and change the link text:
External link
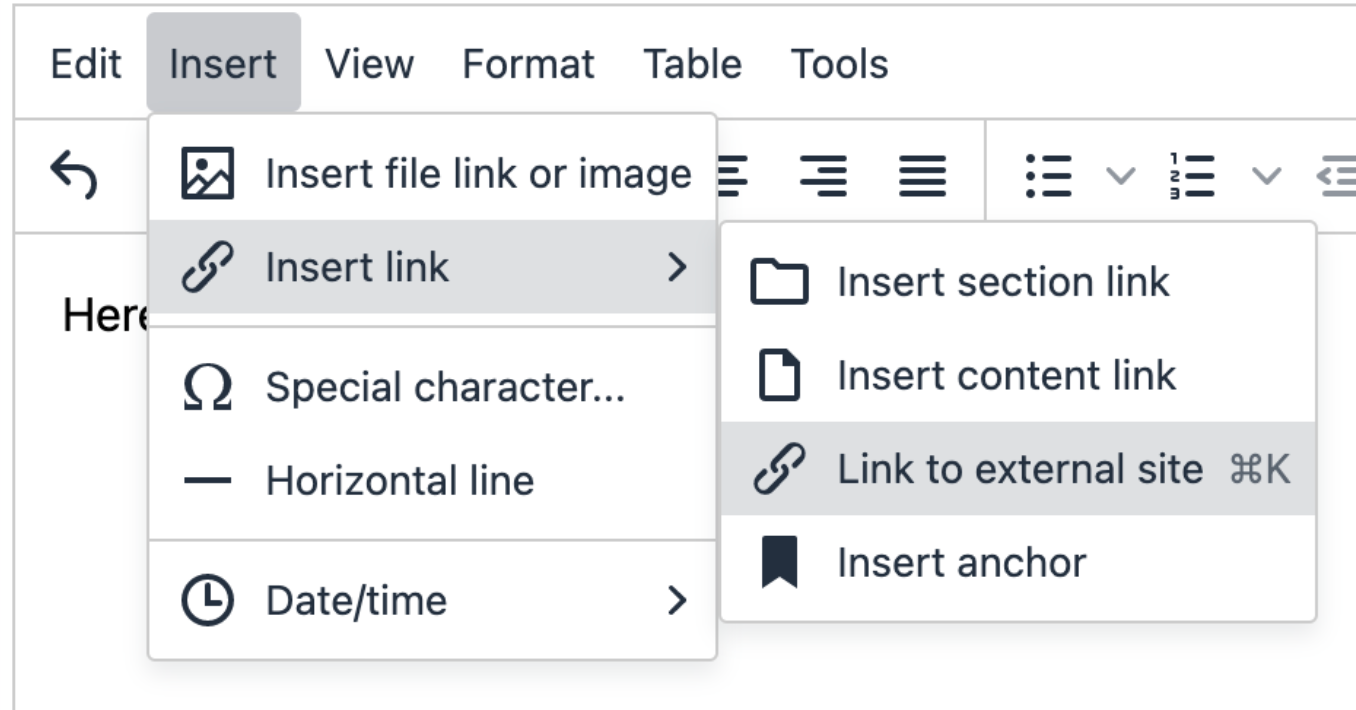
To link to an external website select text or an image and go to Insert > Insert link > Link to external site (or select the link icon from the menu). Alternatively, you can use the Ctrl+K key combination.
Editing an external link
Select the linked item and right-click and select Insert link > Link to external site (Ctrl+K):
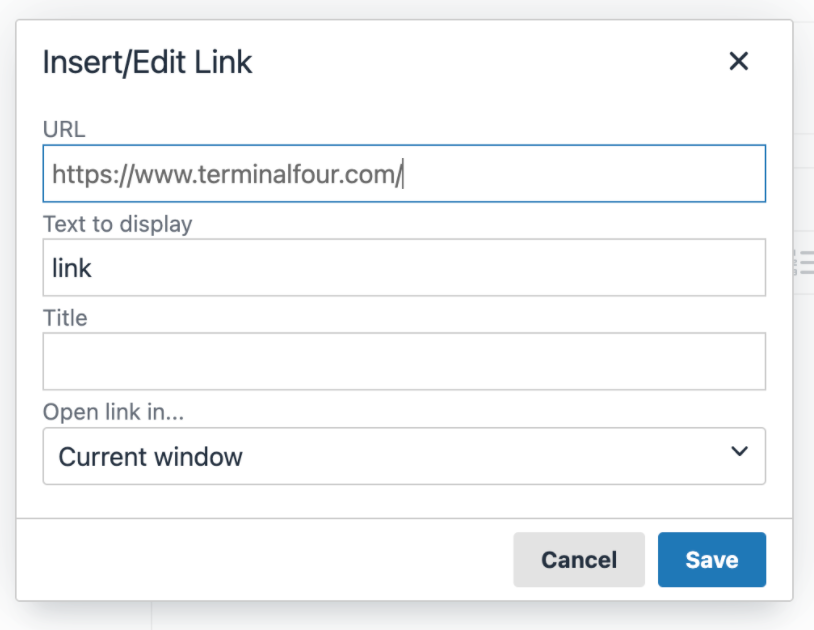
From here, you can edit the link URL, text, title and which window it should open in.
Adding Media
To add a Media Item select the “Add image or link to file” button from the menu:
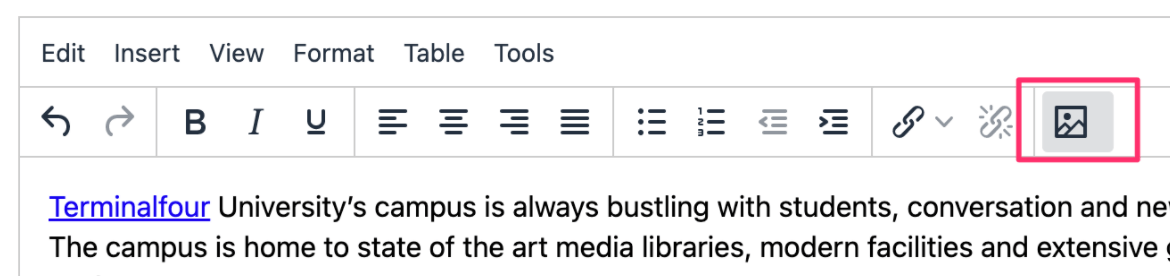
When you click on this, the Media Library modal will be displayed where you can select a Media Item.
Double-clicking on the Media Item will show the editable media attributes.
Adding a file link
If the Media Item you use is a file with a supported Media Layout a link will be created for it.
Spell Check
The free spell check plugin has been deprecated by TinyMCE and has been removed in 8.3.12 however you can use the native browser spellchecking.
A misspelt word will be underlined in the browser. To fix it, press Ctrl and click which will display the browser context menu with a list of suggestions.
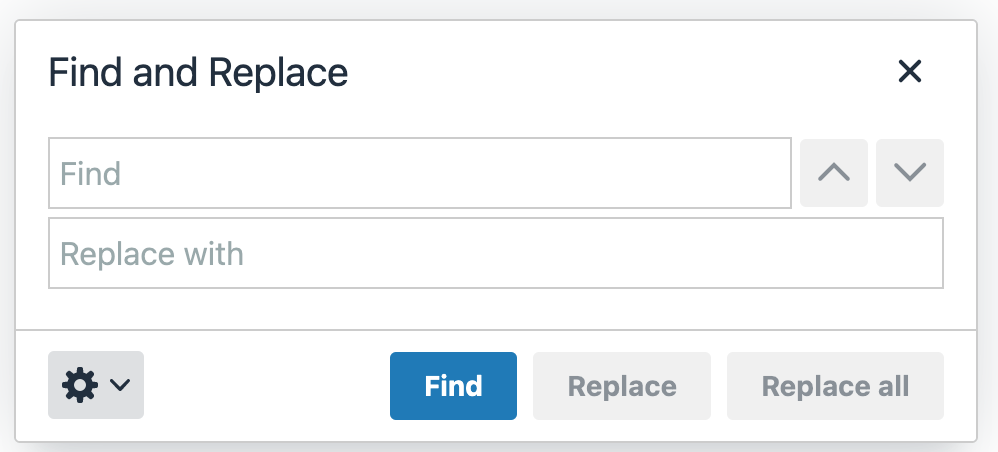
Find and Replace
- Find - enter the word to search for
- Replace with - enter the word to replace
- Match case - check if you want to distinguish instances of the word in upper/lower cases
- Whole words - search only whole words
- Command buttons - Find - Replace - Replace all - Prev - Next - use as needed to complete the task.
Insert Table
To insert a table, click Table on the toolbar menu. This screen opens:
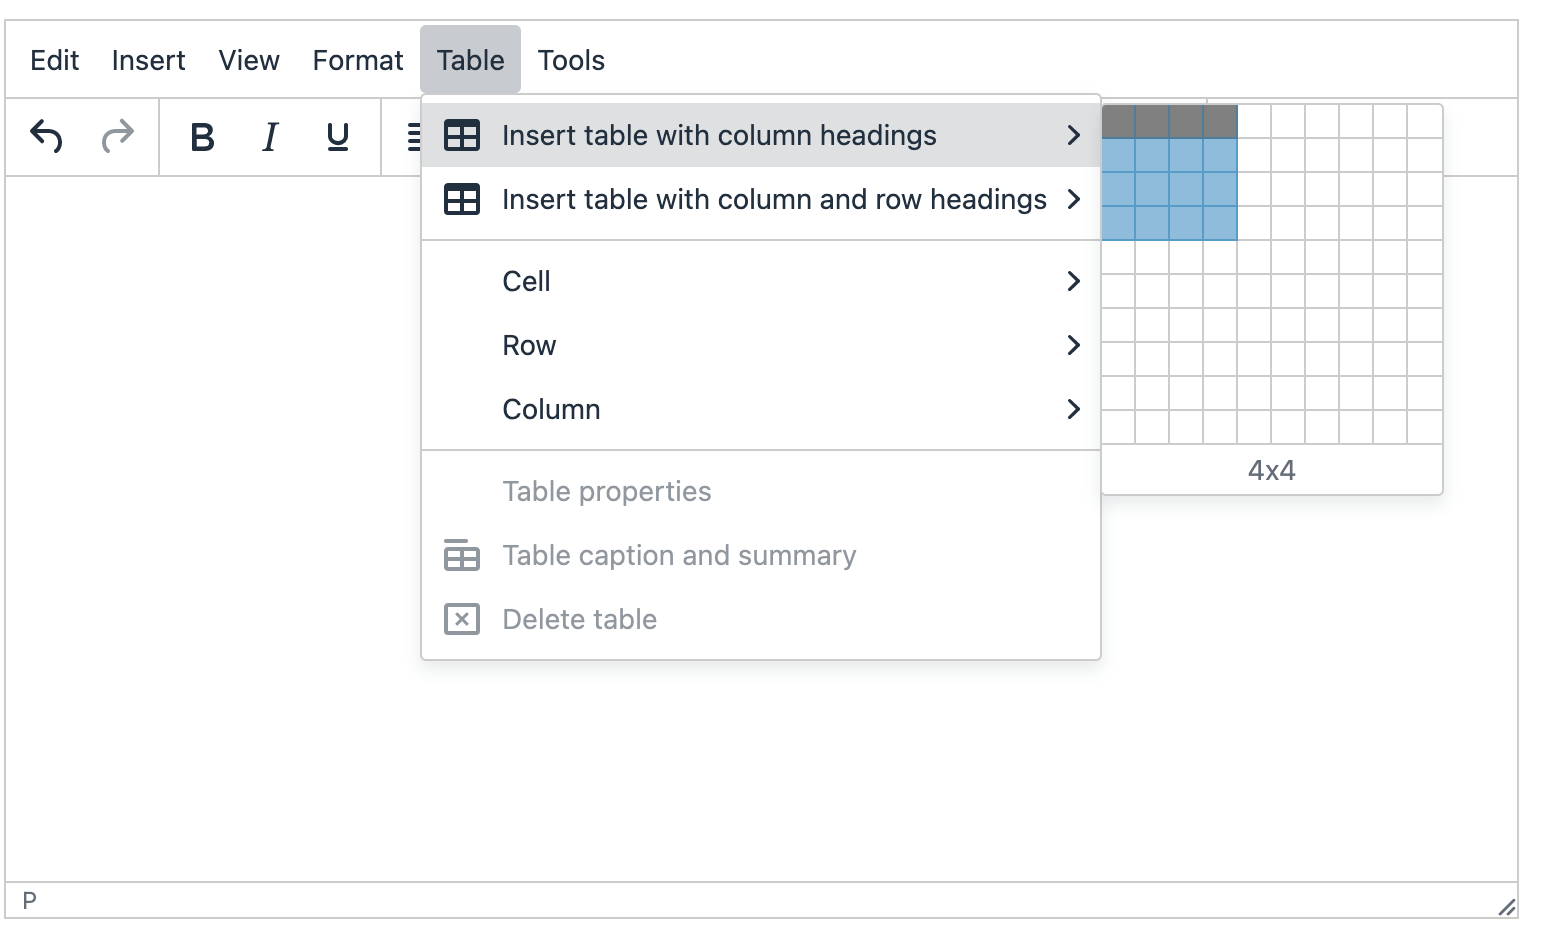
1. In this example, a 4x4 table has been chosen to insert. The maximum setting from the template is a 10x10 table.
2. Click the lowest right corner box to insert.
3. As there is no content, the table is collapsed. To expand, click and drag a corner to a convenient starting size. You can adjust after filling with content. See below for instructions on Cell Properties and Row Properties (there are no Column Properties).
Table Properties
General
From here you can specify the values for table layout and appearance settings:
- Width (in pixels)
- Height (in pixels)
- Cell spacing – the space between table cells (in pixels)
- Cell padding – the distance between cell borders and the content within a cell (in pixels)
- Border - the border width (in pixels); the border color can be selected under the "Advanced" tab
- Caption – select to add a table caption (in pixels)
- Alignment
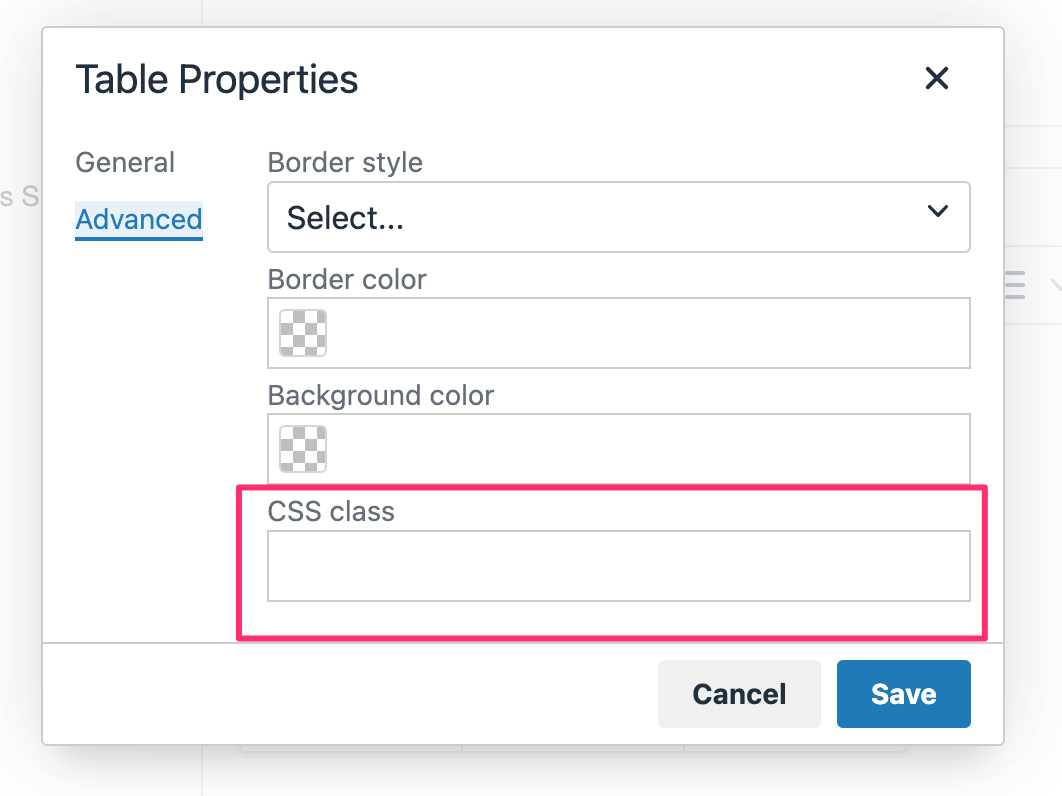
Advanced
From Version 8.3 there's a "CSS class" option in the "Advanced" tab so you can add classes to your table
It's recommended that visual styling is applied in your stylesheet with CSS rather than the inline styles that are applied here.
Check out this article on table styling with CSS for some tips.
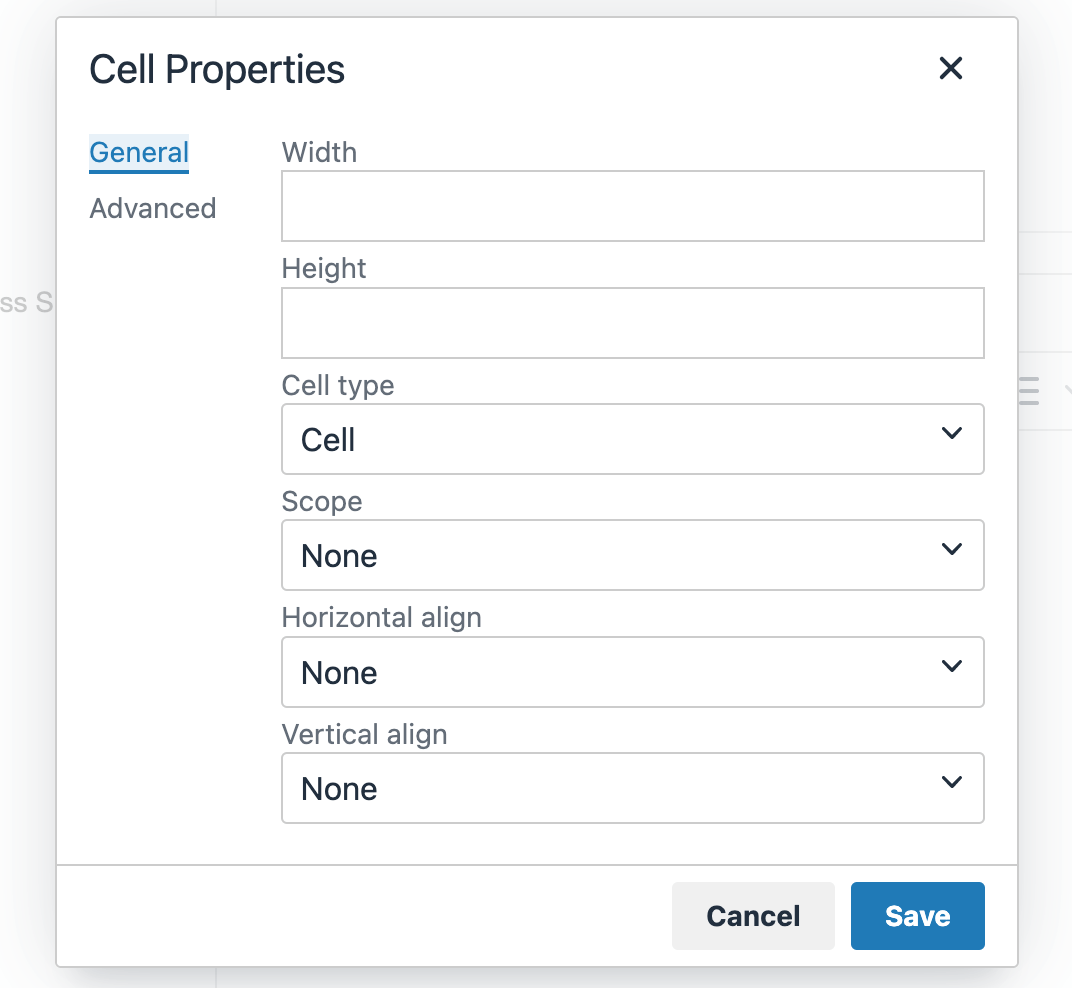
Cell Properties
For Cell properties:
1. Right-click from within a cell
2. From the toolbar: Table > Cell > Cell Properties. This popup appears:
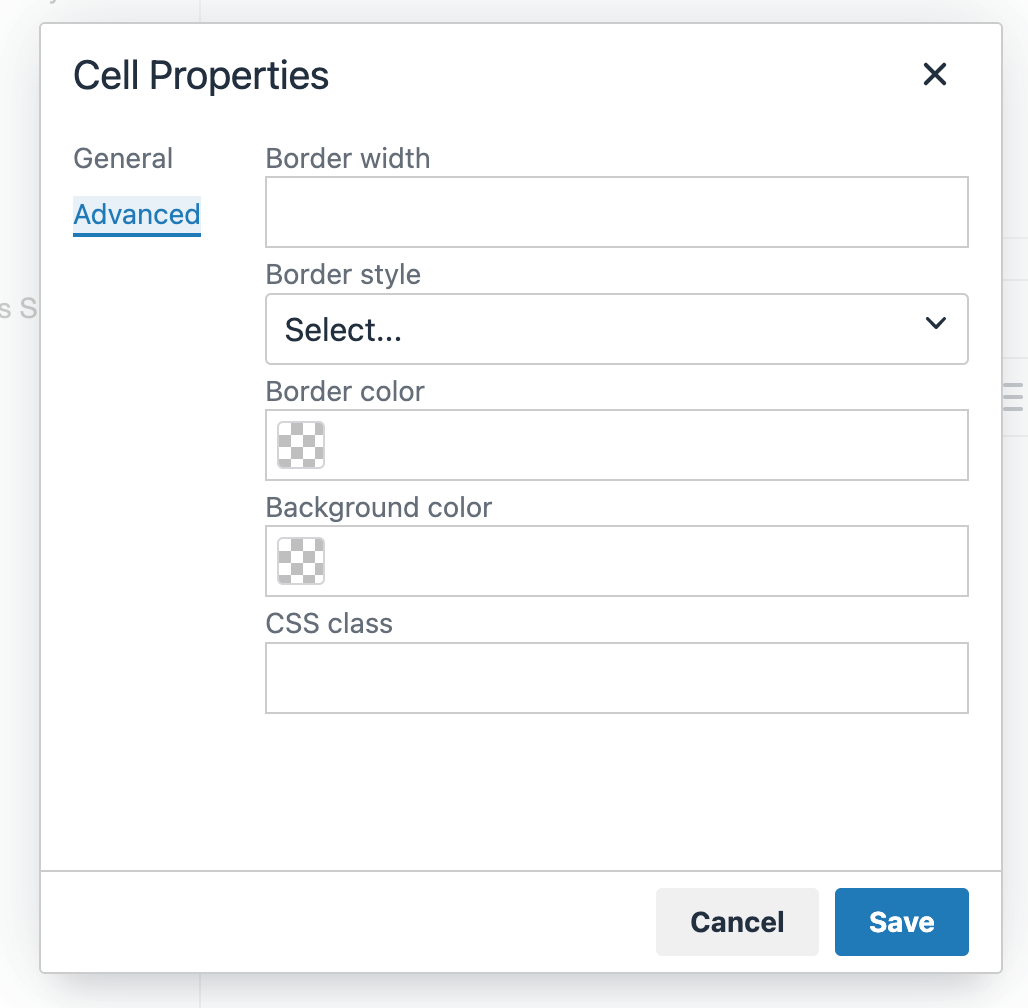
General
Advanced

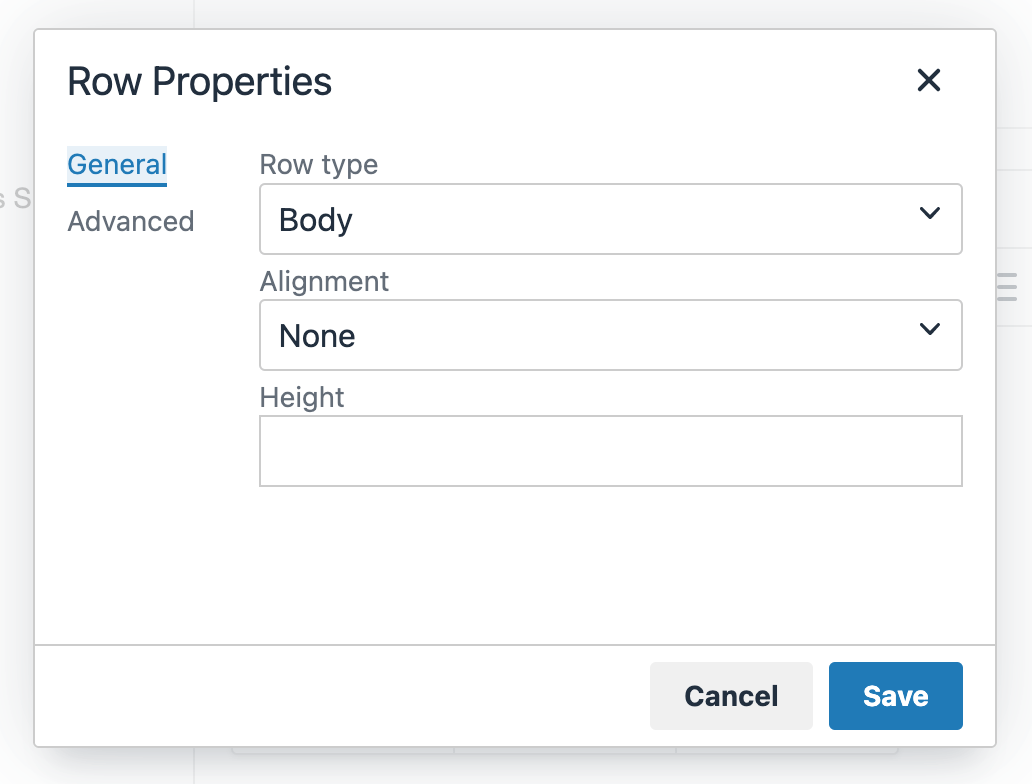
Row Properties
For Cell properties:
1. Right-click from within a cell
2. From the toolbar: Table > Row > Row properties. This popup appears:
General
1. Row type - choose from Header, Body, or Footer (in Advanced you can also set colors.)
Advanced

Footer
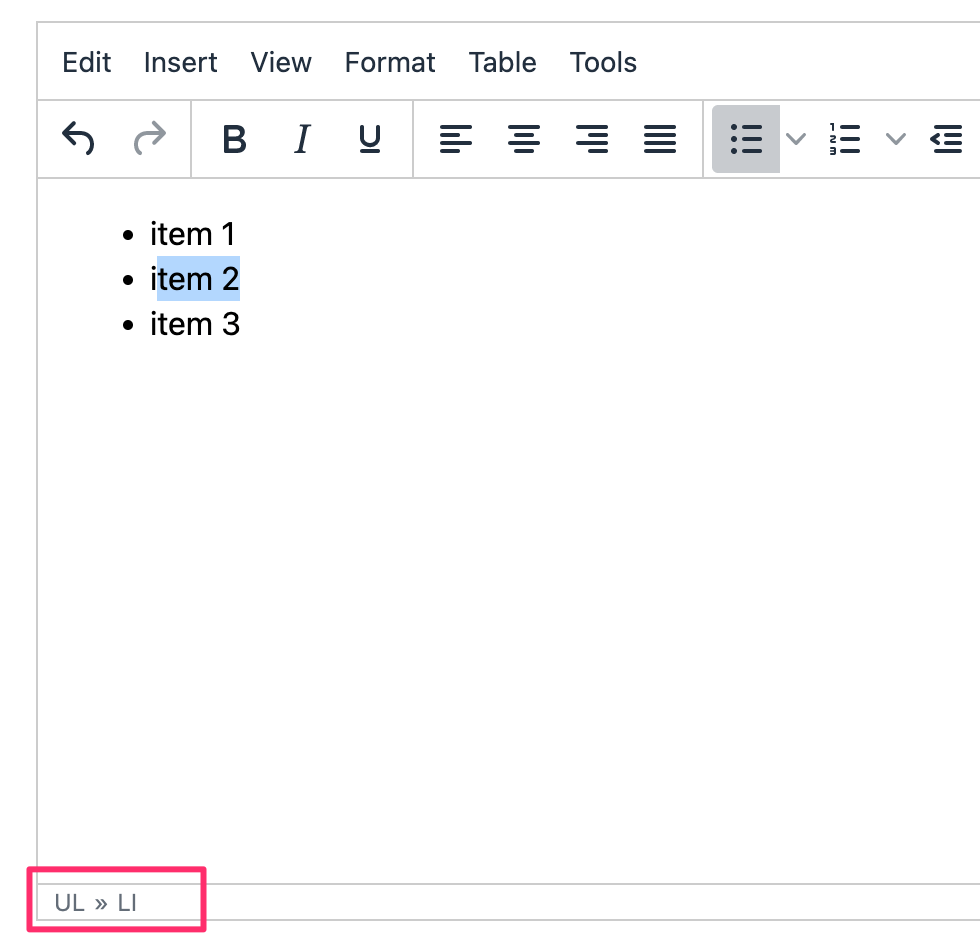
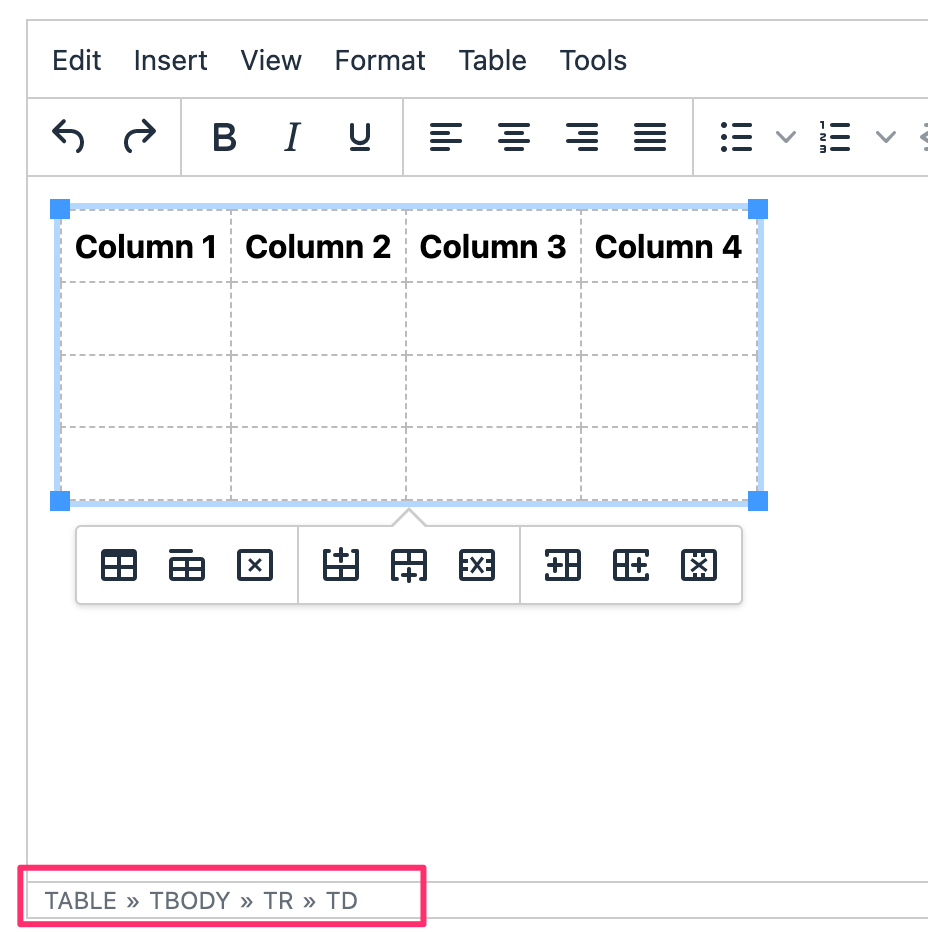
Located in the footer status bar of the editor is a descriptor corresponding to the location of the cursor/pointer. This is similar to breadcrumbs as there can be several elements to the descriptor. Each element is linked to a point on the page. Click the last element (td) and that area is highlighted.
For example, here is a descriptor indicating where the cursor is located in a cell in the table:
This is a textual reference for an unordered list - click the last element (li):