
External Content Syncer
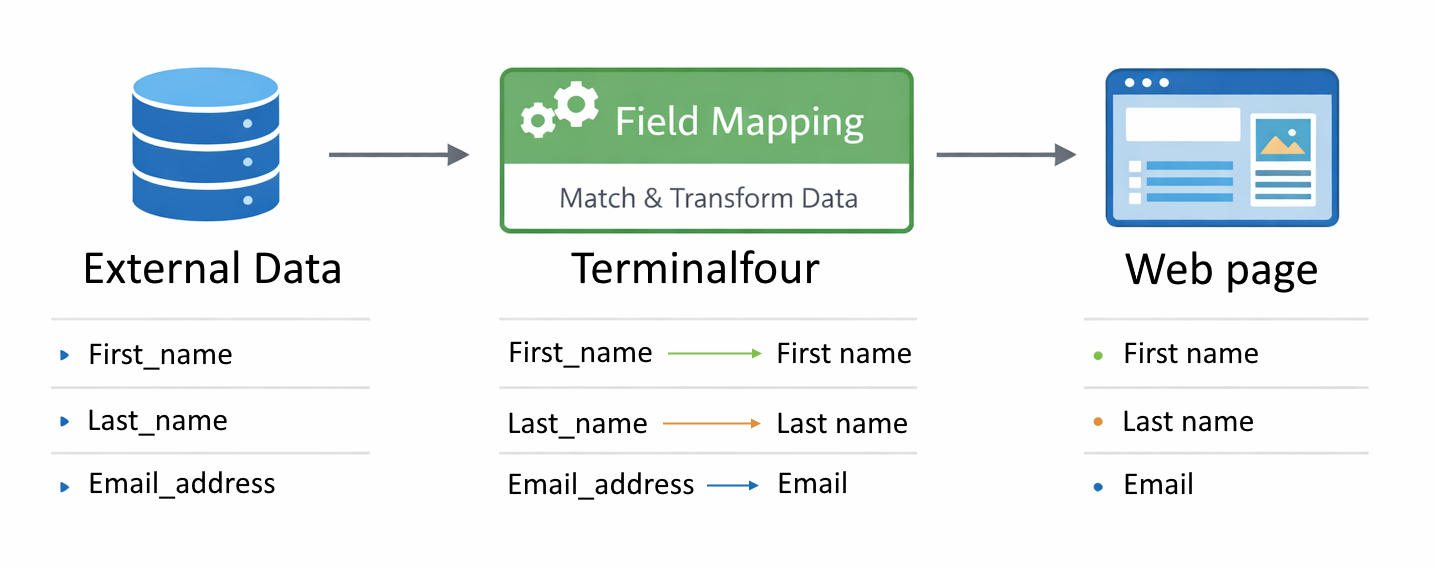
- The External Content Syncer is used to import content from an external database or a CSV file. When this content is imported into Terminalfour, each entry within the database is added into Terminalfour as a piece of content.
- You can modify the content you import, but this only affects the content in Terminalfour and not the content in the original source.
- You need to examine the database table so you can create a Content Type with elements to receive the column’s data. You also need to configure the External Content Syncer, and then import your content.
Build the Content Type
- Examine the external database table and match columns with elements of your Content Type. In this exercise you will use the users table from the Terminalfour installation. The table has a lot of columns, but you don't have to import the content from all columns. The External Content Syncer allows you to select what information to import.
| Column (database) | Type | Content Type Element | Element Type | Size | |
|---|---|---|---|---|---|
| id | int(11) | ||||
| username | varchar(20) | <-----> | Username | Plain Text | 20 Char |
| first_name | varchar(40) | <-----> | First Name | Plain Text | 40 Char |
| last_name | varchar(40) | <-----> | Last Name | Plain Text | 40 Char |
| password | varchar(40) | ||||
| email_address | varchar(60) | <-----> | Email Address | Plain Text | 60 Char |
| default_lang | varchar(4) | ||||
| create_date | datetime | ||||
| last_login_date | datetime | <-----> | Last Login | Date | Default |
| auth_level | int(11) |
- Based on the table above, you should be able to create your Content Type. We have suggested creating five elements; 4 are Plain Text and 1 is a Date element.
- To start the work, go to Assets > Content Types.
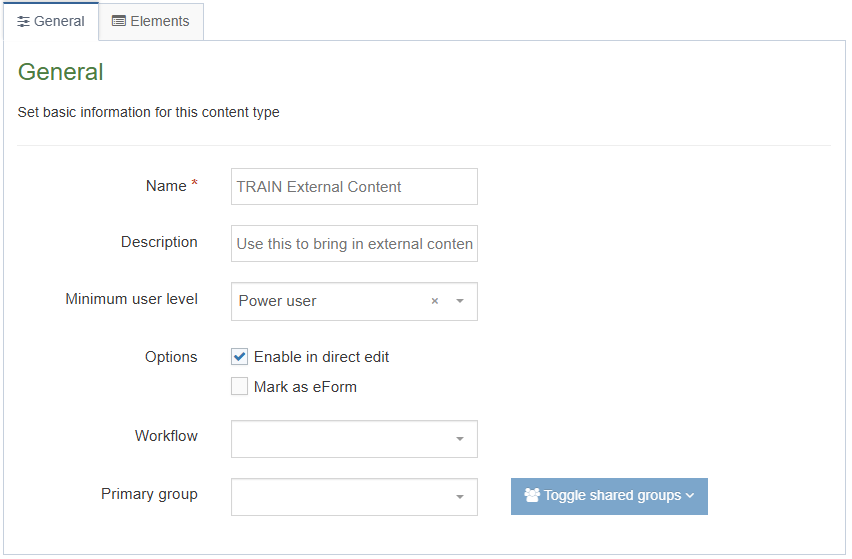
- Fill in the General information:
- Name: enter a name here. This should suggest what type of content it is used for. E.g., Staff Directory.
- Description: describe in more detail when to use this Content Type.
- Minimum user level: if you wish to restrict who can use this Content Type, you can set a level here. If Content Types are created in groups, a user has to be a member of the group as well as meet the minimum user level criteria in order to use the Content Template.
- Enable Direct Edit: decide if Direct Edit can be used for this Content Type.
- Mark as eForm: check this for eForms. This will be described in detail later.
- Workflow: if relevant, enable a workflow for content.
- Primary group: if relevant, select a group.
Element Formats
File, Image and Media Elements can't be used in the External Content Syncer as these files aren't stored in the Database.
If you import content into a list element, the content will only be displayed if the content matches an entry in the list.
Date Type is formatted by the Database.
- Select the Elements tab.
- Each Content Type has a Name element by default. This is used to name the Content and is typically not displayed on the published site.
- Click Add element and fill in the details for each element.
- Add the other elements you need by filling in the information as outlined in the table on the previous page.
- Once you have added all your elements, click Save changes. The Content layout tab opens.
- Create a new Content Layout for your Content Type. Click Create layout.
- Use the default type set in the Channel; in this case text/html. This ensures the Content can be displayed.
- The File extension should be left at Default, unless this is used with a different File Extension. This requires other extensions being permitted in the Channel.
- Select the relevant Syntax type language to enable syntax highlighting.
- Use the Content layout code to build an output for your content. It's up to you how you want to display your elements.
- As each piece of content will have unique information in each element, you need to build Handlebars expressions to output this information.
- To build a Handlebars expression for a Plain Text Element, click on </> Generate Handlebars Expression.
- Build a Content Type Handlebars Expression:
- Information to output: as you need to output the information the user enters in the element, select the Element option.
- Content element: select one of your plain text elements e.g. Username. (Repeat for the other plain text elements).
- Handlebars helper: since this is a plain text element the Publish Helper will be selected by default.
- Keep the default Options:
- Convert special characters to their HTML encoded values.
- Allow this element to be edited inline in Direct Edit.
- Copy the Handlebars expression to use it in your Content Layout.
- Select the </> Generate Handlebars Expression button again.
- Build an expression for the date element:
- Tag output: as you need to output the date the user selects in this element, select Element.
- Content element: select the element you created earlier for Last login.
- Select the Handlebars helper you prefer.
- Date format is recommended as it will allow you to format your date with a regular expression.
- Keep the default Options:
- Convert special characters to their HTML encoded values.
- Copy the Handlebars expression and use it in your Content Layout.
- Click Save changes to save the new Content Layout. The Content Type is complete.
Site Structure
- On the Site Structure screen, create a section for the content you're going to import. To do this, click: Actions > Create section.
- Enter a Name for your Section i.e. Directory.
- You need to enable your new Content Type for this Section, so select the Content Types tab. Click the radio button to enable the Content Type either for the branch or section:
- Enabled (branch): the Content Type can be used in this section as well as all its sub-sections.
- Enabled (section): the Content Type can be used in this section only.
Create Connection to Database
- You need to create a connection to the external database; Terminalfour keeps the database connection details separate from the import functionality as a security measure.
- Go to Administration > Configure Integrations Tools > Data Sources.
- Click on +Add new data source to add a new database connection (you won't actually do this, as the connection details will be provided by the trainer).
- Name: Enter your data source name.
- Username: username which has access to the database; this user only needs read access.
- Password / API Token: for the username provided above; check the “eye” icon to view the password.
- URL: the driver used for this URL to connect to the database.
- Driver: software component enabling a Java application to interact with a database, e.g. com.mysql.jdbc.Driver for a mysql database.
- Click Save changes to update the details.
JDBC URL
The URL is based on the database type, host, port and service.
Example pattern: jdbc:[type]://[HOST]{:PORT]:SERVICE
Define Source to Database
- You have created the connection to the database and now need to define the tasks to fetch the content. To do this, go to Content > Integration Tools > External Content Syncer.
- Click on +Add new content sync to create a new data store. There are 2 tabs on this page—General information and Type mapping.
- Fill in the General information:
- Name: enter a name for your Data Store.
- Description: describes in more detail what this Data Store is being used for.
- Data source: select the database connection your wish to use, i.e. the one you created earlier.
- Root section: select the section you wish to import content into (you created one earlier).
- Channel: select your channel.
- Site structure creator: if configured, select the site structure creator, leaving this field blank will select the default.
Section and content options: - Create individual section for each Content Item: check this option if you wish to create a new section for each content item you're importing.
- Cache each Content Item individually: when checked, the cache will be rebuilt after each content item is imported.
- Set imported content language as: this is where you select which language you will be importing the content into.
- Archive section: is where the Data Store will archive expired content.
- Status of new content: the status which will be applied to new content.
- Get external content via: Select either a database connection, or type in a query.
- Database table: Select the table you want to import data from i.e., Users.
- Go to the Type Mapping tab: Select the Content Type you created from the drop-down menu at Content type to store content.
- Map your Type elements to Column names.
- Select an appropriate Link. Your chosen Link must be a unique Link/Identifier of your data
- Click Save changes.
- Select Initial Sync under Sync Type and click Run a sync to commence the import of your content.
- To see the finished result, go to Site Structure and select Preview from the Section Drop-Down Menu.
Feedback survey
Congratulations on completing the Advanced Web Developer Training module.
Please provide feedback in our on-line survey.