
Geo IP Personalization
- In some situations it might be useful to customize the content on your website based on the geographical region the visitors are coming from.
- There are numerous ways to personalise content with GeoIP within Terminalfour. In this example you are going to create a single Content Type to output content for three different countries/regions.
- You will need a new Content Type, which has a number of elements; these will be used to output content for the different countries/regions.

Requires PHP
This exercise requires the webserver to be able to process PHP.
Enable PHP on your channel
- Your channel needs to allow PHP to be used as an extension. If this is not already the case, modify the Channel; go toAdministration > Set up Sites & Channels > Channels.
- Select your channel. You only need to modify the available file extensions as shown below.
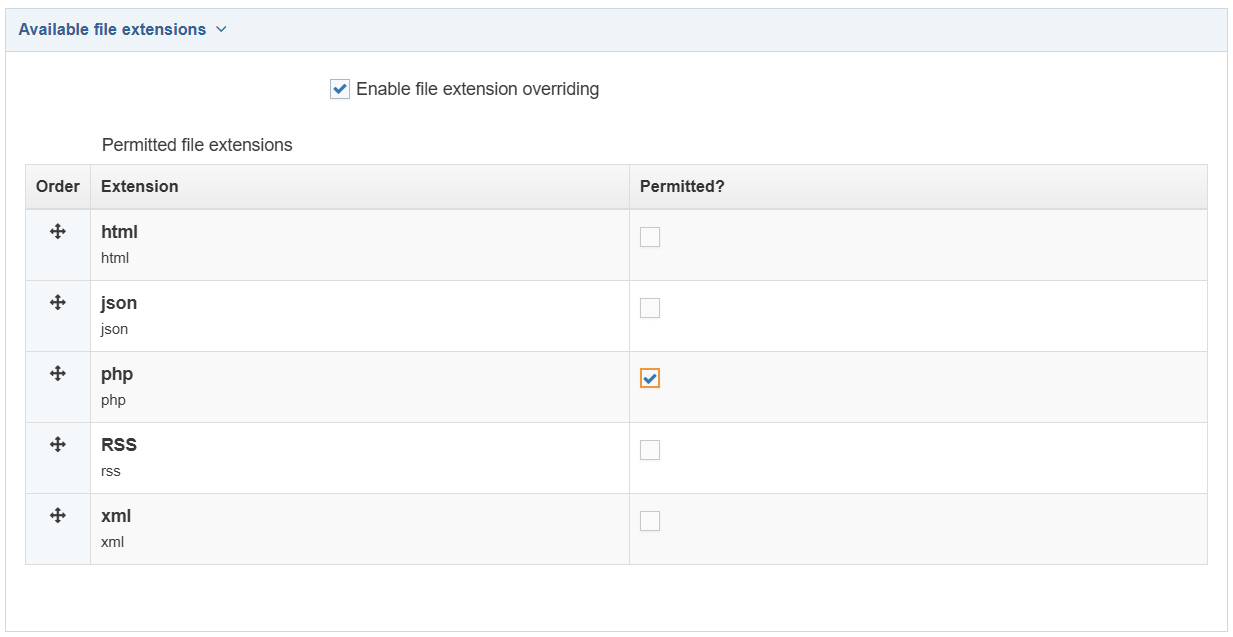
- Available file extensions
- Enable file extension overriding: check this box if you have previously defined additional extensions, this allows you to publish your channel using alternative extensions such as PHP, RSS, CFM etc.
- Permitted file extensions: select the check box for the relevant extension i.e. PHP.
- Available file extensions
- Click Save changes to save the changes made to the Channel.
Create a GeoIP Content Type
You need to create a Content Type which has a number of different country elements. The GeoIP script will display one of the appropriate country field based on where the viewer is coming from.
- Go to Assets > Content Types > + Create content type.
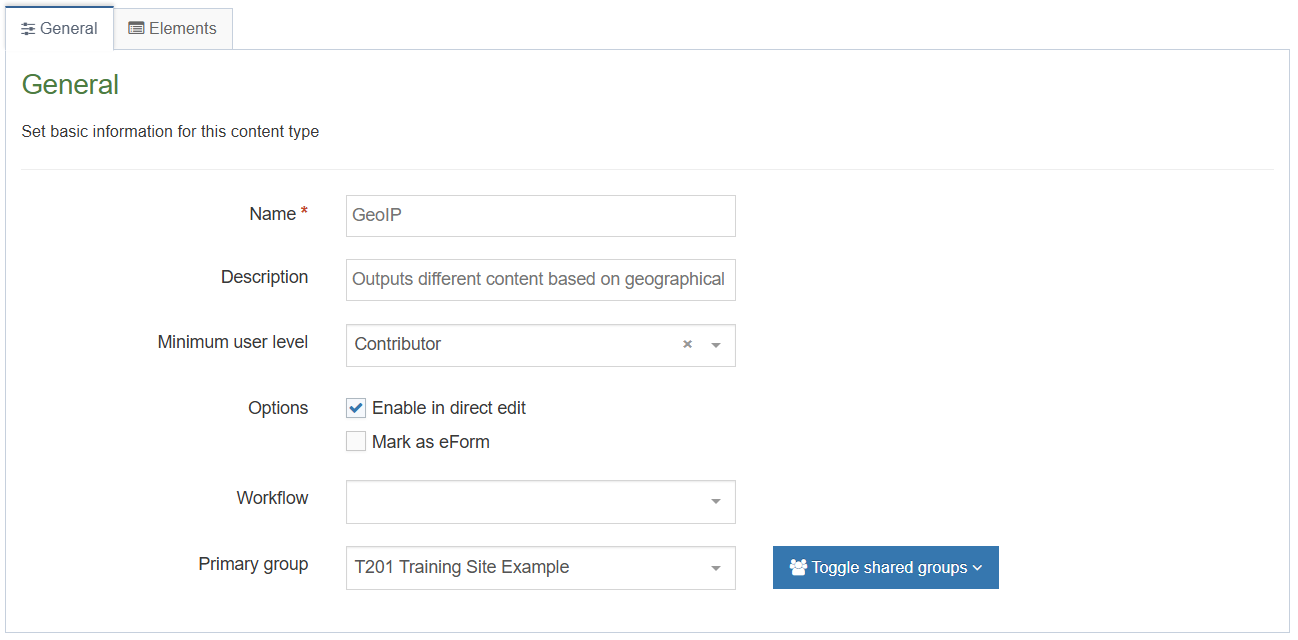
- Fill in the General tab:
- Name: enter a name here. This should suggest what type of content it is used for, e.g. GeoIP.
- Description: describe in more detail when to use this Content Type.
- Minimum user level: if you wish to restrict who can use this Content Type, you can set a level here. If Content Types are created in groups, a user has to be a member of the group as well as meet the minimum user level criteria in order to use the Content Type.
- Enable in direct edit: decide if Direct Edit can be used for this Content Type.
- Mark as eForm: check this for eForms and xForms only. This is not relevant in this example.
- Workflow: if relevant, enable a workflow for content using this Content Type.
- Primary group: Select your group. This allows you to select the group which is permitted to use this content type. Click Show shared groups to share the content type with more than one group.
- Select the Elements tab.
- Add the elements you need by filling in the information as outlined in the table below.
| Name | Description | Type | Max Size | Required |
|---|---|---|---|---|
| Default Language | Enter content here | HTML | 1000000 | Yes |
| Language Two | Enter content here | HTML | 1000000 | No |
| Language Three | Enter content here | HTML | 1000000 | No |
- Once you have added all your elements, click Save changes. The Content layouts tab opens. The Content layouts tab contains the content layouts for your Content Type.
- Click + Add content layout to begin.
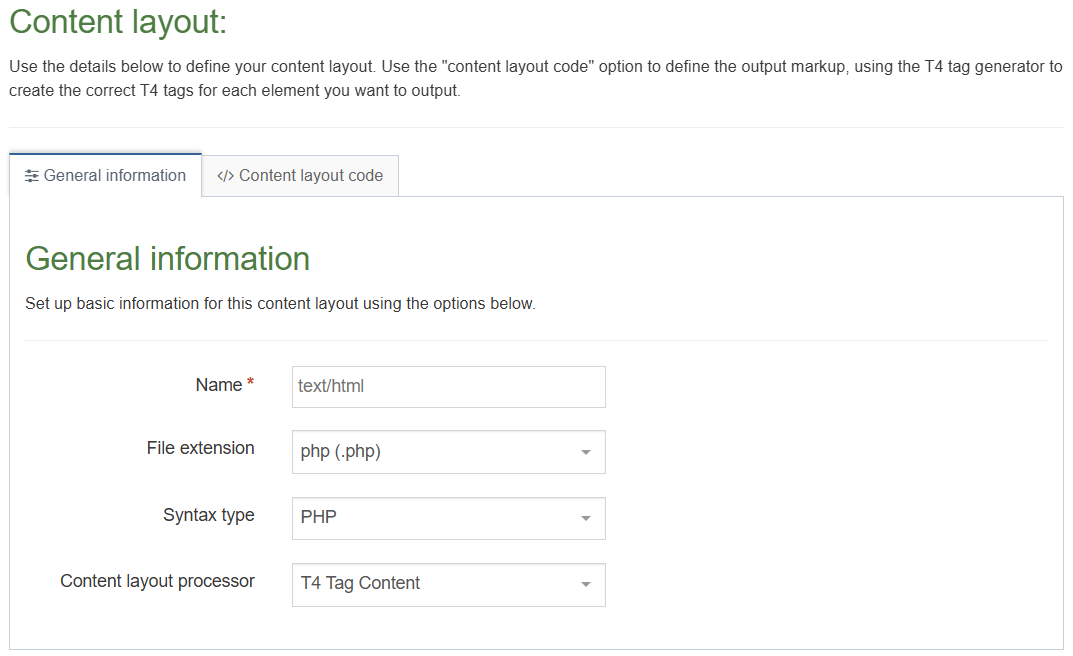
- Name: Fill this in using the default type set in your Channel; e.g. text/html. This ensures the content can be displayed.
- The File extension will need to be set to PHP.
- Select the relevant Syntax type language to enable syntax highlighting, e.g. PHP
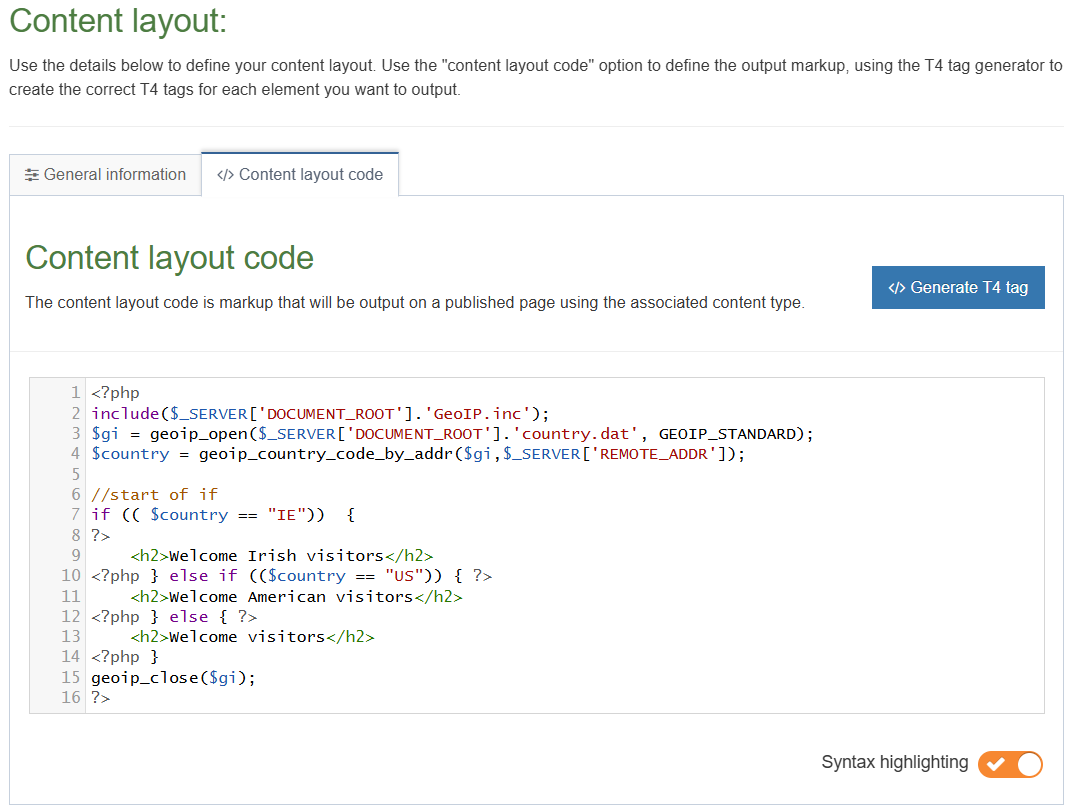
- Copy the example content layout PHP code in the screenshot below and paste it into the content layout.
Country Codes
The country code used in GeoIP follows the ISO 3166 standards for Country Codes.
To customize the country code, look up the country code for the country you wish to use; http://maxmind.com/app/iso3166 and replace the codes in the PHP "if statement".
 <?php
<?php
include($_SERVER['DOCUMENT_ROOT'].'GeoIP.inc');
$gi = geoip_open($_SERVER['DOCUMENT_ROOT'].'country.dat', GEOIP_STANDARD);
$country = geoip_country_code_by_addr($gi,$_SERVER['REMOTE_ADDR']);
//start of if
if (( $country == "IE")) {
?>
<h2>Welcome Irish visitors</h2>
<?php } else if (($country == "US")) { ?>
<h2>Welcome American visitors</h2>
<?php } else { ?>
<h2>Welcome visitors</h2>
<?php }
geoip_close($gi);
?> Country.dat
Country.dat file should be loaded directly onto the server and it should be directly linked to from the Content Layout.
It is done like that for security reasons and to let the server update this file regularly. If it is in the Media Library, the file
cannot be updated by the server and needs to be manually maintained.
For this exercise we are, however, going to load the file into the media library as you might not have access to the server.
We are going to make use of some PHP ($_SERVER['DOCUMENT_ROOT']) to create the full path to the file on the server
instead of URI .
- In Media T4 tag tab, click Select media. This opens the Media Library.
- To upload the file to your Category in the Media Library, click + Add media (repeat for both files):
- Media file: drop the file here or click to choose the relevant file.
- Name: enter a name for your file. It is easiest if you use the filename.
- Description / Alt text: enter a description.
- Media type: this must be set to Media Path (based on standard configuration).
- Syntax highlighting language: leave as None.
- Media language dependence:
- Fully independent: the media is the same in all languages and can hence not be translated.
- Independent media file: the file and thumbnail exist independent of language. Other elements can be modified based on language.
- Fully dependent: all elements depend on language and can be translated.
- Click Save changes and select the file.
- A T4 Tag appears. Click Copy to clipboard to copy the XML Code. It should look similar to this: <t4 type="media" formatter="path/*" id="1234"/> and paste this T4 tag into the Content Layout replacing the relevant text.
- Click the </> Generate T4 tag button again.
- Using what you have learned above, build a tag to output the Default Language element:
- Normal Output (inline).
- Parse for Media Library Tags.
- Parse for Section Navigation Tags.
- A T4 Tag appears. Click Copy to clipboard to copy the XML Code and use it to replace the relevant code in your content layout. Repeat for the other elements you created.
- Click Save changes to save the new Content Layout. The Content Type is complete
Enable and test your content type
- Enable your Content Type, so you can test it. On the Site Structure screen, click Edit section from the Section Actions menu beside the section you created earlier.
- Select the Content types tab.
- Click the radio button to enable the Content Type for either the branch or section:
- Enabled (Branch): the Content Type can be used in this section as well as all its sub-sections.
- Enabled (Section): the Content Type can be used in this section only.
- Click Save changes to save the changes made.
- Click into the Content tab and click the + Add content button.
- Select your new Content Type.
- Enter content for each element.
- Click Save & approve.
Publish and test
- To view the content you need to publish your channel and use a web proxy provider to view the results as if you were viewing your content from different geographical IP addresses.
- To publish your website, go to Sites & Channels > Publish Channels.
- Locate your channel and select Enable publish.
- Click Publish channels to publish.
- View the publish site to see your content, using a web proxy to disguise your GeoIP location.
Feedback survey
Congratulations on completing the Advanced Web Developer Training module.
Please provide feedback in our on-line survey.