
RSS Feed
- You can use an RSS feed to publish frequently updated content such as news, events, and blog posts.
- In this module, you’ll create an RSS feed for your news items using the news content type you’ve already set up.
- Because RSS feeds are delivered in XML format, you’ll need to create a dedicated page layout, a content layout for your news items, and configure two navigation objects to structure the feed correctly.
Before You Start
Be sure you have the following added to your training site:
1. A “News” section and a “News” content type enabled. If you don’t have one, you can duplicate the “T201 or T201H "News" Content Type.
2. Add a few news stories that we’ll fetch later.
3. A “Code only” content type. If you don't already have one, you can duplicate either the T201 or T201H "Code Container” content type.
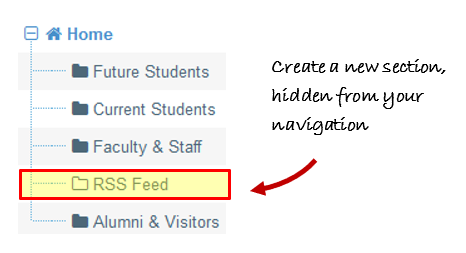
Add a Section to Site Structure
- The first step is to create a section for your RSS feeds.
- In the Site Structure screen, locate the section where you want to add your new RSS section.
- Click Actions > +Create section.
- Enter a Name for your section (for example RSS Feed).
- Clear the Show in navigation checkbox to prevent the section from appearing in the site menu.
- Click Save changes. The new section is now added to your Site Structure.
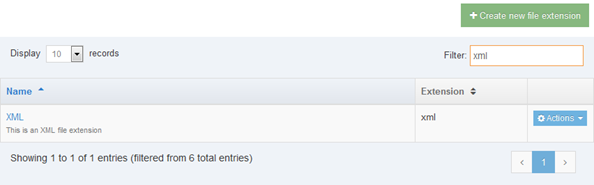
Enable XML File Extension
Next, ensure that your Terminalfour platform is configured to output XML as a file extension.
- Go to Administration > Settings > File Extensions.
- If XML is already in the list, skip steps 3 and 4.
- Click + Add new file extension.
- Name: XML.
- Description: This is an XML file extension.
- Extension: xml.
- Click Save changes.
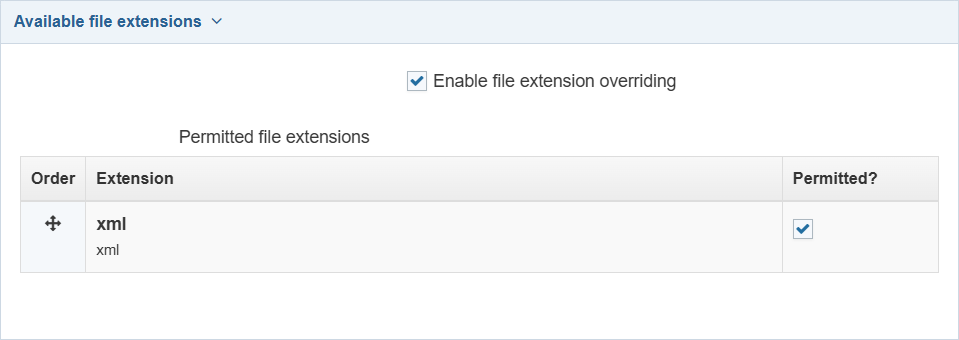
Allow XML on your Channel
Your channel only supports the file extensions you have enabled. For this setup, XML must be included as one of the allowed extensions.
- To check if this is the case (or to add it) go to:
Administration > Set up Sites & Channels > Channels. - Click on your channel name to edit it. Scroll down to the Available file extensions.
- Enable file extension overriding: this may be checked already if you previously defined additional extensions, such as PHP, RSS, JSON, etc.
- Permitted file extensions: select the relevant extension, i.e. XML.
- Click Save changes to save the changes made to the channel.
Create Page Layout for RSS feed
In order to publish out an RSS feed, you need a Page Layout which is formatted for XML.
- Go to Assets > Page Layouts > + Add new layout.
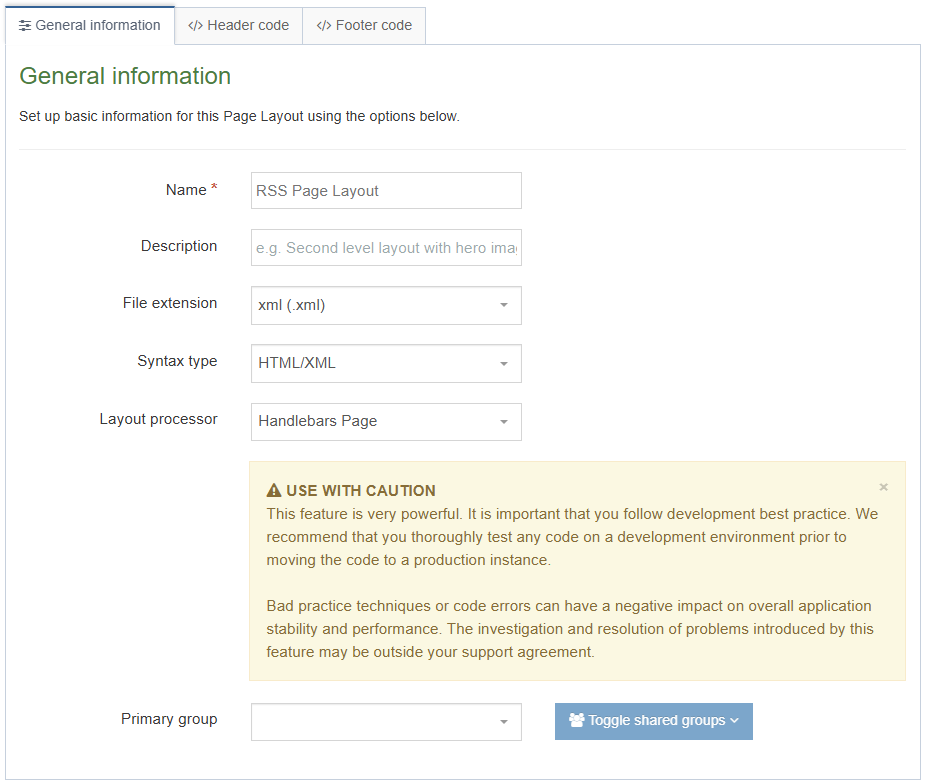
- Fill in the following General information:
- Name: enter a name for your Page Layout, e.g. RSS Page Layout.
- Description: enter a description for your Page Layout.
- File extension: as you are not going to use the default, select the relevant extension here, e.g. XML.
- Syntax Type: if you wish to use syntax highlighting, select it here.
- Layout Processor: select Handlebars Page.
- Primary group: If appropriate, select a primary group.
- Copy the information from the Header and Footer sections below and paste into the </> Header code and </> Footer code tabs in the Page Layout.
- Change the code in the header to reflect your configuration. Look below for guidelines.
- Click Save changes to save the Page layout.
RSS Feed Header Code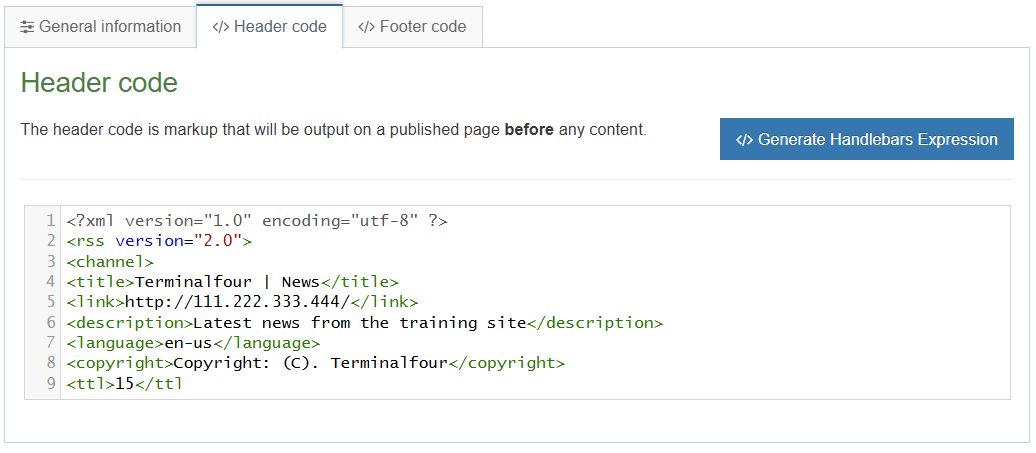
<?xml version="1.0" encoding="utf-8" ?>
<rss version="2.0">
<channel>
<title>Terminalfour | News</title>
<link>http://111.222.333.444 /</link>
<description>Latest news from the training site</description>
<language>en-us</language>
<copyright>Copyright: (C). Terminalfour</copyright>
<ttl>15</ttl>
Required channel elements for an RSS feed are:
- title: the title of your news feed. It’s how people refer to your service. This will appear at the top of the feed.
- link: URL to the HTML website corresponding to your Channel.
- description: phrase or sentence describing the content of the feed.
Some optional channel elements are:
- language: language the channel is written in
- copyright: copyright notice for content in feed
- ttl: "time to live" indicates the amount of time (in minutes) which specifies how long a channel should be cached before refreshing from the source.
RSS Feed Footer Code
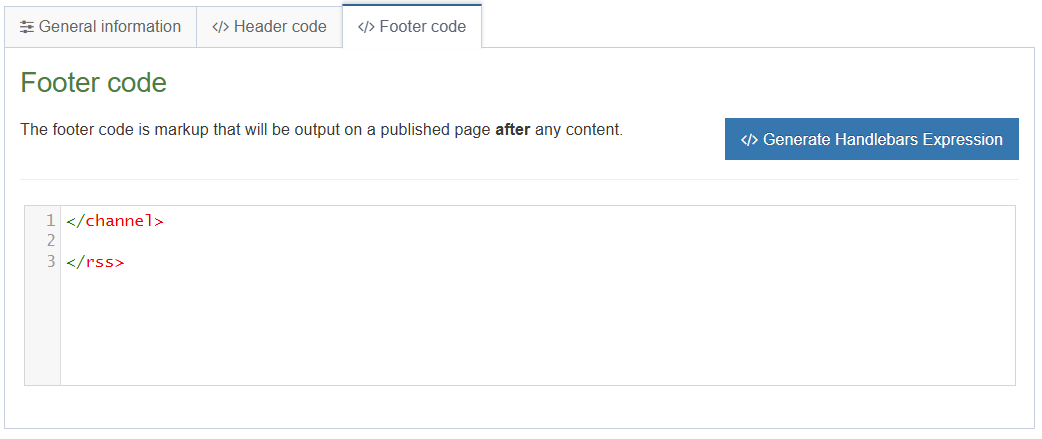
</channel>
</rss>
Enable your RSS Page Layout
- On the Site Structure screen, select Edit section from the Actions Menu beside your RSS section.
- Select the Page Layouts tab.
- Select your new RSS Page Layout from the drop-down menu.
- Click Save changes to save the changes. Your Page Layout is now assigned to your section.
Create the Top Content Navigation Object
The Navigation Object will be used to fetch the latest News items and output them to the RSS Feed Section.
- Go to Assets > Navigation > + Add new navigation > Top Content.
- The Top Content Navigation contains the following options:
- Name: enter a name for the RSS Feed. To make it easy to identify what it is used for, you should make this as descriptive as possible.
- Description: Enter a description of the RSS feed (i.e. what content will be included).
- Primary group: if appropriate, select a group (or groups) to add this to.
- Options:
- Show pending content in preview: lets you view non-approved content in preview.
- Cache output: caches the generated output for use in subsequent previews and publishes.
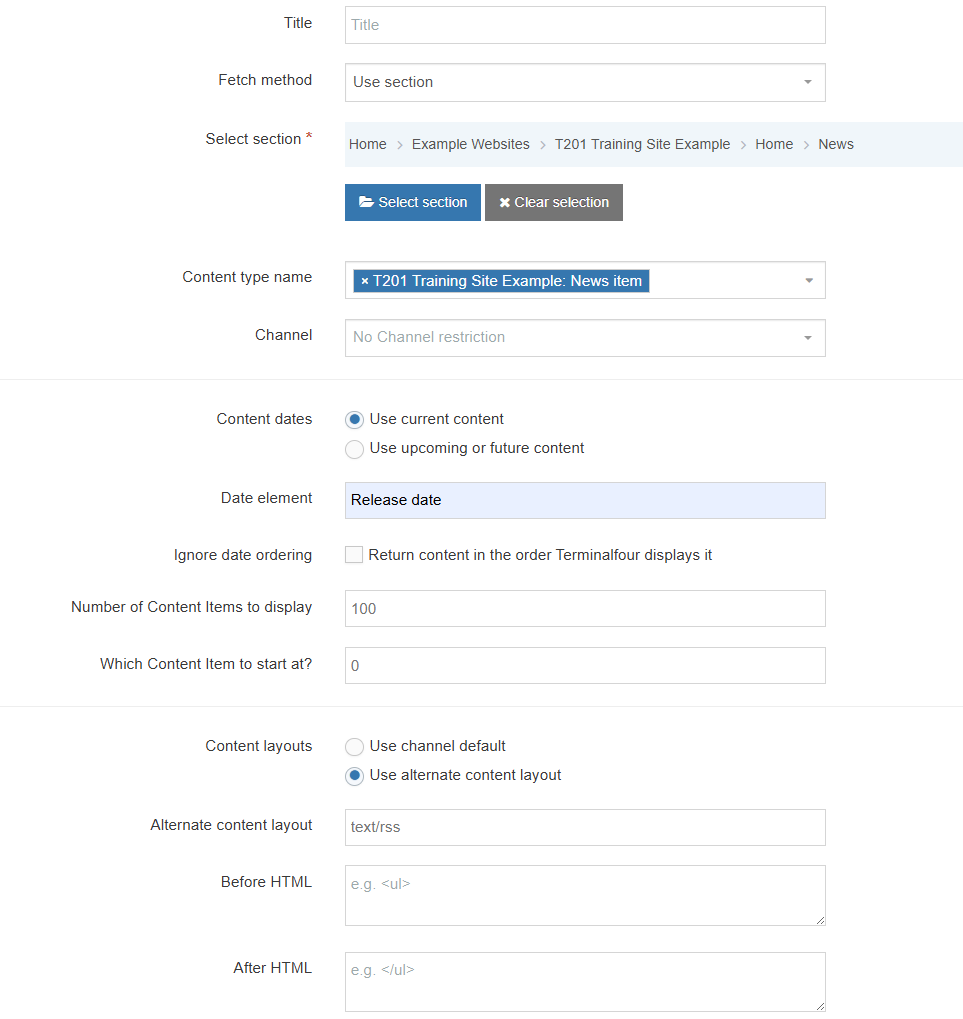
- Title: enter the title you wish to output before the menu, or leave it blank if you do not wish to use a title.
- Fetch Method: select the relevant option:
- Use section: content will be fetched only from the Section you specify.
- Use branch: content will be fetched from the Branch, starting at the Section you specified above.
- Use current: content will be fetched from the current section.
- Use current branch: content will be fetched from the Branch, starting at the current section. If you selected a Section above, this will be ignored.
- Select section: click Select section and navigate to the section you wish to fetch the content from.
- Content type name: select one or multiple Content Types from the list. Only content using these Content Types will be fetched.
- Channel: if content should not be published to all channels, select one or multiple channels from the list.
- Content dates: Select either current (i.e. content with a date in the past) content or future content.
- Use current content.
- Use upcoming or future content.
- Date element: enter the name of the date element in your Content Type(s). This must be an exact match to the Element name.
- Ignore date ordering: check this if you have ordered the content in your section and wish to use that order, rather than the date order.
- Number of Content Items to display: specify the maximum number of content items you wish to display.
- Which Content Item to start at?: specify which piece of content to start with--this does not have to be the first piece.
- Content layouts: check this to use an alternate Content Layout for the content. If not checked, the content will be output using the default as specified in the Channel (e.g. text/html).
- Use channel default.
- Use alternate content layout.
- Alternate content layout: specify which Content Layout you wish to use i.e. text/rss.
- Before HTML: the HTML to be output before the list of items.
- After HTML: the HTML to be output after the list of items.
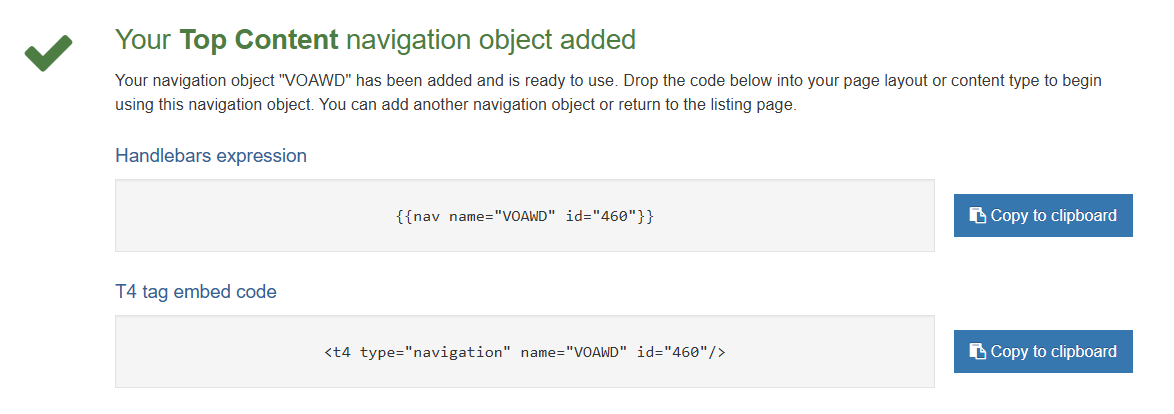
- Click Next to save the Navigation Object and copy the Handlebars expression.
Code Content Type
You need a "code" Content Type. If you don't have one already, use the T201 Implementer training material for step-by-step instructions on how to create it.
Insert Navigation Object into Content
- To display the content in your RSS section, you need to add the Handlebars expression or T4 Tag for the Top Content Navigation Object as content.
- From the Site Structure, select +Create content from the Actions Menu beside your RSS Feed section.
- Select your Code Only Content Type.
- Give the piece of content a name and paste the Handlebars expression or T4 Tag in to the Code element.
Make sure to use the process Helper to wrap your navigation object like so:
{{process (nav name="RSS Feed" id="123")}}
- Click Save changes or Save and approve to save the content.
Build Alternative Content Layout
- Remember, your Top content navigation object is going to output content using an alternate content layout called text/rss. You need to create this alternate layout in order for the content to output.
- Go to Assets > Content Types > edit your content type (News).
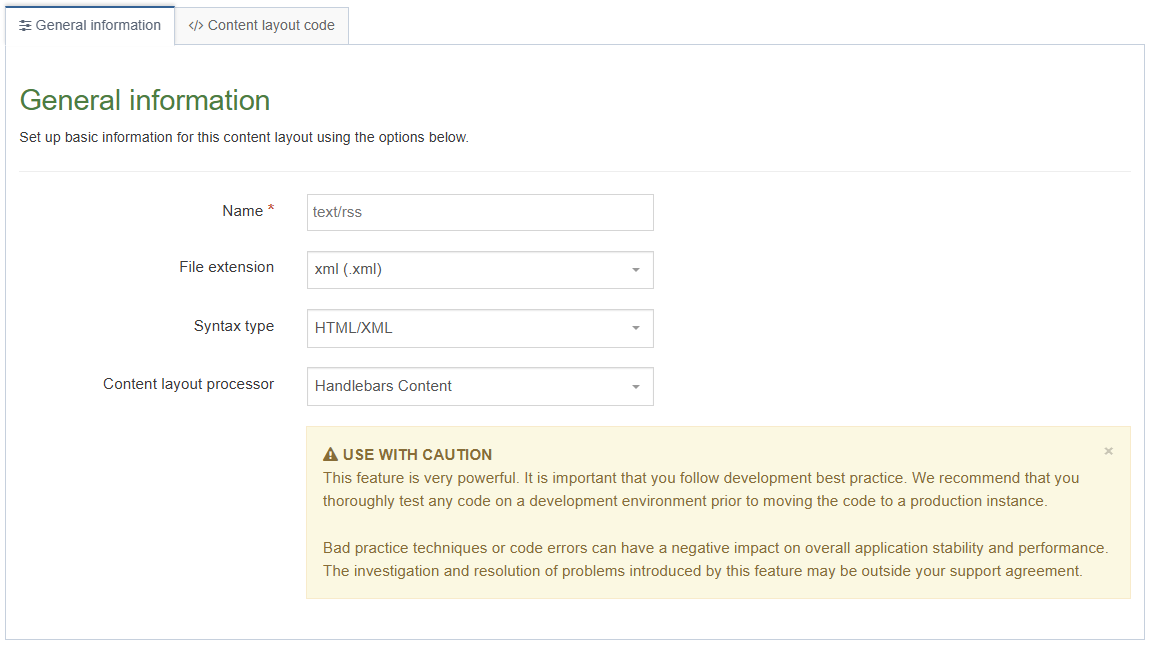
- Select the Content layouts tab and click + Add content layout.
- Name: enter the name you specified in the Navigation Object, e.g. text/rss.
- Select the File extension which you have enabled in the channel, e.g. XML.
- Select the relevant Syntax type language to enable syntax highlighting.
- Content layout processor: set to Handlebars Content.
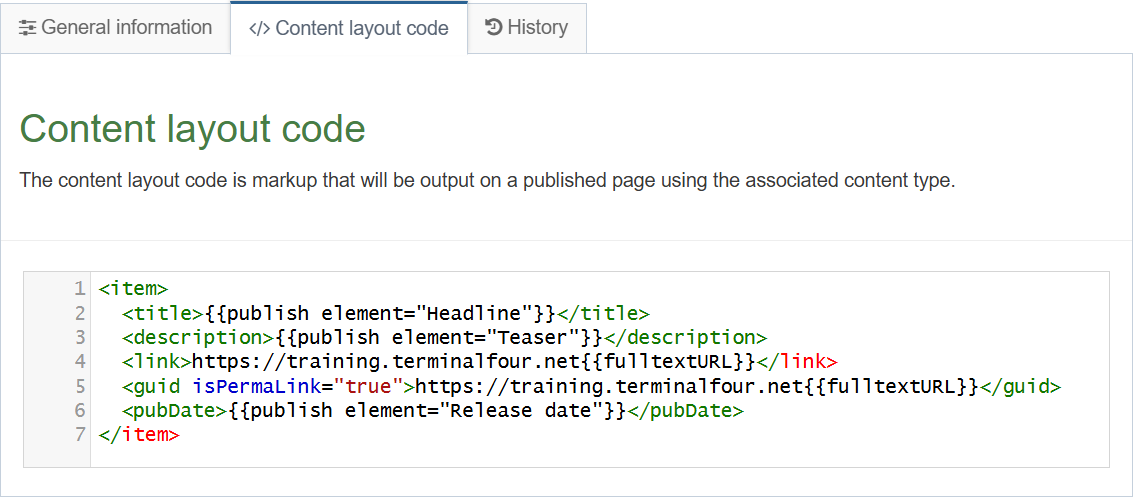
- Use the Content layout code tab to build the output for your content. If you have created the HTML already, you can start by pasting that into the code field as displayed below (copy the code text in red).
- As each piece of content will have unique information in the Headline, Teaser and Release date, the text below needs to be replaced with what the user enters when creating the content. To do that you need to build some Handlebars expressions.
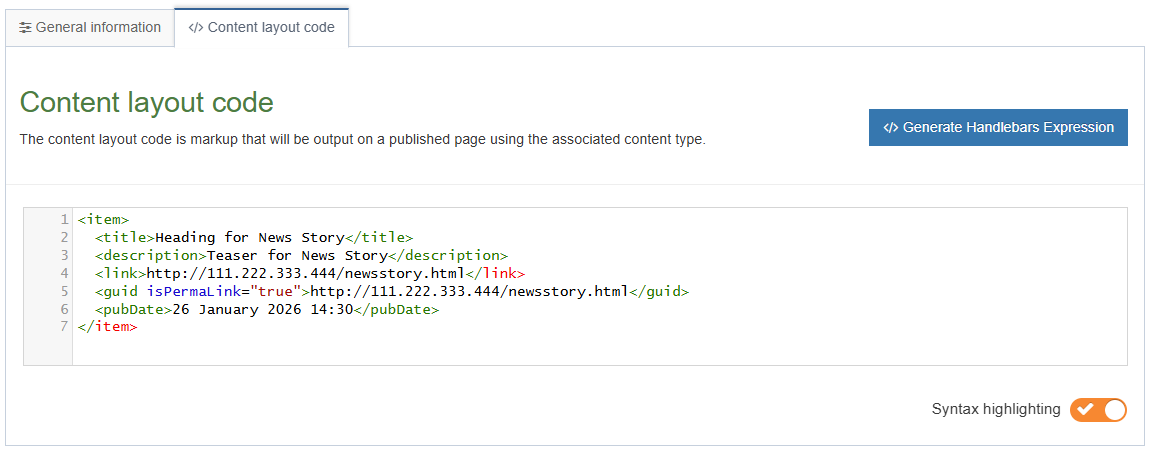
<item>
<title>Heading for News Story</title>
<description>Teaser for News Story</description>
<link>https://111.222.333.444/newsstory.html</link>
<guid isPermaLink="true">https://111.222.333.444/newsstory.html</guid>
<pubDate>26 January 2026 14:30</pubDate>
</item>
- Replace the text Heading for News Story with a Handlebars expression.
- To build this, click the </> Generate Handlebars Expression button.
- Information to output: to output the information the user enters in this element, select Element.
- Content element: select the element you created earlier for the Headline.
- Handlebars helper: the Publish Helper will be used as this is a plain text element.
- Options: be sure the following modifiers have been selected:
- Convert special characters to their HTML encoded values.
- The Handlebars expression should look similar to this (depending on which modifiers you have selected): {{publish element="Headline"}}
- Click Copy to clipboard.
- Replace the original heading Heading for News Story with the new expression. By leaving the <title> tags around the new Handlebars expression, the information entered by the end user will be output as the title in the RSS Feed.
- Click </> Generate Handlebars Expression again.
- Using what you have learned above, build an expression to output the Teaser.
- Content element: select the element you created earlier for the Teaser.
- Handlebars helper: the Publish Helper will be used as this is a plain text element.
- Options: be sure the following modifiers have been selected:
- Convert special characters to their HTML encoded values.
- The Handlebars expression should look similar to this (depending on which modifiers you have selected):
{{publish element="Teaser"}}
- Click Copy to clipboard.
- Replace the original content for the Teaser for News Story with the new expression. By leaving the <description> tags around the Handlebars expression, the information entered by the user will be output as the description in the RSS Feed.
- Click </> Generate Handlebars Expression again.
- Build an expression to replace part of the URL/path found in the <link> and the <guid> (for example; /newsstory.html).
- Information to output: select the option Fulltext.
- Fulltext: select the Fulltext URL radio button to generate a fulltext URL/path. Your Handlebars expression should look like so:
{{fulltextURL}}
- Click Copy to clipboard.
- Replace the /newsstory.html with the new expression in both your <link> and <guid>.
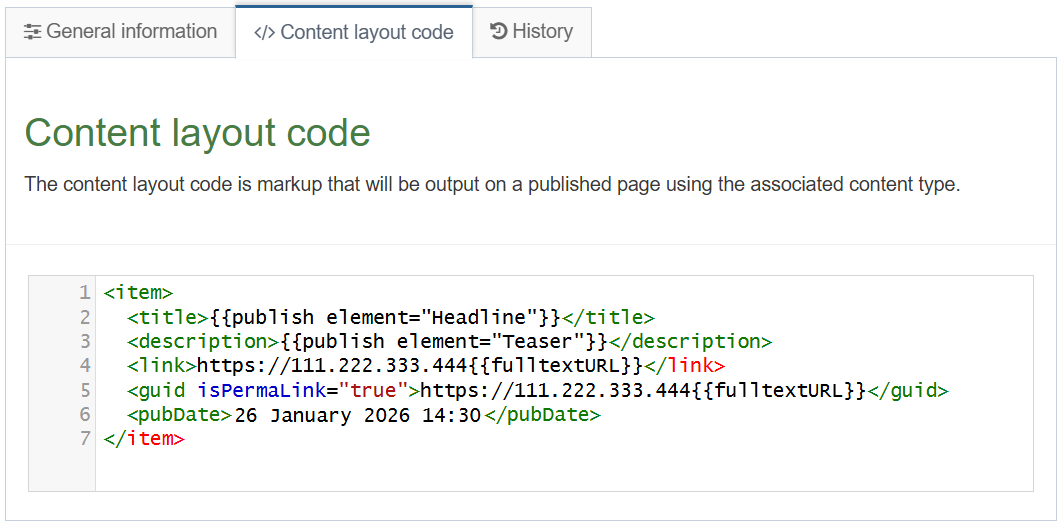
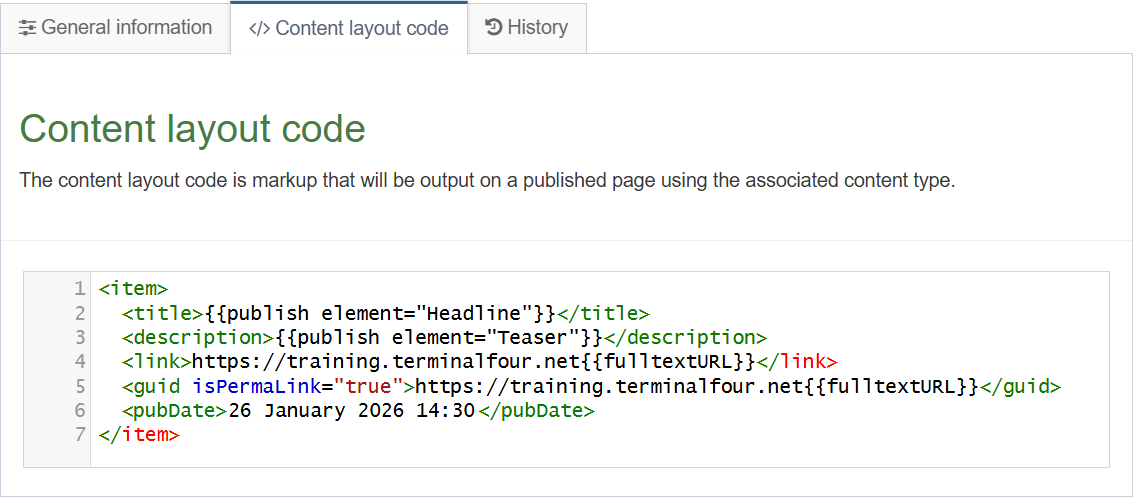
- Now we’ll add the IP address of your published website to prepend your {{fulltextURL}} in both your <link> and <guid>. Your trainer will provide you with the proper IP address. (for example; https://training.terminalfour.net).
- Now we need to modify the <pubDate>.
Click </> Generate Handlebars Expression again. - Build an expression to replace the date placeholder 26 January 2026 14:30
- Information to output: as you need to output the date the user selects in this element, select the option Element.
- Content element: select the element Release date.
- Handlebars helper:: select the Publish Helper.
- Options: select Convert special characters to their HTML encoded values. The Handlebars expression should look like this:
{{publish element="Release date"}}
- Click Copy to clipboard.
- Replace the date placeholder 26 January 2026 14:30 with the new expression.
- Click Save changes to save the changes to your content type layout.
Date Formatting
The preferred date format for the <pubDate> element in an RSS 2.0 item is RFC 822, which defines a specific format including the day of the week, day, month, year, time, and timezone.
You handlebars expression {{publish element="Release date"}} uses this as the default format.
When you have completed all the updates to your text/rss layout it should look similar to this:
Create link to RSS Feed
Your RSS section is hidden from your website's navigation menu. For site visitors to find the RSS Feed on your website, you need to have a link to it. Use a Section Details Navigation Object to create a link to your hidden RSS Feed section and place it into your website.
- Go to Assets > Navigation > + Add new navigation > Section Details.
- Use the HTML from the footer in the main Page Layout to determine how the Link to RSS Feed should be built. In this case you can build a full link, assuming you named your Section "RSS Feed".
The Section details navigation configuration contains the following options:
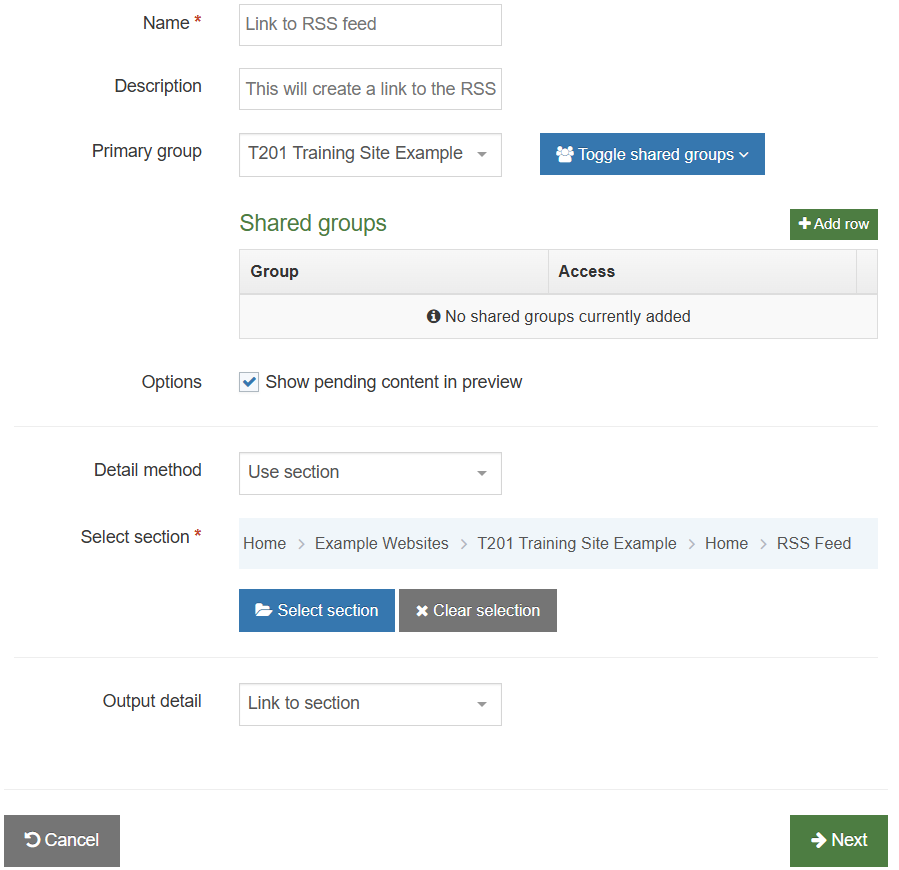
- Name: enter a name for the Link to RSS Feed. This will appear in a comment when used in the Page Layout, and to make it easy to identify what it is used for, a descriptive name should be considered.
- Description: enter a description for the Link to RSS Feed, i.e. what will be output.
- Primary group: restricts availability of the asset to members of the group and members of any shared groups specified.
- Options:
- Show pending content in preview: includes pending content when previewing a page.
- Detail method: determine whether the detail refers to Current section, Use section at level or Use section; then use one of the following two options to specify the relevant details. For this activity, we’ll use our RSS Feed section.
- Level: if you selected Branch at Level, specify the level here. This will be ignored if you selected Specific Section.
- Select section: if you selected Specific Section, click Select section and select the section you wish to use. This will be ignored if you selected Branch at Level.
- Output detail: you can output the section's ID, Name or Path or alternatively output Link to Section.
- Click Next to save the Navigation Object.
- Go to Assets > Page layouts.
- Find and edit your Page layout. Go to the </> Footer code tab.
- Click on </> Generate Handlebars Expression.
- In the Navigation tab Restrict navigation objects by type: Section Details.
- Available navigation objects: select your Link to RSS Feed.
- Copy the Handlebars Expression.
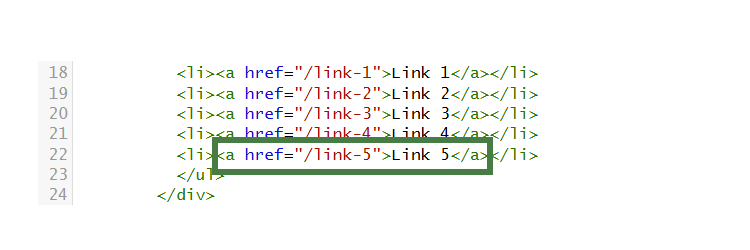
- Paste the Handlebars expression in to replace a footer link (see below).
- Click Save changes.
- The link is now complete. Preview your site to check the result. If you have a preview open already, simply refresh that one. Otherwise you can preview the site from the Site Structure screen.
- If you are happy with the result, close the preview and click Save changes.
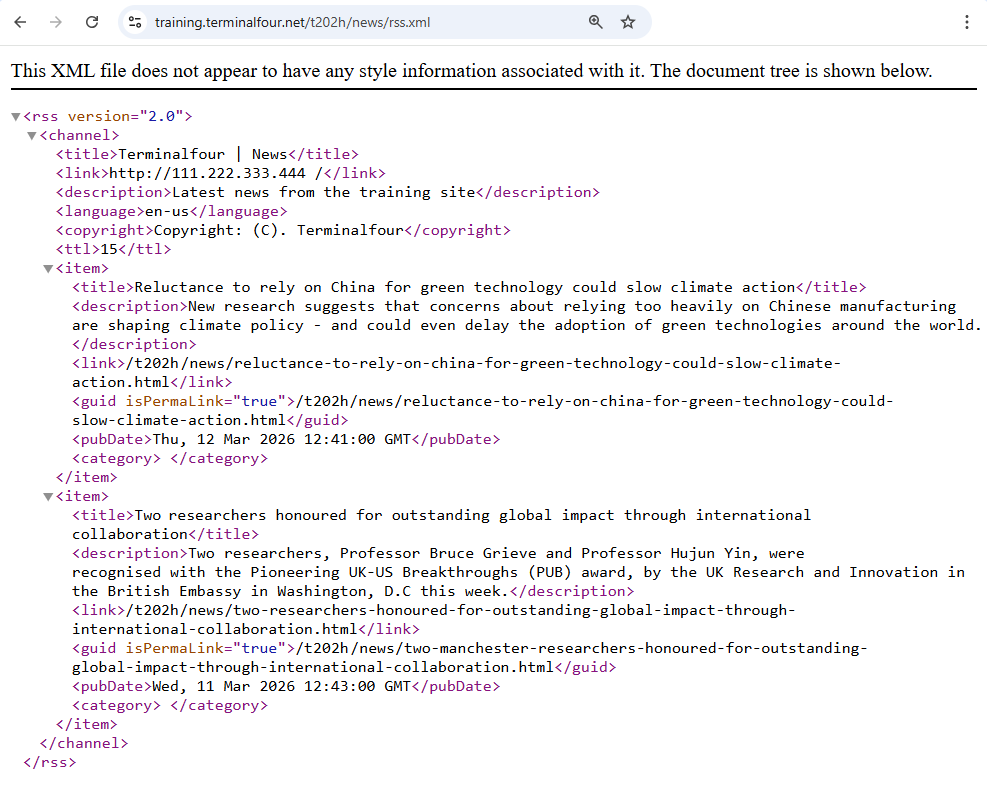
- The external RSS feed is now displayed on your page and will update whenever new items become available.
Publish and View Feed
Approve your content and publish your channel to see your news RSS feed
Feedback survey
Congratulations on completing the Advanced Web Developer Training module.
Please provide feedback in our on-line survey.