
Selective Output
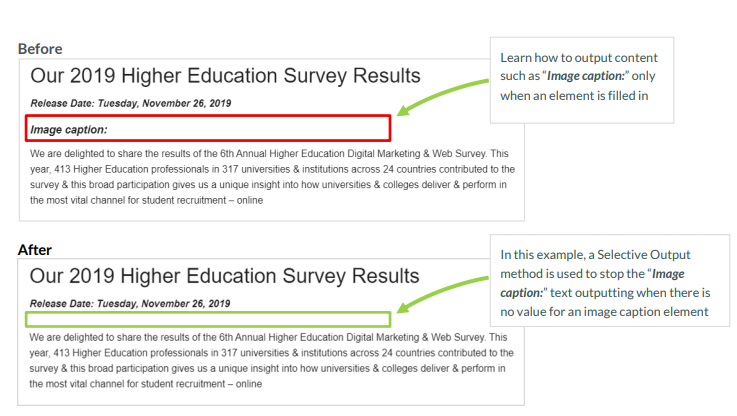
- Selective, or “optional”, output is used to only output the value of a Content Type Element if it is filled in.
- If you have elements in a Content Type which are not required, you can ensure the element is not output if there is no content in the element.
Before we start
Be sure you have the following added to your training site:
A "News" section with a "News" content type enabled. If you don't have one, you may duplicate one to your Site Structure.
Add a few news stories that we'll use for testing Selective Output later.
Other uses for Selective Output
- While selective, or “optional”, output is traditionally used to only output the value of a Content Type Element if it is filled in, the below information will highlight alternative ways to use this technique to, for instance, output a disclaimer if a box is checked, output a logo, etc.
Create a list to enable a disclaimer
- You need to create a list with a single entry. The reason behind this is that you need to create a check box in your Content Type that gives the end user the ability to enable the disclaimer in the Content Type.
- To create a list, go to Assets > Lists > +Add new list:
- Fill in the List information:
- Name: enter a name for your list.
- Description: enter a description for your list.
- Localization: if your site is bi- or multi-lingual, select the option that best fits.
- Primary group: if appropriate, select the group using this list.
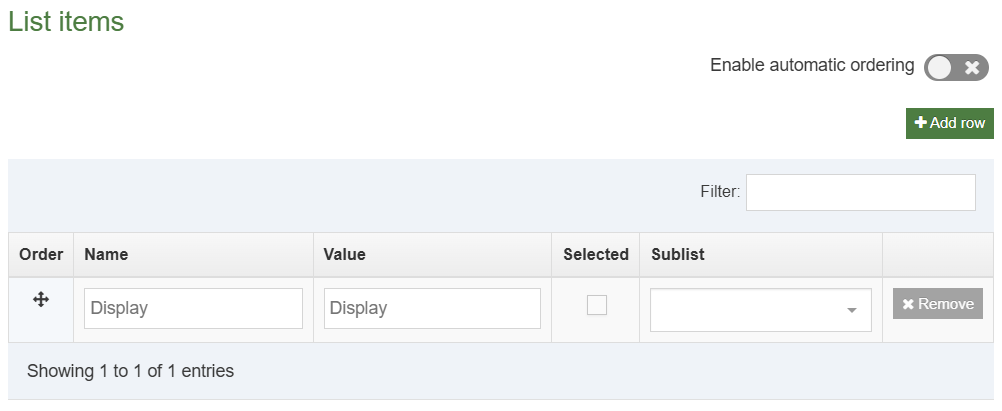
- List items
- Click +Add row.
- Name: enter the name you wish the user to see when adding the content, e.g. Display.
- Value: enter the value you wish to output on the published site, e.g. Display.
- Selected: if a value should be selected by default, select which one to use.
- Sub List: if you are creating a cascading list, select the sub-lists for each list item. Sub-lists must be created first in order to link to them.
- Click Save changes to save the list.
Add list to a Content Type
- Edit your General Content Type by adding the List you just created. This List is used to enable the disclaimer message in this Content Type.
- Go to Assets > Content Types.
Filter to find your Generic Content Type (you may want to duplicate it and rename it). - Click Actions > Edit beside your Content type.
- Select the Elements tab.
- Click +Add element.
- Add a new list element by filling in the information as outlined in the table below. Various elements can be used with lists; in this exercise we’ll use a Check Box.
| Name | Description | Type | List | Max Size | Required |
|---|---|---|---|---|---|
| Display Disclaimer | Check the box to display a disclaimer |
Check Box | [Select your list] | 80 | No |
- Click Save changes.
Don't have a General Content Type?
If you don't have a general content type you can:
Refer to the Web Developer training manual for step-by-step instructions to create one, or
Duplicate one from the training instance - your trainer will show you how
- Click Actions > Edit beside your Content type again.
- Select the Content layouts tab.
- Click Actions > Edit beside the text/html Content layout name.
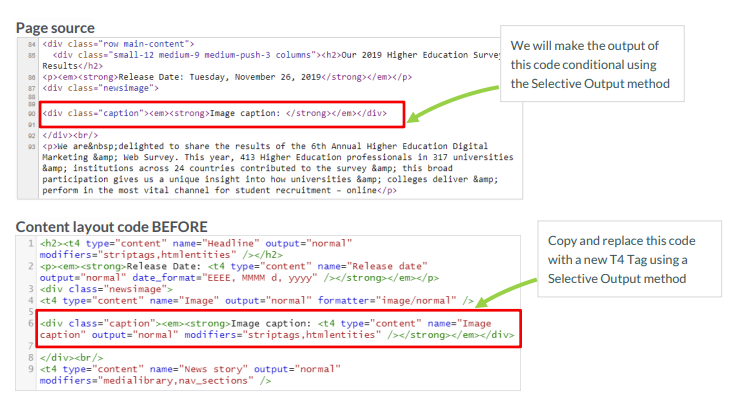
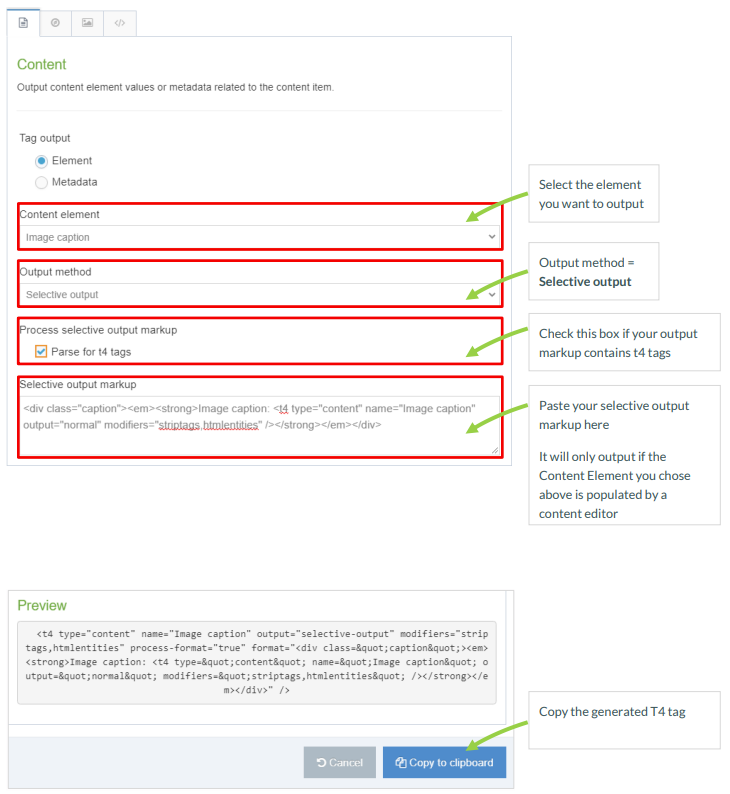
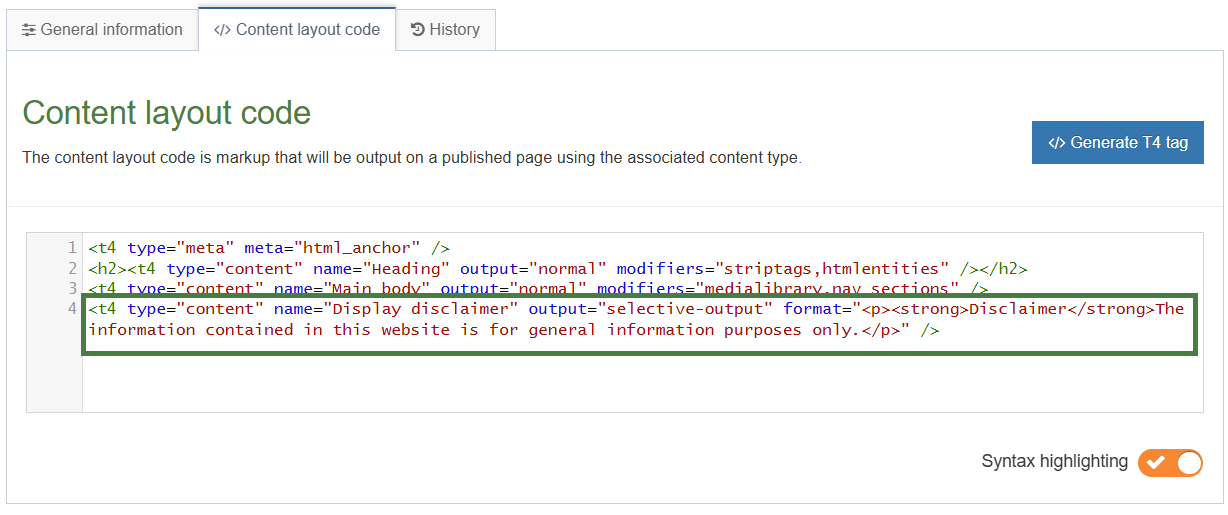
- Generate a T4 tag to output the value of the list element:
Click </> Generate T4 tag.- Content element: Select your new element (i.e. Display disclaimer).
- Output method: Selective output.
- Parse for t4 tags: leave this unchecked.
- Selective output markup: enter the text you want optionally displayed.
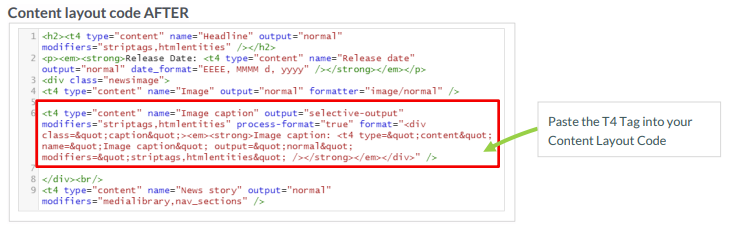
- Copy the T4 tag and paste it into the Content Layout code area following any other tags you have built.
.png)
Enable and test Content Type
- From the Site Structure screen, click Actions > Edit content beside a section which already has content added to it.
- Select the content you wish to modify.
- Check the check box to enable your disclaimer.
- When you have modified your content, Preview to ensure you are happy with the result.
- Once complete, click Save changes.
.png)
Feedback survey
Congratulations on completing the Advanced Web Developer Training module.
Please provide feedback in our on-line survey.