
Installing Terminalfour on Windows using Apache Tomcat
This guide is divided into two parts. The first part outlines the installation of Apache Tomcat on a Windows system. The second part explains how to install the Terminalfour software once you Apache Tomcat server has been configured.
Installing Apache Tomcat 8.5
If you haven't already done so, download the 32-bit/64-bit Windows Service Installer for Apache Tomcat 8.5, this is available from https://tomcat.apache.org/download-80.cgi. There are other installers available, but this particular installer will create the Windows service for Apache Tomcat for you.
- Run the installer and follow the screens until the Choose Components screen:
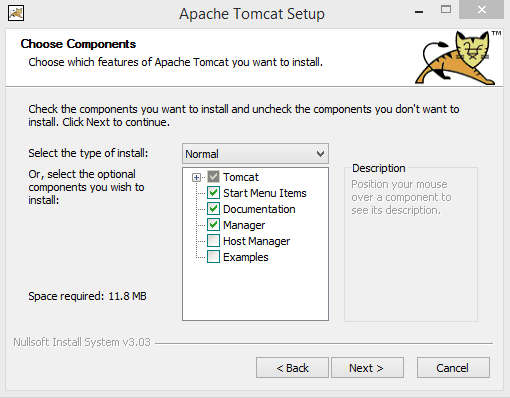
- The only necessary component is the "Tomcat" component; however, it may prove useful to install the standard options (selected by default). If your machine is open to the internet on port 8080, it is best to only install the Tomcat component. Continue to the next screen after selecting your components.
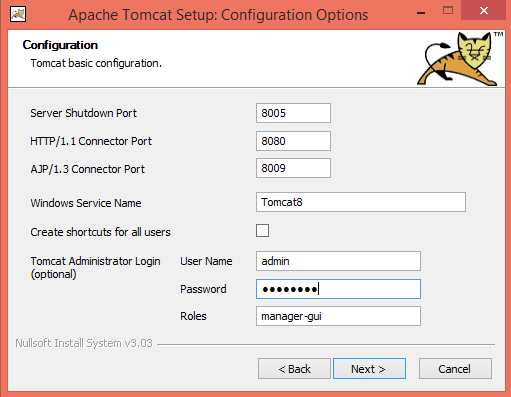
- This screen allows you to define the port on with Tomcat will listen as well as a username and password for the Tomcat Manager component application (if you chose to install this). It is preferred to leave Tomcat listening on port 8080 for HTTP, and 8009 for AJP:
- You will now be asked to select your Java Virtual Machine or JVM. Your system's default JVM should be picked up automatically; however, you can change this to another JVM instance if you wish.
Only Oracle Java 7 is supported by TERMINALFOUR 8.2+Once selected, follow the screens until Tomcat has been installed: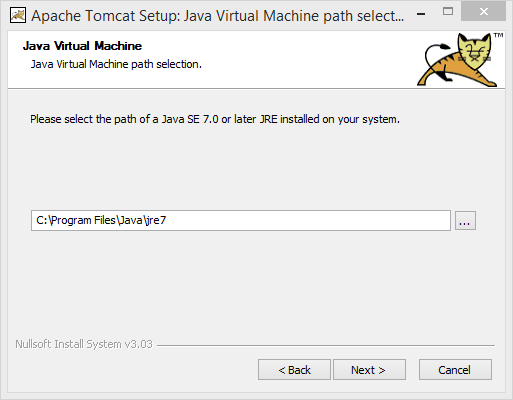
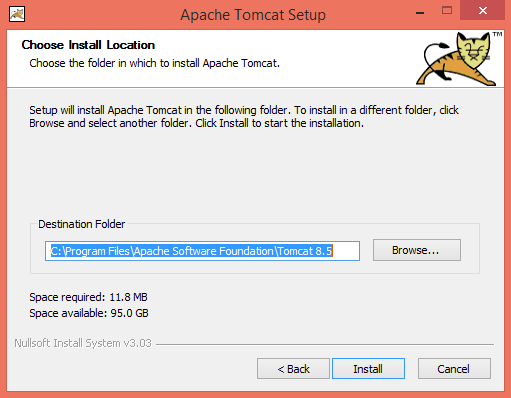
- The next screen will ask you where you would like to install Tomcat. Any file system location is fine. Once you have chosen your directory, go to the next screen:
Post Installation Configuration of Tomcat 8.5
Setting the Tomcat process to start automatically
If you chose the installer package outlined above, a Windows service would have been created during the installation process. This process should be set to run automatically when the system starts:
- To open the Windows Services control panel, Go to Start and search for "View Local Services".
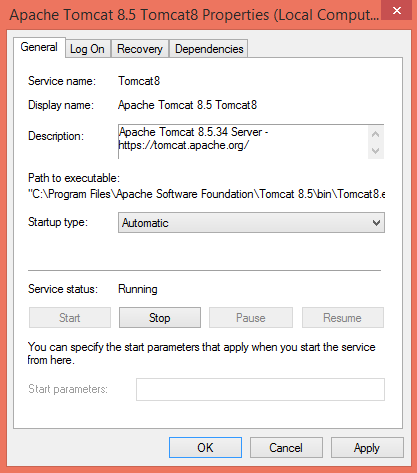
- Locate the process for Tomcat 8.5 in the list, then right-click and select properties. A new window opens:

- On the General tab, change the process's Startup type to Automatic. You should also start the process if you have not already done so:
- On the Log On tab, you can change the user Tomcat runs as. This is only necessary if you plan to publish your website to a file share. To change the user, select This Account and then enter an appropriate username and password for that shared location.
Changing the Java memory parameters for Tomcat
When Tomcat is installed, it will only run with a default memory allocation. It is recommended that this memory allocation is altered to at least 2 gigabytes and if possible 4 gigabytes:
- Open the Configure Tomcat application. If Tomcat is running, you should have an item in the system tray for Tomcat which you can right-click on and select Configure. Otherwise, open the folder you have installed Tomcat in, then run the program "tomcat6w.exe" which will be in the bin folder.
- On the Java tab, you can specify the memory allocations for Java. Have a look at the recommended memory allocation settings in this article.
- Java Environment Variables can also be set from this menu under Java Options. Our recommended Environment Variables are:
-XX:PermSize=128m-XX:MaxPermSize=256m-Djava.util.Arrays.useLegacyMergeSort=true-Djava.awt.headless=true-XX:-OmitStackTraceInFastThrow-XX:+CMSClassUnloadingEnabled-XX:+UseConcMarkSweepGC
These should be added below the default options: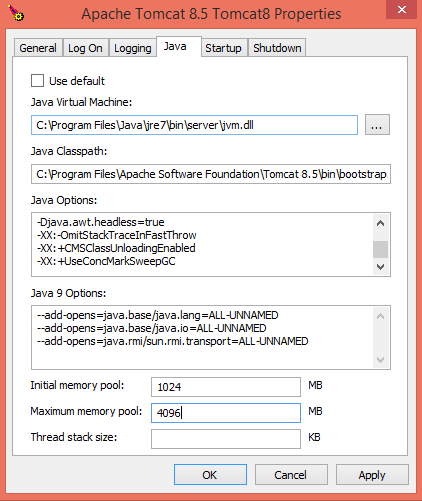
- Select Apply to save your changes.
- Switch back to the General tab and then Stop and Start Tomcat to ensure your memory settings are okay.
Verify your Tomcat installation
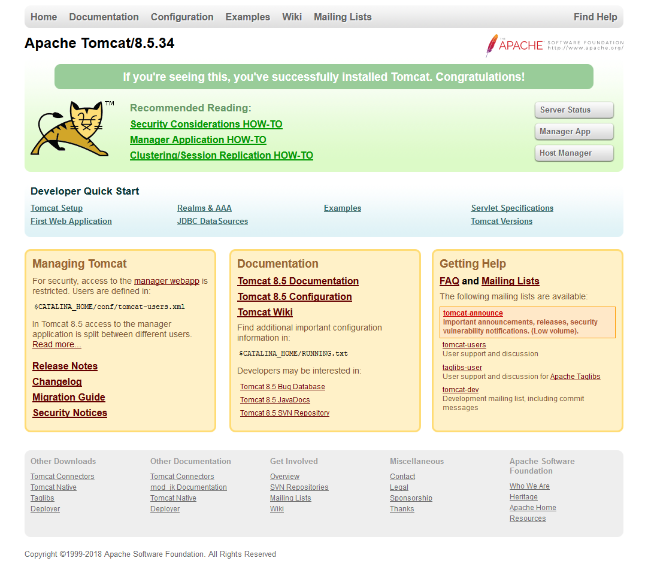
To quickly check that Tomcat has installed without error and is running, navigate to http://localhost:8080/ where you should see the default home page for Tomcat:
Setting Up TERMINALFOUR in Apache Tomcat 8.5
To set up TERMINALFOUR you need to do the following:
- Create a folder structure for TERMINALFOUR
- Add the JDBC driver for your database into Tomcat
- Configure Tomcat's server.xml file for TERMINALFOUR
Create a folder structure for TERMINALFOUR
It is recommended the following folders are created as outlined in the image below.
The main TERMINALFOUR folder can be placed anywhere on your file system, this guide assumes it is located on the C drive as C:\TERMINALFOUR\
filestoreStores all media files that are added to TERMINALFOUR
| Item | Description |
|---|---|
| servlets | Stores the main TERMINALFOUR WAR file |
| temp | Can be set as the temporary file directory for TERMINALFOUR |
| changesets | Should be used to hold the changeset directories for Transfer Manager |
| preview | Directory used for setting up a preview filter |
| publish-transfer-logs | Can be used to store achived publish/transfer logs |
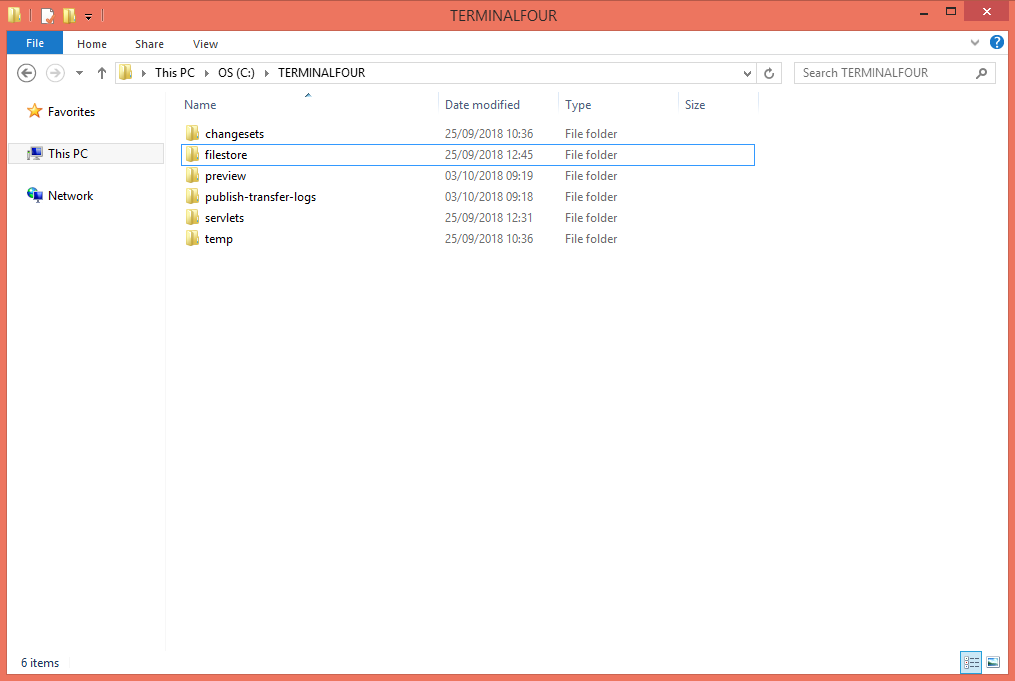
After creating the folder structure, place your TERMINALFOUR WAR file into the servlet's directory.
Add the JDBC driver for your database into Tomcat
The JDBC driver for your database should be placed into the lib folder of your Tomcat Installation. This is a JAR file which will be specific to your database type and version. For Oracle systems we recommend the use of the Oracle Thin JDBC Driver; however, the OCI driver will work.
| Database Type: | Download Link for JDBC Driver: |
|---|---|
| MySQL 5 | https://dev.mysql.com/downloads/connector/j/5.1.html |
| Microsoft SQL Server 2008 & 2012 | https://www.microsoft.com/en-us/download/details.aspx?id=54670 |
| Oracle 11G R1 & 12C R1 | https://www.oracle.com/technetwork/database/application-development/jdbc/downloads/index.html |
Configure Tomcat's server.xml file for TERMINALFOUR
We need to tell Tomcat where to find the TERMINALFOUR files and how to run them. This is done by editing the server.xml file located in the conf folder for your Tomcat installation. Open this file for editing and add in the following code towards the bottom of the file just before the </host> tag. There are three resources available below; please use the resource which is appropriate for your system, remembering to edit any information in bold to match your particular setup.
The path indicated in bold needs to be changed to match the path to your WAR file.
For TERMINALFOUR Version 8.2+, we advise that there are 200 connections available to the database.
MySQL:
<Context path="/terminalfour"
docBase="/usr/share/tomcat8/webapps/servlets/terminalfour-8.2.14.1-FINAL-234.war"
reloadable="false"
antiJARLocking="true">
<Resource driverClassName="com.mysql.jdbc.Driver"
maxActive="200"
maxIdle="20"
name="jdbc/SiteManagerDB"
username="DATABASE_USER"
password="DATABASE_PASSWORD"
type="javax.sql.DataSource"
url="jdbc:mysql://DATABASE_HOST/DATABASE_NAME?zeroDateTimeBehavior=convertToNull&characterEncoding=UTF-8&useSSL=false"
validationQuery="SELECT 1"
maxWait="-1"
removeAbandoned="true"
removeabandonedTimeout="60"
minEvictableIdleTimeMillis="600000"
factory="org.apache.tomcat.jdbc.pool.DataSourceFactory"
jdbcInterceptors="ResetAbandonedTimer"
logAbandoned="true"
testOnBorrow="true"
testOnReturn="true"
testWhileIdle="true"
timeBetweenEvictionRunsMillis="1200000" />
</Context>
Microsoft SQL Server:
<Context path="/terminalfour"
docBase="/usr/share/tomcat8/webapps/servlets/terminalfour-8.2.14.1-FINAL-234.war"
reloadable="false"
antiJARLocking="true">
<Resource driverClassName="com.microsoft.sqlserver.jdbc.SQLServerDriver"
maxActive="200"
maxIdle="20"
name="jdbc/SiteManagerDB"
username="DATABASE_USER"
password="DATABASE_PASSWORD"
type="javax.sql.DataSource"
url="jdbc:sqlserver://DATABASE_HOST;DatabaseName=DATABSE_NAME"
validationQuery="SELECT 1"
maxWait="-1"
removeAbandoned="true"
removeAbandonedTimeout="600"
minEvictableIdleTimeMillis="600000"
factory="org.apache.tomcat.jdbc.pool.DataSourceFactory"
jdbcInterceptors="ResetAbandonedTimer"
logAbandoned="true"
testOnBorrow="true"
testOnReturn="true"
testWhileIdle="true"
timeBetweenEvictionRunsMillis="1200000" />
</Context>
Oracle (assuming Oracle Thin JDBC client):
<Context path="/terminalfour"
docBase="/usr/share/tomcat8/webapps/servlets/terminalfour-8.2.14.1-FINAL-234.war"
reloadable="false"
antiJARLocking="true">
<Resource driverClassName="oracle.jdbc.driver.OracleDriver"
maxActive="200"
maxIdle="20"
name="jdbc/SiteManagerDB"
username="DATABASE_USER"
password="DATABASE_PASSWORD"
type="javax.sql.DataSource"
url="jdbc:oracle:thin:@(DESCRIPTION=(ADDRESS=(PROTOCOL=TCP)(HOST=DATABSE_HOST)(PORT=1521))(CONNECT_DATA=(SERVER=DEDICATED)(SERVICE_NAME=SCHEMA)))"
validationQuery="SELECT 1"
maxWait="-1"
removeAbandoned="true"
removeAbandonedTimeout="600"
minEvictableIdleTimeMillis="600000"
factory="org.apache.tomcat.jdbc.pool.DataSourceFactory"
jdbcInterceptors="ResetAbandonedTimer"
logAbandoned="true"
testOnBorrow="true"
testOnReturn="true"
testWhileIdle="true"
timeBetweenEvictionRunsMillis="1200000" />
</Context>
Save your server.xml file and restart Tomcat using the Windows Services control panel. You should now be able to access TERMINALFOUR by navigating to http://localhost:8080/terminalfour/SiteManager in your web browser. This will present you with the screen.
Go to Step 3 – TERMINALFOUR Installation
Back to top