Access Control Rule Profile
- Last Modified:
- 28 Jul 2022
- User Level:
- Administrator +
Description
With Access Control you can configure the .htaccess file to restrict access to published pages to users with specific usernames and passwords. To do this you must configure Apache and have access to the Terminalfour database.
We have also created a module that provides more flexibility over Access Control that you might want to look at.
- Configure Apache
- Create the System Content Type
- Enable Access Control Content Type
- Create the Access Control Profile
- Configure the Channel
- Site Structure
- Publish the Channel
Configure Apache
In this example, we are using the default .htaccess file. Your server may be configured to use a file with a different name. The file locations here are provided as an example.
We'll create a Content Type that will allow the author to enter the username of the user who has permission to view a Section. This is done by entering their username and checking it against a static file on the server that is not accessible from the web.
Set AllowOverride AuthConfig
Edit the httpd.conf. The location of the file is dependant on where Apache is installed.
Find the directory entry for your site, e.g.
<Directory "/etc/apache2/htdocs">Change the line from
AllowOverride Noneto
AllowOverride AuthConfig<Directory "/etc/apache2/htdocs">## Possible values for the Options directive are "None", "All",# or any combination of:# Indexes Includes FollowSymLinks SymLinksifOwnerMatch ExecCGI MultiViews## Note that "MultiViews" must be named *explicitly* --- "Options All"# doesn't give it to you.## The Options directive is both complicated and important. Please see# http://httpd.apache.org/docs/2.4/mod/core.html#options# for more information.#Options Indexes FollowSymLinks## AllowOverride controls what directives may be placed in .htaccess files.# It can be "All", "None", or any combination of the keywords:# AllowOverride FileInfo AuthConfig Limit#AllowOverride AuthConfig## Controls who can get stuff from this server.#Require all granted</Directory>
Create the password directory and .htpasswd file
Create a directory /etc/apache2/passwords. This should be a location that is not accessible from the web.
Create a file called .htpasswd. If you're not sure about creating .htpasswd files have a look at this guide.
Usernames and passwords should have the following form:jbloggs:$ttr1$MwpTbdEW$5tt6SOJ4oQIa9807Ex/MV0
This file will be referenced from the Content Layout to verify users for access to restricted content.
Create the System Content Type
Before you follow the guide to creating an Access Control Content Type note that for this example, the Content Type comprises just one Content Element:
| Name | Type | Required | Maximum size |
|---|---|---|---|
| Users Allowed | Plain text | No | 400 |
Create a Content Layout called text/access-control. All other fields can be left as the default
Add the following Content Layout Code and save.
# start file
AuthType Basic
AuthName "Restricted Files"
AuthBasicProvider file
AuthUserFile /etc/apache2/passwords/.htpasswd
Require user <t4 type="content" name="Users Allowed" output="normal" modifiers="striptags,htmlentities" />
# end file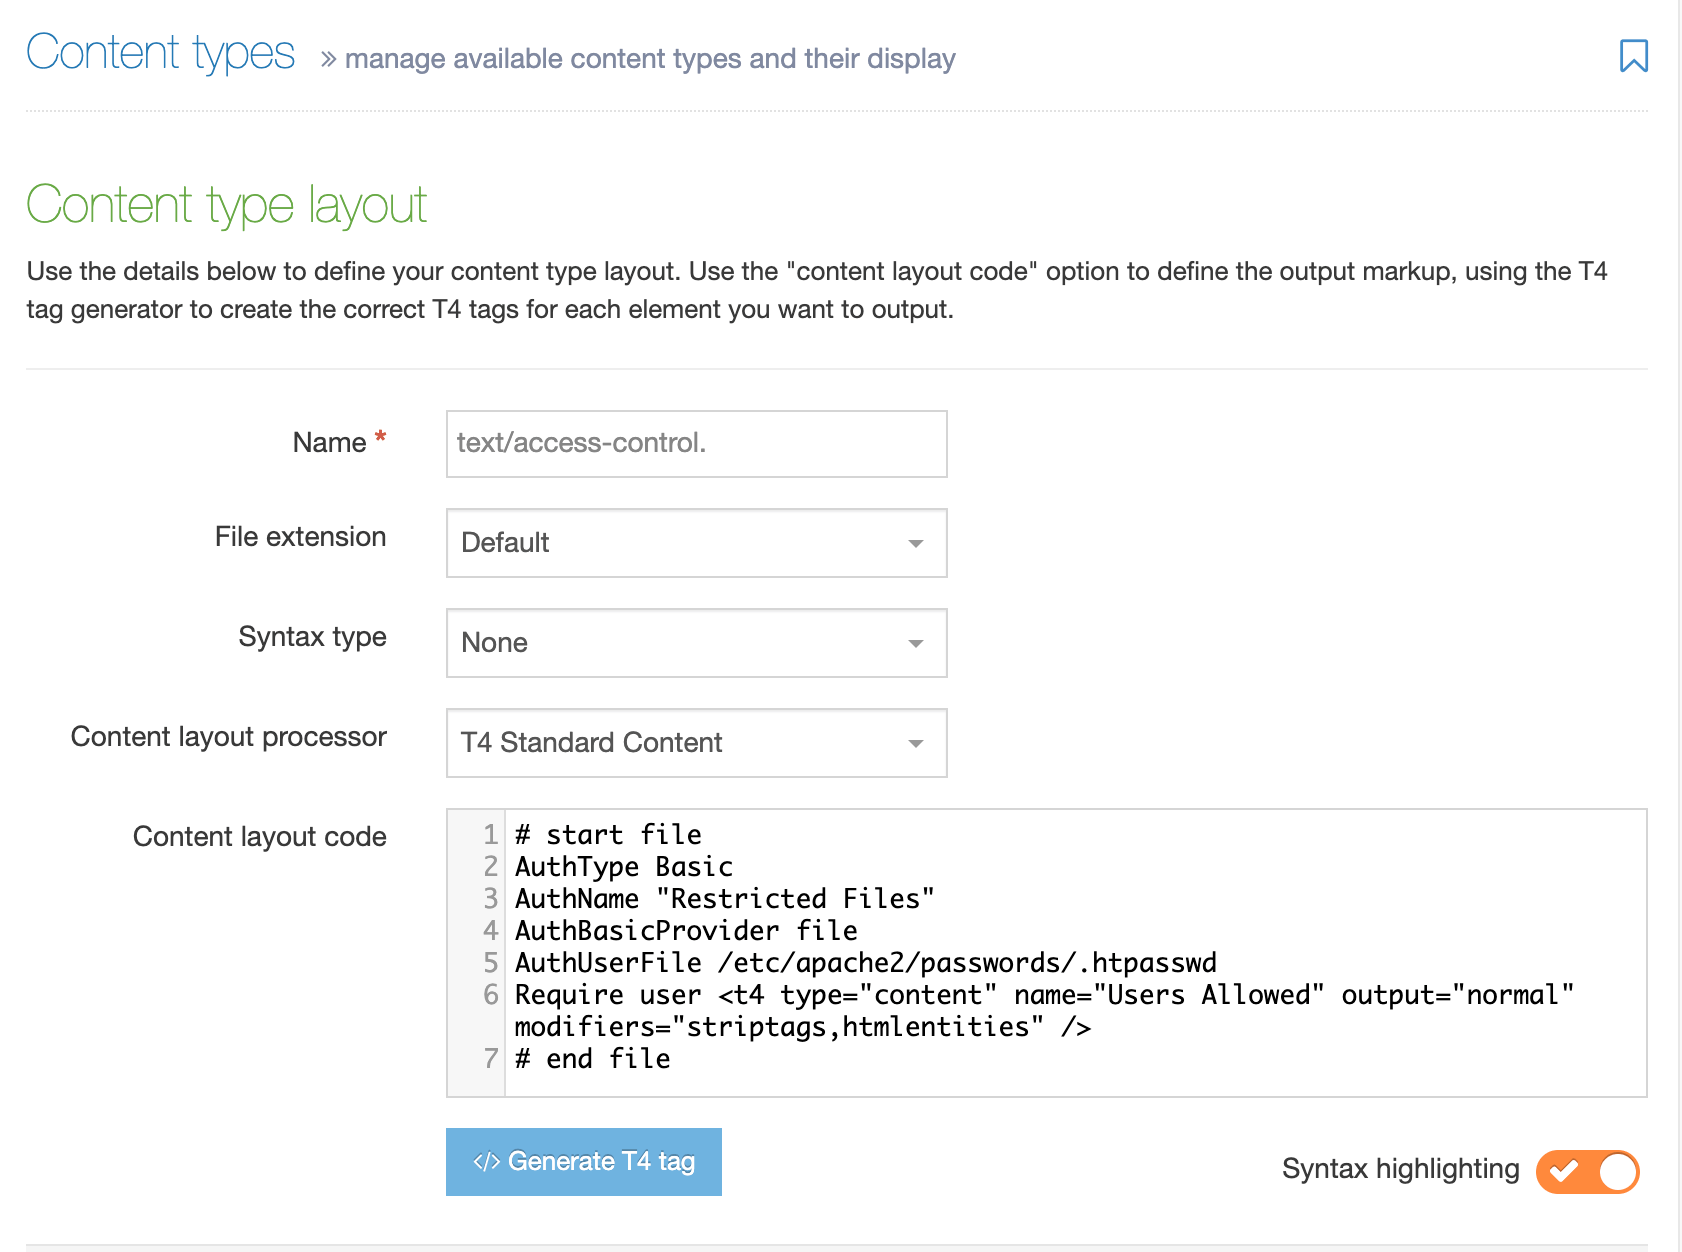
Enable Access Control Content Type
Go to the Access Control Configuration at System administration > Set up sites & channels > Access control
Check Enable hierarchical access control.
Set the Access control content type to the Content Type just created.
Save changes.
Create the Access Control Profile
Go to Sites & Channels > Access control
Select Create new to create a profile. Then select Create new next to Access Control Rule Profile and provide a Name and Description.
- File Name: enter the name of the access file name set on your Apache webserver. By default, the name will be ".htaccess".
- CSS for links to Access Controlled Sections/Media categories: enter the path to the CSS file if you've styled the links that have been created.
Select Add to save the changes.
Configure the Channel
Go to System administration > Set up sites & channels > Channels
Edit the Channel you want to enable Access Control on.
Under Access control and personalization, check Enable Access Control and select the Access Control Profile created earlier.
The setup is now complete and Sections can be access-controlled for that Channel.
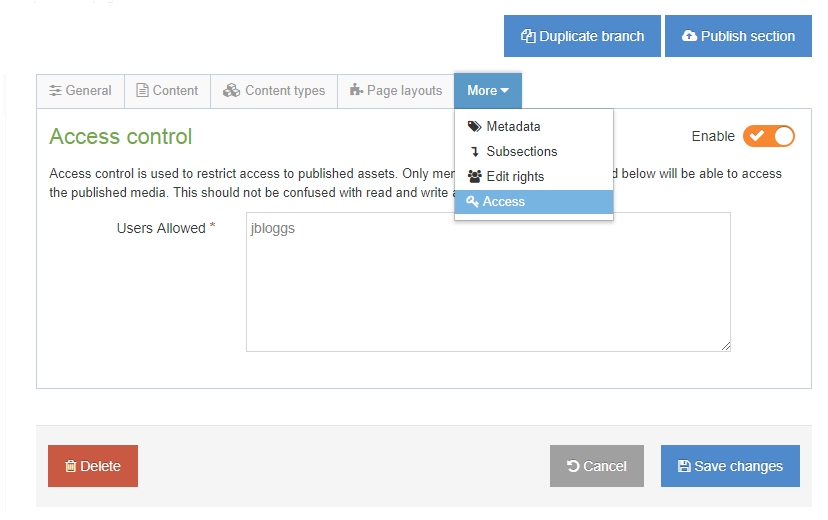
Site Structure
Edit the Section(s) you wish to control access to and ensure it contains content that will publish for the channel.
- Select the Access tab.
- Enable Access Control
- Enter the usernames with a space between each user.
Publish the Channel
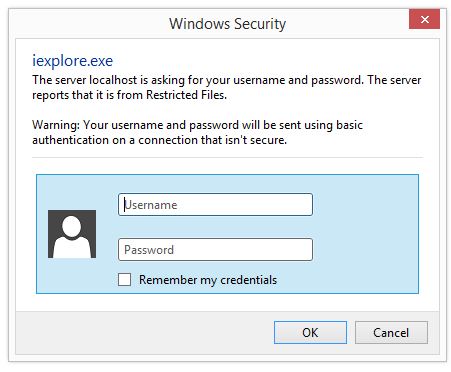
Publish the Channel and browse to the restricted section on the published site. A popup requesting a username and password will be presented. Once a valid username and password is entered, the restricted page will be displayed.