
Access Control
Description
If you'd like to add an authentication requirement to published pages on your site you can use Access Control to limit access to users within a specified Group. For example, you might have a staff-only area on your site that should only be accessible by specific Groups or Users.
Users can be authenticated using the following methods:
- log-in as a Terminalfour user
- log-in with a third-party authentication protocol like NTLM, LDAP or Shibboleth
- IP address based
- using a Control Rule Profile to configure a .htaccess file
In this article we'll cover the Access Control feature which allows you to configure the Groups who can access a Section's published pages.
Check out the Access Control Module we've created to give you even more control over Access Control.
Follow the steps below to configure and implement Access Control:
Enable Access Control
To enable Access Control on a Section the first things we must do are:
- set up an Access Control Content Type
- configure the Access Control settings to use the Access Control Content Type
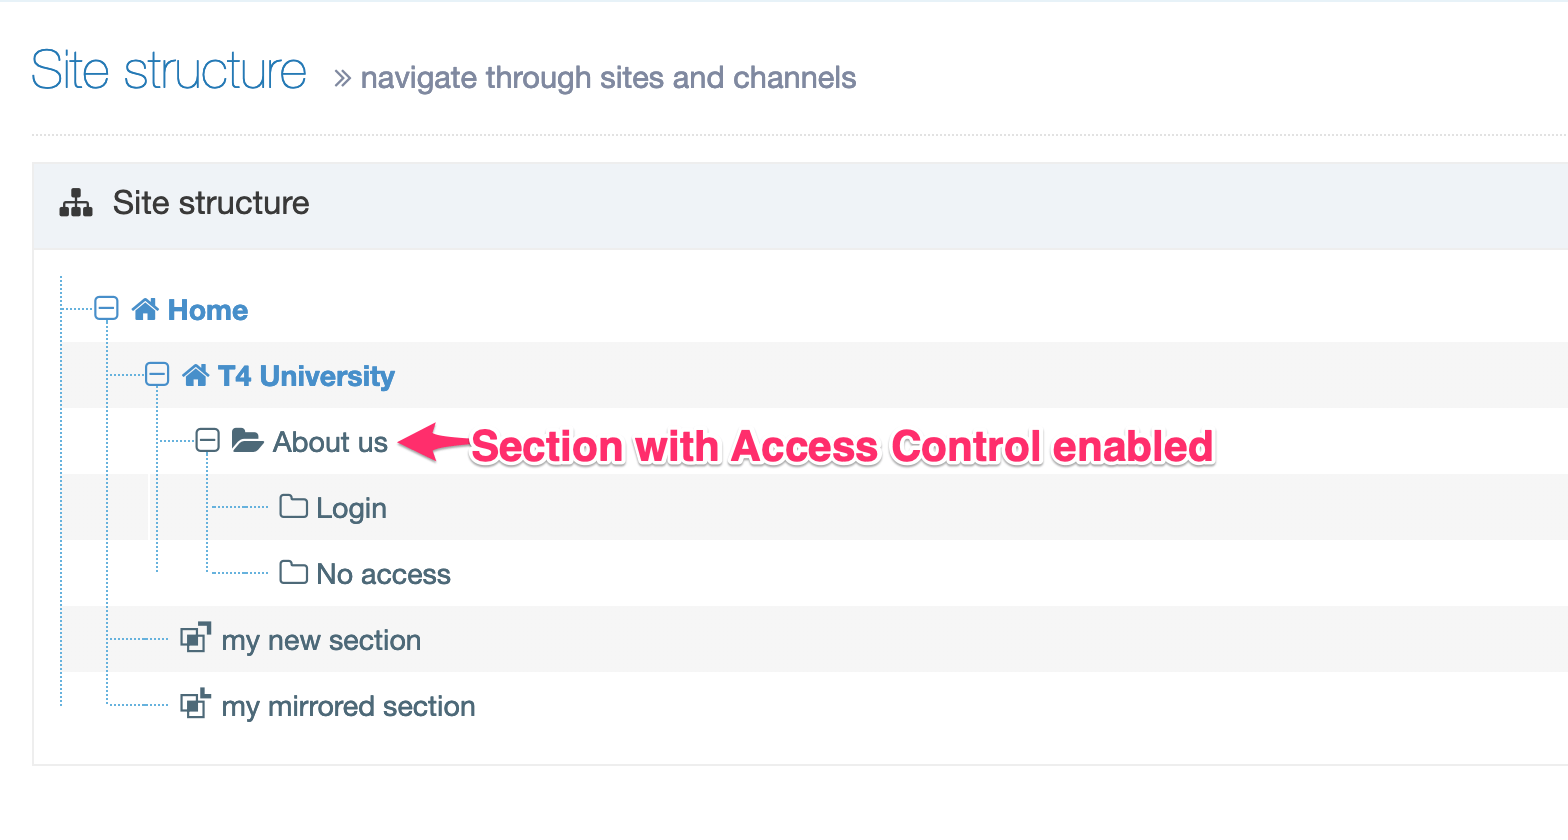
Now when you select the Access Control tab and enable the setting you can check the Group(s) that you would like to grant access to the published pages in this Section:
Create the Access Control Profile
Add the T4 Tag
<t4 type="accesscontrol" output="groupnames" />
Adding this T4 Tag to a Content Element will output a comma-separated list of the Group names that are flagged as having access to the published page:
However, we need to enforce this. To do this we use an Access Control Profile.
Access Control Profiles
Access Control Profiles let you specify how Access Control rules should be applied to the published page.
Go to Sites & Channels > Access Control. Create a new Access Control Profile and select the Create New Basic PHP Access Control
A basic profile has the following fields:
| Item | Description |
|---|---|
| Name | The name of the Access Control Profile. |
| Description | An optional description of the Access Control Profile. |
| Code Before Section |
The code that is output before a Section is published.
|
| Code After Section | The code that is output after a Section is published (if any). |
| Code Before Link |
The code that is output before a link is published.
|
| Code After Link |
The code that is output after a link is published. |
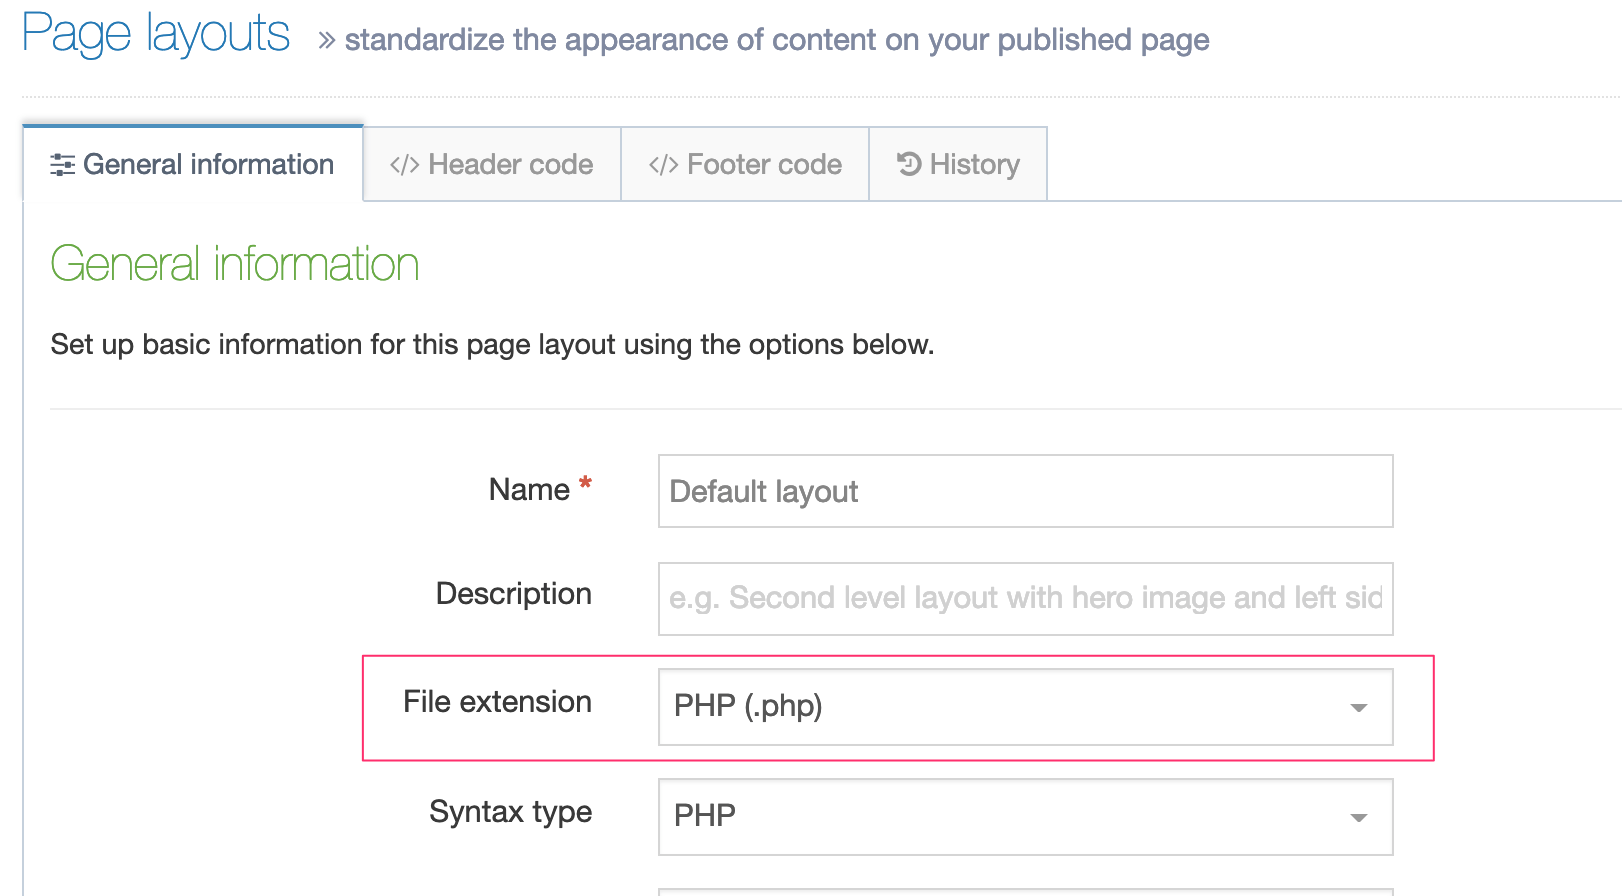
Create a File Extension
You may be using server-side code like PHP or ASP.NET on your page. In this case you will need to ensure that the file extension has been created.
Go to System Administration > System Settings > File Extensions. If you are using PHP and this file extension has not already been added, select Create New File Extension.
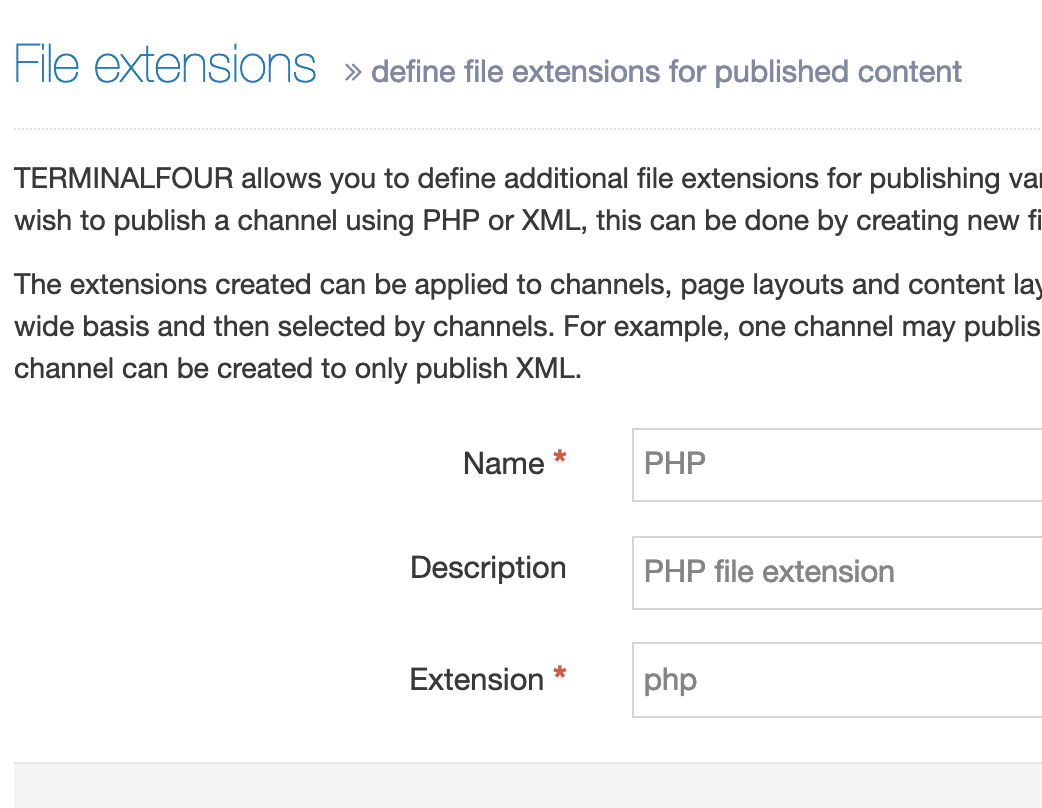
The extension value should not be preceded by a dot.
Configure the Channel
The Channel must be configured to publish content using the file extension you've added and to enable Access Control.
Go to System Administration > Set up Sites & Channels > Channels and edit the Channel that you want to use Access Control with.
Under Available File Extensions check Enable File Extension Overriding and permit PHP (if you are using PHP).
Under Access Control and Personalization, enable both Access Control and Personalization. From Configuration, select the Access Control Profile created earlier:
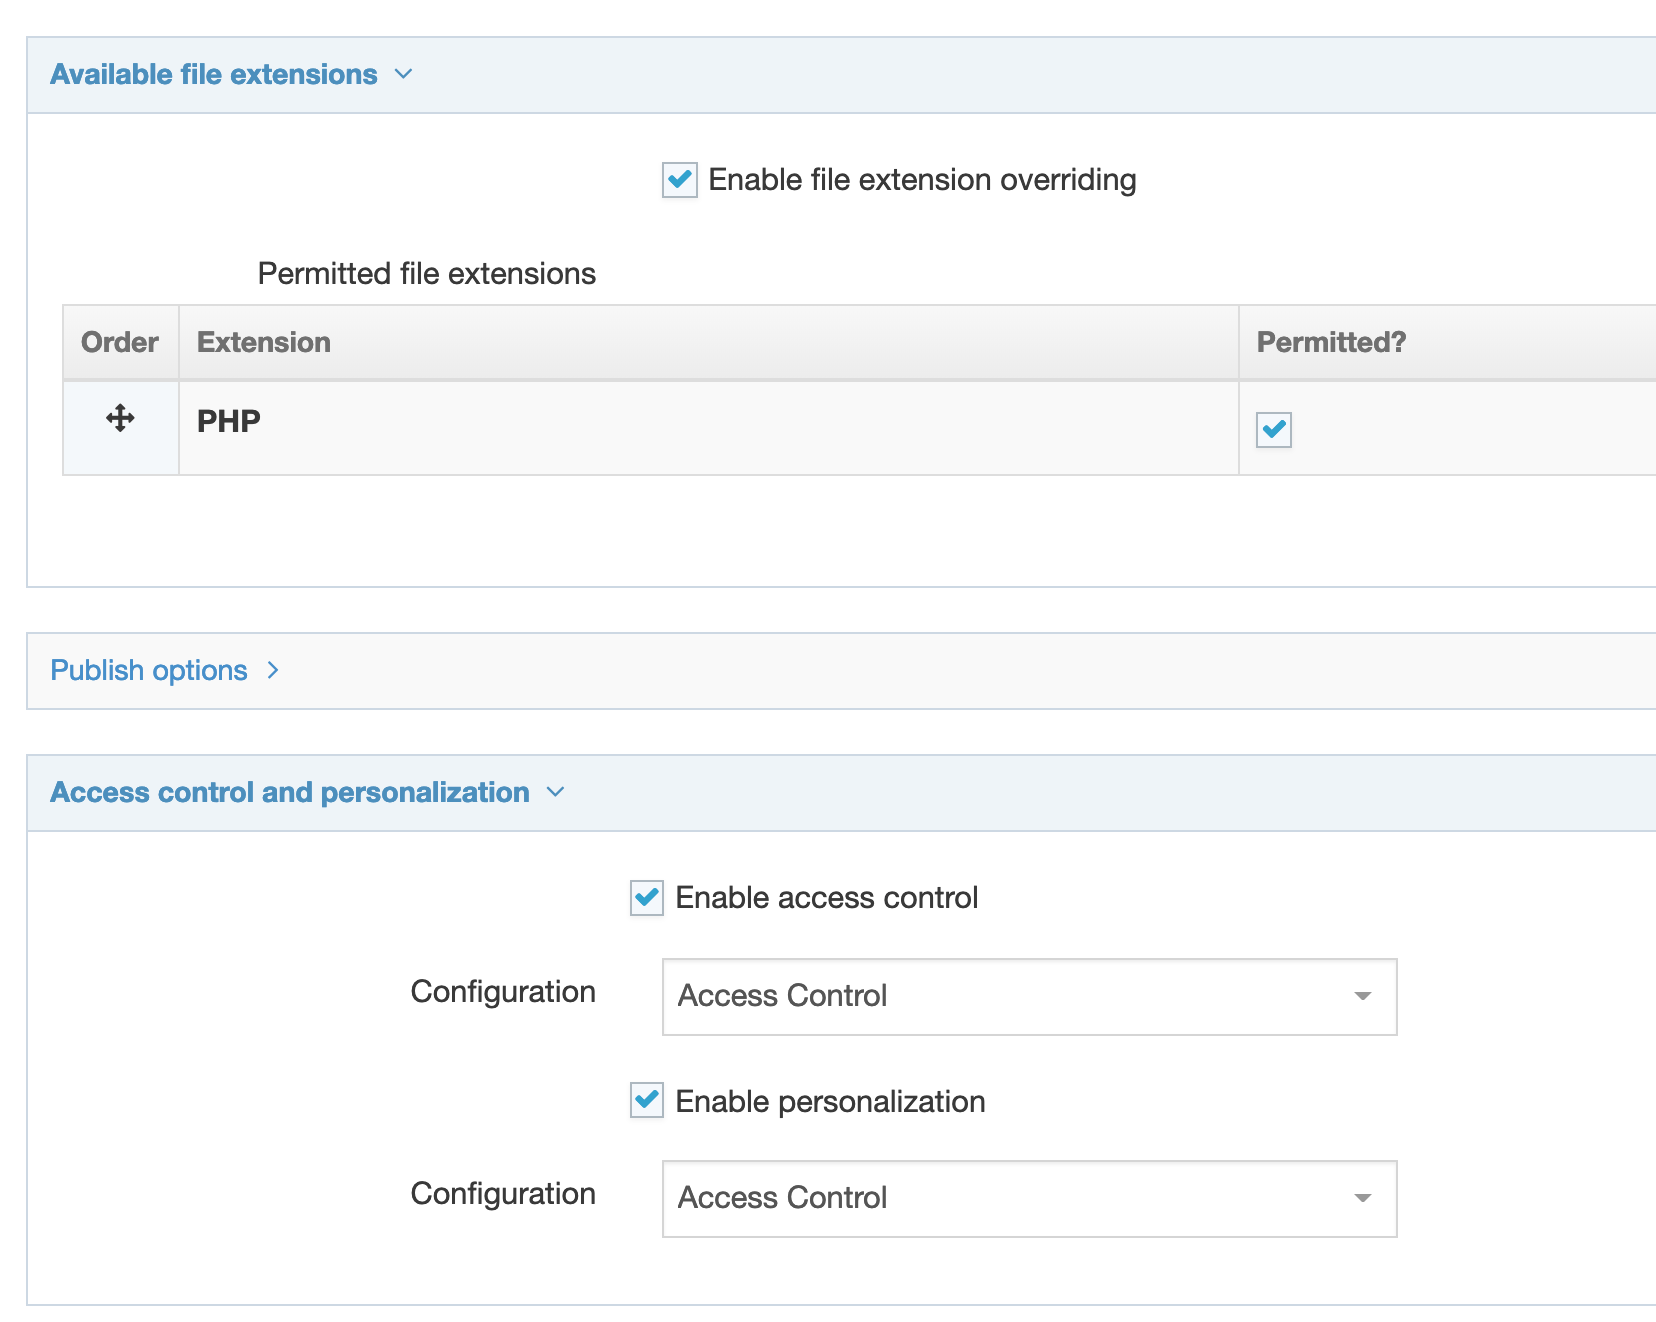
Click Save Changes when you are done.
These settings must be applied to a Channel and will have no effect when applied to a Microsite.
Build the Site Structure
Three new Sections are required below the Section that has Access Control applied.
- Login
- displays Login Screen (hidden from navigation).
- No Access
- displays a message to users who have restricted access
- hidden from navigation).
- Logout
- displays a link to log out. Set the link to /?logout
- not hidden from navigation.
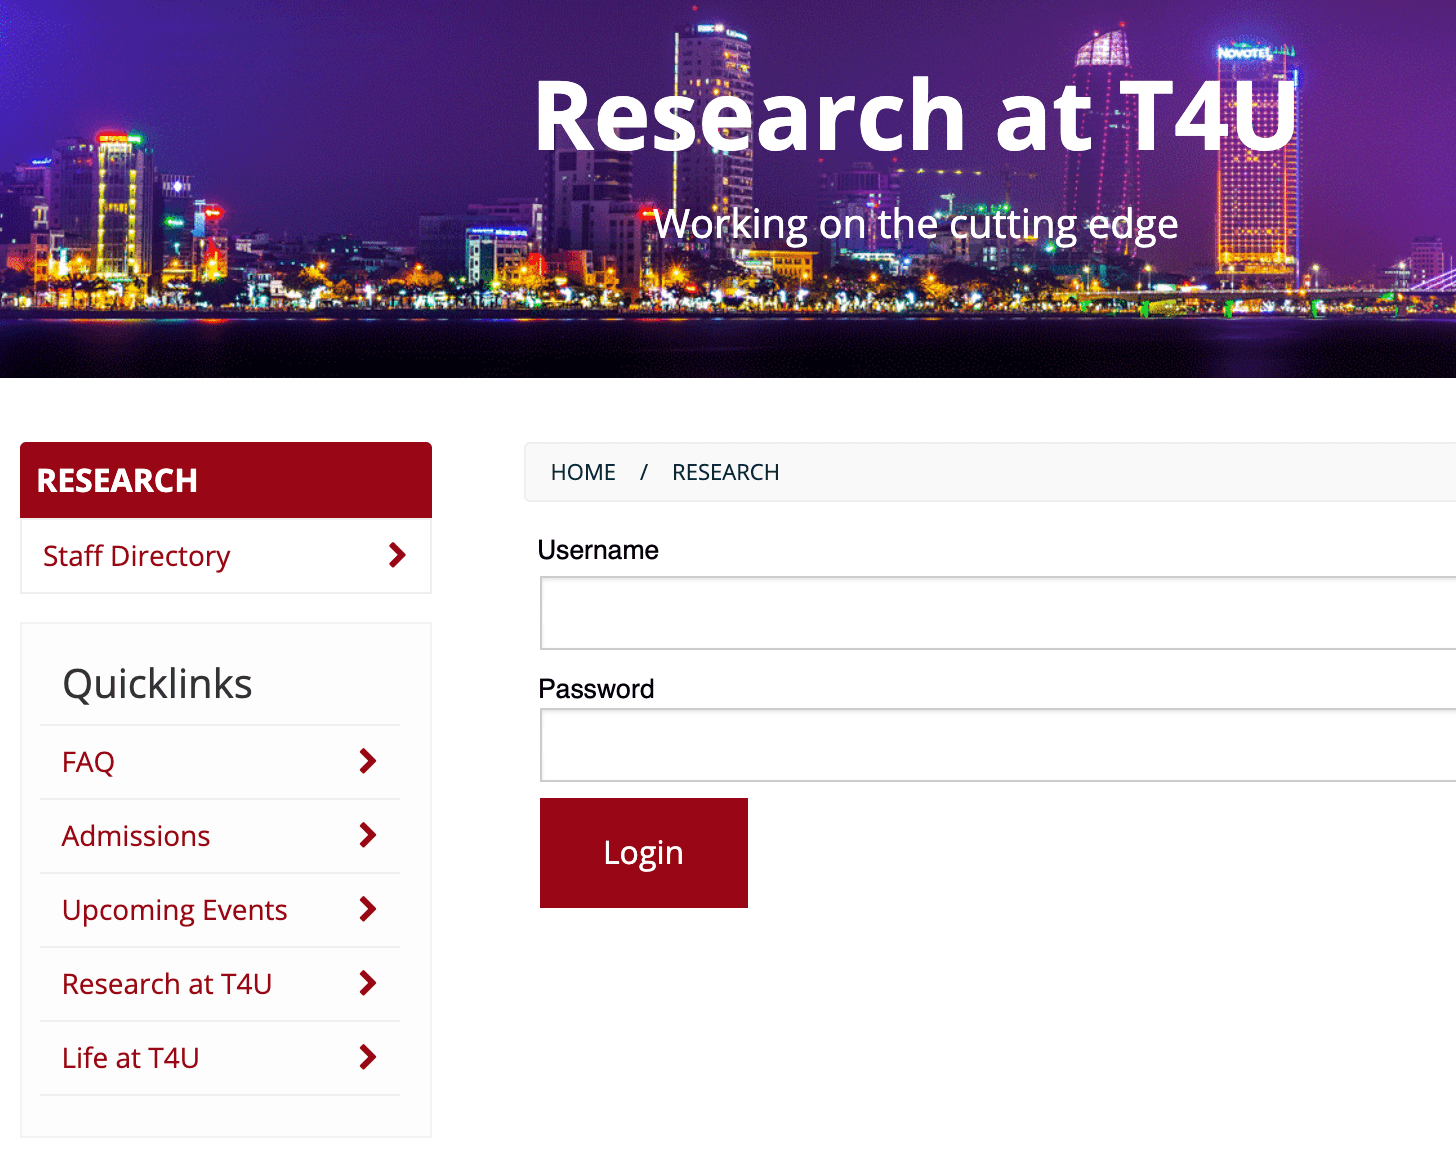
Add Content - Login
Your login panel could look like this:
<!-- login form -->
<div class="loginPanel">
<h1>Heading goes here </h1>
<form action="" method="post">
<label for="uname">Username</label><input type="text" name="uname" id="uname">
<br />
<label for="pwd">Password</label><input type="password" name="pwd" id="pwd">
<br />
<input type="submit" value="Log in">
</form>
</div>
The form action must either be empty, as in this example, or contain the path to the published login page itself.
Add Content - No Access
Add the following code to the No Access Section using a plain text or code only Content Type:
<h1>You do not have access to see this page</h1>
<p>If you believe that you should have access to see this page, please contact your support team.</p>
<p><a href="/?logout">Please click here to log out</a></p>
Create & enable a Page Layout with the file extension
- Edit the Page Layout which is currently enabled on the Section, for example, "About us". Copy the header and footer code and paste this into a new Page Layout.
- Enable the appropriate file extension for the Page Layout.
- In the Site Structure, enable the Page Layout where the Access Control is set up
Grant Group Access
Once Access Control has been configured and enabled you can assign Groups to the required Sections in the Site Structure.
- Modify the Section(s) that you wish to control access to.
- Select the Access tab.
- Assign access by enabling the Group(s) that you want to grant access to
Enabling Groups allows members of those Groups access to the published Section. These Groups can consist of both TERMINALFOUR and Visitor Users.
Visitor User
You may have users who are required to access published content but do not require access to Terminalfour or may not be managed by your directory service.
For instance, you may want to grant access to users outside your organization, in this case, Visitor Users can be created. Visitor Users only have access to the published Section(s) and do not have access to the Terminalfour system.
Publish the Channel
Publish the Channel to apply the changes.
Update the Configuration
The only file you need to modify is "Code-Before-Section.php" as this is where the settings for connecting to Terminalfour Site Manager Web Services are held, as well as the base URLs for each Access Controlled section or site.
Web Services Settings
The following three variables store the settings for connecting to TERMINALFOUR Web Services:
// Site Manager Web Services Username, Password & URL
$s_ws_user = 't4wsuser';
$s_ws_pass = 'password';
$s_ws_url = 'http://10.0.0.242/740001/services/';
Each variable must be updated to values which are appropriate for your own Terminalfour installation.
The username and password must log in as a local account within Terminalfour.
The URL specified for Web Services is your Terminalfour URL with "services/" replacing the "SiteManager" part. This URL must be accessible from your Web Server/PHP installation.