
User Management
Description
Kerberos support was removed in version 8.3.16.
Users are assigned permissions that limits what they can access as well as the actions they can carry out. For instance, you may want to limit the Sections that a user can access. Multiple Users can be assigned permissions with Groups.
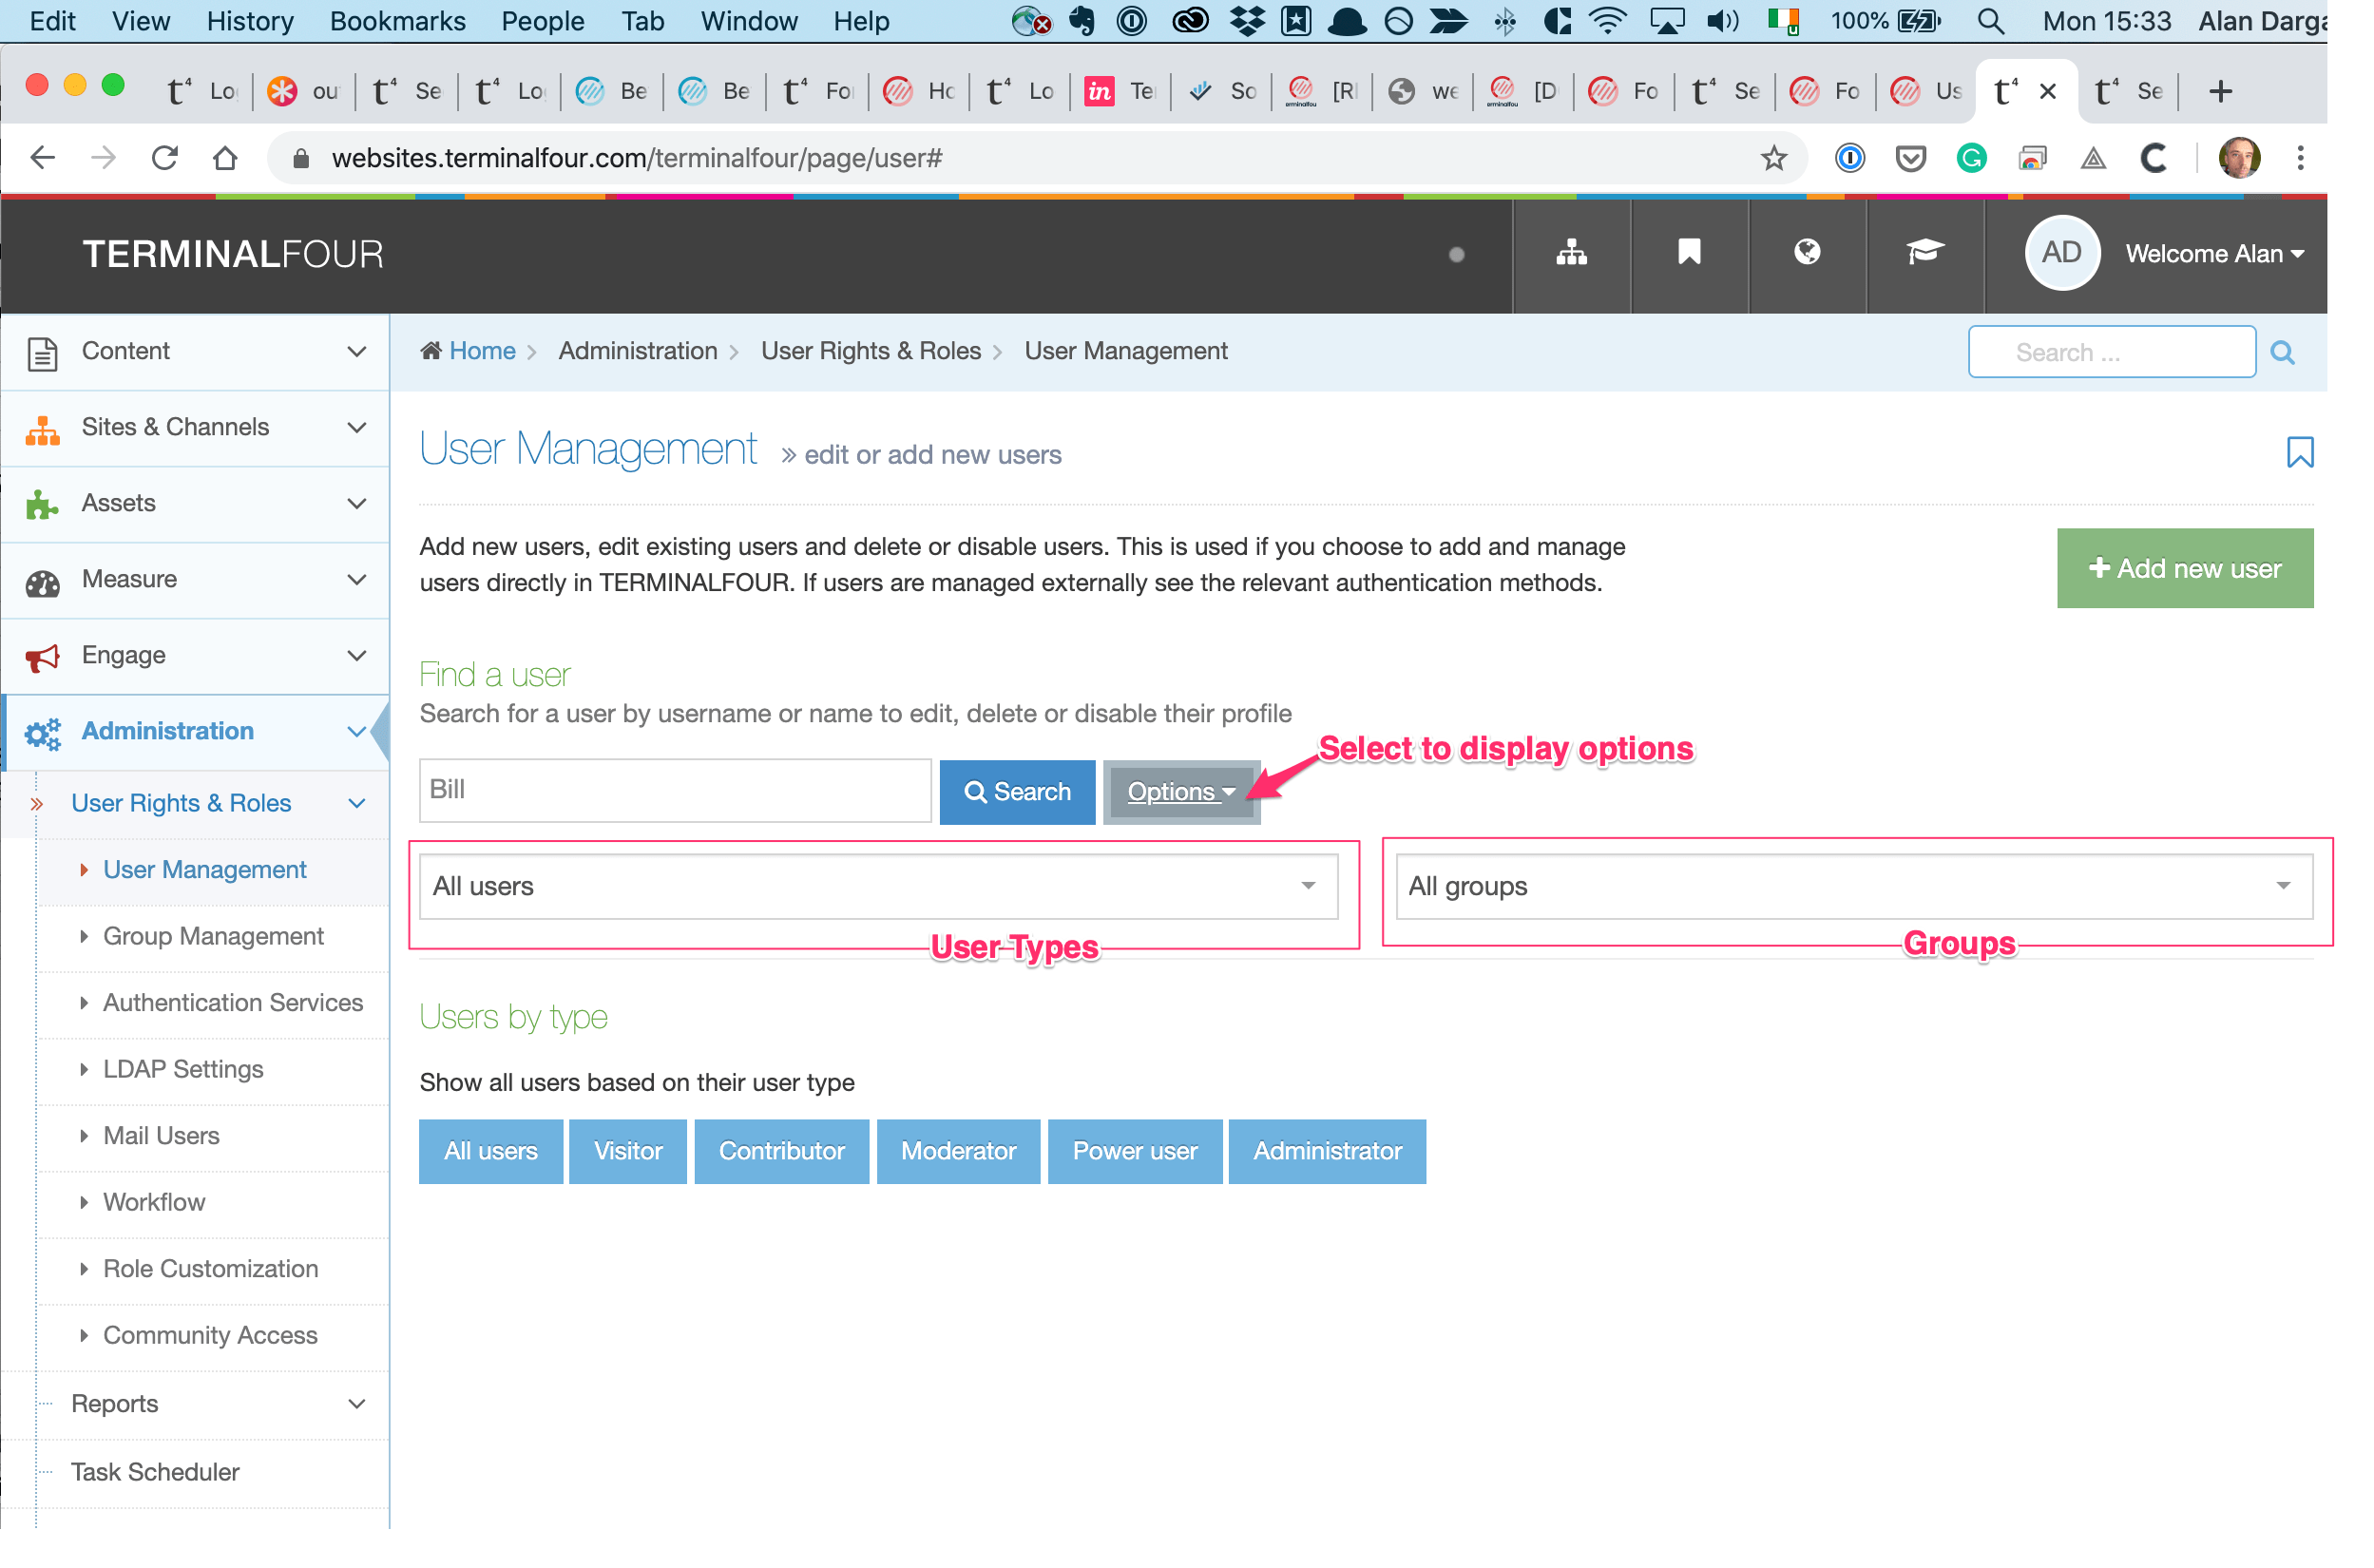
To modify or create new Users for use within the system, go to System administration > User rights & roles > User management
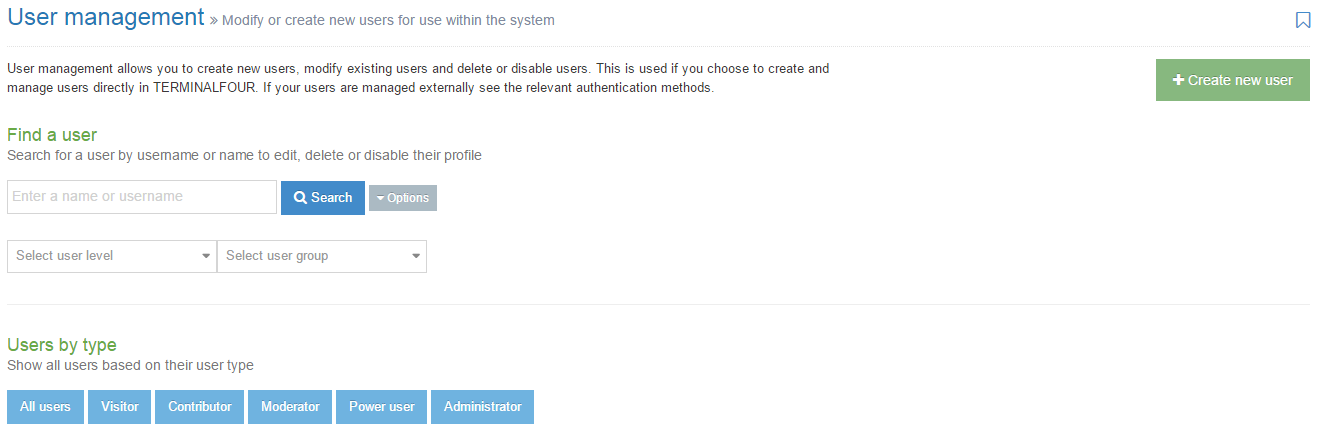
You have several options to choose from this starting point. The Search functions lets you enter a name or username to fetch their records. There are two search box options - Select user level and Select user group. These serve as short cut methods for these categories. If you wish to see the Users by type - you can click any of the blue tabs, including the first on the far left that enables you to see all users. To create a new user, click the Create new user button.
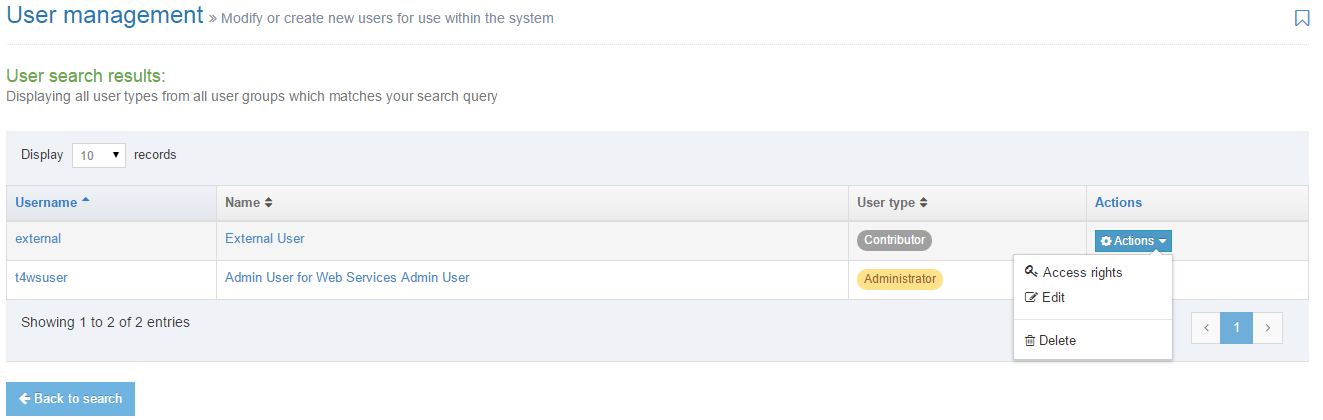
You can choose a User type grouping them by type, or as a master list "All users". To click All users tab gives you this result:
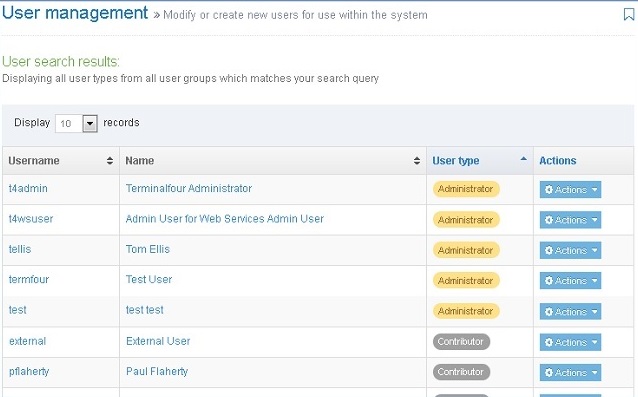
This shows the table of all users - the results are listed by:
- Username: this can be for an individual or group.
- Name: the user's first name and last name
- User type: this is the five types of users (Visitor, Contributor, Moderator, Power user, and Administrator)
- Action button: click this button and you can choose to view their Access Rights, Edit or Delete the corresponding user in that row.
If Power Users are configured to be able to Edit users, they are able to see Visitors, Contributors and Moderators who are in the same Group as the Power User.
Create a user
Power Users can only create users if they are configured to do so in Role Customization.
See the Users Rights and Roles page for a description of roles.
After you click the green Create new user button, the system opens to this page. This image represents a portion of the page. Additional sections are presented below:
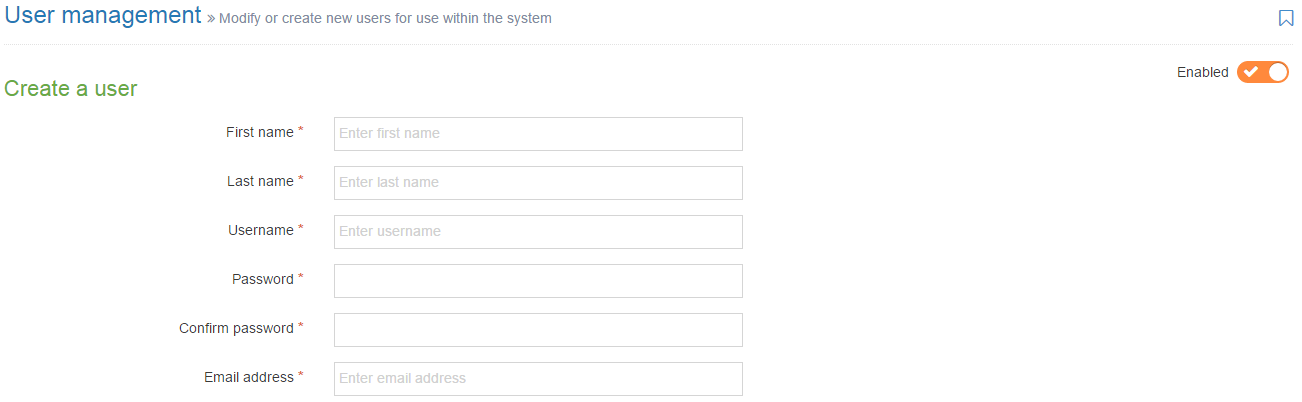
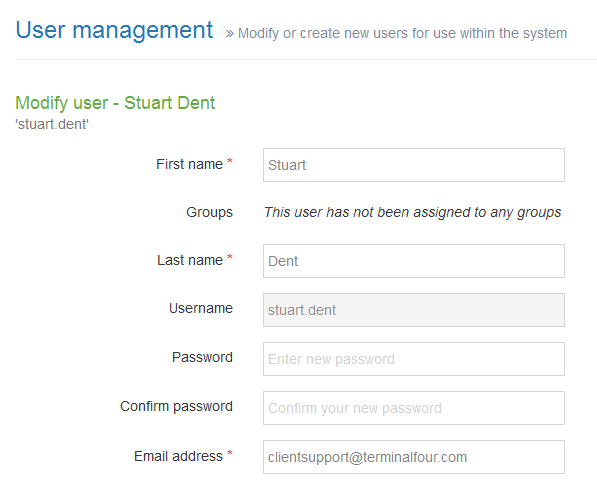
When you are creating a new user you begin with this screen image.
| Item | Description |
|---|---|
| Enabled | To ensure that the rights and roles of the user are in place, confirm that the Enable button in the upper right corner is in the Enabled position. You can create a user and not enable their rights and roles pending the user becoming an active participant on the site. If you wish to disable the user at this point - move the Enable button to the Disabled position. |
| First name * | This can only be changed by a Power User or Administrator after the user is added. |
| Last name * | This can only be changed by a Power User or Administrator after the user is added. |
| Username * | This cannot be changed after the user is added. |
| Password * | Consisting of at least six characters. The characters are not displayed on screen. When safe passwords are used, certain passwords are not accepted by Terminalfour. |
| Confirm password * | |
| Email address * | This address is used for notifications and alerts. Ensure it represents an actively used address. |
| User type | Sets the user level. This restricts access to parts of Terminalfour based on the user level |
| Terminalfour user interface language | Sets the language for the Terminalfour user interface |
| Default content language | Sets the language for written content (for multiple language content) |
| HTML editor | Choose either TinyMCE or Standard textarea - your choice can be changed at a later date. If custom versions of TinyMCE have been created, these will be available in the list. |
| Preview Channel | Sets the Channel to preview content. If a default preview Channel has been specified in more than one place, the system applies the following logic:
If no default Channel is set at all, the user is prompted to select the desired Channel whenever previewing content. |
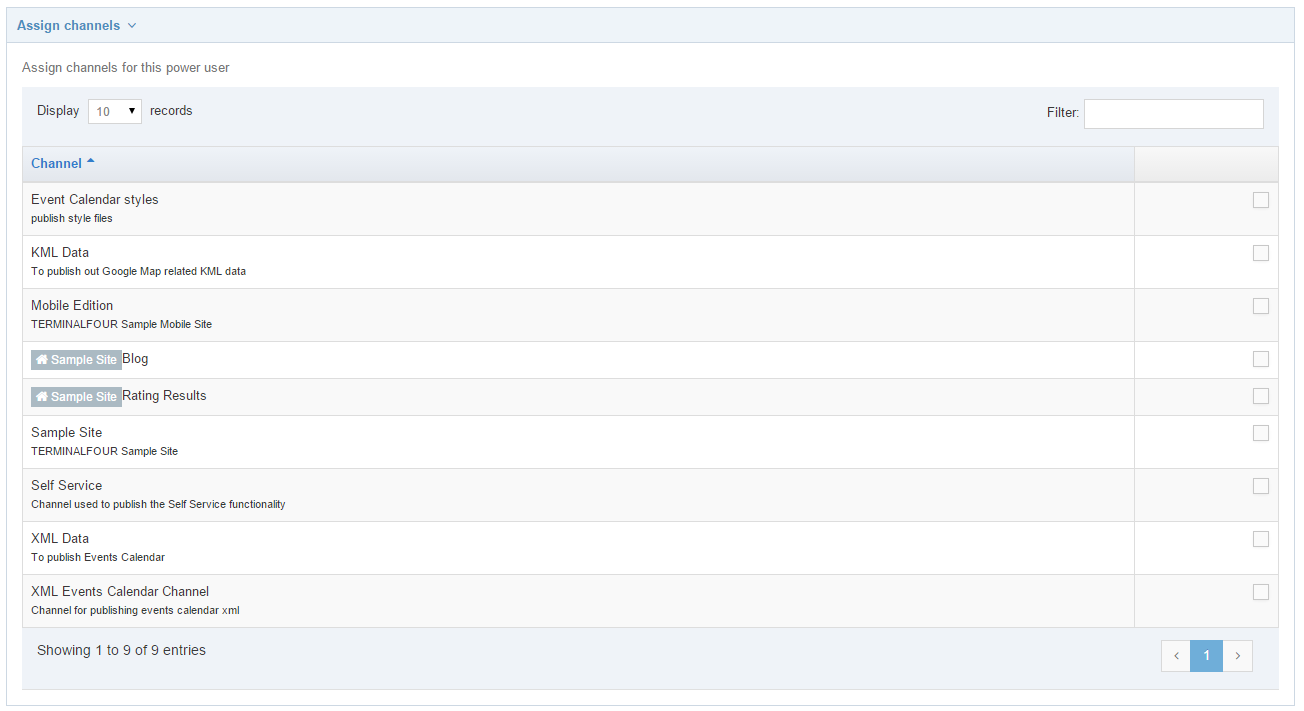
| Assign Channels | See below |
| Community access | Assign access to the Terminalfour community pages |
| Authentication |
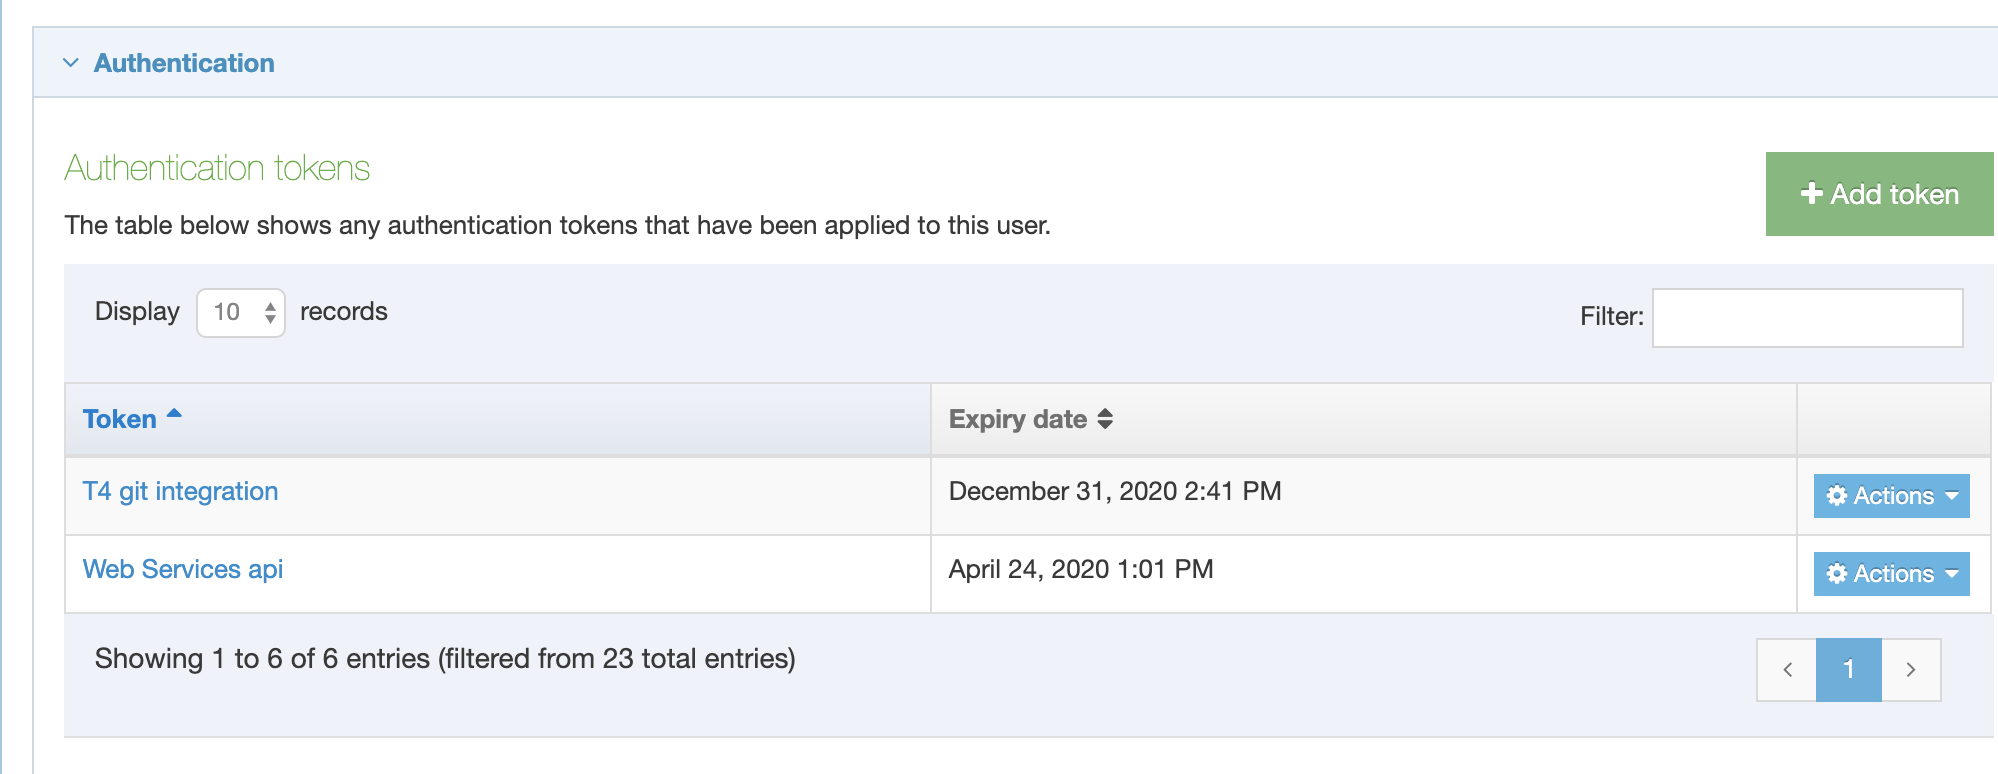
Authentication Tokens From Version 8.3.4 Administrators can create authentication tokens to use with third-party applications via the Web API. |
|
Authentication Methods Configure the authentication methods available for a User. The three columns are
|
You may have additional elements if you use an Extended user details content type. This will vary from installation to installation. If such elements are present populate them with the appropriate information.
Assign Channels
For Power users and potentially Moderators, depending on the minimum user level selected for the 'Publish now' minimum user level When assigned to Channel/microsite in Role customization.
When the user is designated a Power user or Moderator then the user is permitted to publish specific Channels, or micro sites, or both. This enables the User to run a manual publish of the selected Channels or microsites. Make the appropriate selections and then proceed to Community access.
If your entries are complete, you can now click Save changes to record a new user.
How to access a user profile
If you need to make changes to a User profile, you have to search for the user. This image below shows your options:
Using the Search box your results (if found) are presented like this:
To view the complete profile you can click the Username, the Name, or Edit (on the Actions button). This action takes you to:
Modify (Edit) user
Power Users are only able to edit users if it has been configured that they are able to Edit users. This is configured in the Role customization. If enabled, they are able to edit Visitors, Contributors and Moderators that are in the same group as the Power User.
As with the create a user page - there are several sub-sections on this page - this would be the same for this Modify page too.
Regardless of what method you use to find a User profile, you end up with this view of a profile. After you arrive here you can make changes to all the main items and sub-sections
Delete
A deletion always results if the loss of data and it is not recoverable. Deleting a user will remove all history of that user including the username (and details) in the Audit trail and content history when editing content. It is recommended to rather deisable the user in order to retain those records.
Power Users are only able to delete users if it has been configured that they are able to Delete users. This is configured in the Role customization. If enabled, they are able to delete Visitors, Contributors and Moderators that are in the same group as the Power User.
There are two methods of deleting a user.
- From the Actions button (located on the Search results, or in a table format) you can click the Delete button. The popup window "Confirm delete" appears.
- When you have a User profile open - the Delete button is located at the bottom of the page. When you click the Delete button the "Confirm delete" popup window appears.
Disable user
On the User profile page is an Enable button. As discussed with creating a user, this button must be in the Enable position for the user to exercise their rights and roles. You have the option of disabling these rights and roles without deleting the user. This is done on the User profile page. In the upper right corner is the Enable button.
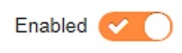
In this position the user's rights and roles are enabled.
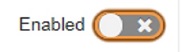
When moved to this position, the user's rights and roles are suspended until such time as the Enable button is returned to the enabled position.
Remember - the User profile is not deleted when in this position and can be 'searched' as it was when enabled.
When you have completed this action, ensure you click the Save changes button.
Access rights
This presents the Username, Name, User type and an Actions button. In this example you can see the options you have if you click the Actions button.
The term Access rights includes Assigned sections and Groups. When you click Access rights the screen shown below appears:
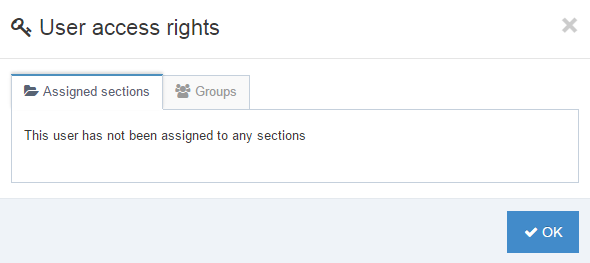
There are two tabs in this popup screen - Assigned sections and Groups.
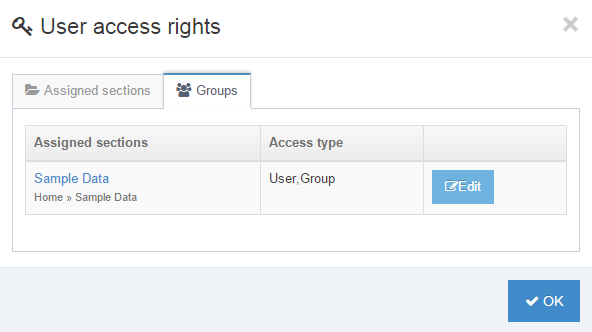
The second tab, Groups, it lists the sections to which the user has access, based on their Group permissions.
Authentication Tokens
You can create an API token to securely authenticate a Terminalfour user without passing a username and password.
Learn more about the benefits of token authentication here.
Creating a token
There's a video on creating a token here:
Step by step
The first option in the Authentication box is the Authentication tokens table:
To create a token select Add token:
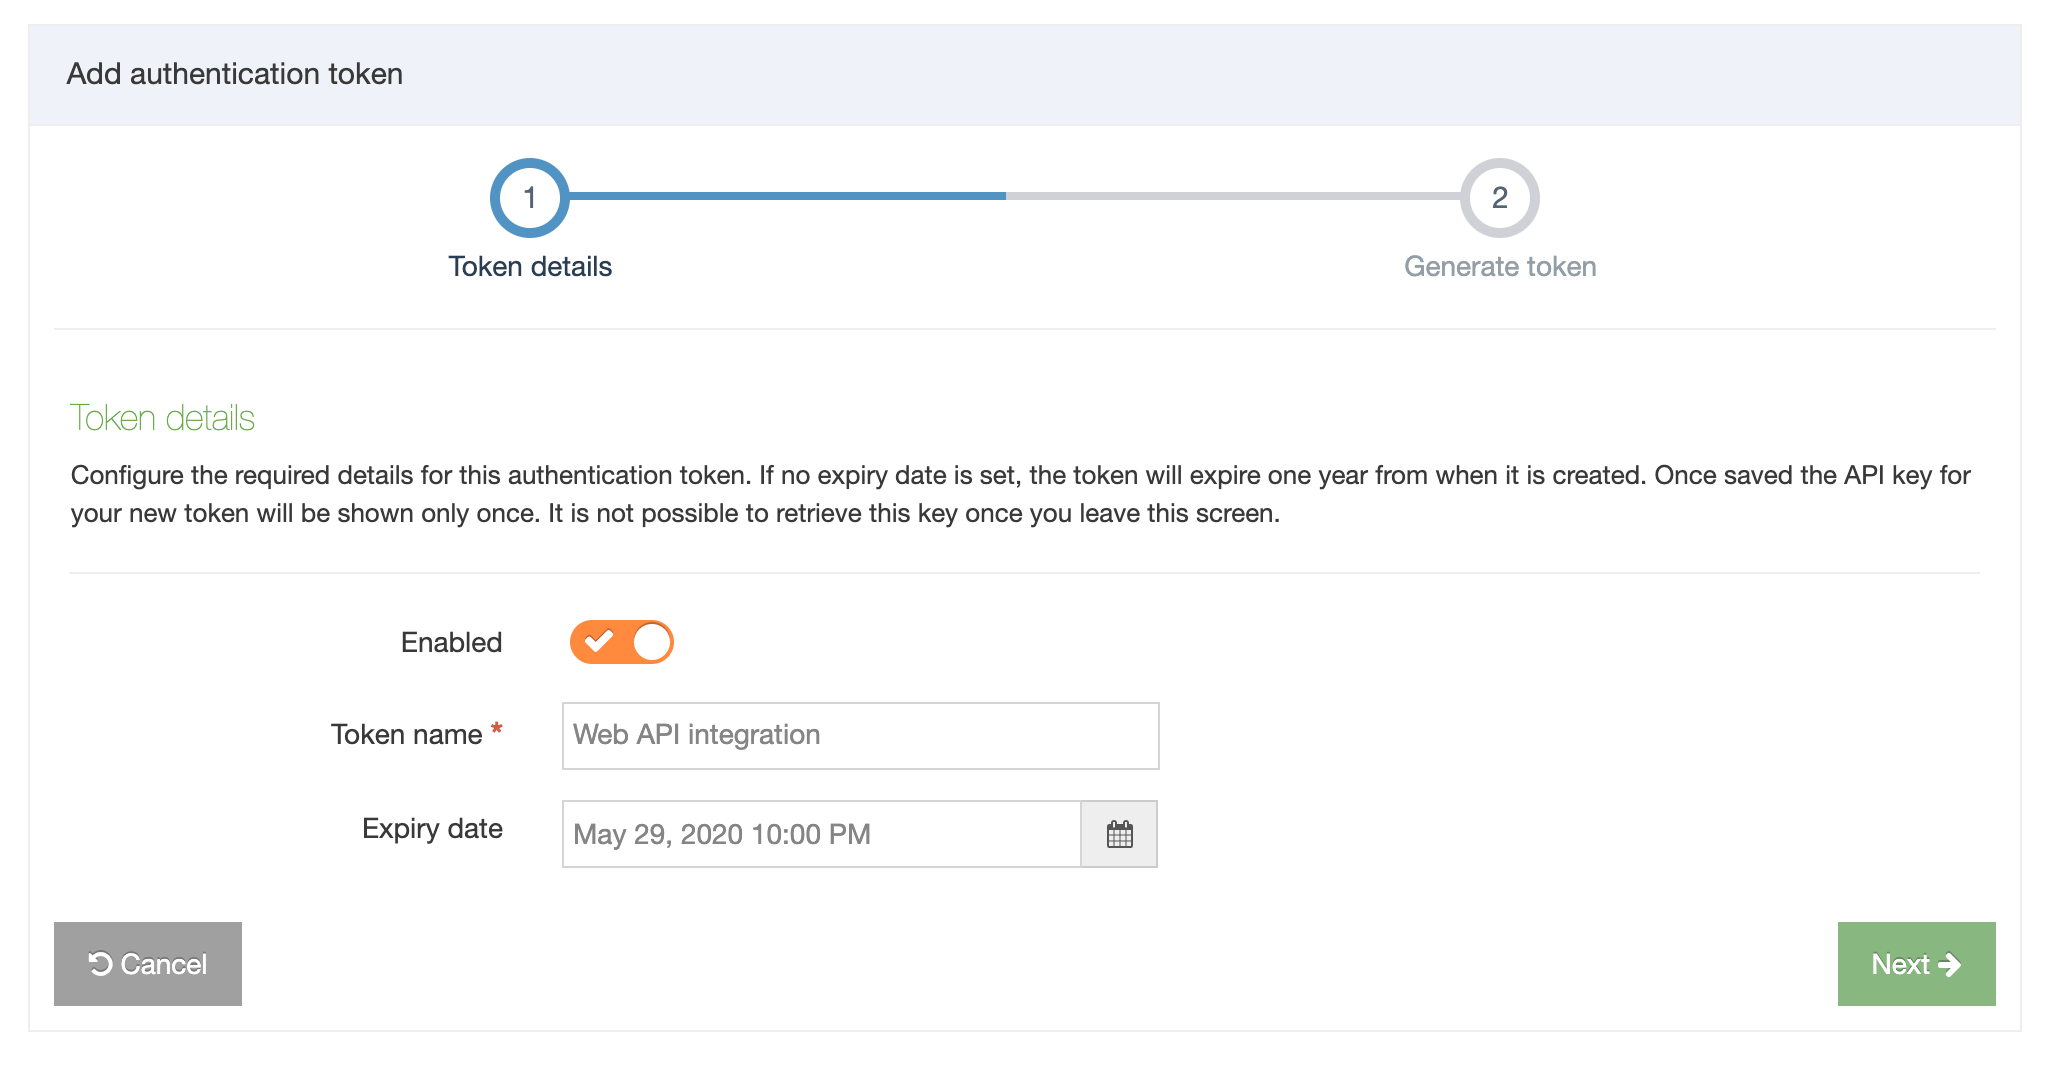
Provide the name of the token and expiry date.
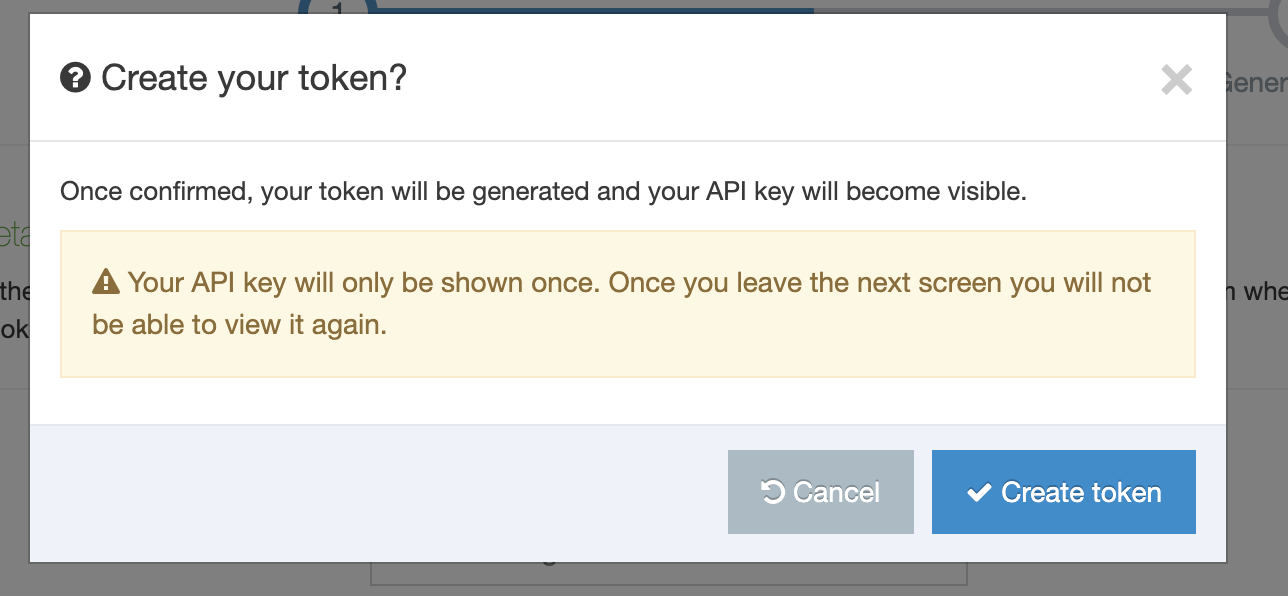
Click Next to proceed. A modal will be displayed to confirm the creation of a token:
When Create token is selected the Generate token screen is displayed:
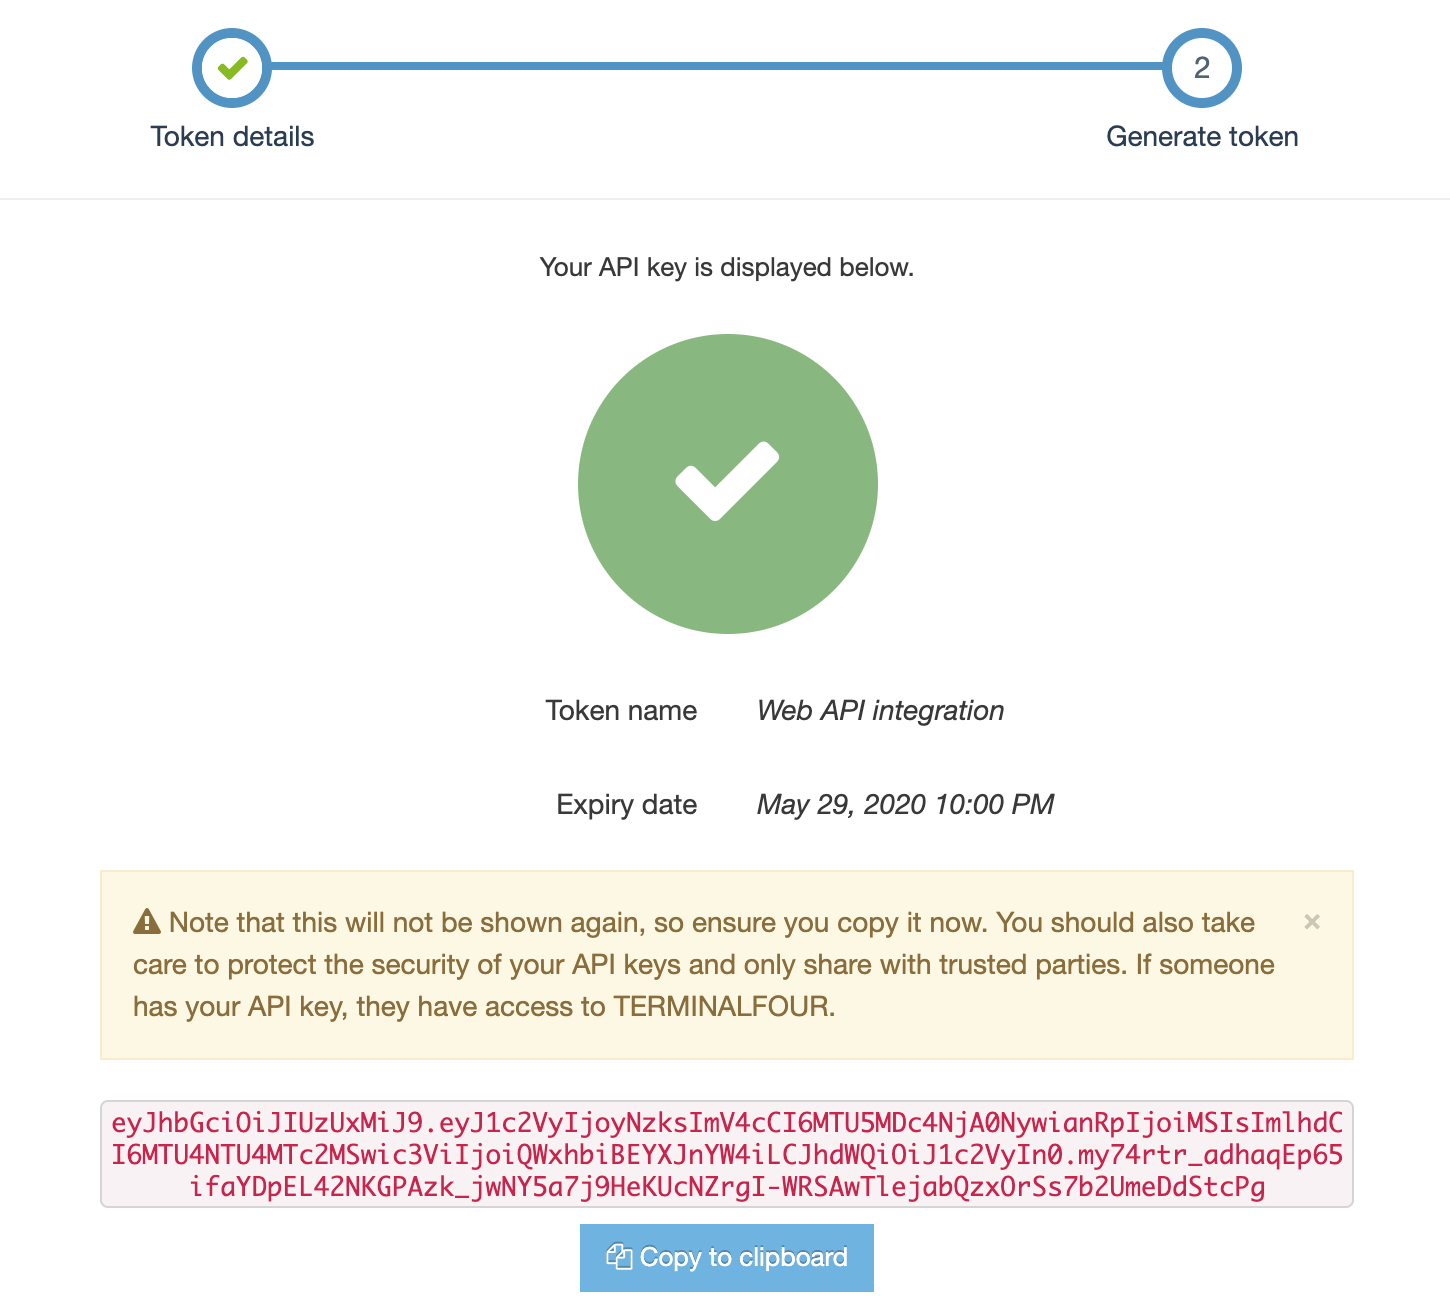
Select Finish to return to the Add User screen.
The token just created will be visible in the Authentication Tokens listing table:
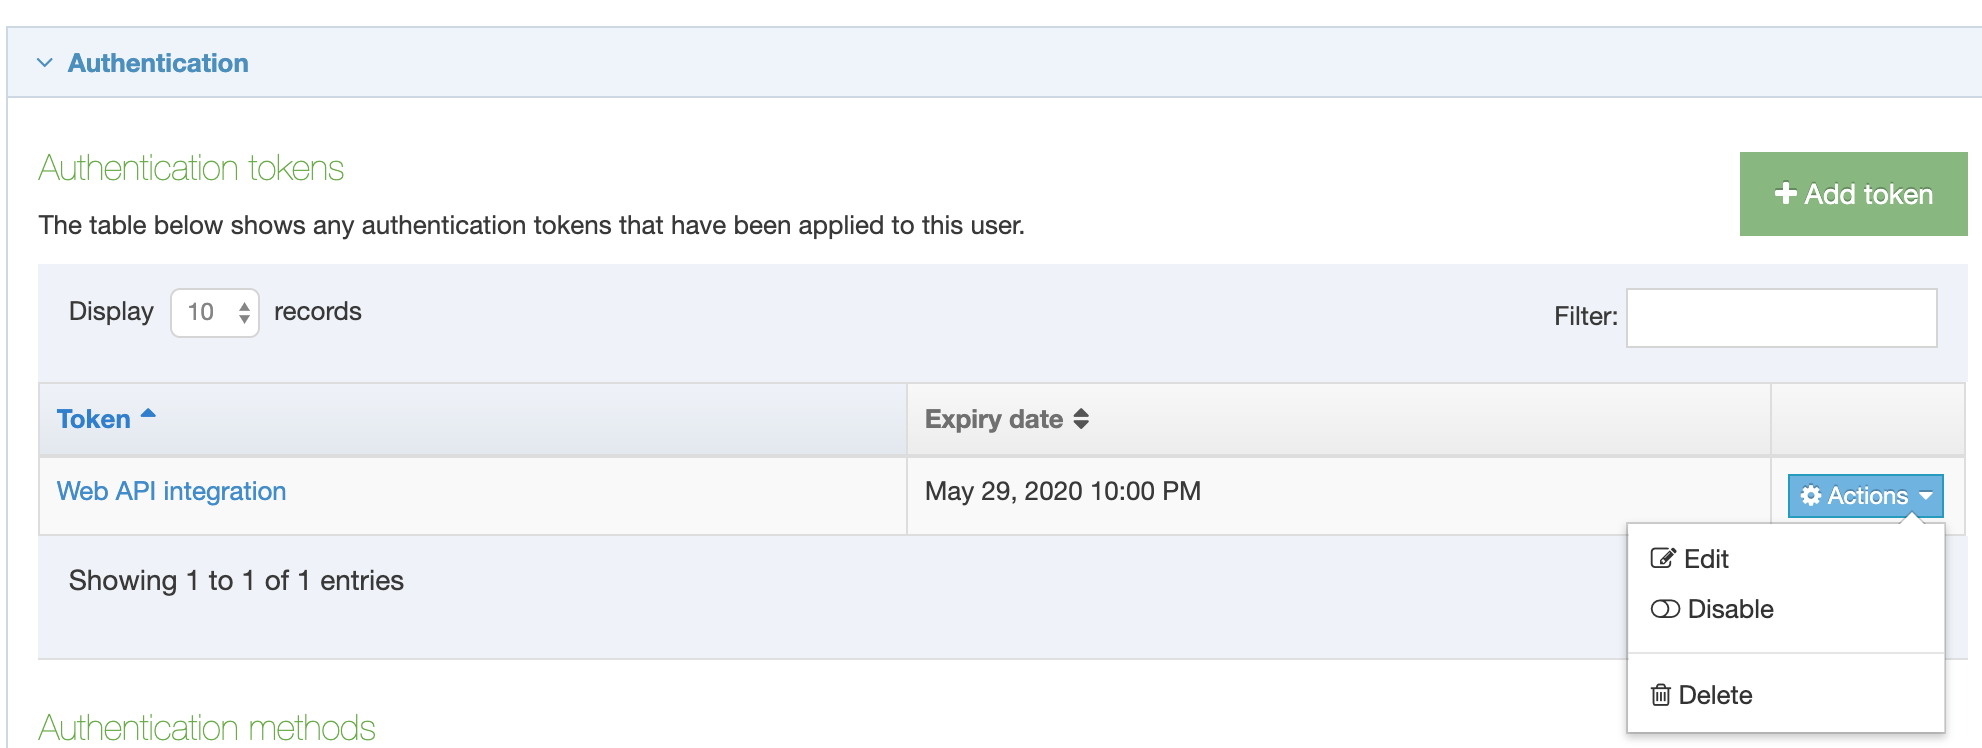
Tokens can be disabled and deleted from the Actions menu. The Edit option permits a user to rename or disable a token.
You may have additional elements if you use an Extended user details content type. This will vary from installation to installation. If such elements are present populate them with the appropriate information.