
Workflow
Description
By default, all content within Terminalfour uses the built-in Workflow where a user (Contributor+) creates or edits content, and a user (Moderator+) approves content. Within this workflow, the content only needs to be approved by one user, and that user is any Moderator, Power User or Administrator who has edit rights to the content. If more complex approval logic is required, it is possible to configure a custom Workflow.
How are Workflows Used?
Workflows can either be assigned to a:
- Section: all content within that Section or Child Sections will use the Workflow. This is useful for parts of the website where users may require additional assistance, for example, where they are newly trained and need some initial guidance.
- Content Type: all content within a specific Content Type will use the Workflow. This is useful for special types of content (e.g. Site Configurations, Code content) which may require additional approval before publishing.
Where a workflow is applied to both a Section and a Content Type, a configuration option defines which Workflow should be used.
Workflow Recommendations
To prevent large time delays between content edits and content approvals, Terminalfour recommends that you:
- use Workflows as sparingly as possible
- keep Workflows simple
- minimize the number of Workflow steps
- ensure that more than one user is able to approve in any one step (if that one user is out of the office, content may not get approved)
Workflow Listing
When you go to Administration > User Rights & Roles > Workflow you will see a list of existing Workflows on the page.
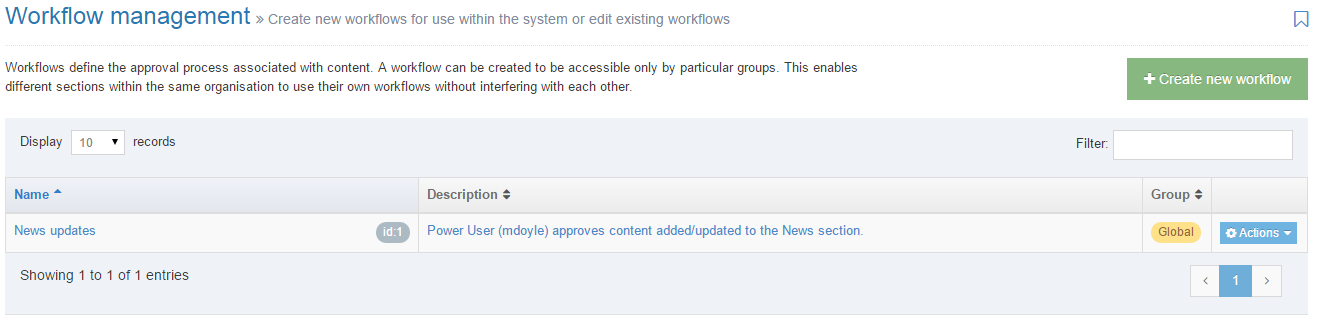
The columns in the table are Name, Group and the Action Menu button:
| Item | Description |
|---|---|
| Name | Contains Workflow name, a brief description (if one has been provided), and the Workflow ID number. The arrow in the header row can re-order the list alphabetically. |
| Group | Shows the Group the Workflow belongs to. Workflows cannot be shared with multiple groups. |
| Action Menu Button | Provides options to Edit, and Delete the Workflow. |
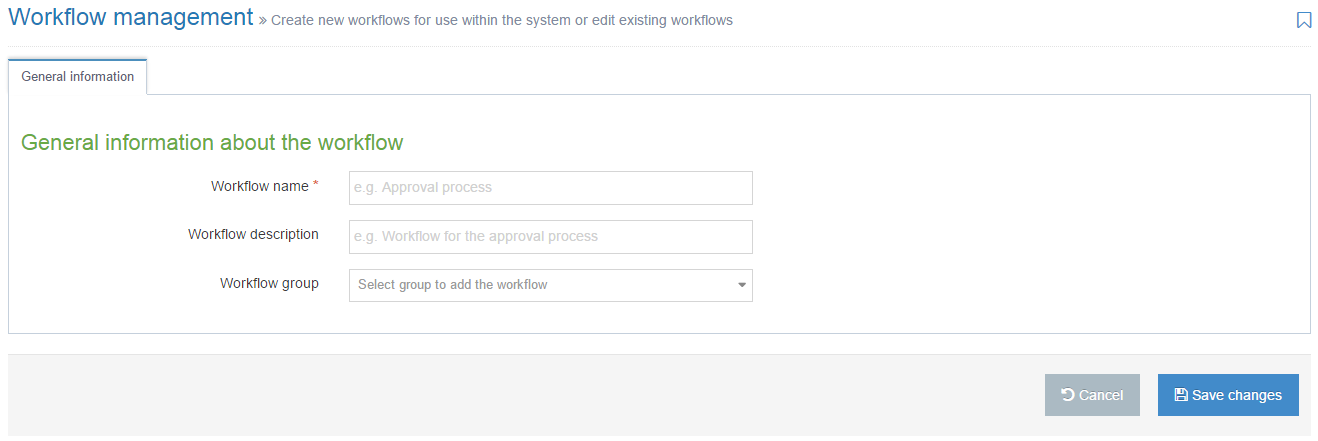
Create New Workflow
When you select Create New Workflow, the General screen is displayed:
| Item | Description |
|---|---|
| Name | This is a mandatory entry. Give your Workflow a name - it is recommended that the name is as descriptive as possible. |
| Description | This is an optional entry. This is used by the filter on the Workflow listing and can be useful for finding Workflows. |
| Group |
Select a Group for this Workflow. Grouping Workflows restricts the users that can use or edit the Workflow. It is good practice to add all your assets to Groups. This makes it easier to identify which assets are being used and where. By grouping assets together, you can also restrict access to them. When a user is not part of the Group, they cannot see or access assets in that Group. |
If you are satisfied with your inputs so far, click Save Changes.
Workflow Steps
The Steps tab lists the individual steps in the selected Workflow. When creating a new Workflow, this will be blank until new steps are created.
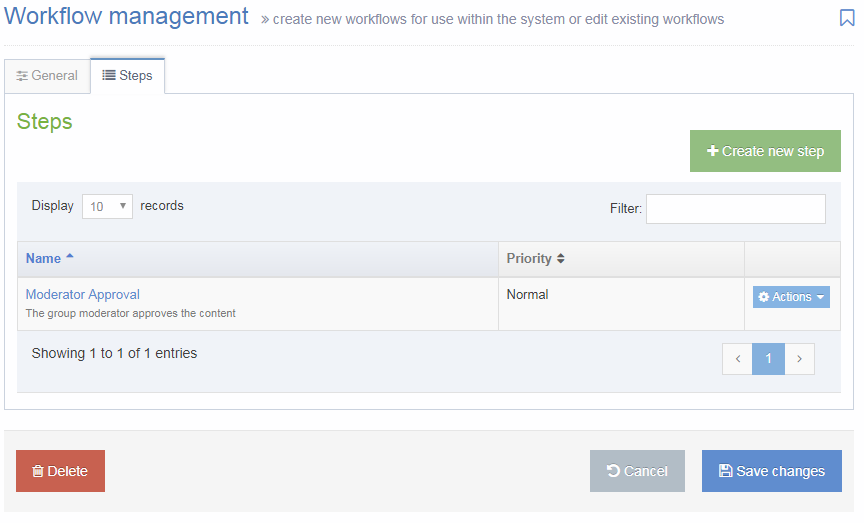
The columns in the table are Name and Priority:
| Item | Description |
|---|---|
| Name | Contains Workflow Step name, a brief description (if one has been provided). The arrow in the header row can re-order the list alphabetically. |
| Priority | Shows the Priority assigned to the step when creating the step. |
| Action Menu Button | Provides options to Edit the Step, and Delete the Step. |
To add a step to the Workflow, select Create New Step.
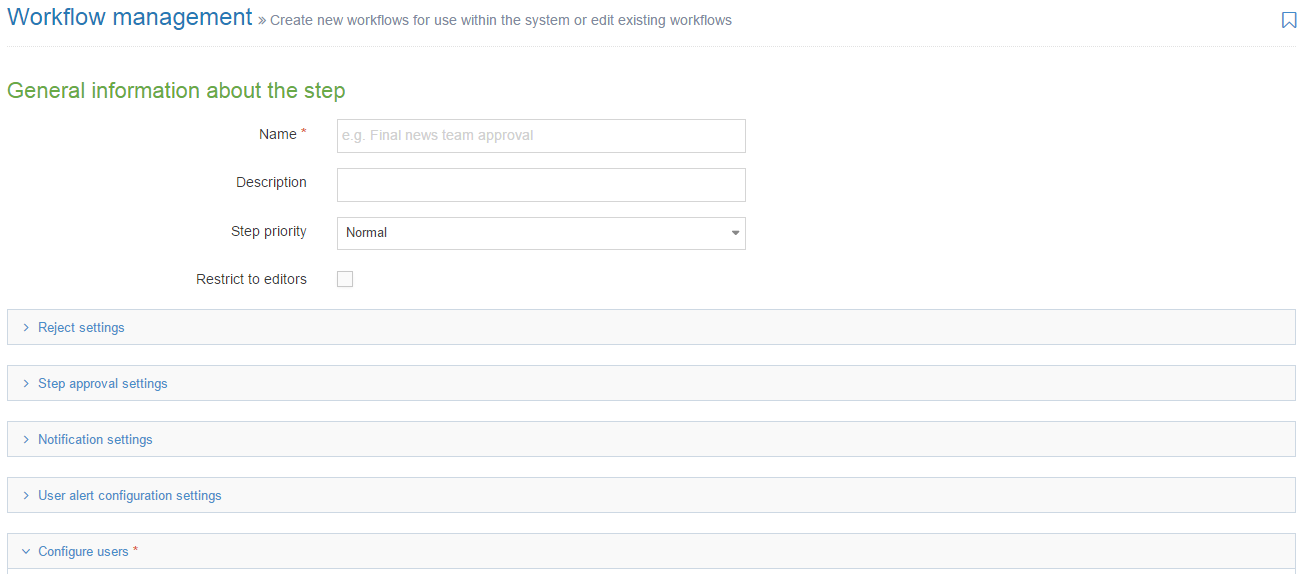
General
Enter the general information about the Workflow step:
| Item | Description |
|---|---|
| Name | Give the Workflow step a name. This is also used in any email alerts that are configured. |
| Description | Give the Workflow step a description. This is also used in any email alerts that are configured. |
| Step priority | This can be left at normal as it is a legacy setting from previous versions that is no longer used. |
| Restrict to editors |
Check this box if you want to restrict the users who can review/approve this step to only those who have editing rights to the content. This is used in conjunction with the Configure Users option to ensure that only users with editing rights can approve a Content Item. This makes the Workflow re-usable across different Branches of the site, with different approvers for the Branches they have access to. Terminalfour recommend that this is checked. |
Configure users
Configure the users who can approve content in this Workflow step:

The Available Users are individuals or groups who can participate in the Workflow you are creating.
The Current Users are the users who are able to approve content in this Workflow step.
To move an Available user to the Current Users' list, click the Add button next to the user.
Reject settings
Configure the action that is taken when content is rejected in this Workflow step:
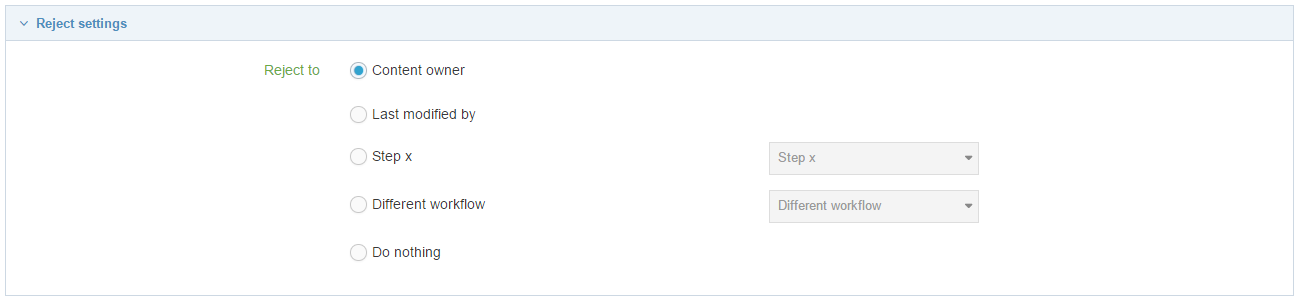
The options are:
- Content Owner: sends the content to the content owner, as specified in the Section or content options.
- Last modified by: send the content back to the person who last modified the content. This is the Terminalfour-recommended setting.
- Step x: send the content to a different step in this workflow.
- Different workflow: send the content to a different workflow.
- Do nothing: the content remains in the Approval list.
Step Approval Settings
Select the number of step approvers required to approve the content for it to successfully pass through this Workflow step:
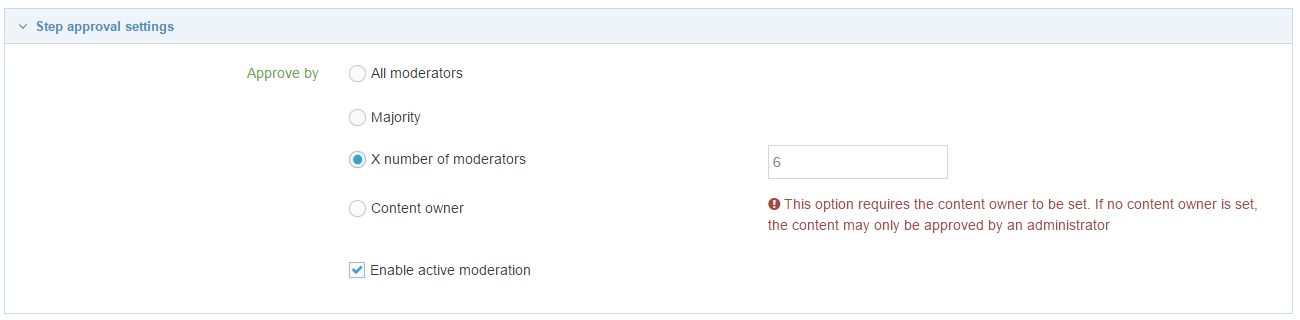
The options are:
- All moderators: all users who are configured as step approvers must approve the content
- Majority: the majority of step approvers must approve the content
- X number of moderators: set the minimum number of step approvers who must approve the content (Terminalfour recommend this setting is used and it is set at 1)
- Content owner: only the content owner, specified in the Section or content options, can approve the content. If no owner is selected, the content can only be approved by an Administrator.
If the Enable active moderation option is checked, combined with X number of moderators, once the set number of approvals or rejections are reached, ultimately meaning that content can never be approved (because too many users have rejected it), the content is considered to be rejected. We recommend that this option is checked (if using x number of moderators).
Notification settings
Email alerts can be sent as part of the workflow. The "from" address of these emails can be configured to be the logged in user's email address in Approval configuration settings. This can be useful as users have been known to reply to the Workflow emails. Alternatively, they will use the application default email address (configured in General configuration).
Configure when email alerts are sent:
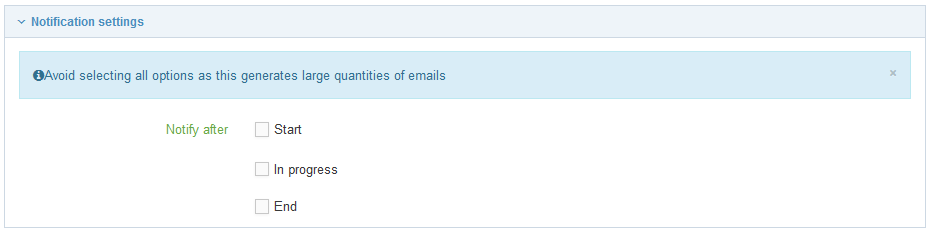
Check the options for when email alerts should be sent:
- Start: an email alert is sent when a Content Item enters the workflow step. This is required if the step approvers are to receive email alerts of new content.
- In progress: if multiple users are required to approve the content, an email alert is sent for each user who approves or rejects the content
- End: an email alert is sent when the workflow step is complete (i.e. content is approved through the step, or content is rejected in the step). This is required if the content editors are to receive email alerts of rejected content.
User alert configuration settings
Configure who receives the email alerts:

Check the options for who will receive email alerts:
- Content owner: the user who submitted the content for approval. This is required if the content editors are to receive email alerts of rejected content, but cannot be used if Step moderators need email notifications for content awaiting approval.
- Step moderators: the user(s) who can approve the content. This is required if the step approvers are to receive email alerts of new content, but will result in content rejection emails not being sent to the content editors.
- All content owners and moderators: This is required if both content editors and step approvers are to receive email alerts. This is the recommended setting if content editors are to receive email alerts of rejected content AND step approvers are to receive email alerts of new content.
It is not currently possible to configure that different emails are sent to different users, e.g. step start email are sent to moderators and step end emails are sent to editors.
If you are satisfied with your inputs so far, then click Save Changes.
Apply the Workflow
Once a Workflow is created, it should either be applied to a section or to a Content Type.
Existing Pending Content
When a workflow is applied to either a section or a Content Type, and content within that section or Content Type, that is currently Pending approval will automatically move into the workflow and any email alerts that are configured will be triggered for each of those content items.
Section
When a Workflow is applied to a Section, all Content Items within that Section or Child Sections will use the Workflow. This is useful for parts of the website where users may require additional assistance, for example, where they are newly trained and need some initial guidance.
To apply a workflow to a section, Edit the section and select the Default workflow on the General tab.
Workflows and Mirrored content
When a Content Item that has been mirrored into a Section with a Workflow is updated, the Content Item will run the Workflow applied to the Section where the Content Item was edited. i.e. if the Content Item was edited in a Section with no Workflow, then none is applied.
Content Type
If applied to a Content Type, all content within a specific Content Type will use the Workflow. This is useful for special types of content (e.g. Site Configurations, Code content) which may require additional approval before publishing.
To apply a workflow to a Content Type, Edit the Content Type, and select the Workflow on the General tab.
Delete a Workflow
In the row of the corresponding Workflow, open the Actions drop-down list and select Delete. A confirmation pop-up window appears and you can confirm your choice and Delete, or Cancel the action. Upon successful deletion, a green banner appears confirming the deletion, and the object is removed from the list.
Troubleshooting Workflow Emails
If the workflow is not being sent, perhaps try the following:
- Check whether Terminalfour is sending emails at all: The easiest way to do this is to go to Administration > User rights & roles > Mail users and send yourself a message. If this is not working, check the mail server configuration. If you are hosted by Terminalfour, or you believe that the mail server configuration is correct but is still not working, then please contact our support team for assistance.
- Check the email address in the user profile: Check the email address configured in the user's profile to ensure that it is correct.
- Check that the content is using the working: After selecting "Save changes" on the Content Item, navigate to the Approval page and ensure that the Workflow (Step) column is populated correctly for the Content Item. If not, check that the workflow has been applied to the section or to the Content Type.
- Check the workflow step notification settings: Check that the workflow step is configured for email notifications at the correct stages. This is configured in the workflow step Notification settings.
- Check the workflow step user settings: Check that the workflow step is configured to email the correct users. This is configured in the workflow step User alert configuration settings.