
Approve content
- Last Modified:
- 08 Mar 2022
- User Level:
- Moderator
Description
When a Content Item is added to or edited in TERMINALFOUR, it must be approved it's published. This ensures only content that has been through the approval process is published on your site.
New and edited Content Items appear in a list of content awaiting approval in the Approve Content screen (Content > Approve Content).
- When new content is created or existing content is edited in TERMINALFOUR, the status is set to Pending and it appears in the Approval queue.
- Content with the status of Draft does not appear in the Approval menu and will not be published to your site unless there is a previously approved version of the content. Draft content, when completed, must be approved before publishing.
- Content with the status of Rejected is never published to your site. Rejected content, after possible remedial actions, must be approved before it can be published.
- If a Content Item is assigned to a Workflow, approving the content advances it to the next step in the workflow.
- You can approve content from the Direct edit screen.
Examine and review content
To access the list of content pending your approval, go to Content > Approve Content.
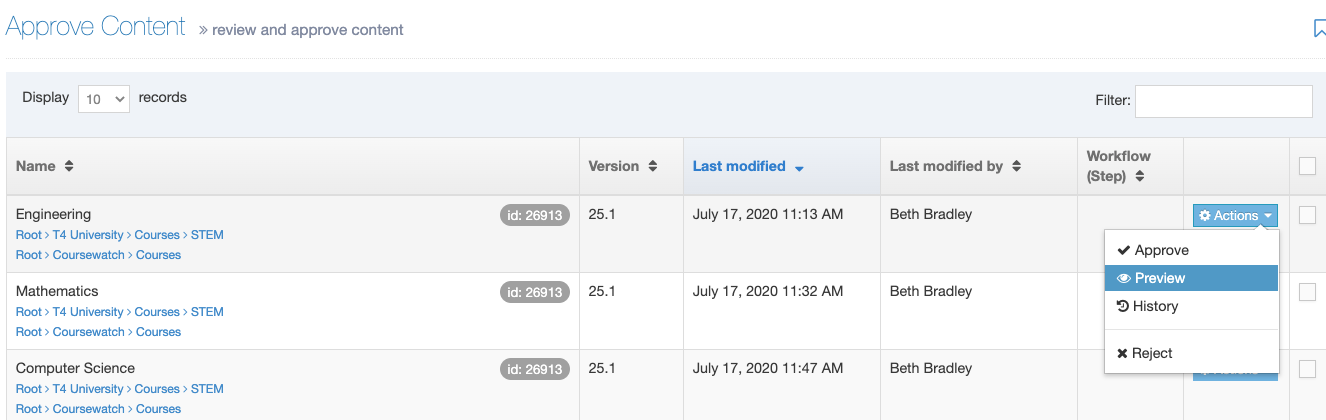
This page opens in a tabular format with seven columns:
- Name - shows the content name, ID number, and a breadcrumb link to edit it.
- Version - the version number of the Content Item. Each time you make and save an edit to a Content Item a version is created.
- Each time a draft is saved, the version point number of the Content Item increments, e.g, 0.0.1.
- When an approved version of the Content Item is saved the version number increments, e.g., 1.0.0
- Last modified - the date on which the Content Item was last modified
- Last modified by - the user who last modified the content
- Workflow (Step) - shows the Workflow step (if the content is in a Workflow)
- Actions (button) - drop-down menu with these items: Approve, Preview, History, and Reject
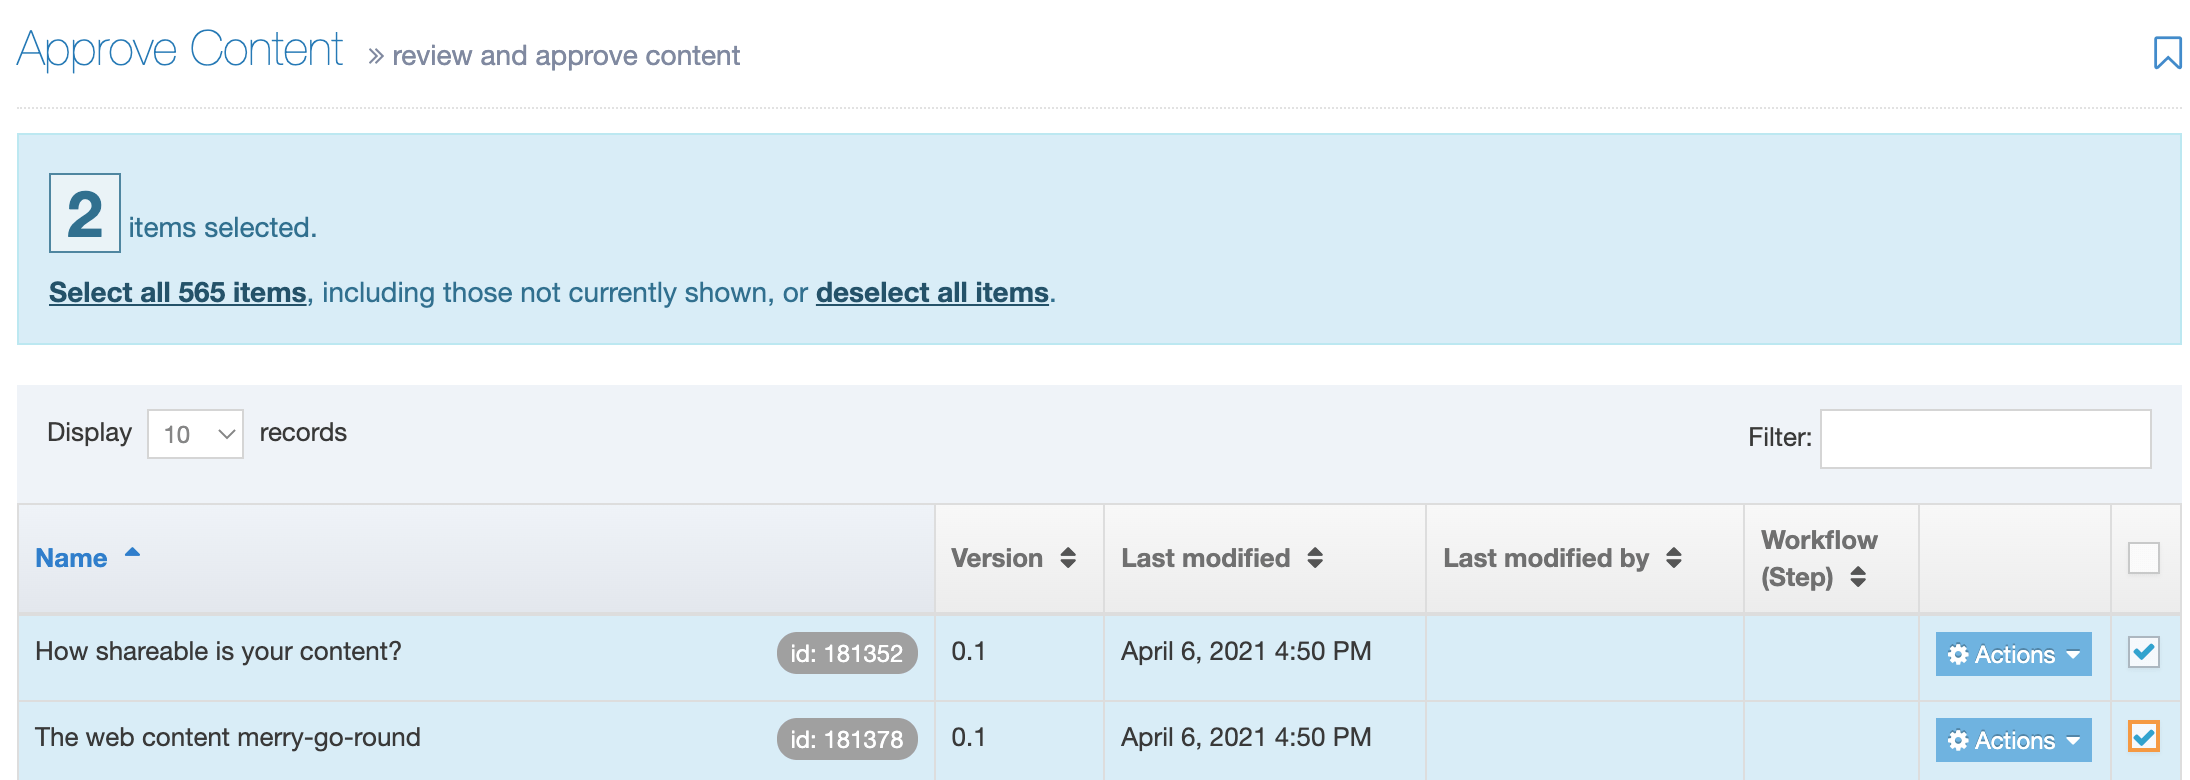
- Checkboxes - check as needed to take approval action or move content forward in the Workflow. A check to the box in the header row is the Select all function. This only appears if selective approval has been enabled for the current user level.
Content can be sorted by clicking on the table headings, or filtered by entering text within the Filter.
When you select more than one item you'll see an alert that will show you the number of items that have been selected:
To review a pending Content Item, simply click the Name of the content to edit the content, providing the option for Preview.
Approve content
Once content has been reviewed and it is correct and ready to approve, click the associated Actions button, scroll to Approve and click. Alternatively, if selective approval is enabled, check the checkboxes in the right column, and select the Approve button.
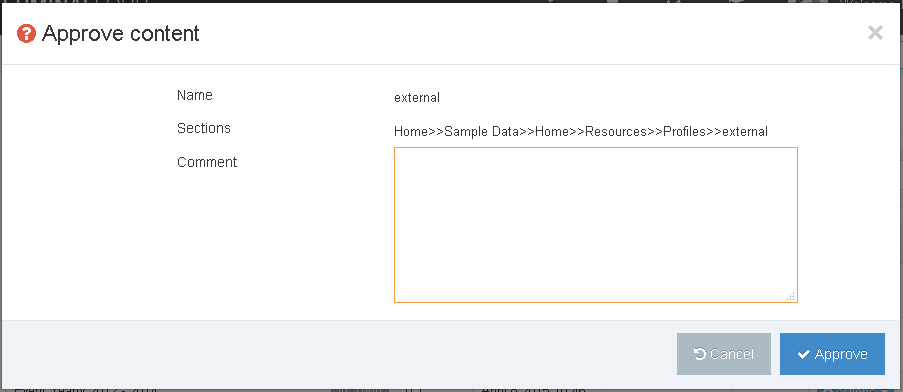
A confirmation popup window confirms the Name and Sections of the content. Additionally, there is a Comments box intended to allow comments to be inserted upon approval. Inserting comments is optional and content can be approved without comment. Click Approve.
If content is in a workflow, and selective approval is enabled, Administrators have the additional options to:
- Advance to next step: The content is moved to the next step of the workflow. If there is no next step, the content is approved. This can be used if the workflow step requires approval by multiple users and the Administrator chooses to skip the multiple approval requirement.
- Advance to completion: The content is approved through all steps of the workflow, and is marked as Approved.
To use these, check the content using the checkboxes, and click the down arrow aside the Approve button. Click the appropriate statement and proceed with the approval, as above.
Preview
From version 8.3.5 you can preview a Content Item on the page as part of the Approval process.
When Preview is selected from the Action dropdown menu a preview of the page will open in a new tab.
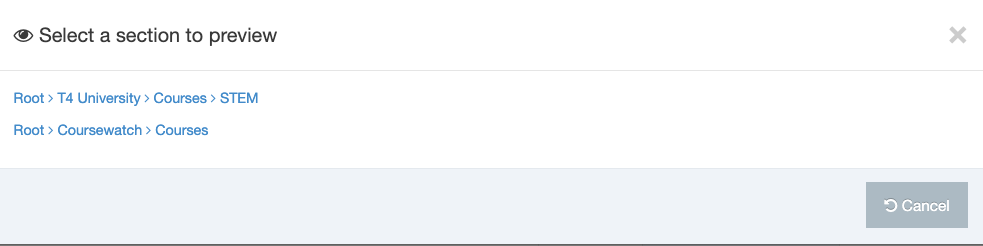
If the Content Item is Mirrored in one or more Sections a "Sections to preview" modal will display. From this modal, you can select the Section to preview the Content Item in:
Content History
For content that has a history (previous versions), you can review the history using the Actions drop-down menu and selecting History.
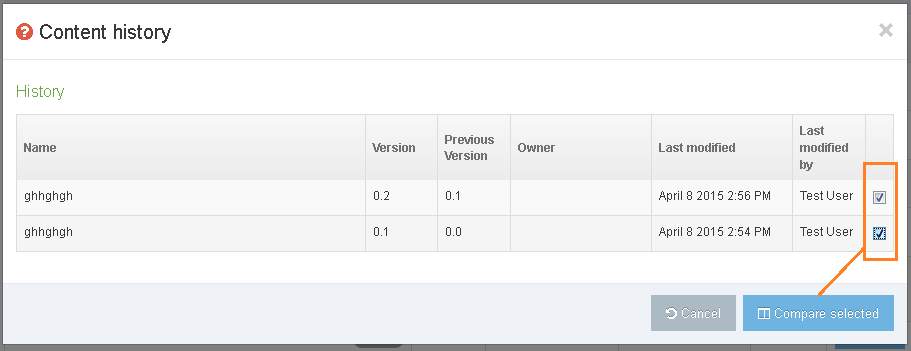
This popup box shows a formatted table with the Name, Version, Previous version, Owner, Last modified, and Last modified by header titles.
When you have two or more versions, you can do a side-by-side comparison of the content. Check at least two check boxes in the far right column to select the versions for comparison. Click the Compare selected button. This screen appears:
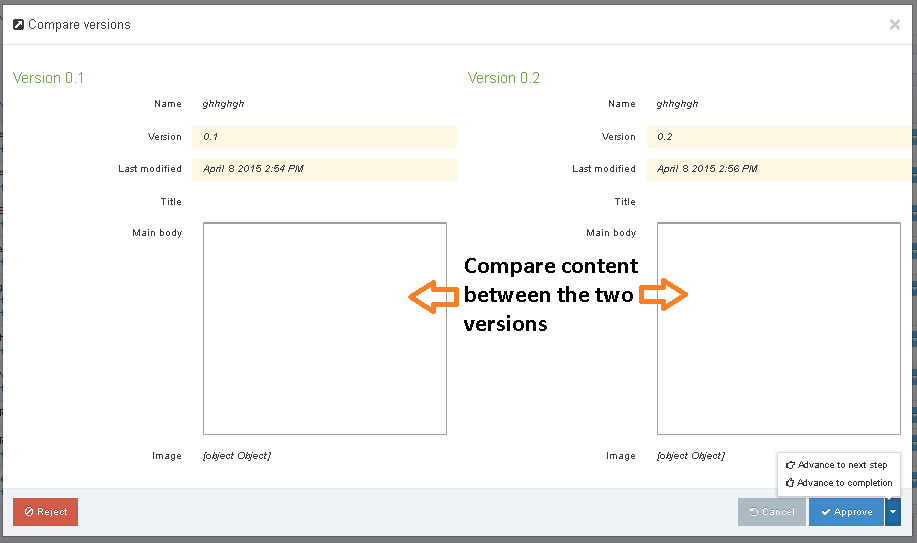
After you review the content details, you can make an Approval decision (included Workflow if needed), or Reject the content. Make your choice or cancel.
Reject content
In some cases you might want to reject content outright. When this is the case, the process is simple. After your review of the content, and you want to reject, then click the appropriate Actions button and scroll to Reject and click. This popup window appears:
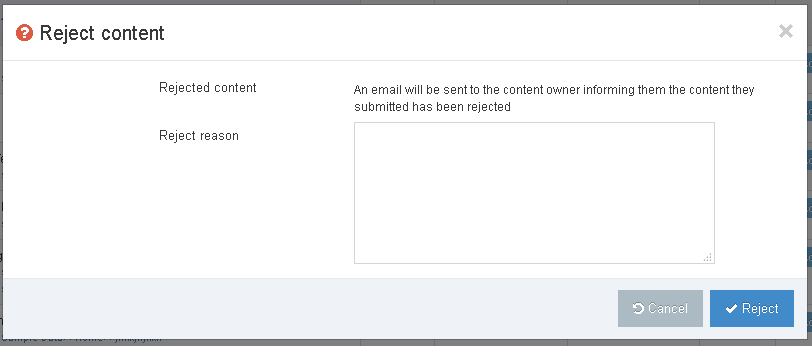
Briefly describe the reason for rejection. Be specific in the reasons and suggest remedial actions that could enable the content to be resubmitted if appropriate. You can reject the content without reason. Click the Reject button to complete the rejection and send an email to the content editor.
The "from" address of these emails can be configured to be the logged in user's email address in Approval configuration settings. This can be useful as users have been known to reply to the Workflow emails. Alternatively the emails will use the application default email address (configured in General configuration).