External Content Syncer
Description
The External Content Syncer is used to import and update content from an external data source like a database, XML/RSS feed or even a CSV file. When content is synced, each row in the data source is added to Terminalfour as a content item. Syncing can ensure that the link between the external data source persists. This means that updates made to content in the external data source are reflected in the synced content in Terminalfour. Synced content can also be edited and amended in Terminalfour.
For instance, if your staff profile information was stored on an external database, that content can be synced with Terminalfour so it can be published on your website. The external database may not include photos but these can be managed directly within Terminalfour.
Content edits are synced in one direction only – from the data source to Terminalfour – so while synced content can be edited in Terminalfour, those edits will not update content back in the data source. Edits to synced content in Terminalfour will be overwritten by changes to content in the data source when the next sync occurs.
Before configuring the External Content Syncer you will need to set up the data source connection details in a Data Source.
There's more than one way to integrate external data in Terminalfour and the method you choose can depend on the type of data and what you want to do with it.
Check out our guide to help you choose the right one.
Using the External Content Syncer
To use, go to Content > Integration Tools > External Content Syncer:
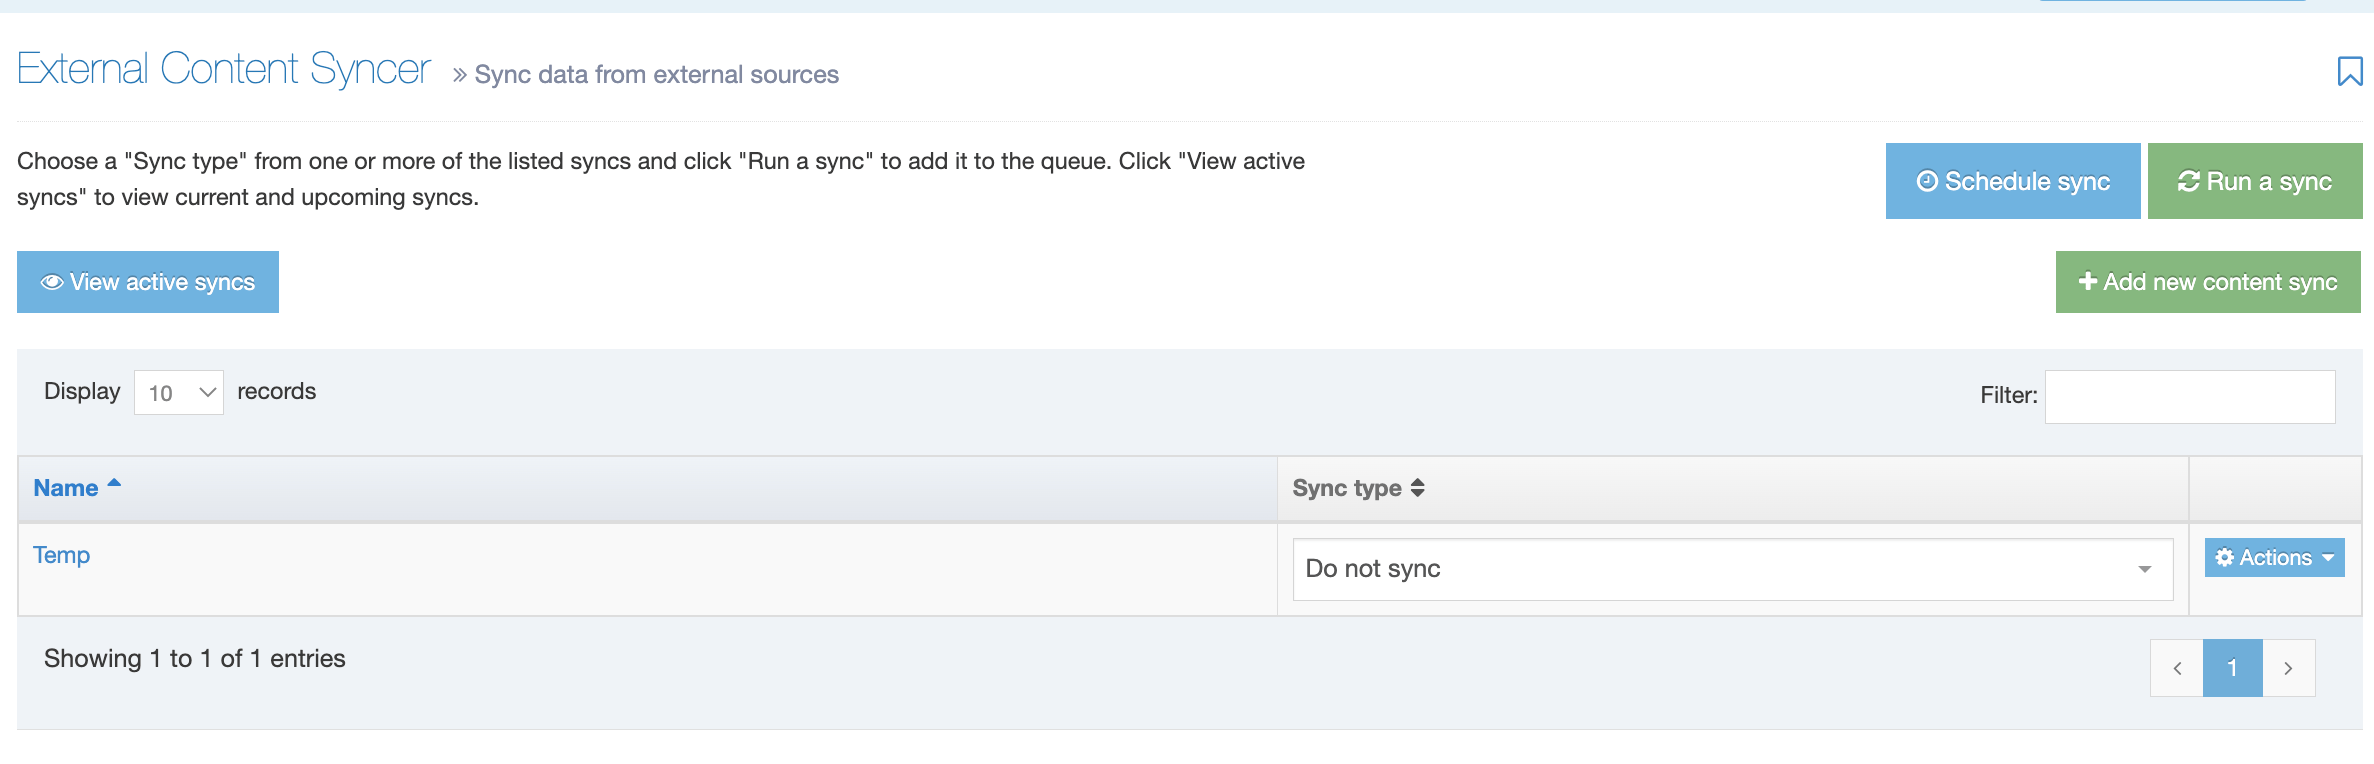
From this page you can:
Configure the External Content Syncer
Data Source
Before configuring the External Content Syncer, you must set up a Data Source.
Once a Data Source is has been set up, go to Content > Integration tools > External Content Syncer and click the Create new Content Sync.
There are two tabs here – General Information and Type Mapping:
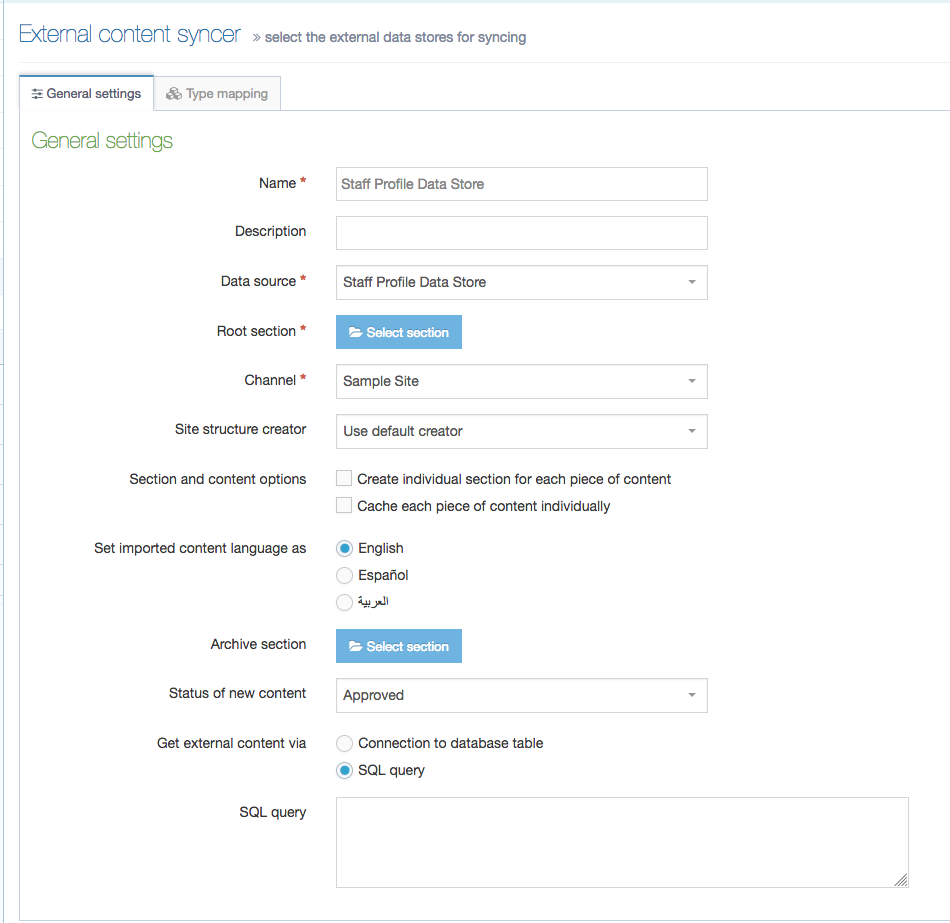
General Information
| Item | Description |
|---|---|
| Name | Give your Content Sync a name. It is recommended to make the name as descriptive as possible. This is required. |
| Description | This is used by the filter on the External Content Syncer listing and can be useful for finding Content Sync. |
| Data Source | Select a Data Source to use. This must be already configured. This is required. |
| Root Section | Set the Section to import the content into via Browse or Search. The Content Type being used to import content must be enabled on this section to allow the External Content Syncer to import the content. This is required. |
| Channel | Select the Channel to publish the imported content. This is required. |
| Site Structure Creator |
By default, either all content will be added to one Section, or a separate Section will be created for each Content Item, under the Root Section selected above. This depends on the option to Create individual Section for each Content Item below. Using a custom Site Structure Creator plugin allows you to generate a custom Site Structure rather than using the default. Leave it as Use default creator to use the default. |
| Section and content options |
|
| Set imported language as | Select the language into which content is imported. This is particularly important for multi-language websites. |
| Archive section | Set the Section to move content to when it is no longer found in the external database. If left blank, content is not moved but is marked as Inactive. |
| Status of new content | Choose from Approved, Pending, Inactive, or Draft. If set to Pending, this may allow users to review new content before it is published on the site. This only applies for new content; updates to existing content do not alter the content status i.e. if content is approved and then updated by the external content syncer, the content remains as approved. |
| Get external content via |
|
| Database table | If Get external content via is Connection to database to get table, select the database table. |
| SQL Query | If Get external content via is SQL Query, enter the SQL query that should be used to retrieve the content. |
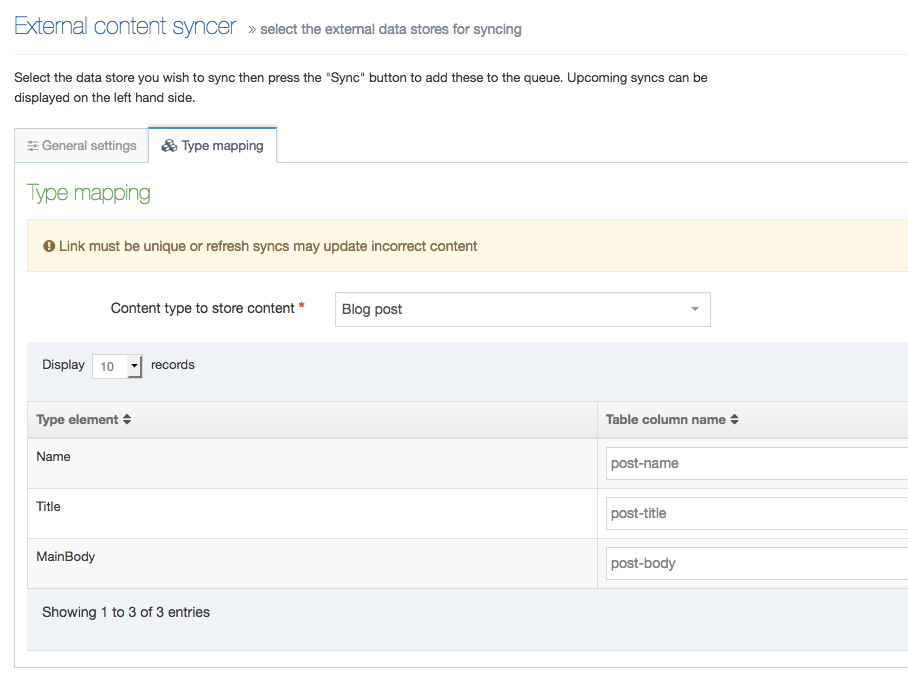
Type Mapping
When syncing content, you must select the Content Type that the synced content will use. When a Content Type is selected from the drop-down list, the Content Type Elements will be listed on the left. To map, just input the Table column name from the external data source in the corresponding Type Element field:
It is currently possible to sync into plain text, HTML, date, select box and radio button elements. For date elements the date format needs to be yyyy-MM-dd HH:mm:ss (e.g., 2018-03-31 23:59:59). When the elements are select box or radio button elements, the value in the database must match the list entry name (rather than the value).
While using multi-select lists may be possible, they are not currently officially supported. It may work in the following scenarios:
- the value in the database must match the list entry name (rather than the value)
- there is only one entry in the list (e.g., a list with one entry that is "Yes" that is a checkbox in the Content Type)
At least one of the elements or database fields should be selected as the Link. This should be the element that can uniquely identify the content item, and which may be used as a Primary Key in the external database. Examples could be a Staff ID or a Staff Email Address. If there is no one unique element, a combination of two can be used, meaning that the combination of the two elements will always be unique. This is used to match the Terminalfour content item with the relevant record in the external database. The values in the field(s) selected as the Link should not change - if the value of the field selected in the Link changes, a new Content Item will be imported for this new Link value, as opposed to updating the existing Content Item. It is worth noting that a unique element/field can be imported, and used internally as the Link, but not output by the Content Layout and not published with the content, if preferred.
If connecting to a CSV file, refer to the article on Content Syncers with CSV files for information on the Table Column Names in CSV files.
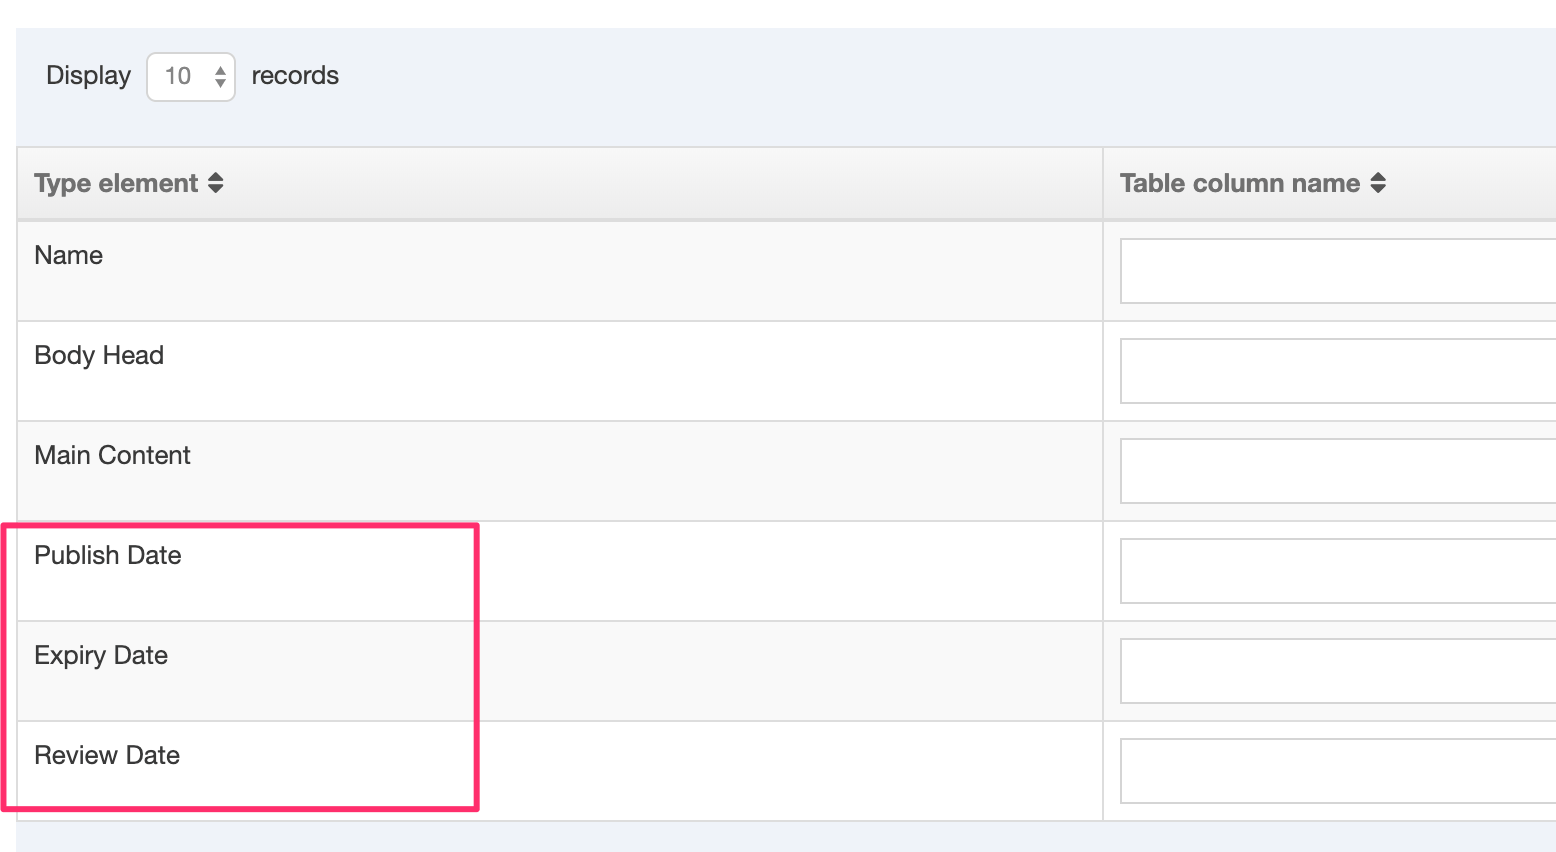
Mapping a Content Item's embargo and expiry dates
From version 8.3.3. you can map a Content Item's embargo and expiry dates:
- Publish date
- Expiry date
- Review date
Run a Sync
For each content sync, select the Sync Type and select Sync:
| Item | Description |
|---|---|
| Initial Sync | Used on the first import. It creates a new Content Item for each entry in the database |
| Full Sync |
The Full Sync was introduced in Terminalfour 8.4.2 |
| Data Sync Refresh | Refreshes content synced initially and updates with new content, if changed in the source. |
| Data Sync New & Refresh | Creates new content for each new entry and updates content that has already been synced. |
| Data Sync Old Status |
Refreshes content synced initially and updates with new content, if changed in the source. It also removes content if it no longer exists in the source depending on whether an Archive Section is set:
|
| Clean & Initial Sync | Deletes all content and does Initial Sync |
Schedule Sync
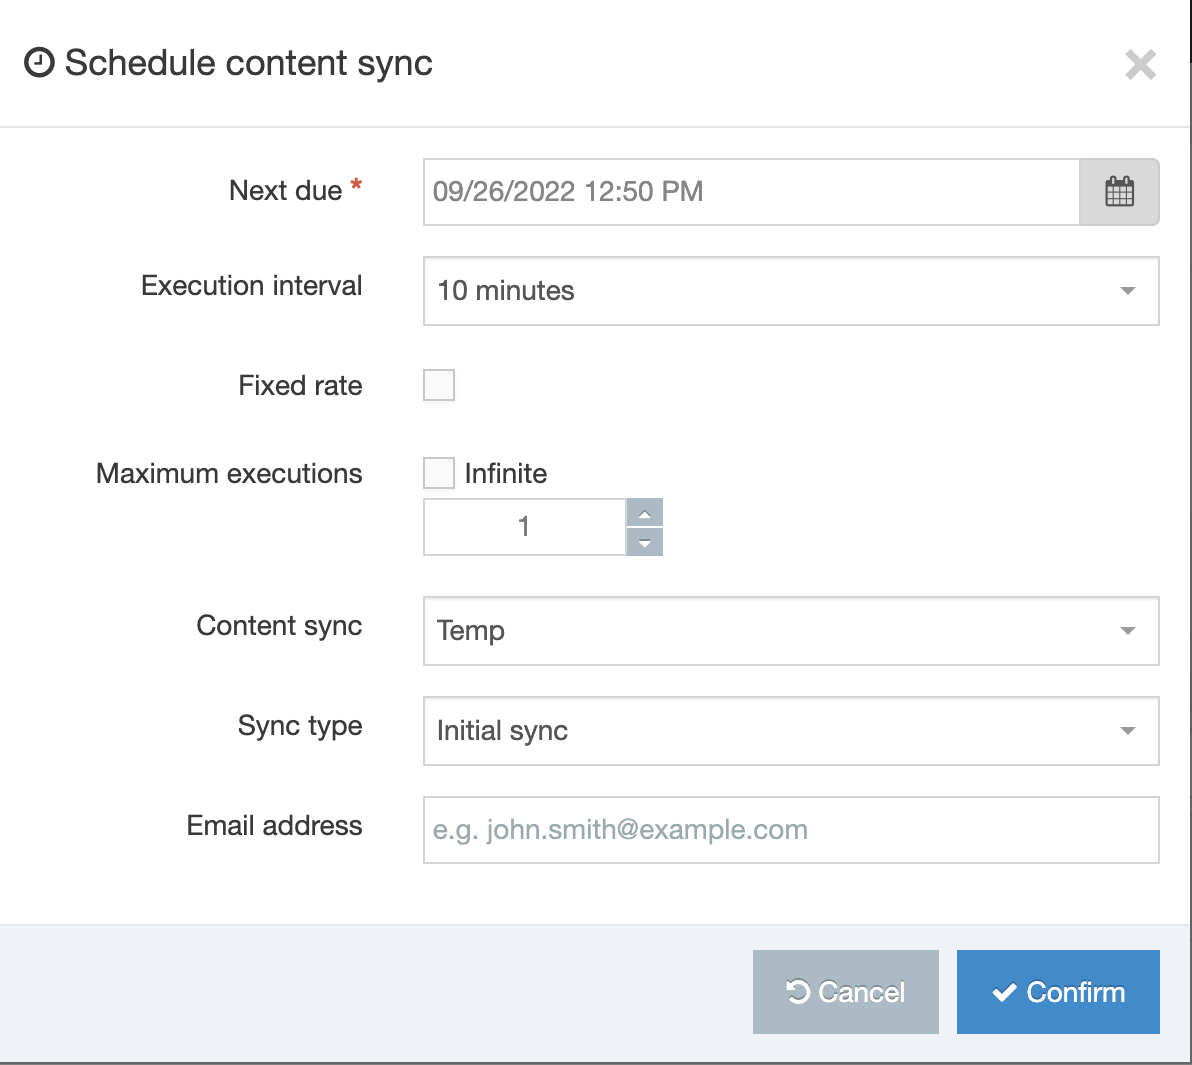
Click Schedule sync. A popup window appears with the following fields to be completed:
| Item | Description |
|---|---|
| Next due | The starting day and time of the next sync. |
| Execution interval | How often you wish this schedule to be run. |
| Fixed rate | When "Fixed rate" is enabled, the execution interval starts only when the previous task has finished and will disregard any Daylight Savings Time (DST) changes. |
| Maximum executions |
The number of times this task will run. This option is only displayed when a frequency interval is selected (i.e., any option but "Once") and "Infinite" is not selected. |
| Content sync | The content sync you want to run. |
| Sync type | The sync type you want to run in this schedule. |
| Email address | The email address of the person(s) you want to be notified in case of a failure of the sync. |
Click Confirm, and the task is added to the Task Scheduler.
The most common sync that is needed is "Data Sync New and Refresh" and "Data Sync Old Status." To schedule both of these, create two separate scheduled syncs, one of each type.
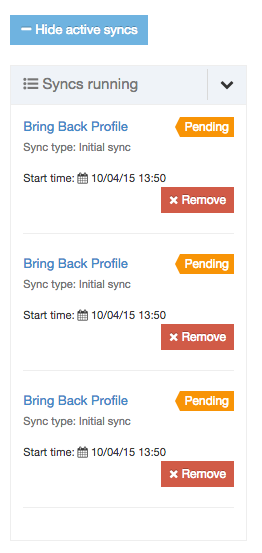
Active Syncs
After you confirm your schedule request, in the active syncs column, the sync you requested is shown:

You can choose several syncs for your content. This screen shows three syncs in the queue: