
Media Items
Description
Media Items are stored within the Media Library and are organized into Media Categories. To access the Media Library, go to Content > Media Library.
Below the Add media button, and the options to navigate the Media Library, Media for the currently selected category is displayed in a tabular view, displaying a preview icon (for images) and sortable columns for the Media Name, Filename, Type and Size.
An icon is displayed for Media Items that have Variants. To see the number of Variants just hover your cursor over the icon.
The last column is a checkbox that allows you to select items for Bulk actions.
You can sort the listed Media Items by the Name, Status, Type, Size and Last modified columns.

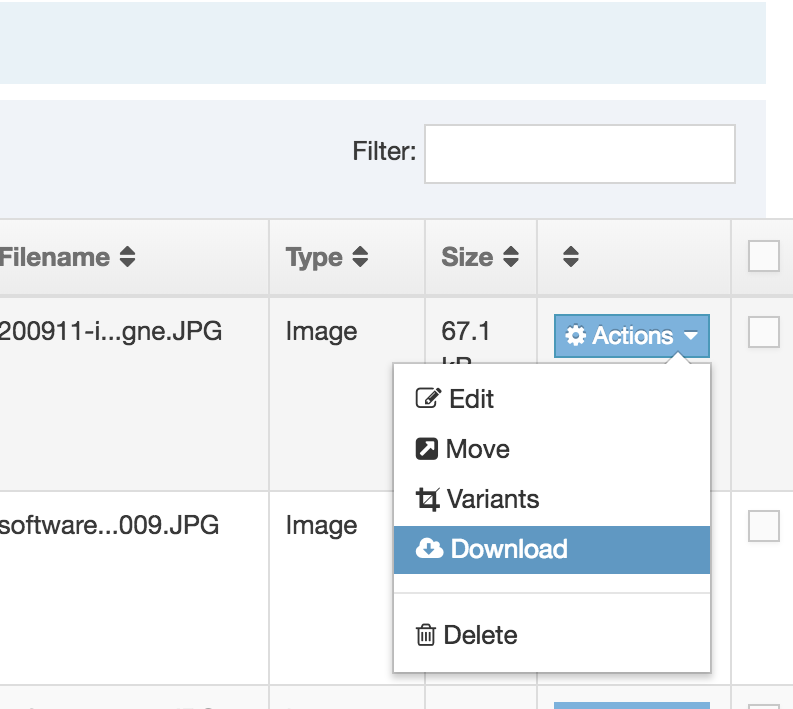
The Actions menu gives the options for:
Add or Edit a Media Item
Add a Media Item
To add a Media Item navigate to the Media Category that the media will be added to and select the Add media button (you'll only see this button if you've been granted Write access to the Media Category).
This opens the General tab:
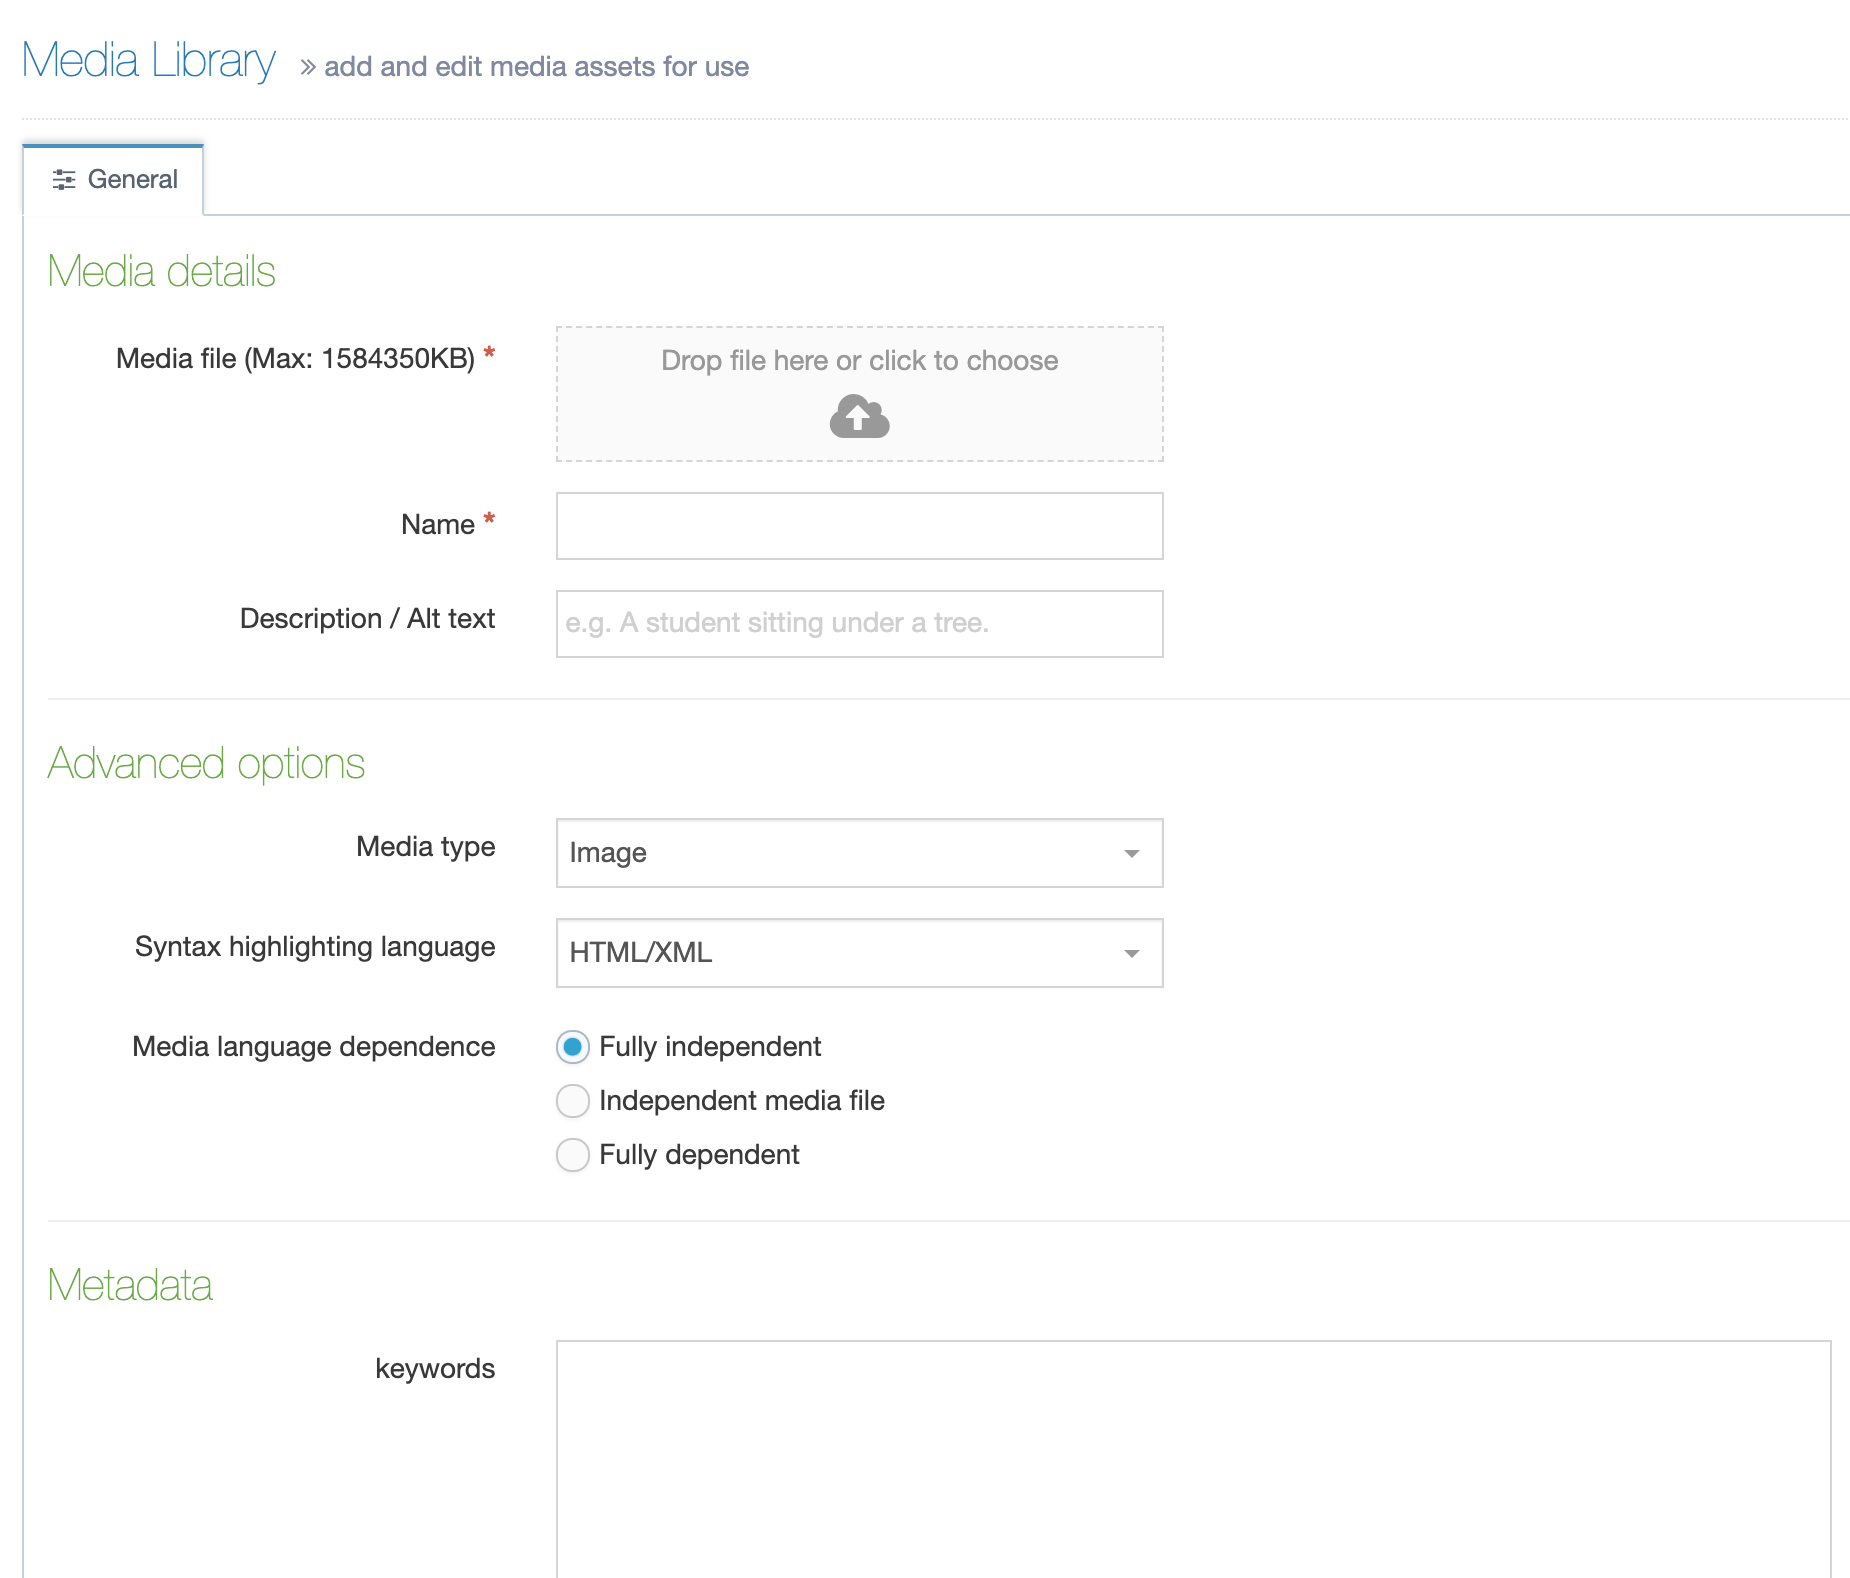
Add or edit the following details:
| Item | Description | ||||||||||||||||||||||||
|---|---|---|---|---|---|---|---|---|---|---|---|---|---|---|---|---|---|---|---|---|---|---|---|---|---|
| Media file* | To upload a file click the dropzone and select a file from your local machine or drag a file to the dropzone. | ||||||||||||||||||||||||
| Media type* | The Media type automatically determined based on the Media types configuration but the type can be modified. If the file extension is unknown within the media types, you need to select the type manually. | ||||||||||||||||||||||||
| Name | Add a descriptive Name. This becomes the name of the media item to Media library users. For Microsoft Office and PDF documents, this is often used as the default link text when using the document within a Content Item. | ||||||||||||||||||||||||
| Description/ Alt text | Provide a brief Description. This value is also used as the alt text for image Media Items | ||||||||||||||||||||||||
| Syntax highlighting language | Sets the language used for the syntax highlighter when editing this Media Item. This is only used for non-binary Media Types. | ||||||||||||||||||||||||
| Media language dependence |
This is only relevant for sites that are in multiple languages. For single-language websites, you can use the default.
|
||||||||||||||||||||||||
| Keywords | Include some keywords that can be used when searching for Media Items in the Media Library. |
If you are satisfied with the entries, then click Save changes.
Bulk uploading
If you need to bulk upload Media Items, you can use a Media Archive Package to bulk upload Media Items like images or documents to the Media Library.
Add or Edit a Media Item
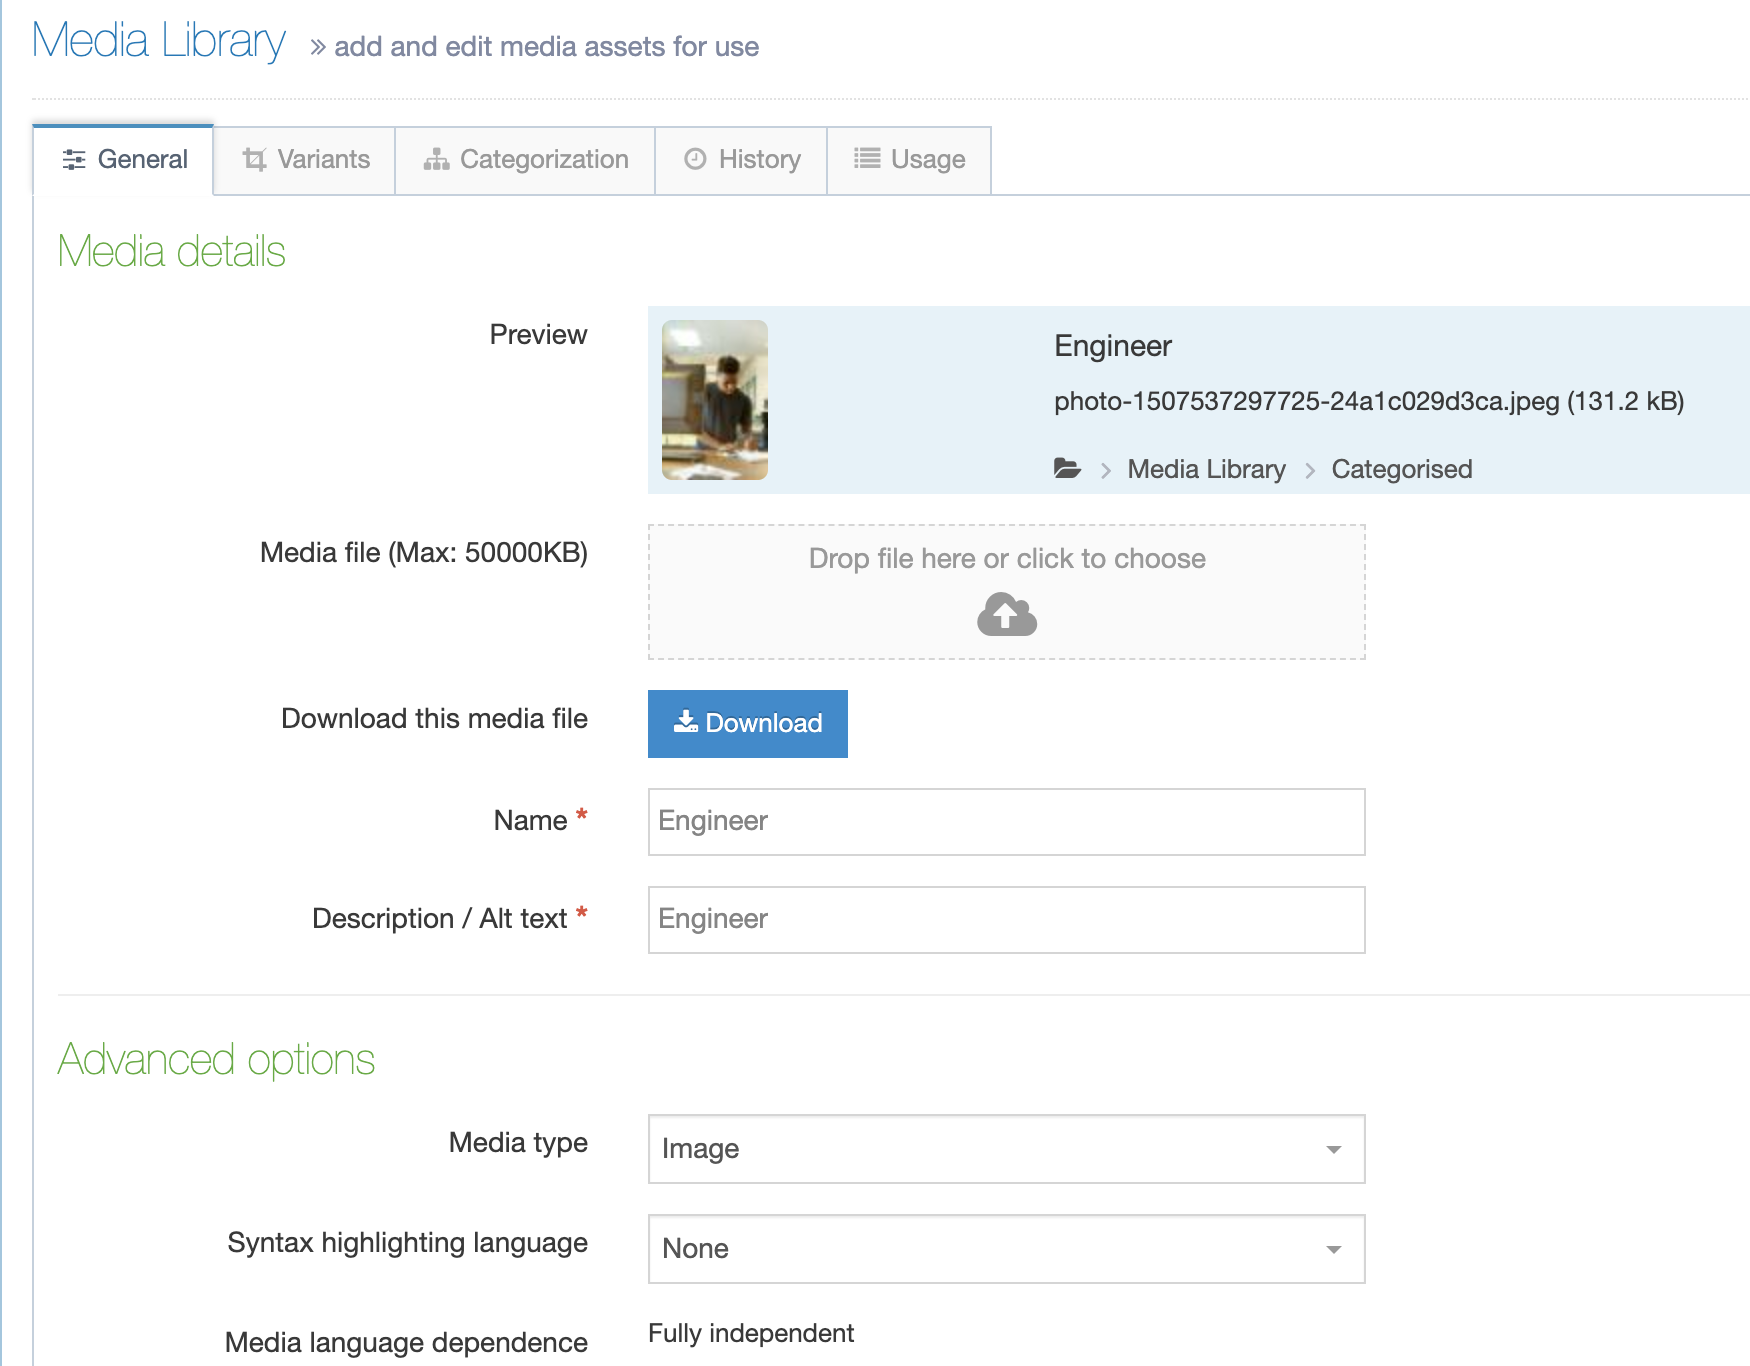
Edit a Media Item
Go to Content > Media Library and select the Media Item name, icon, or thumbnail from the list on the right (see screenshot above).
Image Media Items have thumbnails while other file types are accompanied by an icon.
A download button has been added to the Media Item edit screen in version 8.3.5.
Media Variants
With Media Variants, you can create resized and cropped versions of Media Items, while retaining the original. Depending on the Media Variant configuration, these may be created automatically when Media is added, or they can be created manually.
Prior to version 8.3.19, updating an image in the Media Library did NOT automatically update the variants. Variants will need to be individually updated on these version.
To create a variant, select the Variants option on the Action menu next to a Media item (this option will only appear if you have been granted Write access to the selected Media Category).
You'll need to provide a Name for the Variant as well as an optional Description. The description text you add will be used for the alt text when the image is published. If no description text is provided for the Variant, the parent Media Item description text will be output for the alt text.
When you select Variants you'll see the crop/resize options as well as your image with a crop area highlighted.
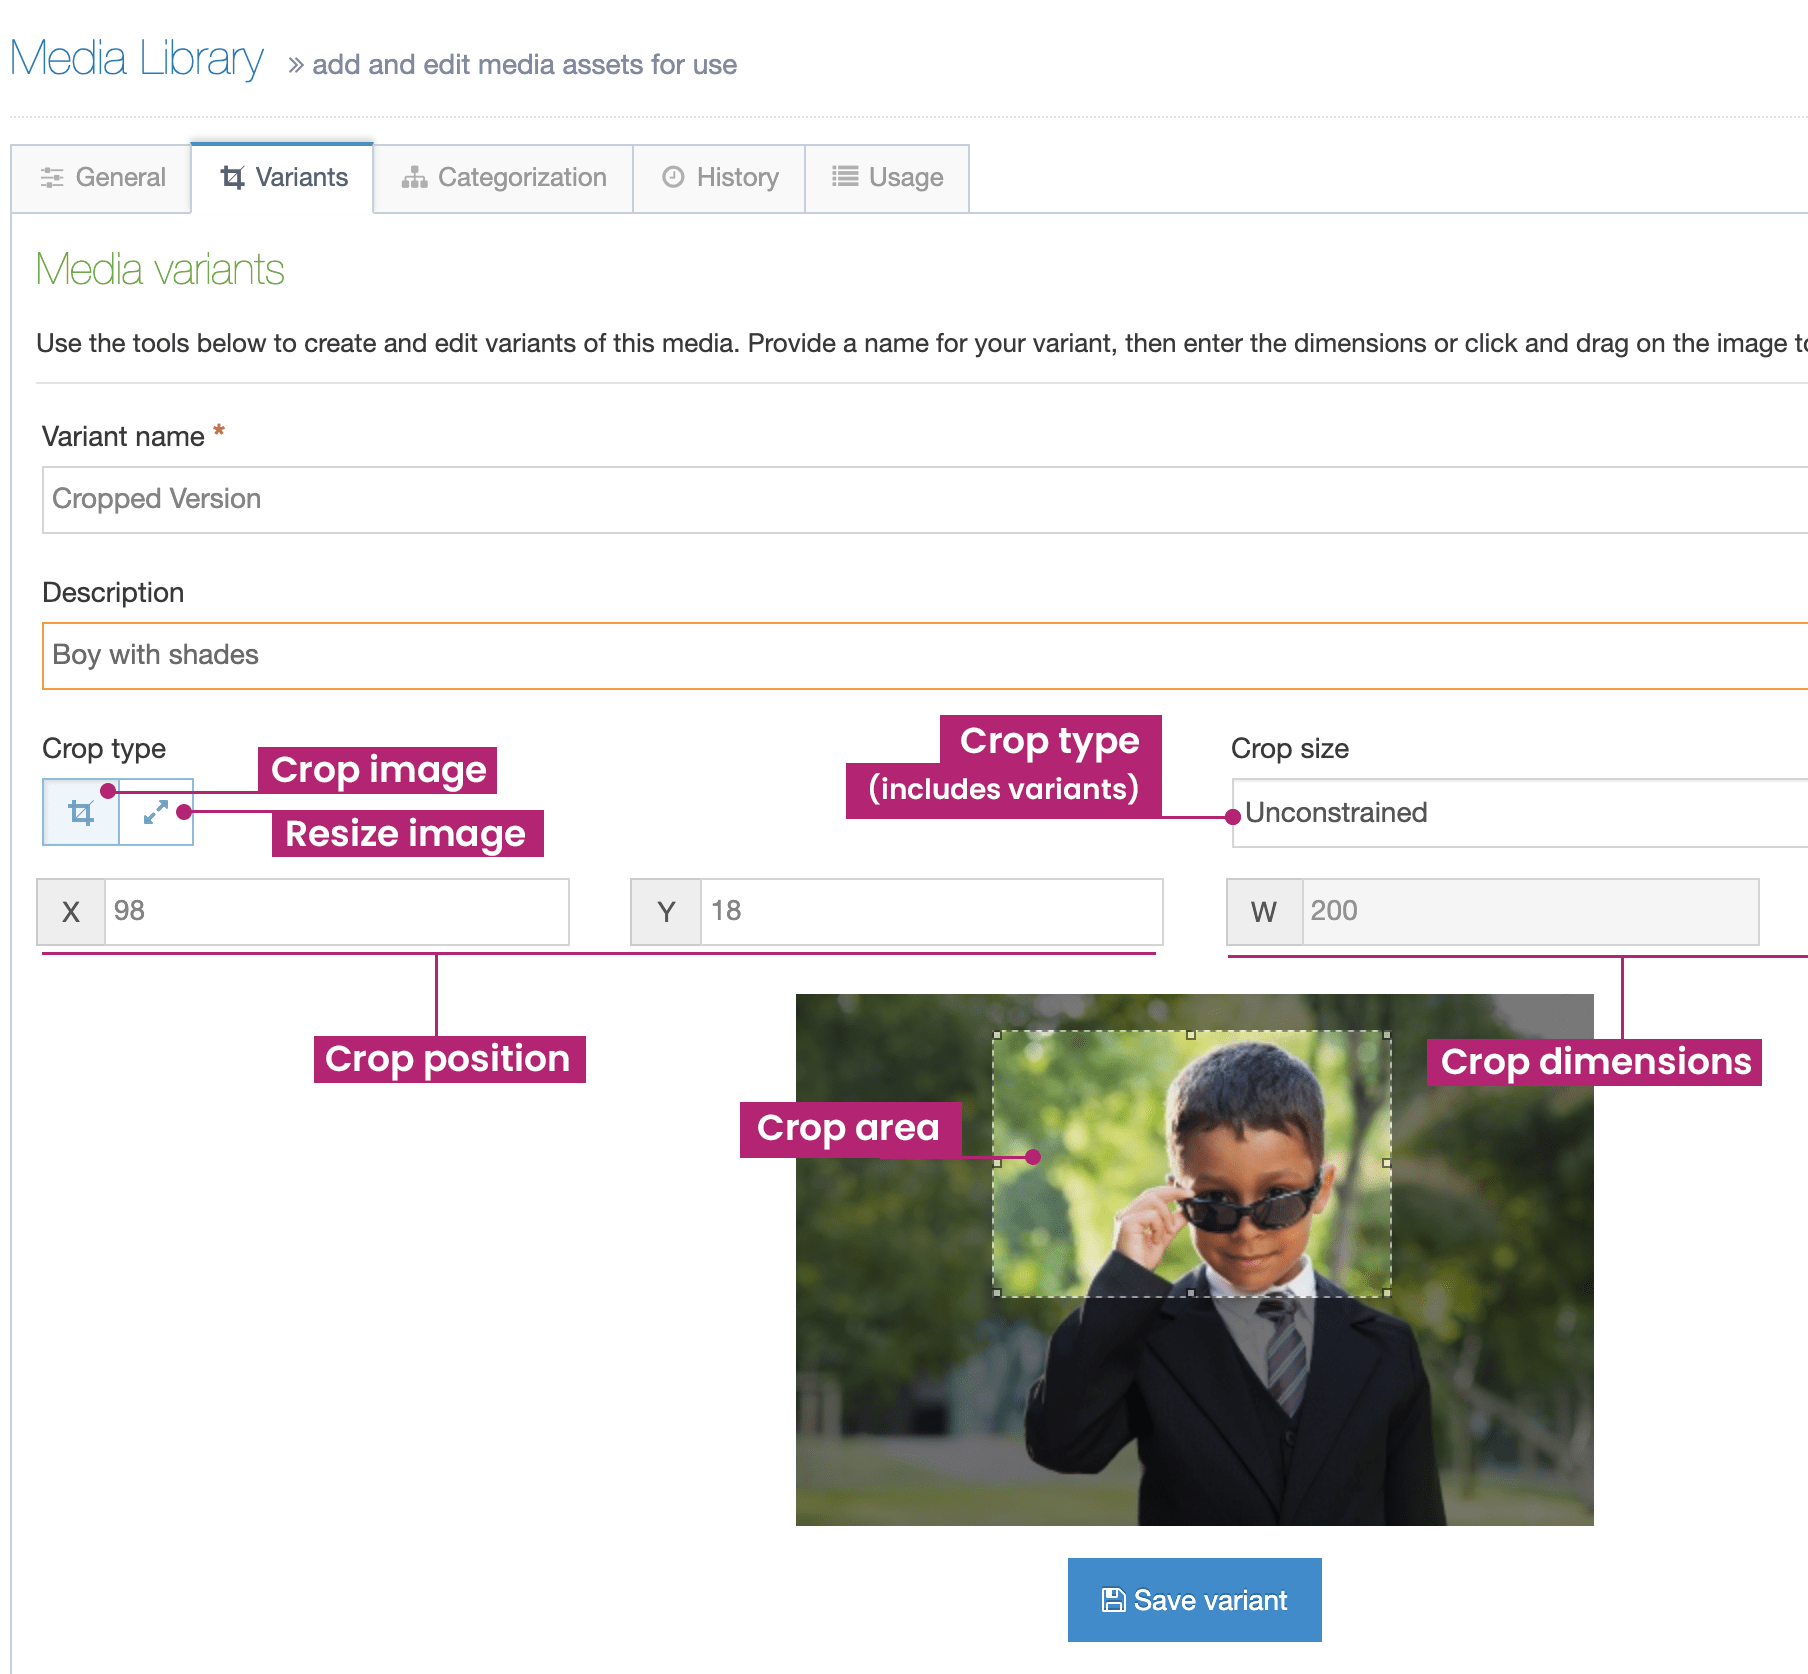
Crop Tool
This tool is similar to most image editing tools. The tool is activated when you click the Crop icon.
- Crop size: If specific image dimensions are required, select Exact dimensions, or one of the Predefined variant sizes; otherwise leave this as Unconstrained.
- X: Enter the starting X coordinate for the crop (or leave this blank to select it on the image).
- Y: Enter the starting X coordinate for the crop (or leave this blank to select it on the image).
- W and H: If Exact dimensions has been selected, enter the Width and Height in pixels. If the image is larger than the user's screen dimension they will see an alert informing them that the image has been scaled down.
Using your pointer, trace the boundaries of the cropped image you want to save. The portion of the image that remains dark is the portion that will be removed from the image.
Enter a Name and a Description and click Create variant to save the variant.
Resize
To resize the image, you have three options - see image below:

- Predefined variants: If specific image dimensions are required, select Exact dimensions, or one of the Predefined variant sizes.
- Maintain aspect ratio: Check this option to maintain the original aspect ratio when resizing the image. If checked, entering a value into the Width or Height will automatically calculate and populate the other value.
- W and H: Enter the width and height for resizing.
Enter a Name and a Description and click Create variant to save the variant.
Save variant
When you're satisfied with your crop/resize area and have added the name and optional description select the Save Variant below the image preview.
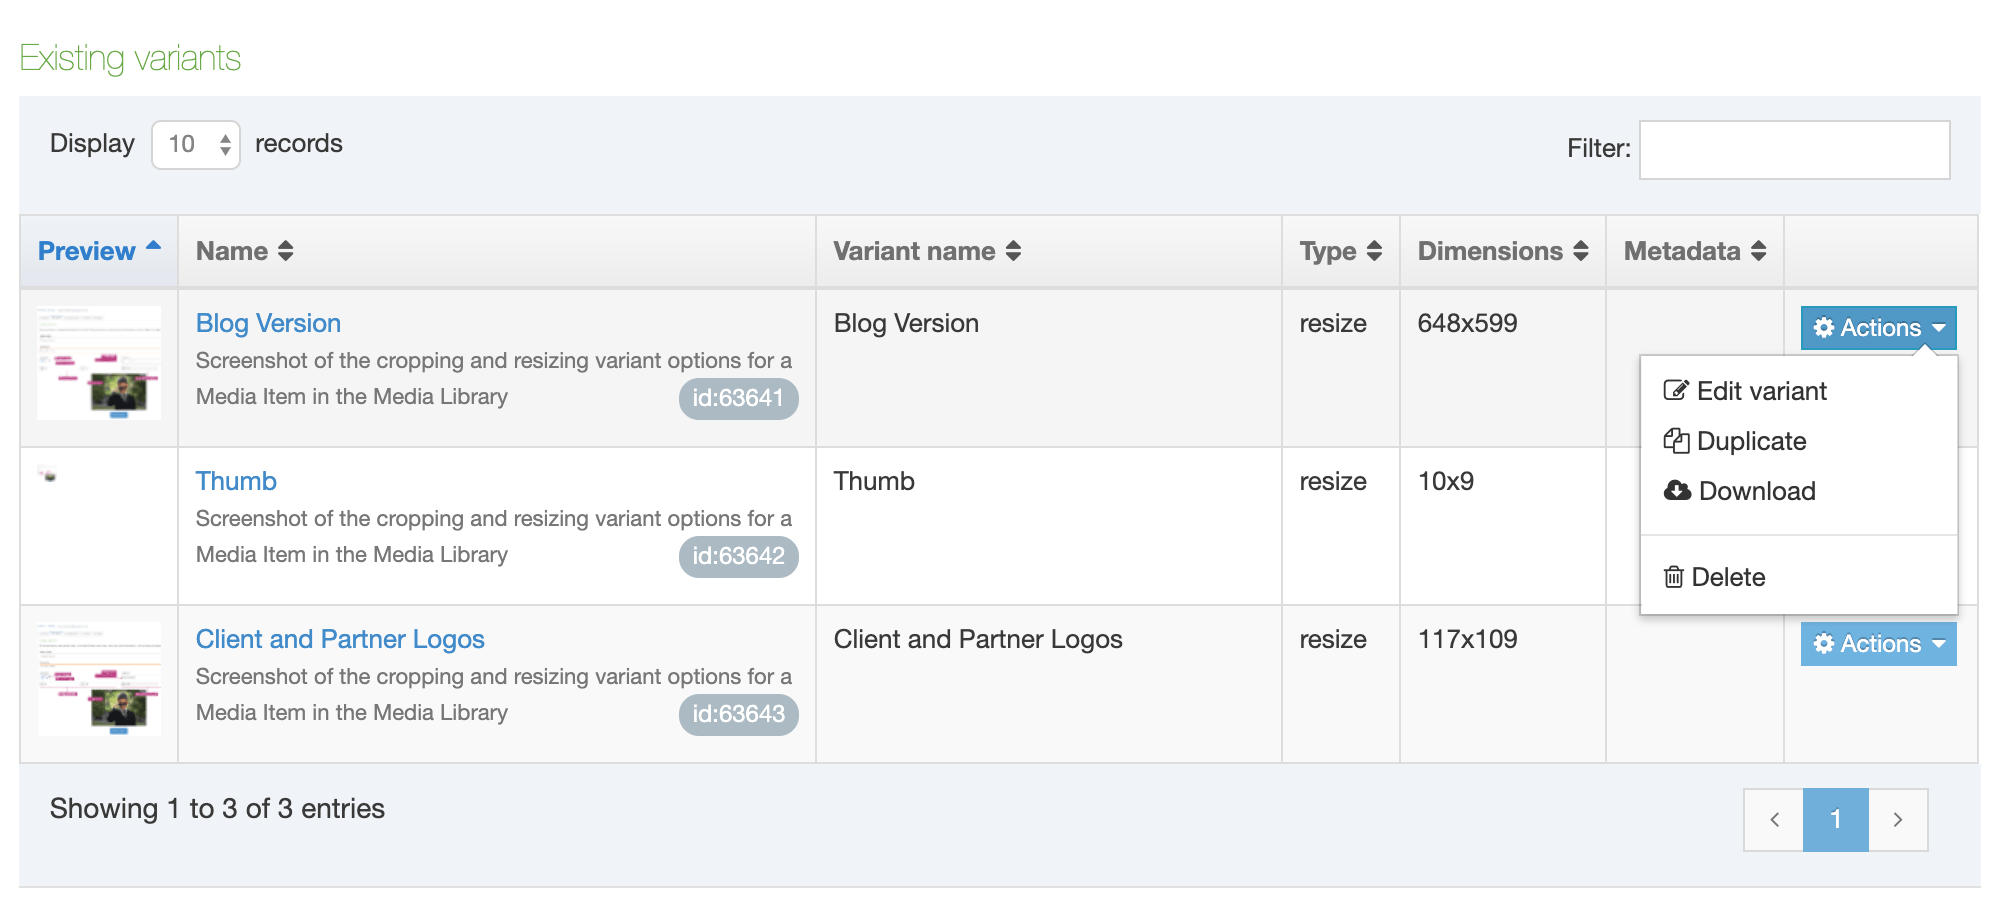
Existing variants
All Variants (resized or cropped) are added to the Existing Variants table. From the Actions menu, you can Edit, Duplicate, Download or Delete a Variant.
Categorization (and Move Media)
When Media is added to the Media Library, it is added to a Media Category. Similar to Mirrored content, media can exist in multiple categories. To move Media to a different category, or to mirror the Media to multiple categories, select Move on the Actions menu for the Media, which will bring you to the Categorization tab.

Expand the structure to reveal where the media is to be filed (the checkbox on the right is checked).
- To Move Media, uncheck the current category, and check the category into which it will move. If there are large volumes of Media items to move, use the Bulk actions to move multiple Media items at once.
- To Mirror Media, check the categories into which the Media will be Mirrored.
If satisfied with your choices, click Save changes.
History
To view the History on a Media Item, select Edit on the Actions menu for the Media and select the History tab. This displays each version of the Media, showing the Name, Version, Previous version, Last modified date and time, and the Last modified user.
Usage
To view where a Media Item is used, select Edit on the Actions menu for the Media and select the Usage tab. The information listed for the media is:
- Content name
- Asset type
- Variant
- Location
- Occurrences
This is useful in determining where a Media Item is used, and whether it can be deleted.
Download media
To Download an item from the Media Library, select an item, and from the Actions menu, select Download.
This action may open the file in your Operating System dialog box. See below from Windows:
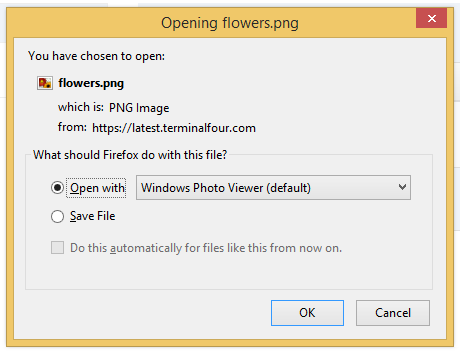
Open the file with an image viewer, or select Save file, and click OK. Save the download to a location of your choice.
Delete Media
You can Delete media from the Media Library. To do so, select the file you want to delete, click the Actions button, and select Delete. This action prompts a "Confirm delete" popup window (see below):
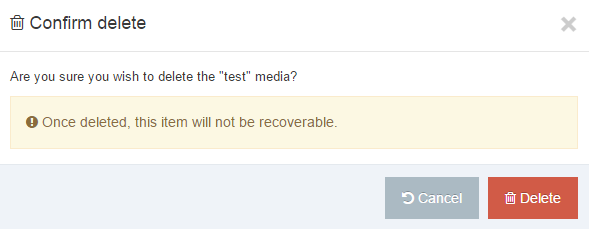
If you want to proceed, click Delete.
From version 8.3.10 the Confirm Delete modal will list the Content Items where the Media Item is present:
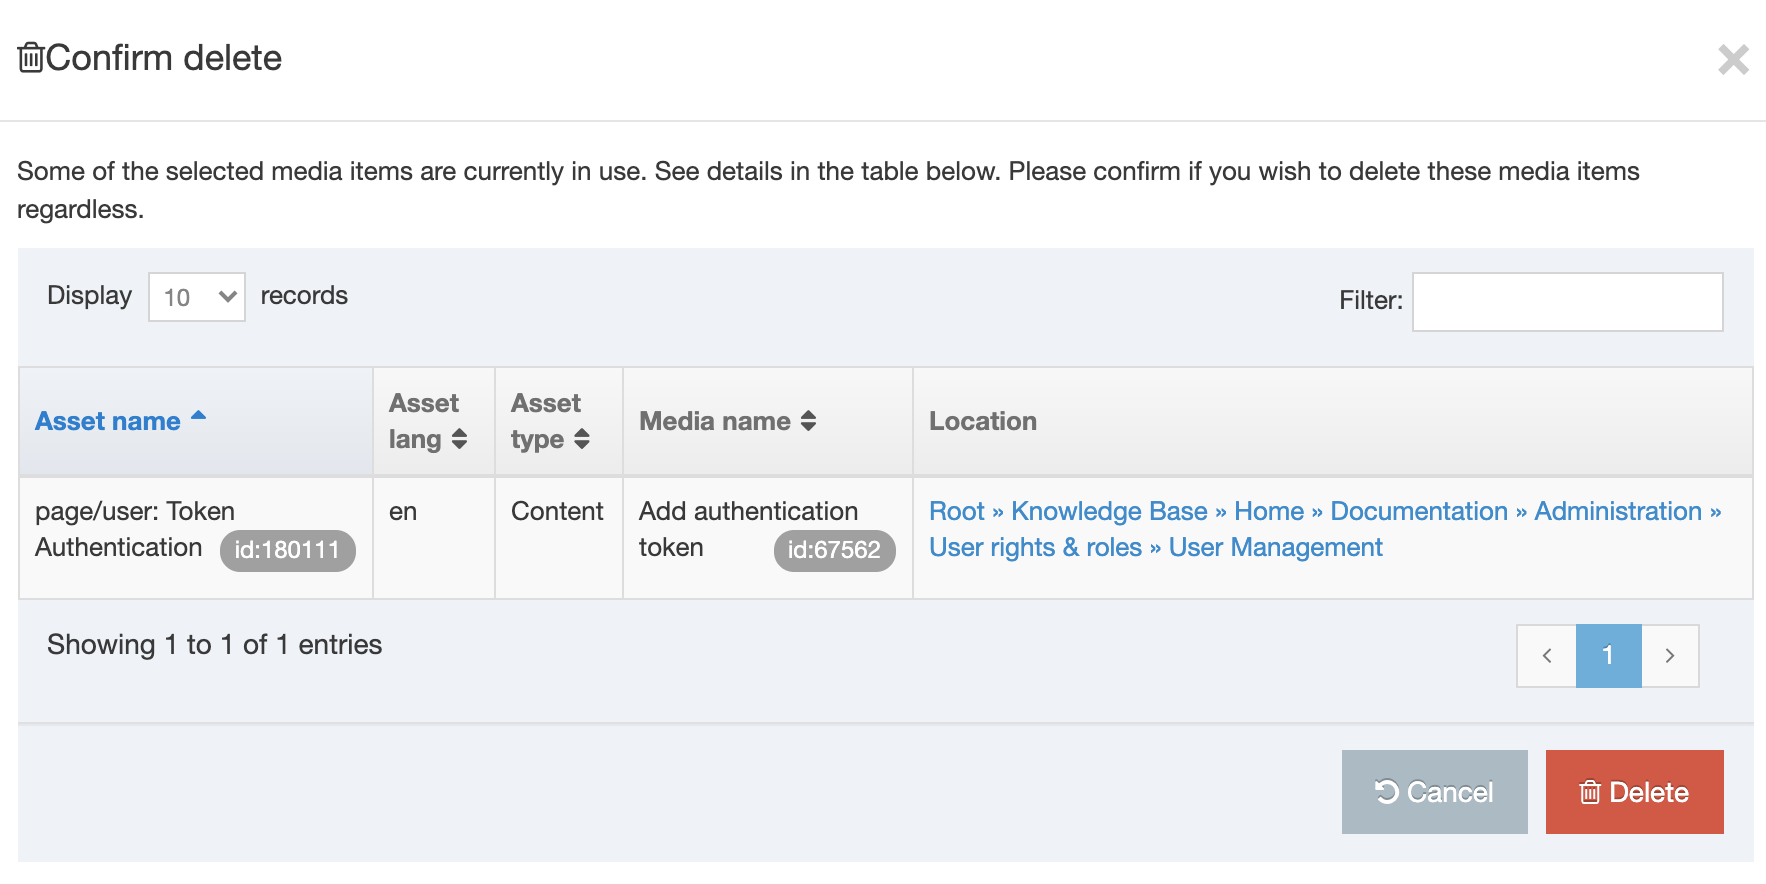 To visit the Content Item that the Media Item appears in select the path and it will open in a new tab.
Bulk deleting
If there is a large number of Media Items to delete, use the Bulk actions to delete multiple Media Items at once.
Alternatively, when you have any of the Media Items open, you can choose to delete from any of the four tabs. If you choose to delete the media from any of these pages, click the red Delete button, and again a "Confirm delete" popup window appears. To proceed, click Delete, and the media is removed from the library.
Once Media is deleted, it is sent to the Recycle Bin where it can be purged or recovered. If the Media Item is used in a Content Item, it will be removed from the Content Item.
Bulk Actions
When you want to Move or Delete more than one media file, you can use Bulk actions button. To Move or Delete, you need to select the appropriate media files. Do this by checking the boxes in the far right column of the table. When you select two or more files, the Bulk actions button has the option to:
- Move: move the selected Media by selecting the destination category
- Delete: delete the selected Media