
Direct Edit
Description
For content editors, whose focus is solely on adding and changing content, Direct Edit offers an even easier way to edit content by editing it directly within a page preview. This offers a more intuitive content editing experience since changes appear exactly as they will look on the published site.
Direct Edit Tour
From version 8.3.3, a user will be given a brief tour of Direct Edit the first time it's launched. Once dismissed with the Skip button it will not be displayed again until the help button at the bottom of the sidebar is selected.

Who Can Use Direct Edit?
Your Administrator assigns rights to Direct Edit. Depending on your assigned User Level, you can have access to Direct Edit. Normally, the Contributor User Level is restricted to Add/Edit/Delete content.
You can only access Direct Edit if it has been enabled by your Administrator. If you are not able to access, contact your Administrator.
Link Sections do not have a Direct Edit option.
Access Direct Edit
You can open a Section in Direct Edit from the Site Structure or the Section screen.
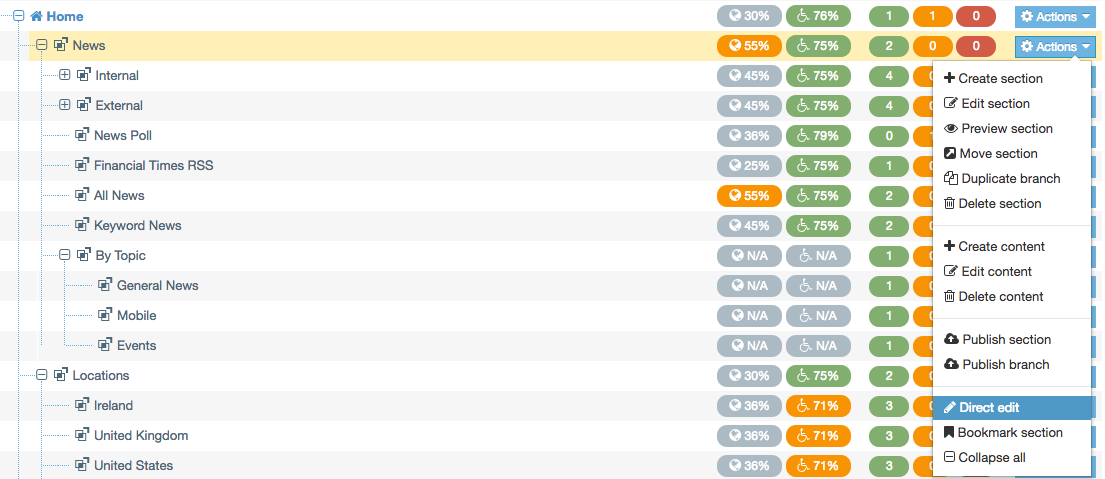
To open from the Site Structure, select the Action button from the Section you want to edit, expand the Section Action Menu and select Direct Edit:
You can also click on the Direct Edit button from the Content tab of the Section screen:

If more than one Channel is associated with the Section in Channel Configuration, you will be asked to select the Channel to use Direct Edit.
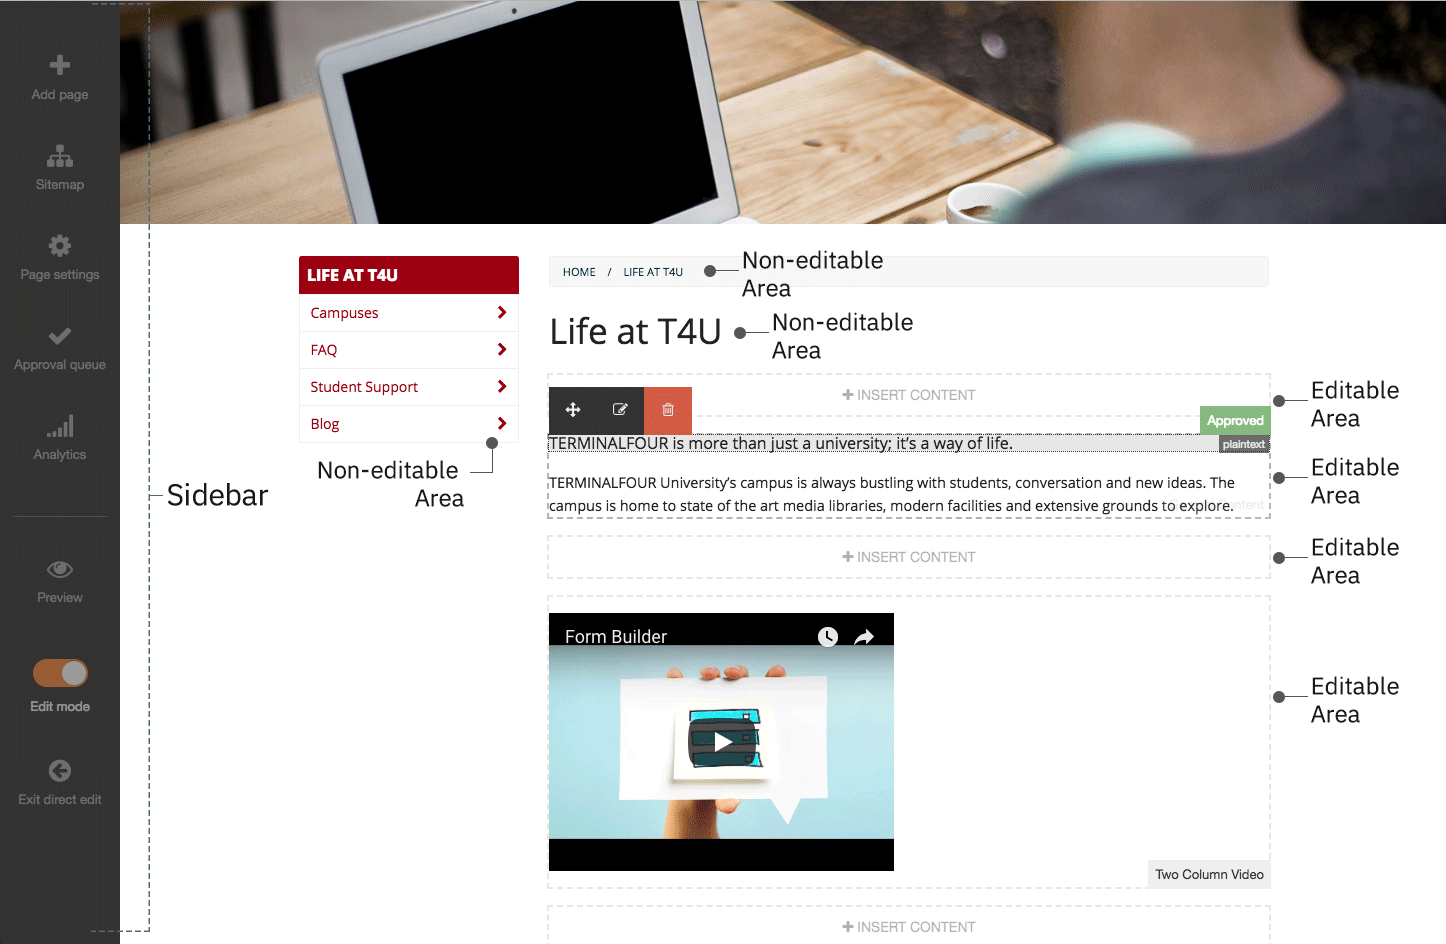
The Direct Edit screen is made up of two areas:
- the Sidebar which contains page options
- the Direct Edit area which shows a preview of the page with editable (highlighted with a dashed line) and non-editable areas
Though areas highlighted as non-editable cannot be edited within the Direct Edit area, some, like the Page Name, can be edited from the Sidebar. Others, such as navigation elements generated by Navigation Objects, can only be edited from the TERMINALFOUR main interface.
You might notice that within the Direct Edit settings, there are plenty of mentions of "pages" instead of "Sections". This is intentional. Sections let you Preview and Publish to a variety of Channels using different Page and Content Layouts across multiple sites.
When we are using Direct Edit we are editing a page previewed through a specific Channel using particular Layouts. We are also limited to the site that the current page is located in, so we are unable to move a page across sites.
Similarly, you cannot create Link Sections, Hidden Sections, or other features in Direct Edit.
Add Page
To add a new child page or Section below the page currently being edited in Direct Edit select Add page and provide a name. Direct Edit will reload with the new page ready to edit.

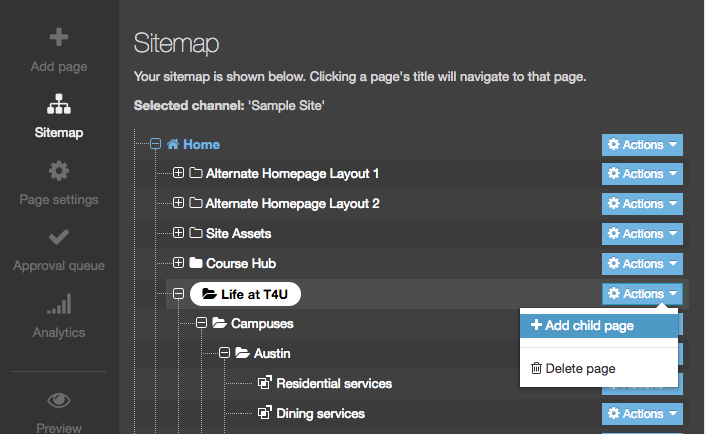
Sitemap
The Sitemap option will display the Site Structure of the current site only. From this, you can navigate to other pages or, using the Actions menu, add a child page or delete a page.
Link Sections cannot be edited in Direct Edit.
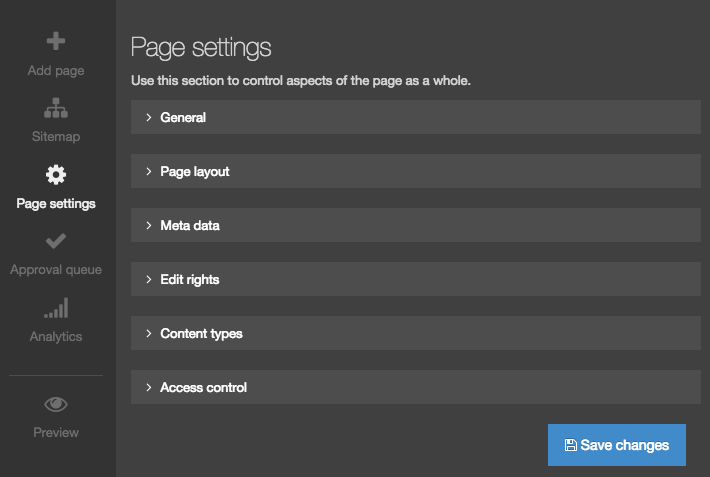
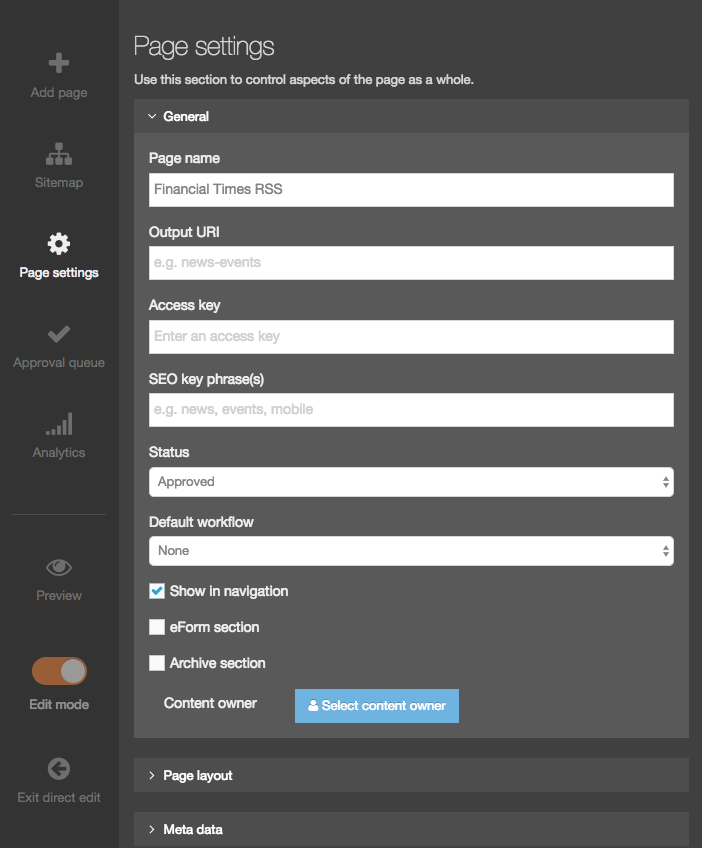
Page Settings
With Page Settings, you can configure the page options. The settings are grouped in categories. Select the category name or the arrow to the left of the category name to expand it. For further information on these options, refer to the documentation about Creating Sections.
General
The information shown in this page reflect the latest settings for this page.
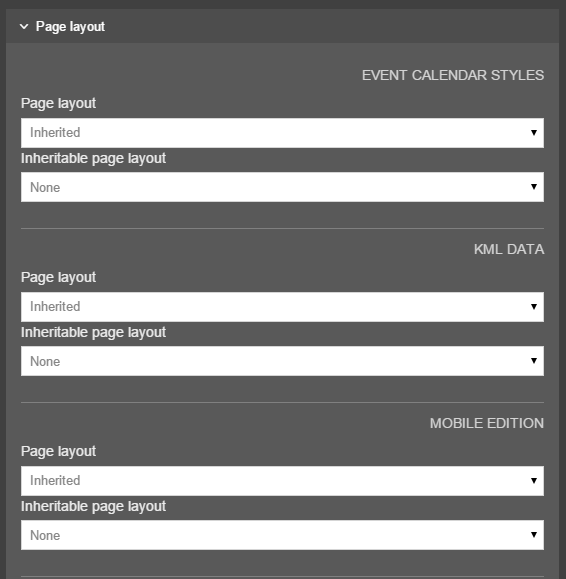
Page Layout
You can change the Page Layout and the Inheritable Page Layout for multiple Channels here. The Channel names are on the right in caps.
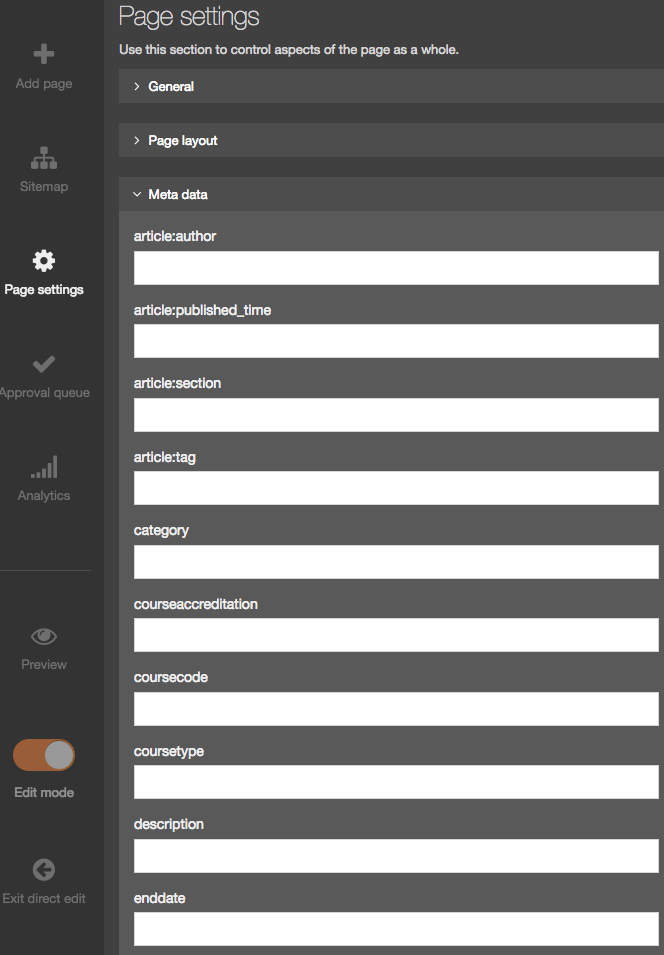
Metadata
You can edit the page's metadata values here. The metadata properties listed here can be configured in the Metadata settings.
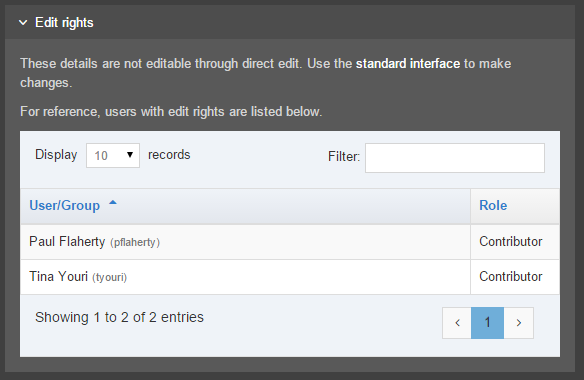
Edit Rights
This tab lets you see what the page Edit rights are for your Users or Groups.
This tab is read-only, you must use the standard interface to make changes.
| Item | Description |
|---|---|
| User/group | the Users or Groups that have editing rights to this page. |
| Role | the Access Role of the corresponding User/Group. |
Content Types
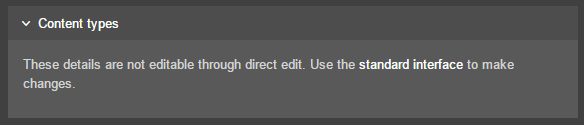
You cannot edit from this tab, you must use the standard interface to make changes to the Content Types on this page.
Access Control
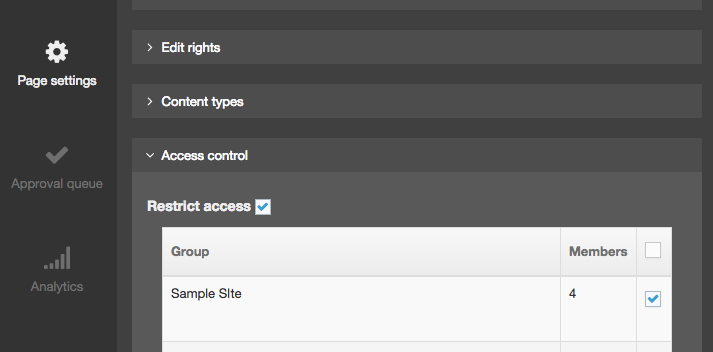
If you want to restrict access to this page, check the Restrict Access box, and then choose the Group(s) you want to provide access to. Being restricted means the users indicated can only view this content when they log in.
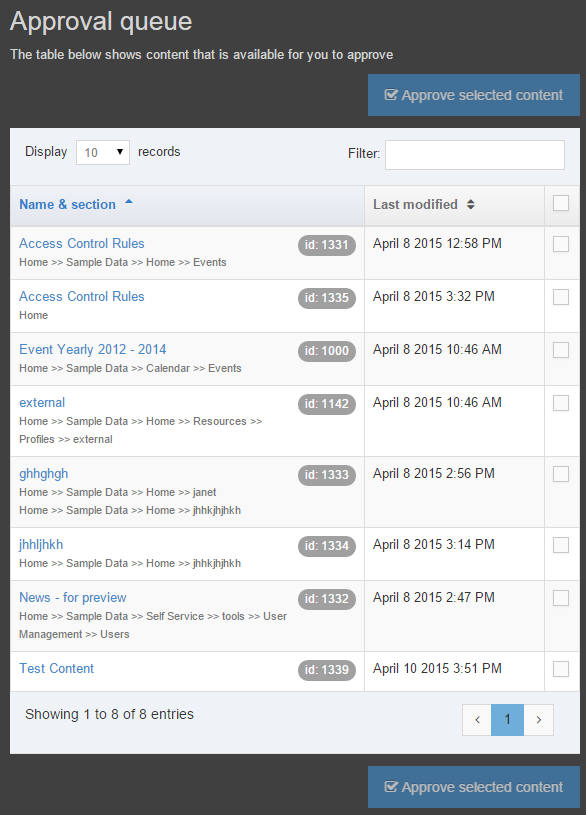
Approval Queue
This displays a list of content items which are currently pending approval. Approval requires an Administrator, or if assigned the rights, a Power User or Moderator. Each item in the queue shows the following information:
| Item | Description |
|---|---|
| Title | The name of the Content Item. Clicking on the Title will display the Content Options modal. |
| Last Modified | The date and time when the content was last modified |
| ID | The unique content ID number |
Analytics
Direct Edit provides content editors with insights from Google Analytics so they can see how well a page's content has performed over time. To see analytics in Direct Edit, you will need to ensure that the following is in place:
- In Administration > Settings > Analytics
- set up a Google Analytics in Analytics Accounts
- create a Dashboard
- assign the Channel that your page will be published with to the Dashboard
- add a Report to the Dashboard
- the page's Page Layout should include the Google Analytics tracking snippet
When Analytics is successfully set up, it will be available in Direct Edit:
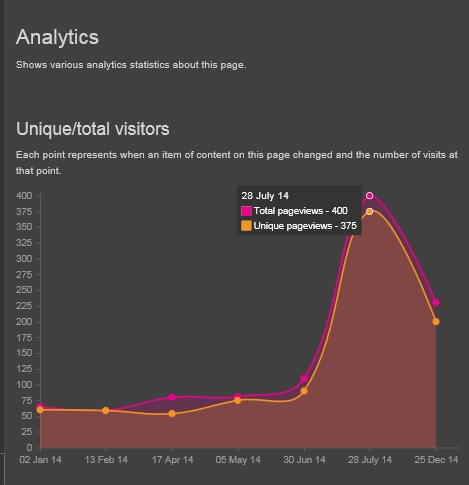
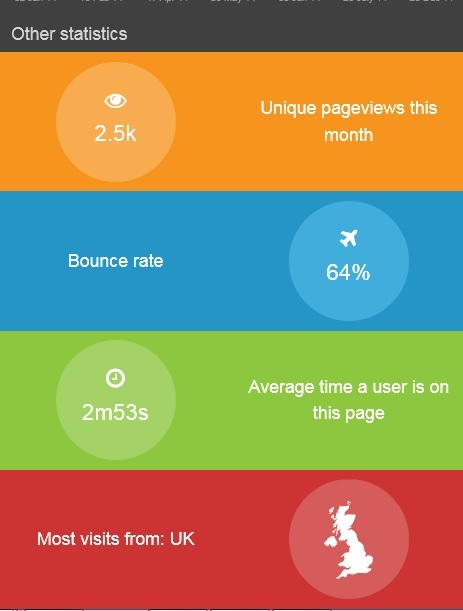
When Analytics in Direct Edit is working correctly, the following page statistics are displayed:
- Unique/total visitors
- a unique visitor is an individual that visits the site once a day for three days out of a week. This is recorded as three visits by one visitor. Recorded time periods can be a day, week, month or year. Each point on the graph shows indicates the date of a content change. With this, you can see the effect that content changes have on site visits
- Unique page views this month
- with unique page views, you eliminate the factor of multiple views of the same page within a single session. If a user views the same page more than once in a session, this will only count as a single unique page view. For this reason, unique views can be understood as user sessions per page, with each session potentially representing multiple views of the page but a minimum of one view per session.
- Bounce rate
- Bounce rate is a measure of the effectiveness of a website in encouraging visitors to continue with their visit. If the visitor only visits one page and then leaves without viewing another page on the site - this is a "bounce". It is expressed as a percentage and represents the proportion of visits that end on the first page of the website that the visitor sees.
- Average time a user is on this page
- to calculate time on page, Google Analytics subtracts the difference between the timestamps for two pages. For example, if a visitor visits Page A at 10:00 a.m. and then Page B at 10:05 a.m., the time on page for Page A will be 5 minutes. To get an average time on page for a specific page, the total time spent on a page for the selected date range is divided by the number of unique visits to that page. The value is shown in minutes.
- Most visits from
- this is a geographical reference as to the location where most site visitors originate.
Edit Content
Those parts of the page that are editable are identified with a surrounding dashed line. Editable areas are Content Items that use a Content Type with Direct Edit enabled. Page Layout and Navigation Object Content Items are not editable in Direct Edit and can only be edited within the main interface.
The empty content areas on a page are labeled with Insert Content text. Editable areas of the page are highlighted when the cursor hovers over them. Here, we can see the cursor highlighting an editable empty content area, plain text and HTML areas of the page.
We can also see if the approval status of the content area on the right-hand side.
Both Plain Text and HTML can be edited in place using Direct Edit. When editing HTML content formatting, links and Media Items using the HTML editor.
To add an image or a link to a file in the Media Library, like a PDF, just go to Insert > File link or image or select the photo icon in the icon row.
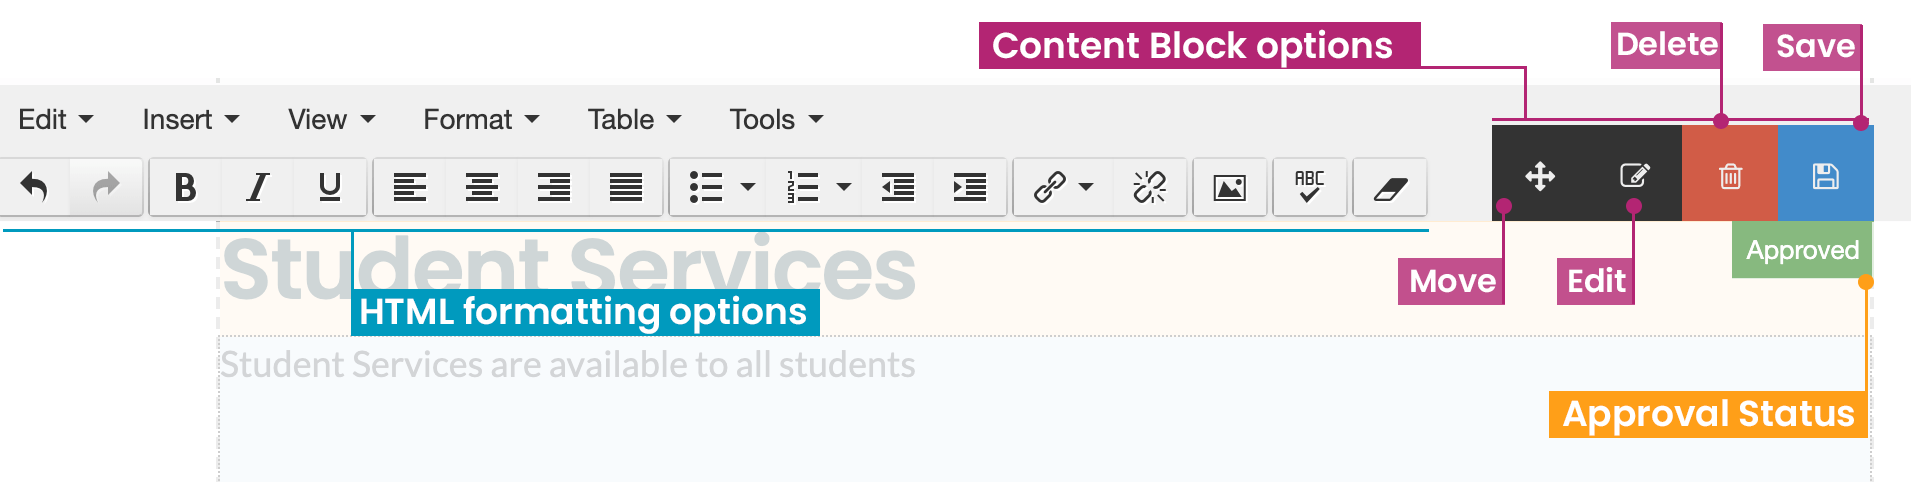 Content Item Options
| Name | Description |
|---|---|
| Move | Select and hold to drag the Content Item to another position on the page. |
| Edit | Opens a modal window with advanced content editing options that are not accessible from the Direct Edit area alone. |
| Delete |
Users with appropriate permissions can delete the current Content Item. Deleted content is flagged as Inactive and can be retrieved or permanently purged from Recycle Content. A modal window will be displayed to confirm the deletion. When deleting a Mirrored Content Item a confirmation modal window will appear. |
| Save | The Save button will display when the Content Item has been edited. When selected, edits to the current Content Item are saved. |
Preview
Selecting the Preview option from the side menu allows the user to Preview the page outside of the Direct Edit interface. This will give a clearer representation of how the page will look once published.
Edit Mode Toggle
Selecting the Edit Mode toggle from the side menu allows the user to disable the editing mode in order to get a more accurate view of how the content will look once published, and to click links within the content (with Edit mode enabled, it is not possible to click links within content).
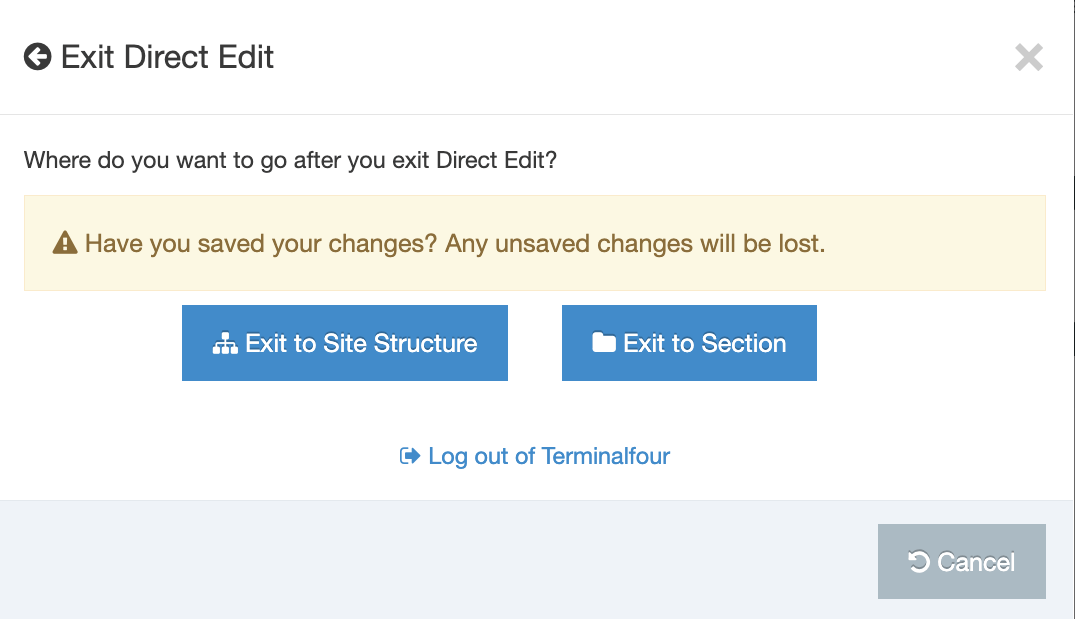
Exit Direct Edit
To exit Direct Edit select Exit direct edit from the side menu. This provides a modal that allows the user to either Log out of Terminalfour, or switch to the standard interface:
Edit content
Description
Editing Content is just as easy as creating it in the first place. You can start from the Menubar on the left or from the Section Action Menu in the Site Structure.
You can choose to create content from the Content menu item in the Menu or select a Section from the Site Structure and create content from there.
Edit content from the menu
Go to Content > Edit Content:

You will then be asked to select the Section that contains the Content you want to edit:
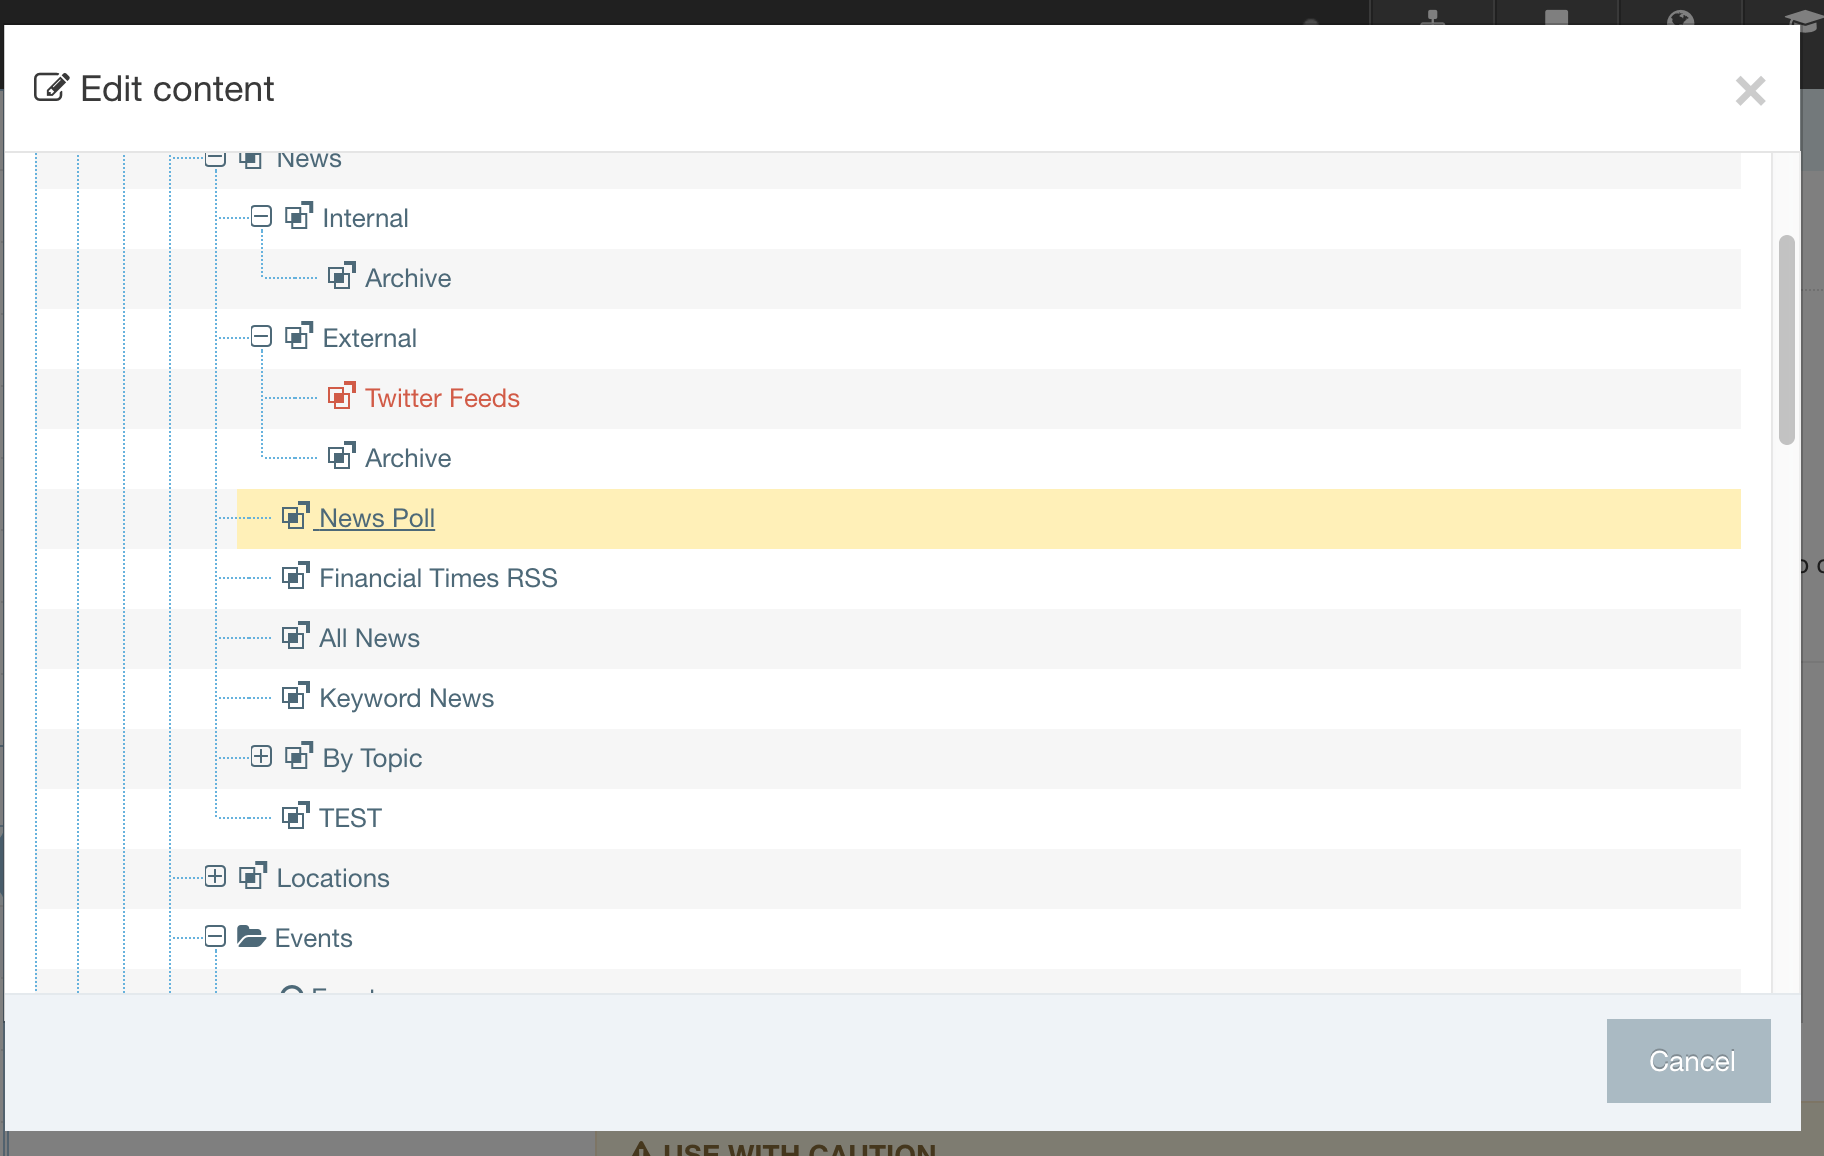
Once the Section has been selected, you can then select the Content Item that you want to edit:

Edit Content from Site Structure
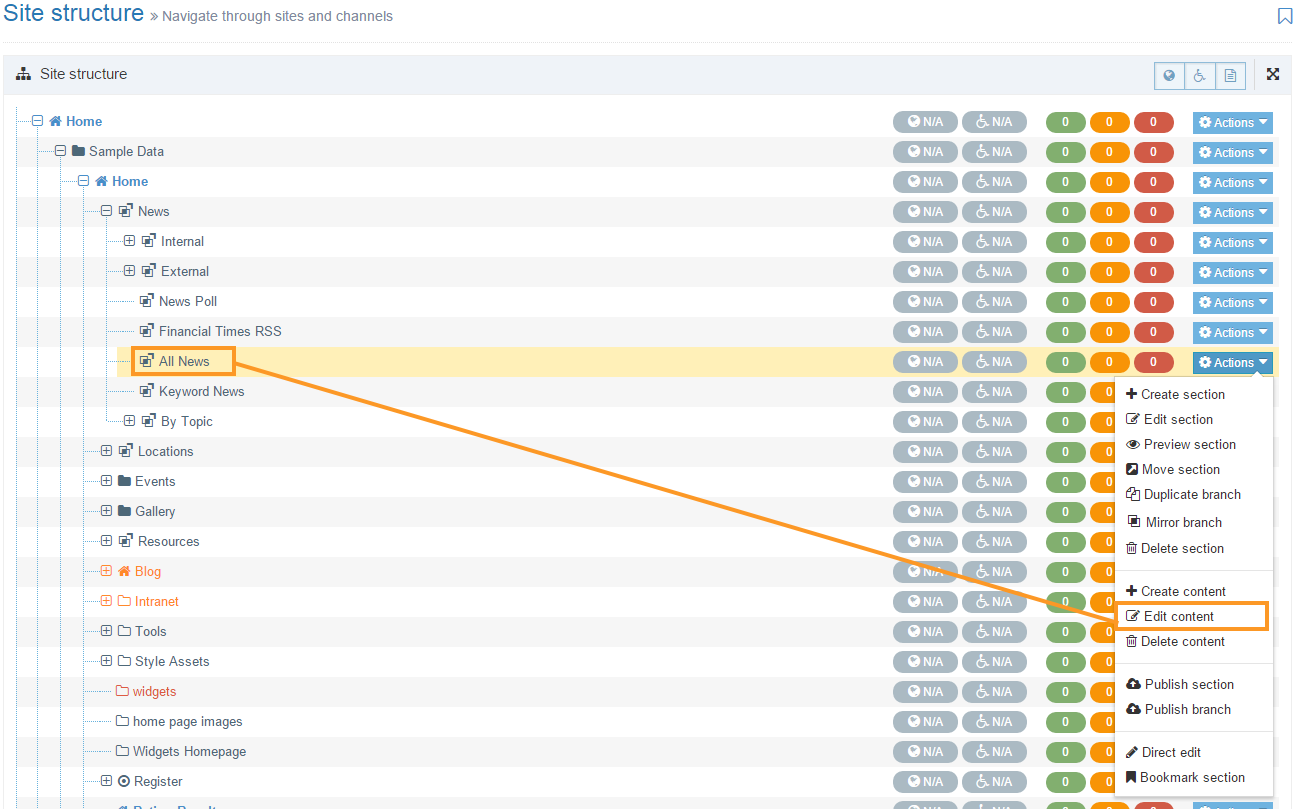
In the Site Structure, select the Section with the content you want to edit. From the Section Action Menu select Edit Content:
This will open the Content tab in the selected Section screen. From here you can choose the Content Item you intend to edit:
The buttons at the top and bottom of the Content Table are:
| Item | Description |
|---|---|
| Above Content Table | |
| Preview | Preview the Content Items in the Section |
| Undo last action | Undo the last re-ordering action |
| Undo all actions | Undo all content re-ordering actions |
| Bulk actions |
This is a drop-down menu of options which can be applied only if multiple Content Items are selected. These options are:
|
| Create Content | Create a content item. When you select this, you will be asked to choose a Content Type to add the content to. See this article on creating Content for more detail on this. |
| Below Content Table | |
| Delete | Delete the current Section |
| Cancel | Return to Site Structure without saving changes. Changes to ordering are saved as they are made. |
| Save Changes | Save changes and return to Site Structure. |
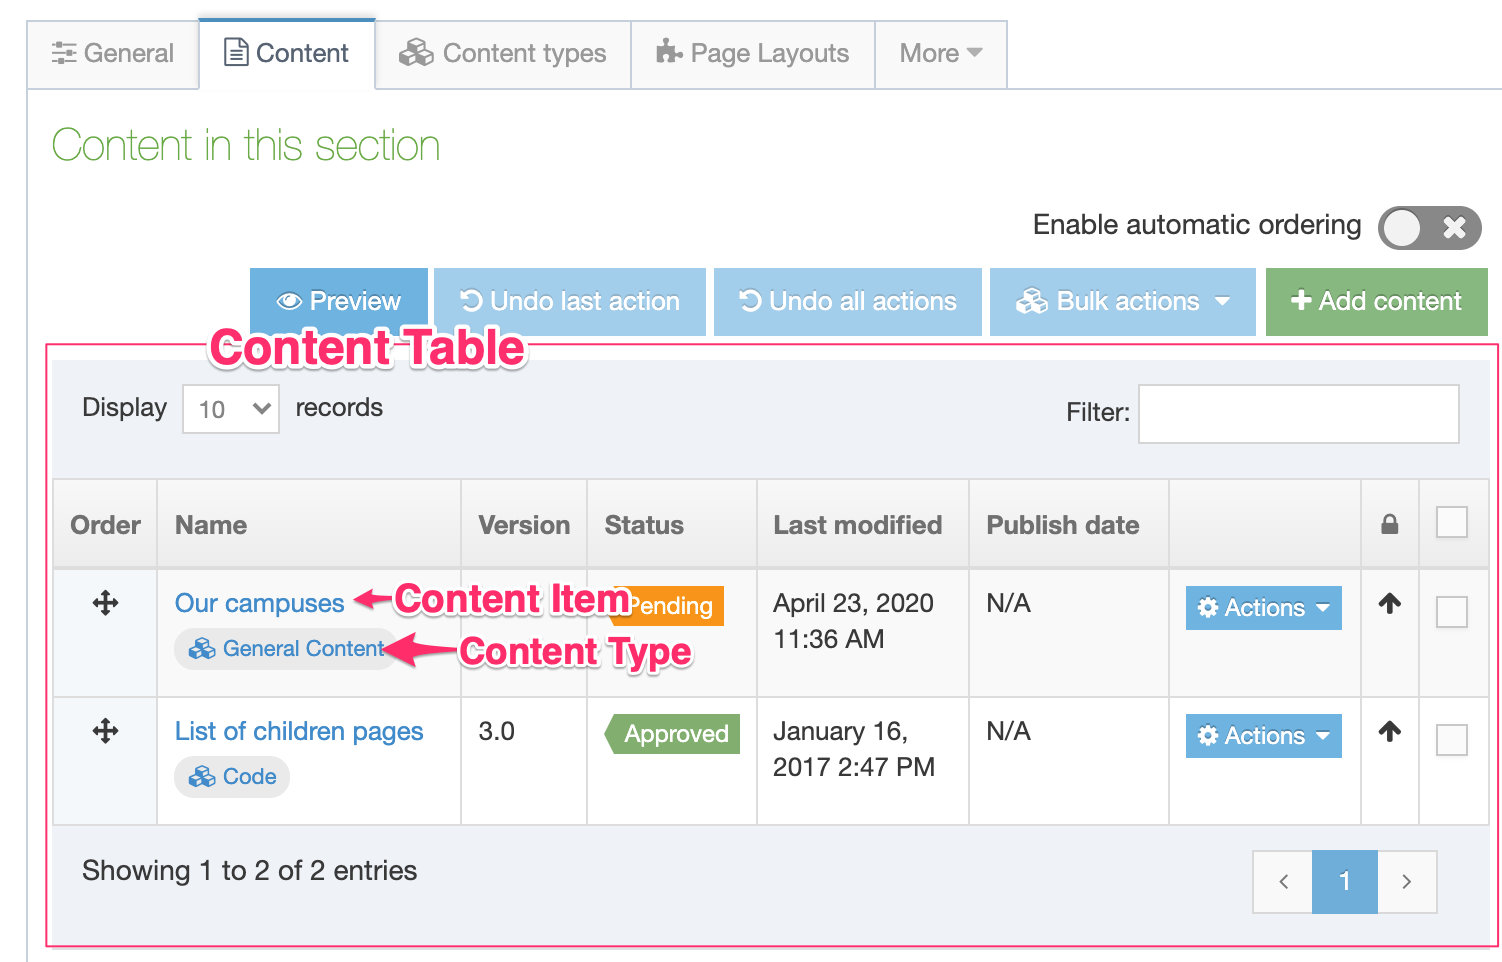
Content Table
The Content Table features the following column names:
| Item | Description |
|---|---|
| Order | Dragging the cross icon will change the order of a Content Item. This icon is not displayed for content that is automatically ordered, except for content that is locked to the top or bottom. |
| Name | The name of the Content Item |
| Version | The version number of the Content Item. Each time you make and save an edit to a Content Item a version is created. This allows you to view and compare older versions of Content Items. |
| Status |
|
| Last modified | The date on which the Content Item was last modified. |
| Publish date | If a publish date is set for the Content Item it is displayed. |
| Lock status | Locks a Content Item's order, preventing it from being reordered. The position of each Content Item in the ordering is either locked or unlocked, determined by whether or not Automatic Ordering is enabled for the Section. |
To edit a Content Item select the name or select the Actions Menu and choose Edit.
Other options on the Actions list are covered below.
Depending on the User Level of the editor, changes made to existing content might require approval before publishing on the live site. When published the changes appear on the live site.