Using CDN/PXL
Description
CDN/PXL offers a way to distribute media and files globally. With PXL functionality you can edit images on the fly to improve image performance on your site.
How do I use CDN/PXL on my site?
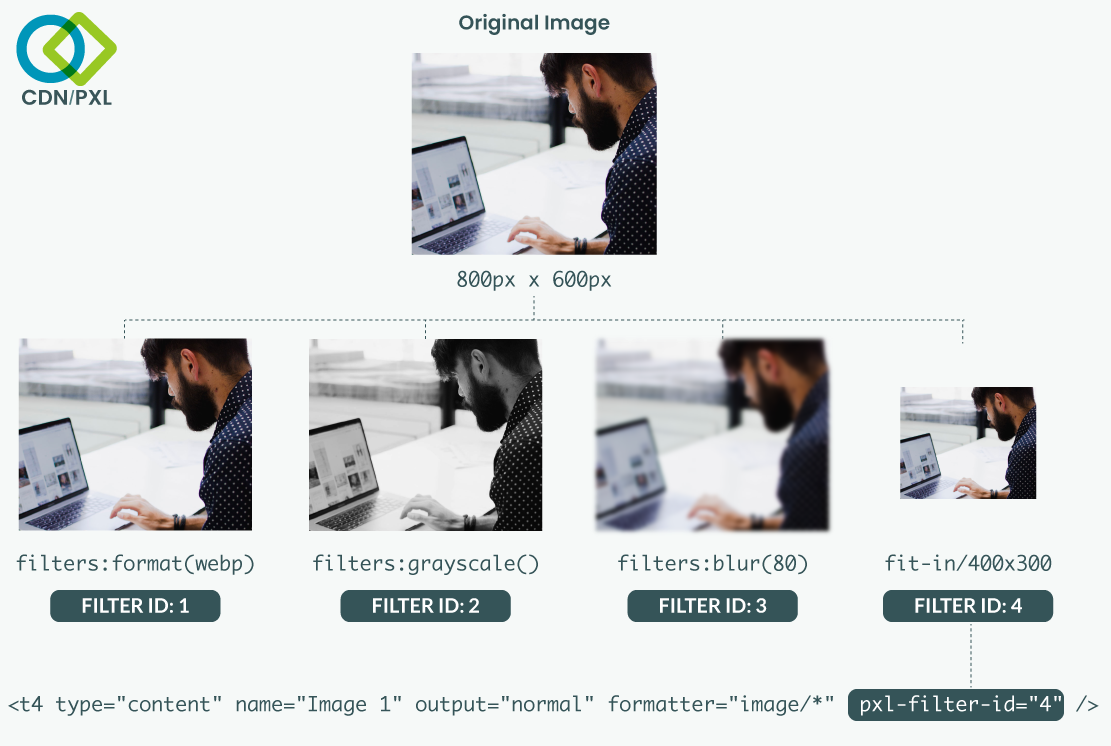
If you have CDN/PXL enabled on your site you add either of the following attributes to a T4 Tag in a Content Layout, Media Layout or Media Element :
|
Attribute |
Example |
Notes |
|
cdn="<BOOLEAN_VALUE>" |
cdn="true" |
Files are published to the CDN when the attribute’s value is “true”. A "false" or other value will publish the files to the Channel’s output directory which is the default behavior. |
|
pxl-filter-id="<PXL_FILTER_ID>" |
pxl-filter-id="1" |
Only valid PXL filter IDs are applied to an image and published to PXL. If the PXL filter ID doesn’t exist, the file will be published locally as normal. |
The supported file types are listed on this page.
When adding a PXL filter attribute the CDN attribute is not required. The T4 Tag builder can add both, but the CDN attribute is ignored if the pxl-filter-id attribute is set.
Configuration
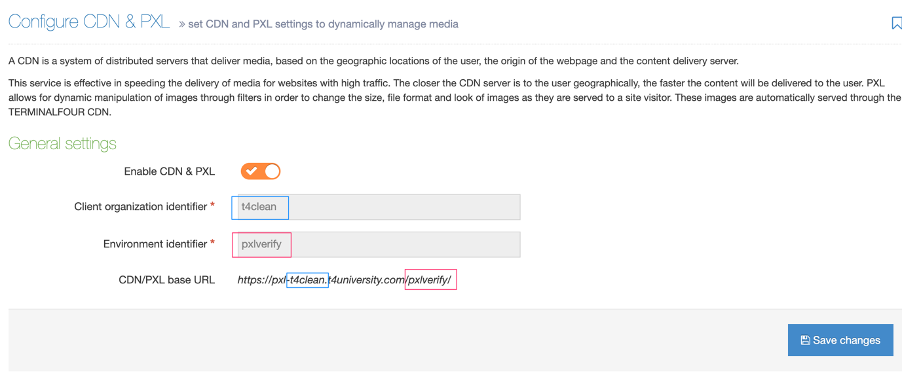
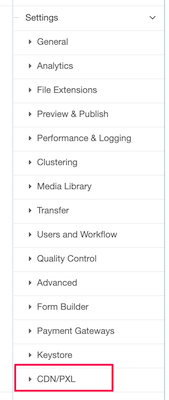
Your Terminalfour instance must be hosted with AWS to use CDN/PXL. To enable the feature go to Settings > CDN/PXL:
The Client Services team will configure CDN/PXL with a unique Client organization and Environment identifier. A folder must also be configured for CDN/PXL in the Channel settings for the site.
These identifiers form the base URL that’s used to serve up your images
Creating Filters
A Filter is a defined preset to make image manipulations on the fly, so you don’t have to create multiple copies of the same image. A single image can be output in multiple sizes, formats and have effects applied to it.
In this example, we’ll create a Filter to create a grayscale version of the image. The original image, in the Media Library, won’t be altered.
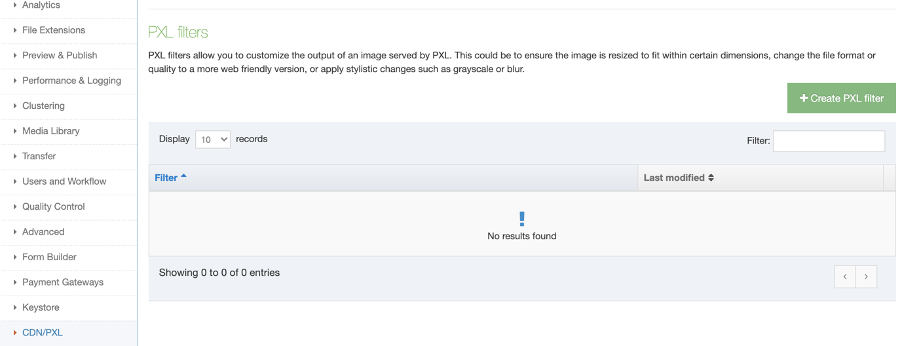
To create a Filter, go to Settings>CDN/PXL and ensure that CDN/PXL is enabled.
Select “Create PXL filter”:
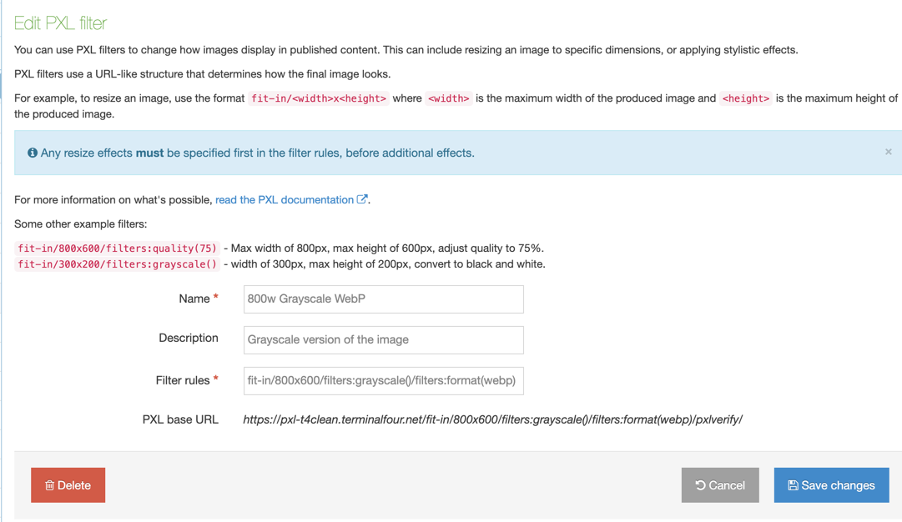
In the Edit PXL Filter screen give the PXL Filter a name and optional description:
You must also add filter rules. In this example, I’ve added the grayscale filter.
Filter rules
Filter rules follow a format:
filters:filtername(value)
The only one that is different is the resizing filter which follows this convention:
fit-in/wxh
|
Filter Name |
Filter Syntax |
Notes |
|
Blur |
/filters:blur(7) |
Adds a Gaussian Blur to an image. The blur value ranges from 0 to 150. |
|
Grayscale |
/filters:grayscale()/ |
Changes a color image to grayscale. No values are required. |
|
Image format |
/filters:format(image_format) |
Specifies the output format of the image. Values can be jpeg, png, gif, or webp. |
|
Quality |
/filters:quality(0-100) |
Determines the amount of compression that’s applied to a JPEG. Is not applied to other file formats. Value ranges from 0 (none) to 100 (maximum) |
|
Resize |
/fit-in/800x600 |
Resizes the image to fit within an area of specified dimensions without cropping. If the width and height ratio of the original image is different from the ratio provided by the fit-in dimensions then the smallest value is used to determine the other value. E.g., if the original image is 800 x 600 and fit-in value of 300 x 200 is provided, the resulting image would be resized to 267 x 200.
Width and height values are in pixels only.
|
|
RGB |
/filters:rgb(20,-20,40) |
Changes the amount of color in the Red, Green, Blue (RGB) color channels.
Each color channel value ranges from -100 to 100. |
|
Rotate |
/filters:rotate(90) |
Rotate the image to a given angle value.. |
| Crop |
fit-in/750x950xmiddle/filters:quality(95)/CROP |
After the height add a value to tell PXL where to start the crop of the image from: top/middle/bottom, here we are using middle and add the CROP placeholder at the end of the filter. For more information see our page on CDN/PXL Cropping. |
To add more than one filter just prepend each filter name and value with the filters keyword, e.g.:
fit-in/800x600/filters:grayscale()/filters:format(webp)
This will create an instance of the image that:
- fits into area that’s 800px wide and 600px wide
- is grayscale
- will output as WebP
All saved PXL Filters are listed in the PXL Filters table. Each Filter has a unique ID to identify it:
Using a PXL Filter
Now that we have a Filter created let’s apply it to an image from the Media Library.
In a Section I’ve added a Content Item from a basic Content Type that contains just one image from the Media Library:
To compare the images I’ve added placeholders for the original image and the PXL image in the Content Layout. To add the image, select Generate T4 Tag:
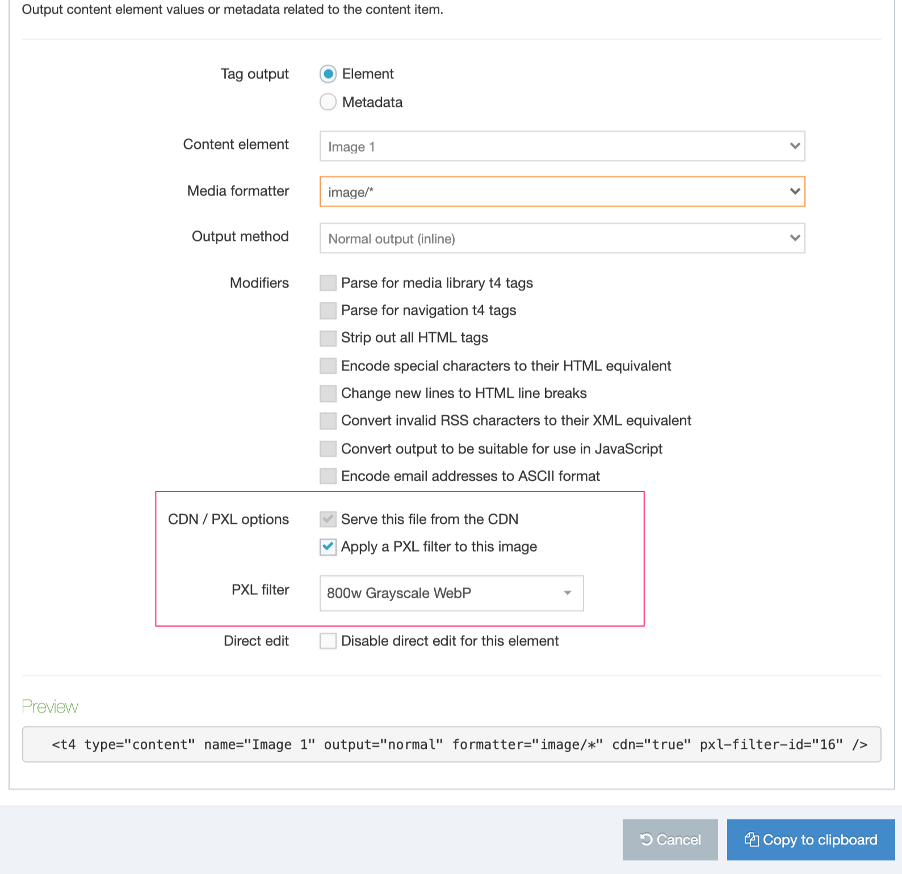
When a Media, File, or Image Element is selected from the Content Element dropdown, The CDN/PXL options will display:
|
Item |
Description |
|
Serve this file from the CDN |
This will cache a copy of the file on the Content Distribution Network (CDN) to serve it from a location closer to your site visitor. Even if you don’t intend to use PXL for image manipulation, you can still use the CDN to distribute it. CDN usage isn’t just limited to images and can be used to deliver CSS and JavaScript files, PDFs as well as audio and video. |
|
Apply a PXL Filter to this image |
When this is selected the “Serve this file from the CDN” option is also selected. A dropdown will appear to select an existing Filter. |
|
PXL Filter |
Lists all existing PXL Filters. |
Once you’ve selected a PXL Filter from the dropdown, select “Copy to clipboard”.
You might notice that there are two new attributes added to the T4 Tag:

When the CDN is used the cdn attribute has a value of “true”. The pxl-filter-id specifies the Filter that will be used.
When adding a PXL filter attribute the CDN attribute is not required. The T4 Tag builder can add both, but the CDN attribute is ignored if the pxl-filter-id attribute is set.
In the following example, the top T4 Tag uses CDN/PXL while the bottom is just a standard image T4 Tag. Both tags reference the same image from the Media Library.
The filter we created earlier has the following settings:
fit-in/800x600/filters:grayscale()/filters:format(webp)
When we preview the page we can see how the same image compares:
Comparing the images in the Sources tab in Chrome Developer Tools we can see that the dimensions, file size, and format have been updated:
Approaches to using CDN/PXL filters
CDN/PXL attributes can only be applied to the following types of T4 Tags:
|
Description |
Original |
With CDN attributes |
With PXL attributes |
|
File element |
|
|
|
|
Image element |
|
|
|
|
Media element |
|
|
|
|
Media T4 tag |
|
|
|
How you use CDN/PXL is up to you but you should consider the method that’s easiest to maintain and provides the most flexibility. Adding the same PXL Filter manually to all T4 Tags across your site may not be the best approach.
Adding T4 Tags to Content and Page Layouts
You can select to use a CDN/PXL attributes on T4 Tag when adding content to a Page Layout or Content Layout. The benefit of this is that even if the Media Item is changed the same filter is applied.
This gives you control over published images on your site so you can ensure that even if a large image is added to a Content Item it will be resized to the area on the page allocated to it as well lowering the file size. Similarly, if the Filter is updated, the update will be applied to all T4 Tags that use that Filter.
Using Media Layouts
Responsive images and CDN/PXL
A useful application of CDN/PXL is when creating image or picture elements that can be used for responsive images
If you’re not familiar with responsive images check out this primer from Mozilla.
Paying attention to image performance will speed up your site and ensure that you’re serving the best image format and size to your site visitor’s device.
Unfortunately, creating an image element that does this can end up looking like this:
<picture>
         <source srcset="/small.jpg 650w,
             /med.jpg 1000w,
              /large.jpg 1600w" type="image/jpeg">
         <source srcset="/small.webp 650w,
             /med.webp 1000w,
             /large.webp 1600w" type="image/webp">
         <img src="/small.jpg" alt="My great image">
</picture>
This isn’t something you want to create each time so using a Media Layout that uses CDN/PXL filters to create the images would ensure that you could create this once, roll it out across your site, and update as your image requirements change.
To use PXL in a Media Layout replace the file URLs with T4 Tags:
<picture><source srcset="<t4 type="content" name="Media" output="file" modifiers="" pxl-filter-id="2" /> 650w,
...
Then, when you want to use the Media Tag you can use a single T4 Tag with your custom formatted:
<t4 type="media" id="28" formatter="image/pxl" />The benefits of this approach include:
- This will allow users to select the Media Layout they wish to use when selecting media from the Media Library.
- A new Media Type can be created or an existing one can be edited. The Media Layout can be added to the list of associated layouts or set as the default Media Layout.
- The Media Layout can be manually added to T4 Tags if required. You’ll need to ensure that the Media Layout is associated with your Media Type
- This approach can only be used with Media Elements as well as T4 Media Tags
Using a T4 Media Tag
This approach is useful for one-off applications of a PXL filter or CDN attribute but it’s not recommended for site-wide use of a PXL filter or CDN tag as its harder to maintain.
CDN/PXL attribute precedence
It’s worth being aware of the scenarios where CDN and PXL attributes could conflict with each other:
- If a CDN attribute and a PXL filter attribute are applied to the same T4 Tag, the CDN attribute is ignored and the PXL attribute is applied
- If a CDN/PXL attribute is applied to a Media Layout and a different CDN/PXL attribute is added to the T4 Media Tag then the Media Layout CDN/PXL attribute will be used
Troubleshooting
Three possible scenarios for unsuccessful CDN publishing might be:
- If the CDN is unavailable before the publish begins
- in this case, the publish will fail
- If the CDN becomes unavailable during a publish
- in this case, the publish will fail
- If the CDN is unavailable on Preview
- in this case, Media Items will be previewed from the Channel’s output directory and PXL filters will not be applied
If you encounter an issue check that your CDN/PXL configuration is correct. If you're unsure of your configuration settings or you're still having issues, just contact Client Support.

