
Get up and running with Terminalfour Web API - Part 3
- Last Modified:
- 09 Jul 2025
- User Level:
- System Administrator
Last time around, we used the Web Services API to list and edit Sections within TERMINALFOUR. In this article, we are going to look at editing content.
If you've arrived at this article without having read Parts One or Two, now is probably a good time to consult those.
Download the Webservices API Postman Collection (this is a JSON file so you can right-click and save it to your local machine)
The full Web Services API reference docs are available here
Create a Content Type
Before we can add content to our new Sections, we will need to add a brand new Content Type. As with any Content Type we create, we can add any of the 18 Content Elements that can be added to any Content Type.
|
ID |
Type Name |
Type of Element |
|---|---|---|
|
1 |
Plain Text |
Text |
|
2 |
Image |
Binary File |
|
3 |
HTML |
Text (HTML) |
|
4 |
File |
Binary File |
|
5 |
Date |
|
|
6 |
Check Box |
|
|
7 |
Select Box |
List |
|
8 |
Multiple Select |
List |
|
9 |
Radio Button |
List |
|
10 |
Cascading List |
List |
|
11 |
Media |
Media Id |
|
12 |
Decimal Number |
Number |
|
13 |
Whole Number |
Number |
|
14 |
Section/Content Link |
T4 Tag |
|
15 |
Multi-select List |
List |
|
16 |
Content Owner |
User ID |
|
17 |
Group Select |
Group Id |
|
18 |
Keyword Select |
List |
To create a new Content Type in TERMINALFOUR, we will need to make use of the POST "/contenttype/" service and the "ContentTypeDTO" data type.
In Postman, in the Content Types folder, select the ‘Create Content Type‘ Request.
In the Body tab, ensure that the ‘raw’ radio button is selected and that JSON(application/json) is selected in the dropdown box that appears to the right.
If you enter the following, a Content Type will be created.
{"name": "elementsTest","type": 10,"contentTypeElements": [{"name": "Name","type": 1,"maxSize": 80}]}
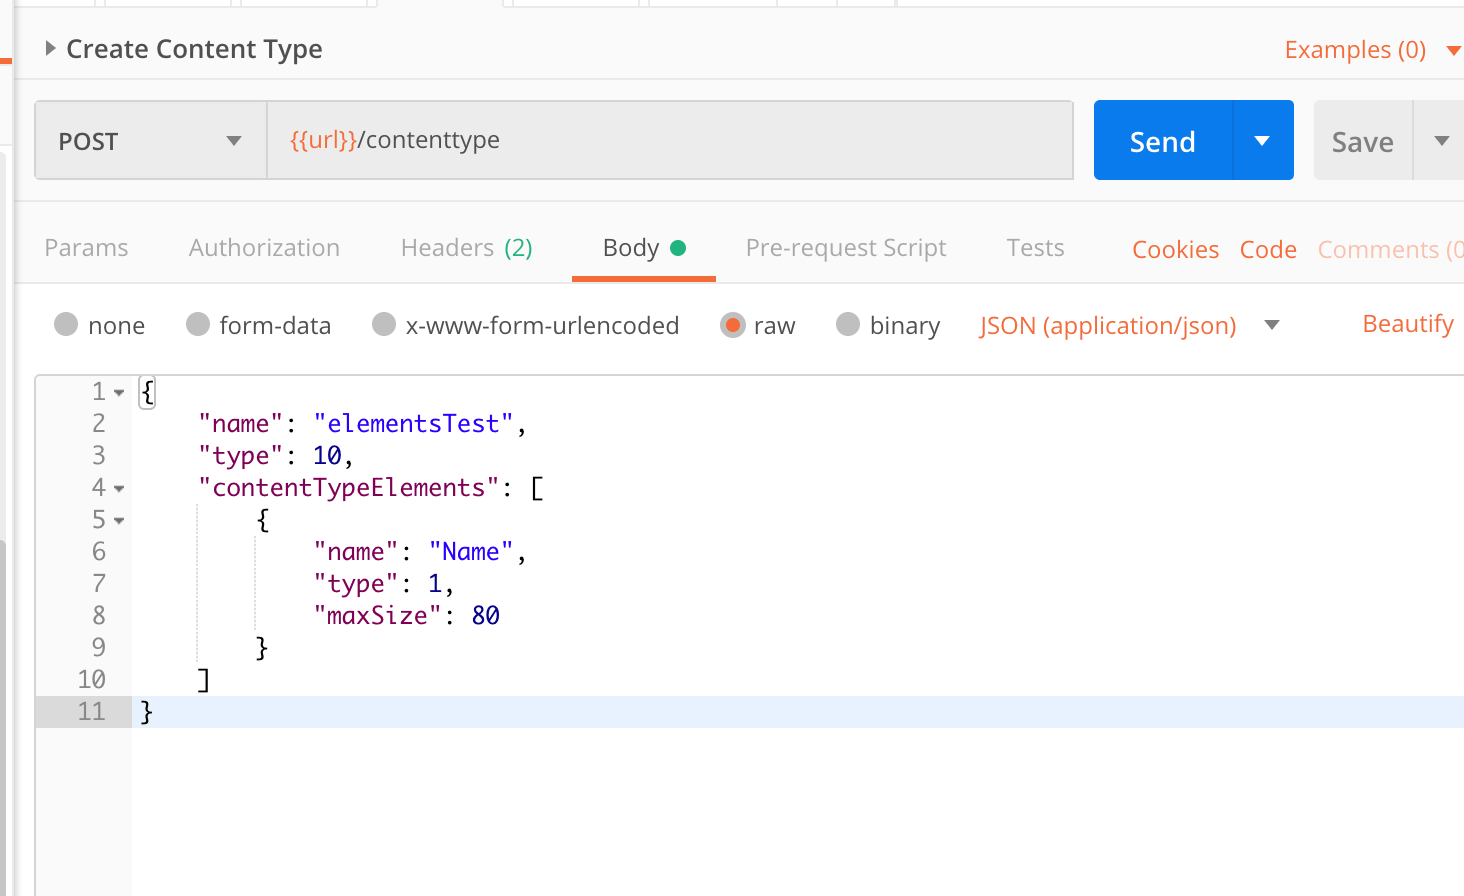
Let's break this down – this will create a Content Type called "elementsTest". The "type" value determines the type of Content Type:
- 10 creates a regular Content Type
- 30 creates a system Content Type
- 20 creates an eForms Content Type (deprecated)
An empty Content Type is of limited use so the "contentTypeElements" field provides an array of ContentTypeElementDTO objects that are used as the elements of the Content Type. This array must contain one object of name and type in order to be valid. The Type IDs are provided in the table above). The “maxSize” element specifies the maximum length of the content in bytes which can be added into the Content Type Element. This will default to 0 so you should specify a value above this.
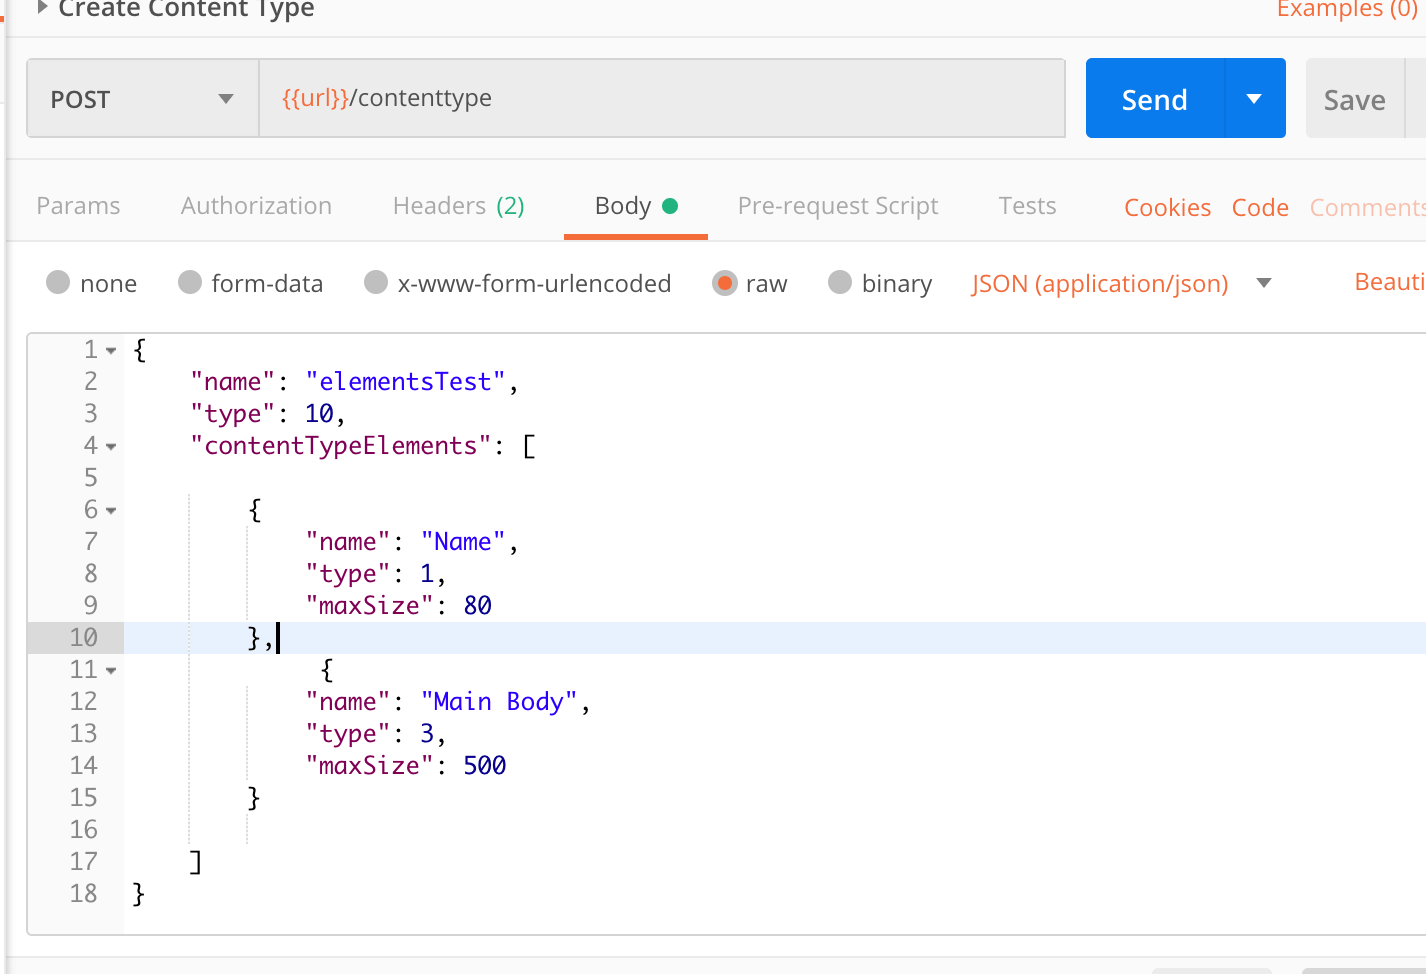
If you wanted to add another element to your new Content Type, just ensure that you separate the array objects with a comma (,):
When you click Send a successful request will return a "200 OK" response from TERMINALFOUR. The response body will display the Content Type details including the ID:
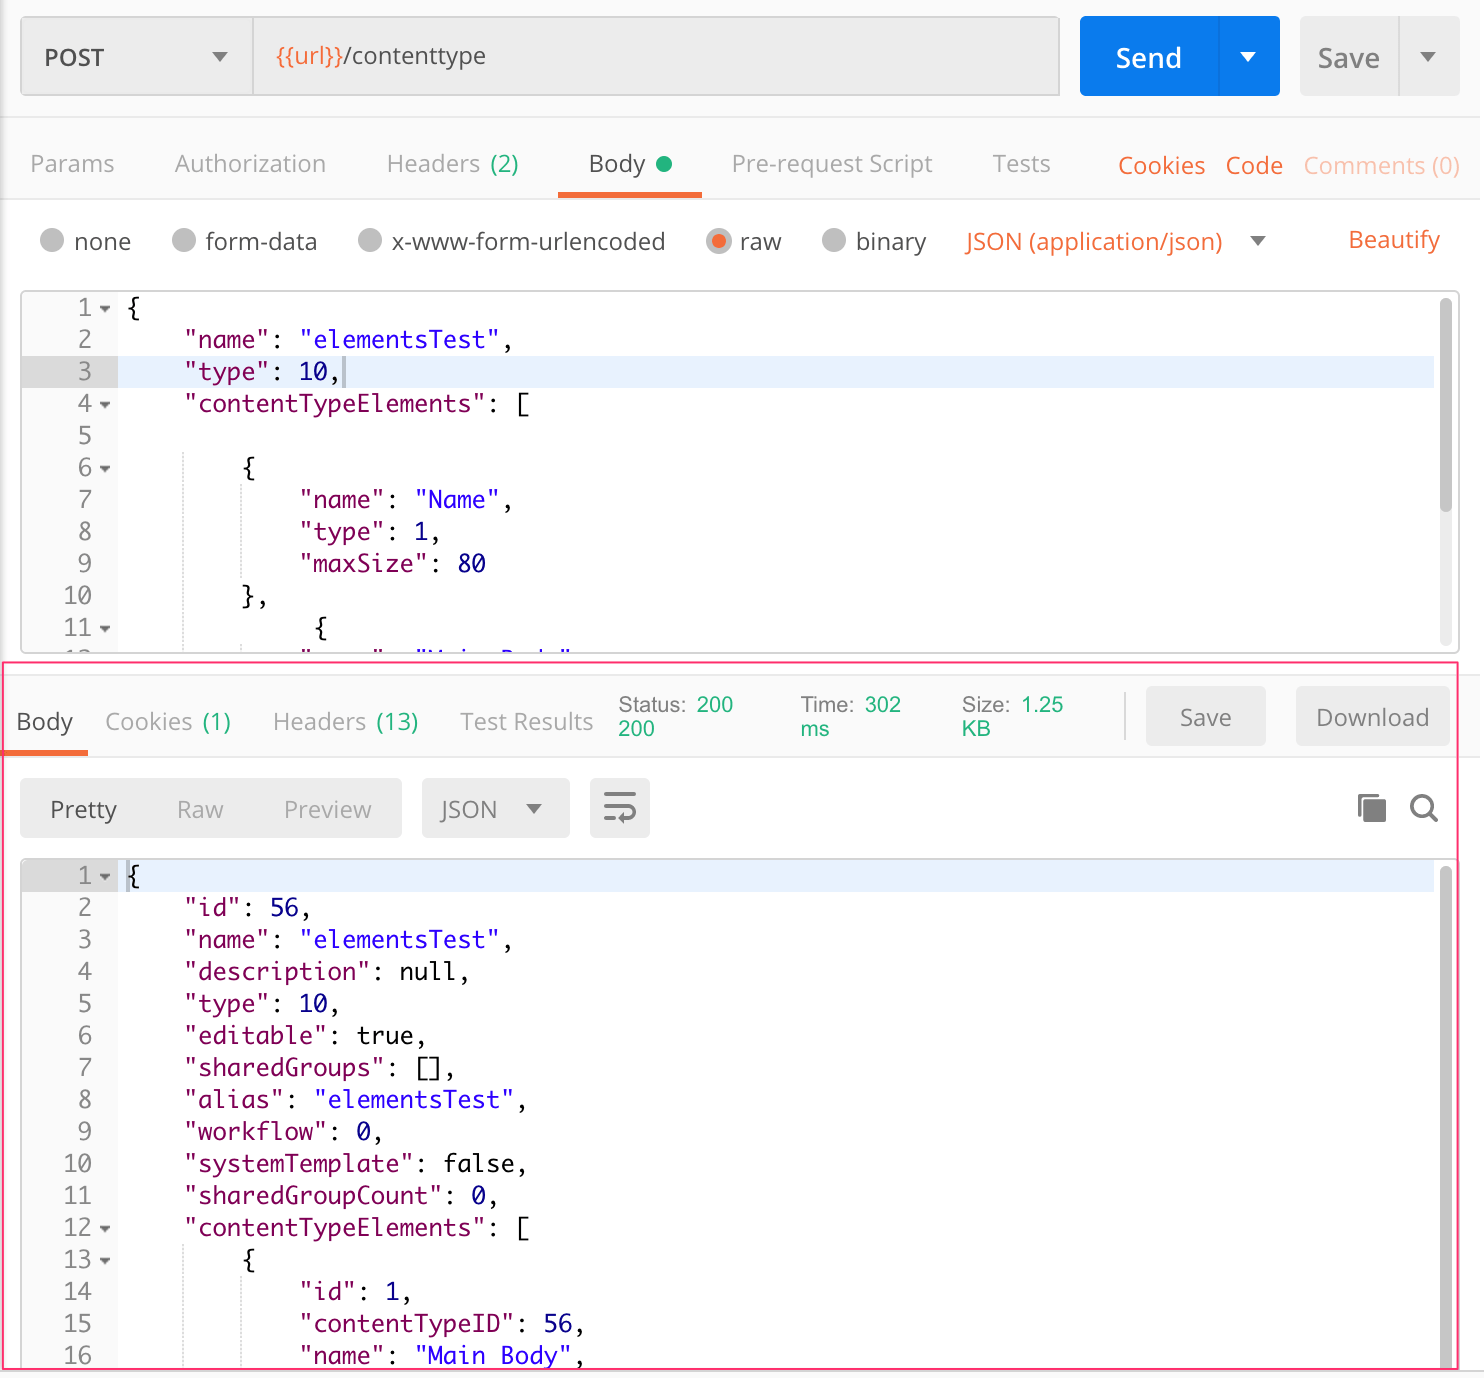
The response request also lets us see the other fields that can be added our request so, as you can see from above, we could add "description", "workflow" and "alias" values.
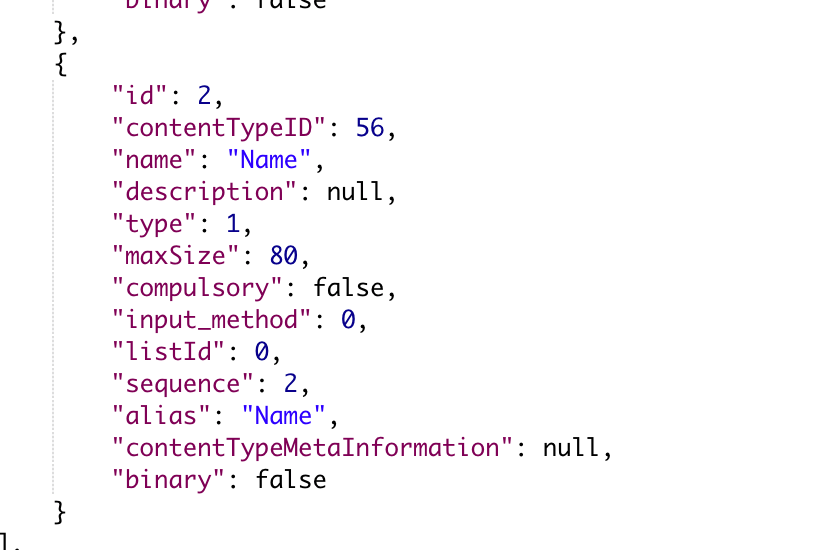
Similarly, in the Content Elements object array we can add fields for "description", "compulsory" and "ListId"(this is required when a List is selected as the element type):
The new Content Type with Content Elements is now visible in TERMINALFOUR:
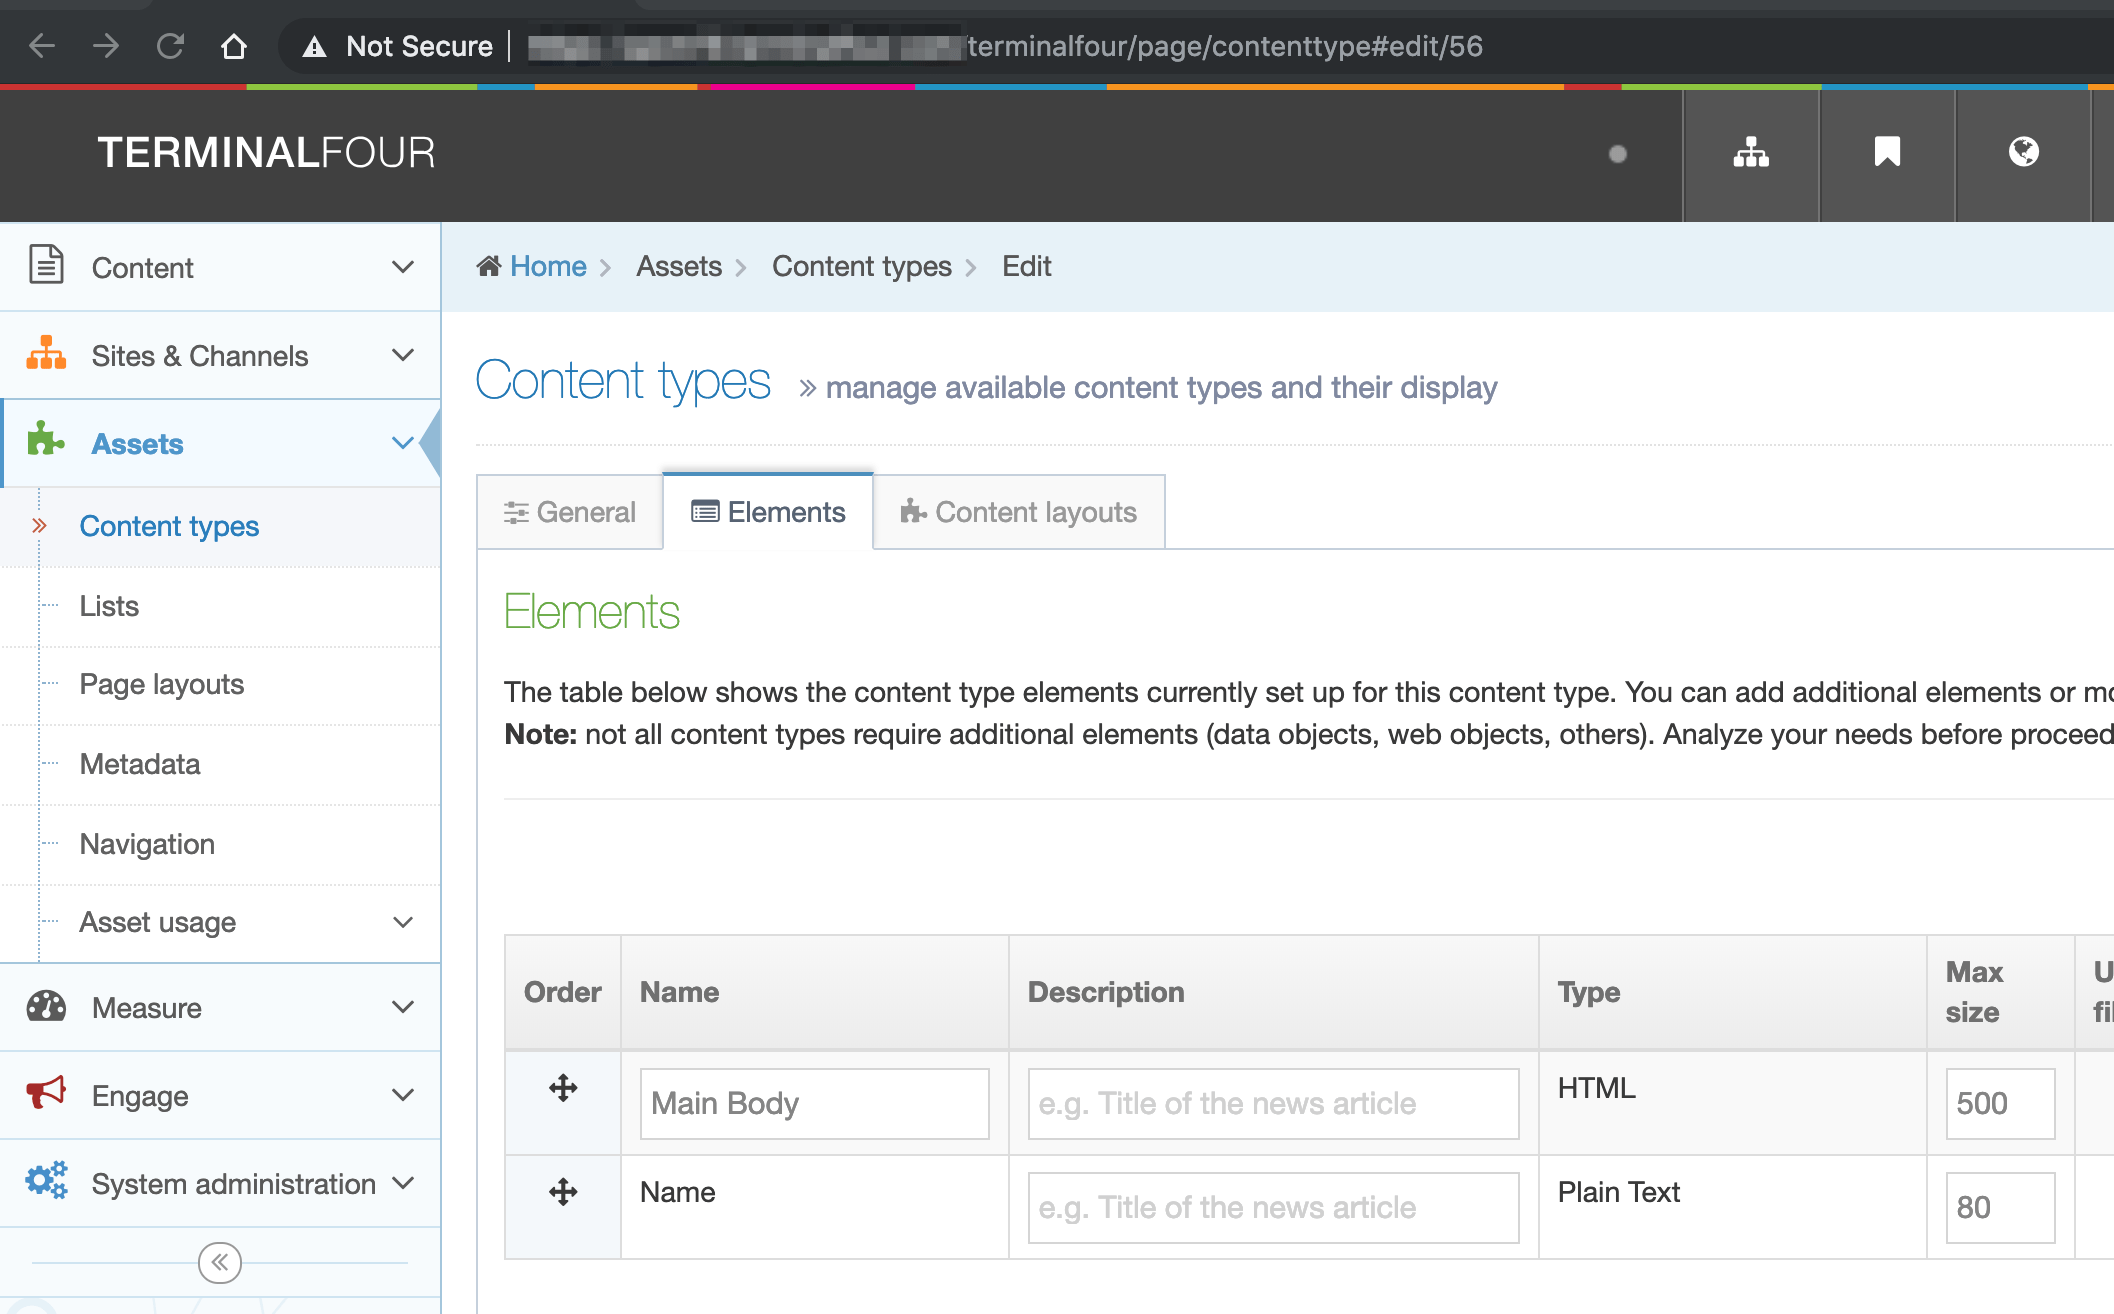
Update a Content Type
Create a List
Once we've created a Content Type we will want to update it so in this example we are going to take our newly created Content Type and add a List to it. First up, we'll need to create a List.
We can do this by opening the "Predefined Lists" Collections folder and selecting "Create a List". In the request body, create a list called "userList" and, using the "items" object array add the names and values:

Hit Send.
A successful response will show you the list ID:

If you wanted the ID of another List you can use the "Get All Lists" request to return the details of all Lists including their IDs.
Get a Content Type
Next up, we need to get the response from the Content Type that we created. Go to the "Get a Content Type" and append the Content Type ID to the URL field:

If you don't know the Content Type ID you can get this with the "Get All Content Types" request.
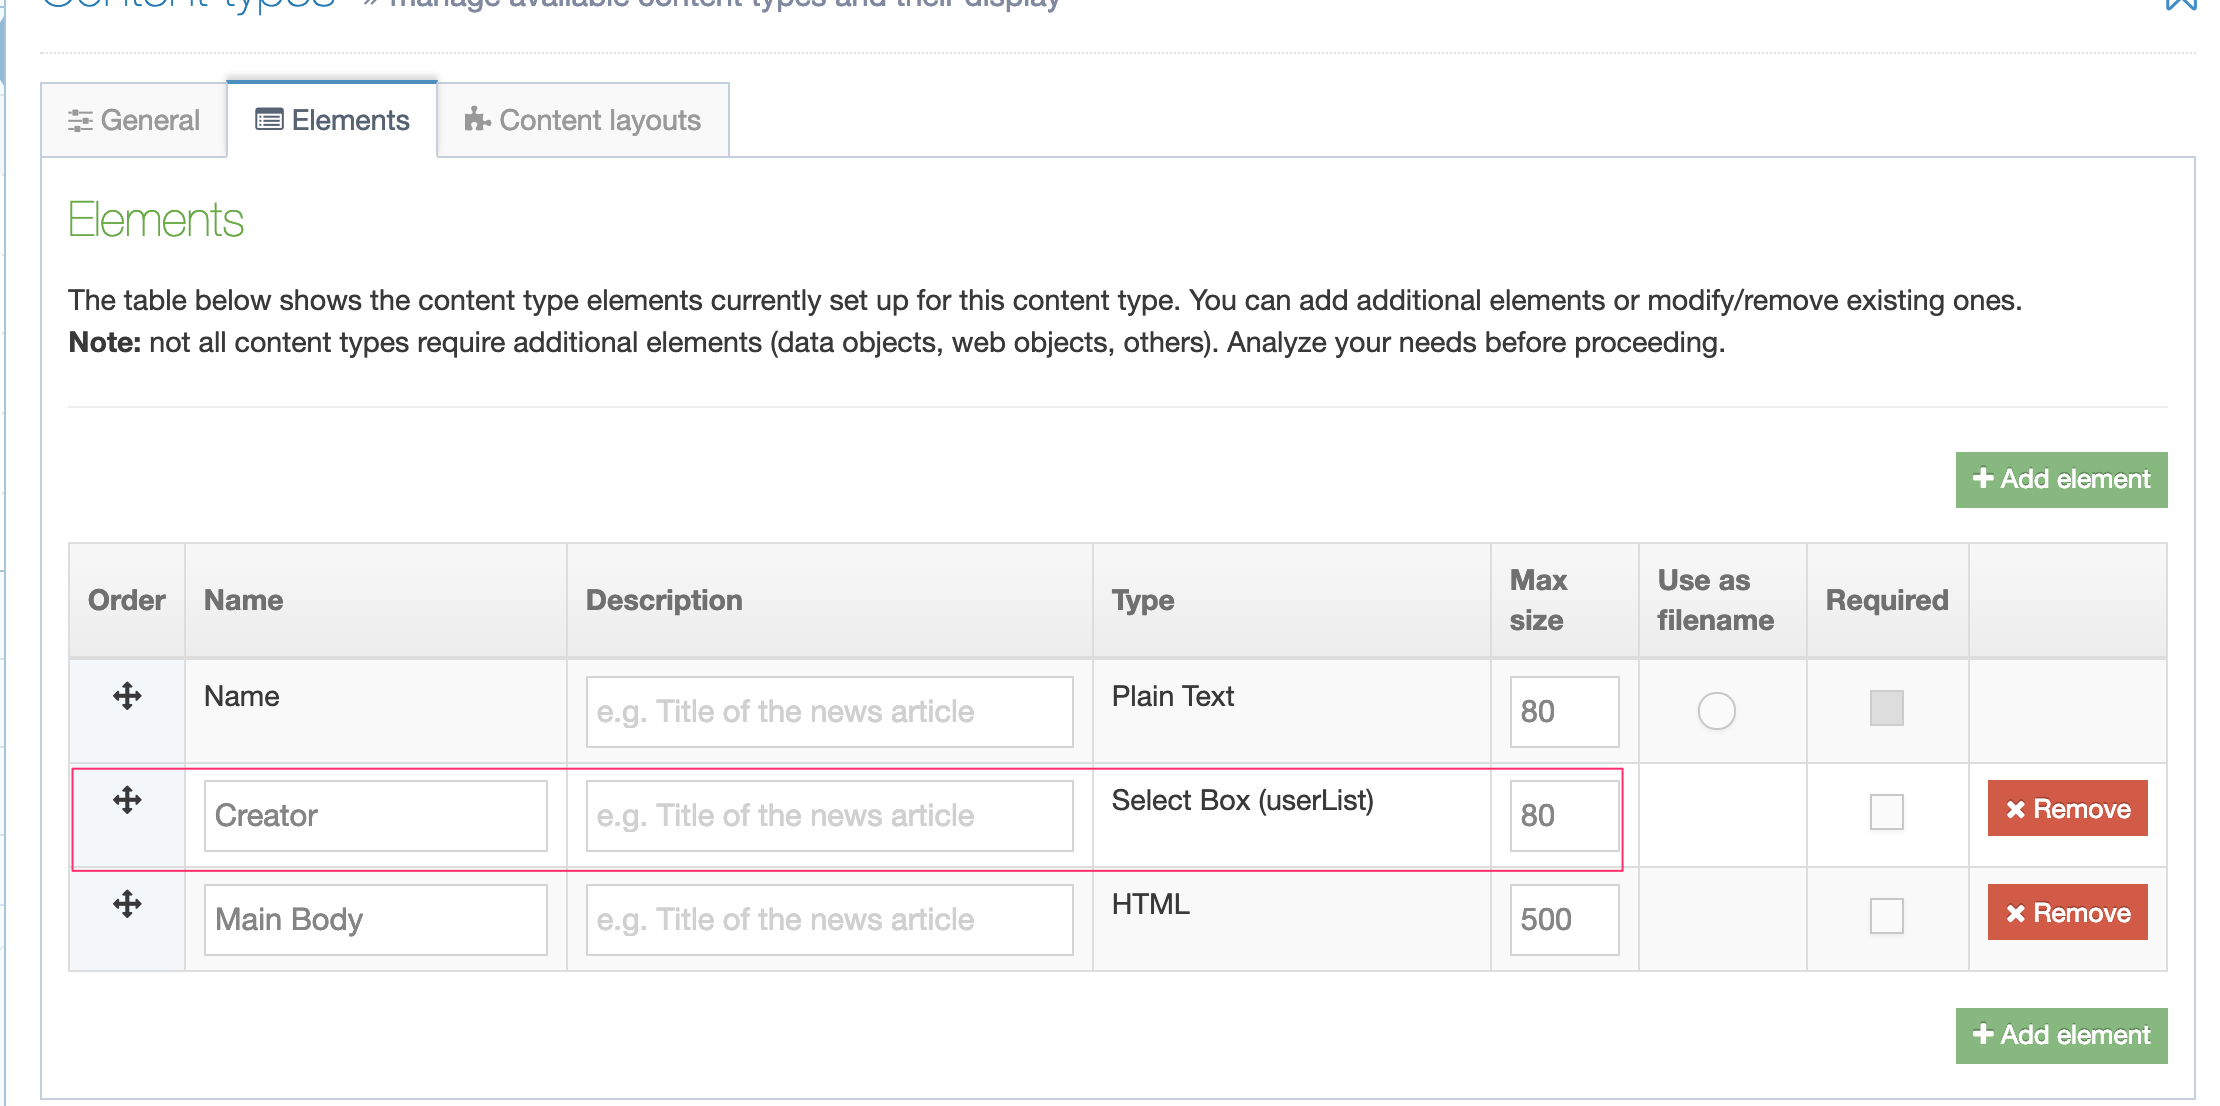
Select and copy the response from the "Get a Content Type" request and open the "Update a Content Type" request from the Content Types Collections subfolder.
Paste the response text into the Request Body input field. Under the “contentTypeElements” field, at the end of the array, add the following (remember to add the “,” between the current last element and your new element):
{
"name": "Creator",
"type": 7,
"maxSize": 80,
"listId": 1
}
We have set the “type” of this element to 7 which is the type id of a Select Box. We will need to provide a “listId” that can be used to populate the values of the select box, add the list Id of the “userList” list that you created above.
Click Send
A successful request should result in a ‘200 OK’ response from TERMINALFOUR
In the TERMINALFOUR interface, you will see the new Content Element:
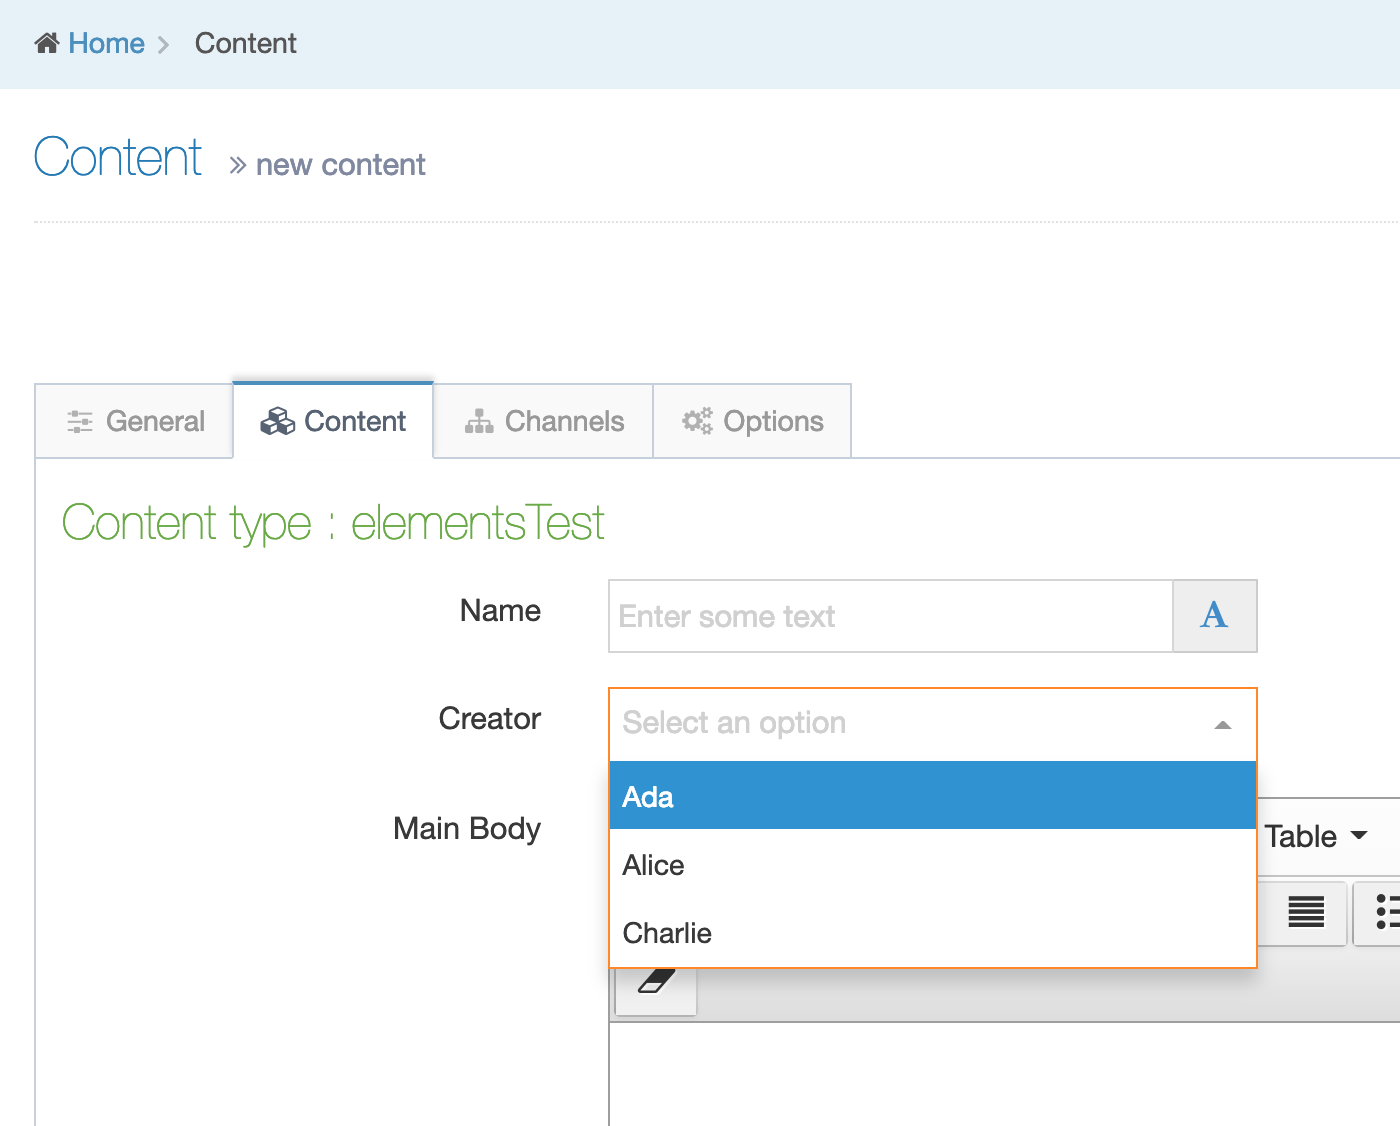
If we were to add content using this Content Type we would see the following:
Create Content
In order to create a Content Item you will need to know the following:
- the ID of the Section that you are adding the Content Item to
- the Content Type ID of the Content Type
- the names of the Content Elements that are available in the Content Type
Content Element names should be appended with a hash (#) symbol.
Here's an example:
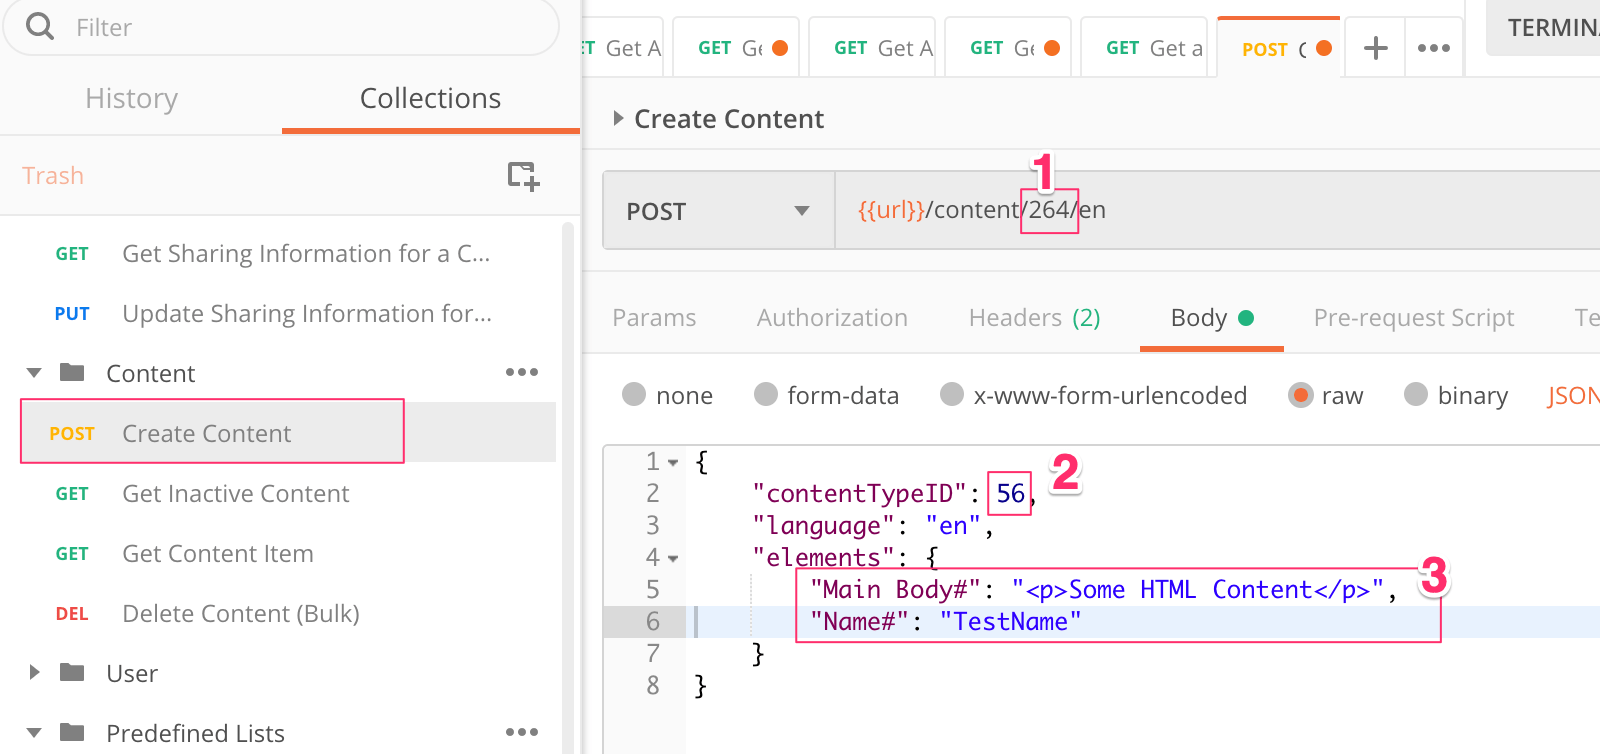
Elements with the key ‘compulsory’ set to true should be included. The ‘maxSize’ field - this represents the maximum number of characters that can be used in the field.
Hit Send.
Back in the TERMINALFOUR interface, you should see the following Content Item added to the Section whose ID was specified in the request:
