
Get up and running with Terminalfour Web API - Part 1
Changes were introduced to the /about service and the naming of access tokens in v8.2.8 and v8.3.
If you're running an older version, have a look at the older version of this article - 8.2.8 here and 8.3 here.
With the Web Services API, you can integrate Terminalfour with your own or other services in a custom web or native mobile application.
Download the Webservices API Postman Collection to follow along (this is a JSON file so you can right-click and save it to your local machine).
The purpose of this article is to let you connect to your Terminalfour instance and using a GET request to view the current User Profile information and "About" details of your instance.
To get up and running, we’re going to use Postman, a free application that lets you test and develop Web APIs, so to follow along you should download and install this.
You don't need to sign in to Postman or create an account in the application to follow along with these steps.
To follow along with this you should be signed into Terminalfour as an Administrator.
Authenticate with the API Key
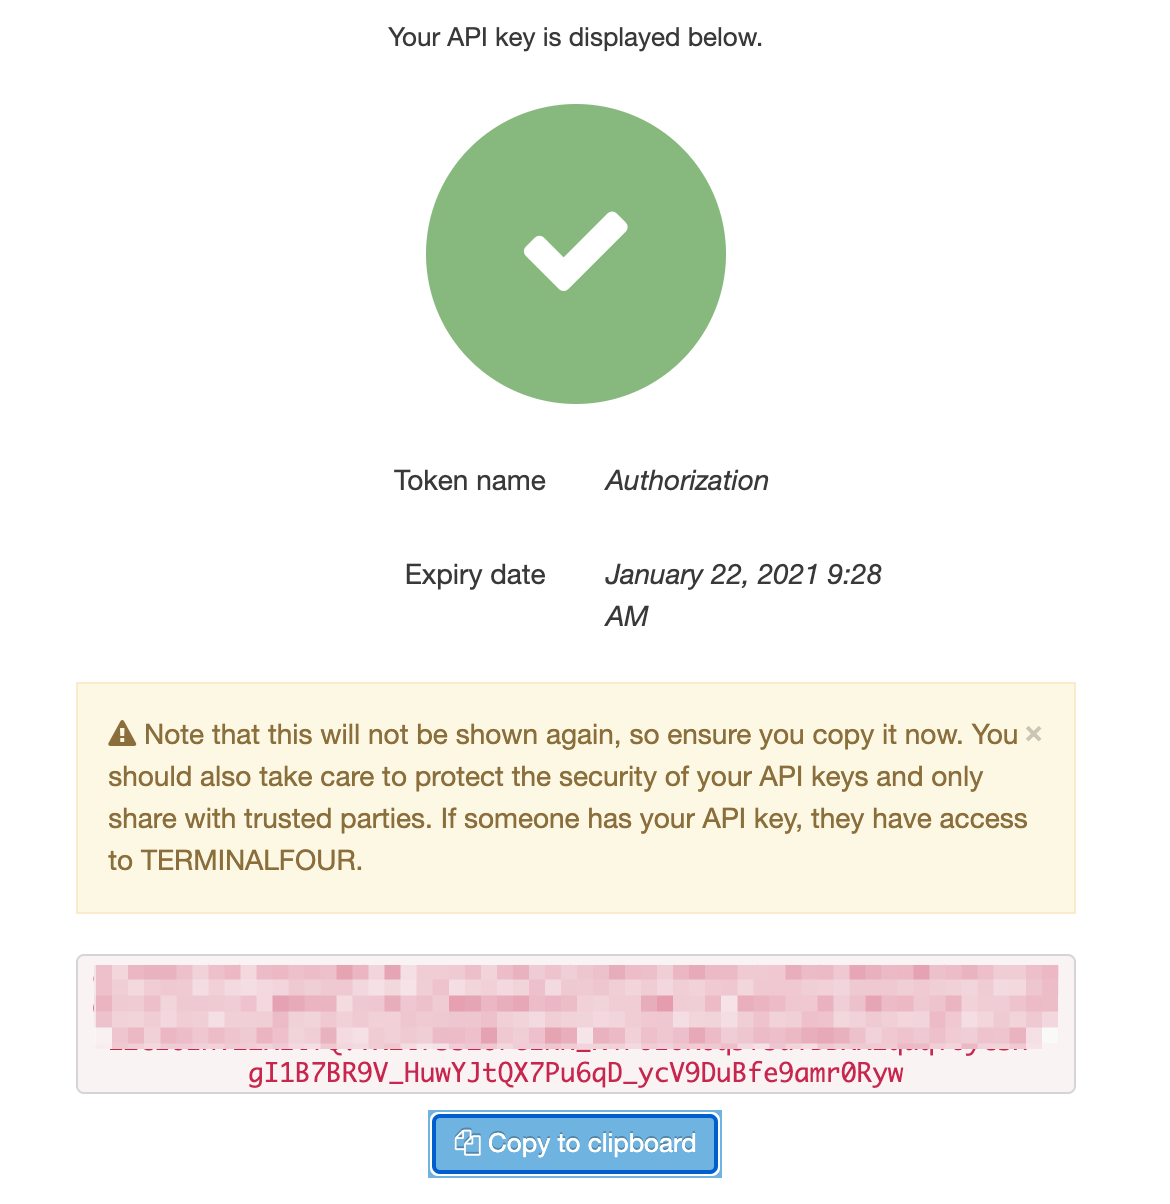
Before we can start using the requests we must generate an API key in Terminalfour.
Check out the video and step-by-step walkthrough on how to do that here.
Token Authentication has been available since version 8.3.4.
You won't be able to view or copy this API key again once you move away from this page so be sure to copy it straight away
Postman Environment Setup
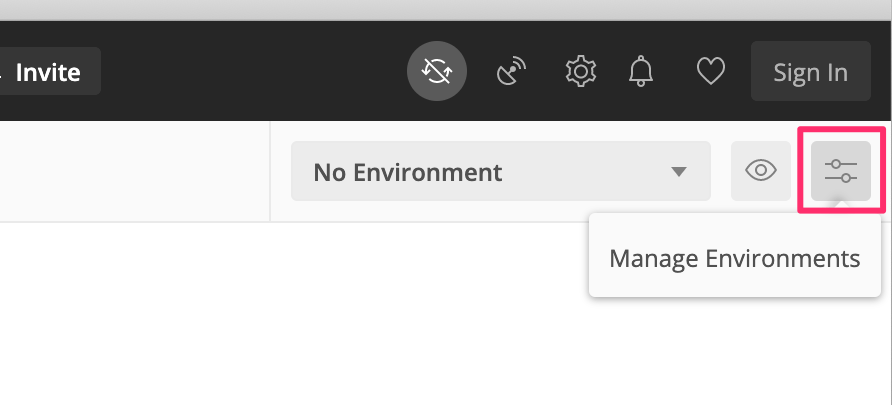
When using Postman, you’ll first set up an Environment. This is a set of key/value pairs we’ll populate with the URL of our instance. The advantage of using an Environment is that we can move between instances without changing our requests – so we could test our requests on a local or test instance and then, by just switching the Environment context, can use those same requests on our live instance.
To set up the Environment, select the Manage Environments button highlighted below:
From the window that appears select the orange Add button.
Add the following variables:
| url | Both the Initial and Current Values are the url for your Terminalfour instance with an /rs (RESTful API) appended to it. |
|---|---|
| tokenValue | The value of the API token value you copied earlier. |
| tokenName | The name of the token - call it Authorization |
| AccessToken | Leave blank |
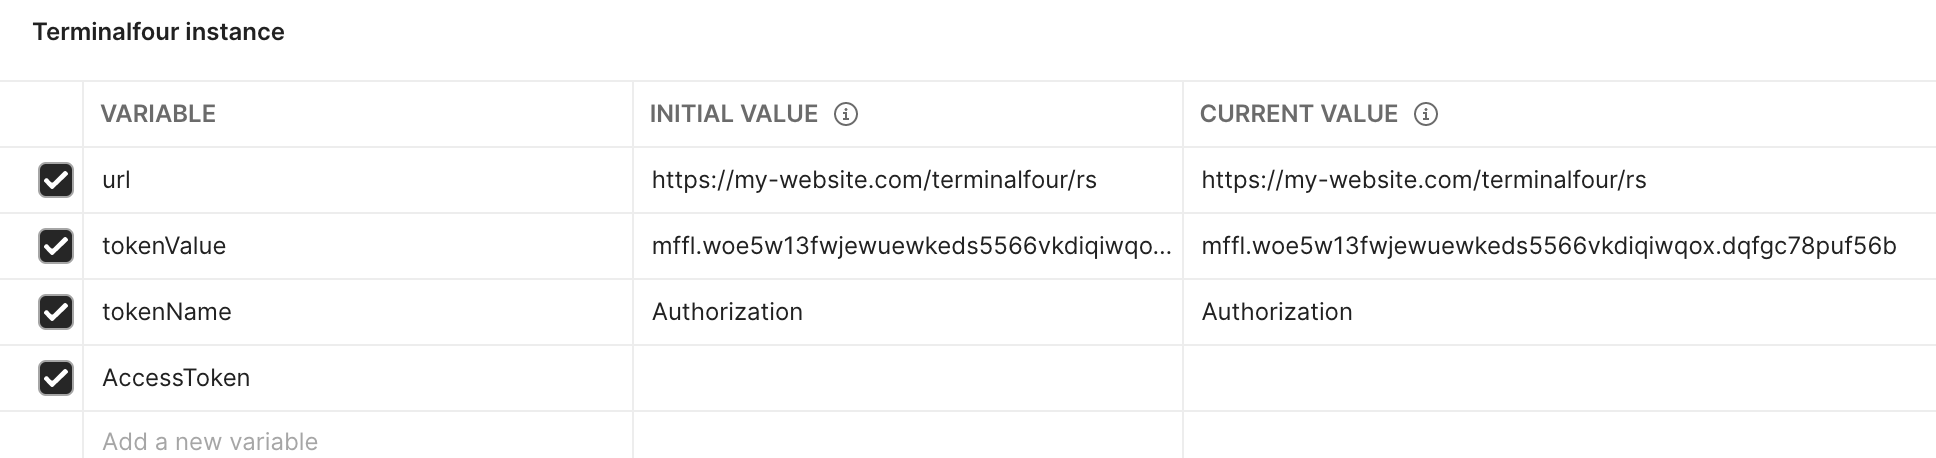
Once that’s done, click Add or Update and close the Manage Environments window.
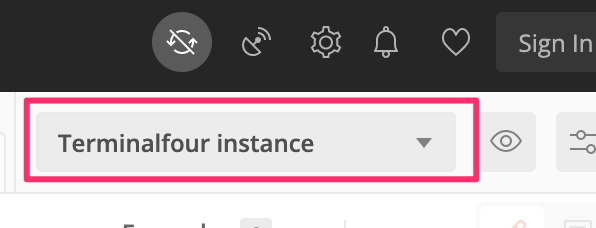
Before you go ahead, make sure that you select the Environment you just created from the Environment drop-down highlighted below:
Import the Web Services Collection
Now, we want to import the Terminalfour requests that you’ve downloaded above. We import these requests into Postman as a "Collection". These are a set of pre-written requests we’ve created to help you get familiar with the Web API. In Postman go to File > Import and select the Collection file.
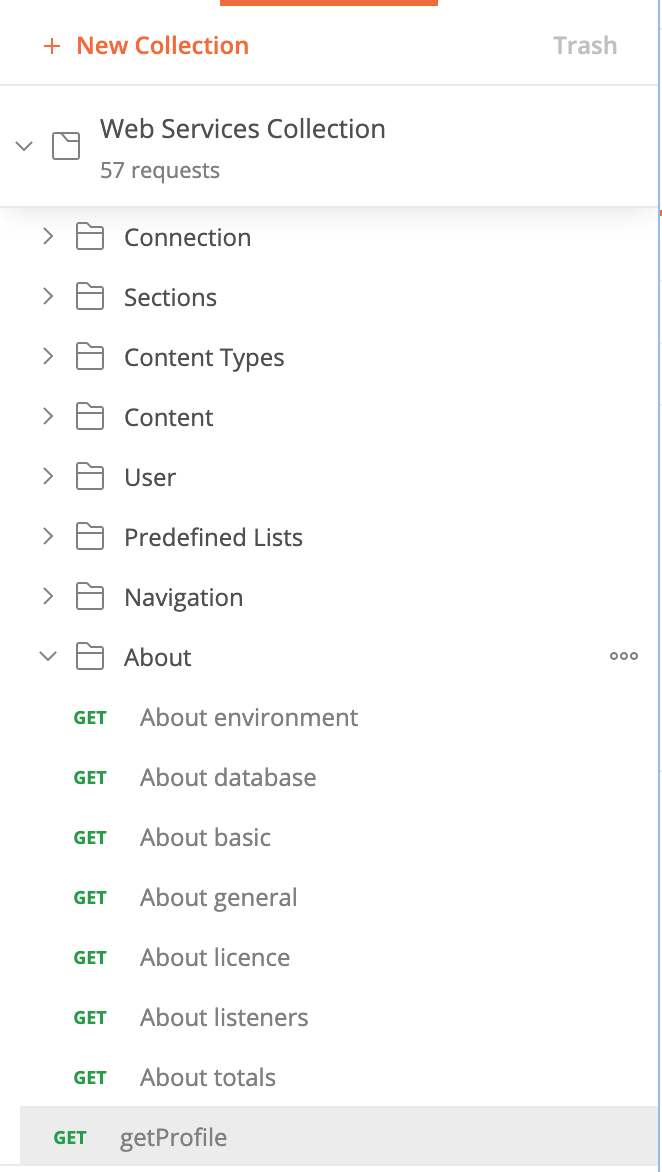
On the left, in the Collections tab, you’ll see an organized folder structure of requests. The first one we are going to use is getProfile. This request is in the root of the collection and outside of the other folders:
When we select the getProfile request we'll receive an authentication error that looks like this:
{"message":"Full authentication is required to access this resource","cause":null}So let's get authenticated...
Add the API key
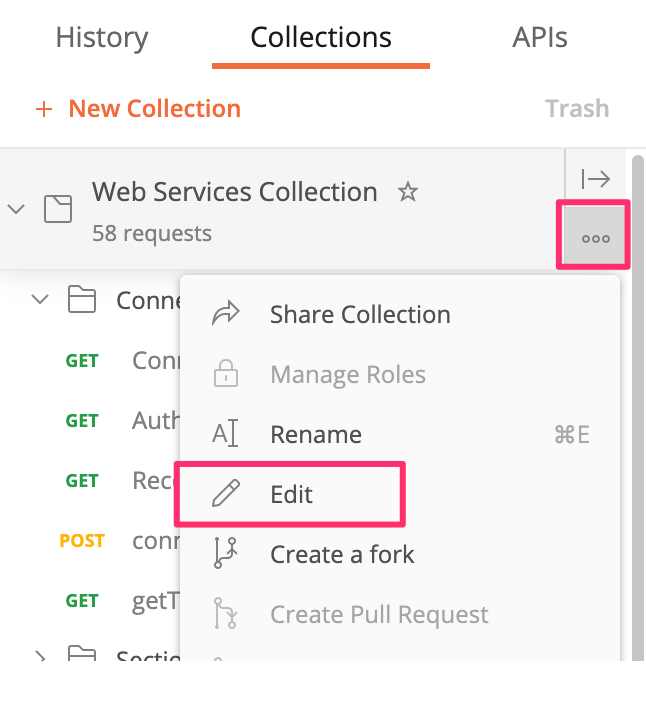
To apply the API Key authentication method to the Collection select the options button on the root Collections folder and choose Edit:
Select the Authorization tab and from the drop-down select API Key and add the following values:
| Name | Description |
|---|---|
| Key | {{tokenName}} |
| Value | {{tokenValue}} |
| Add to | Select "Header" |
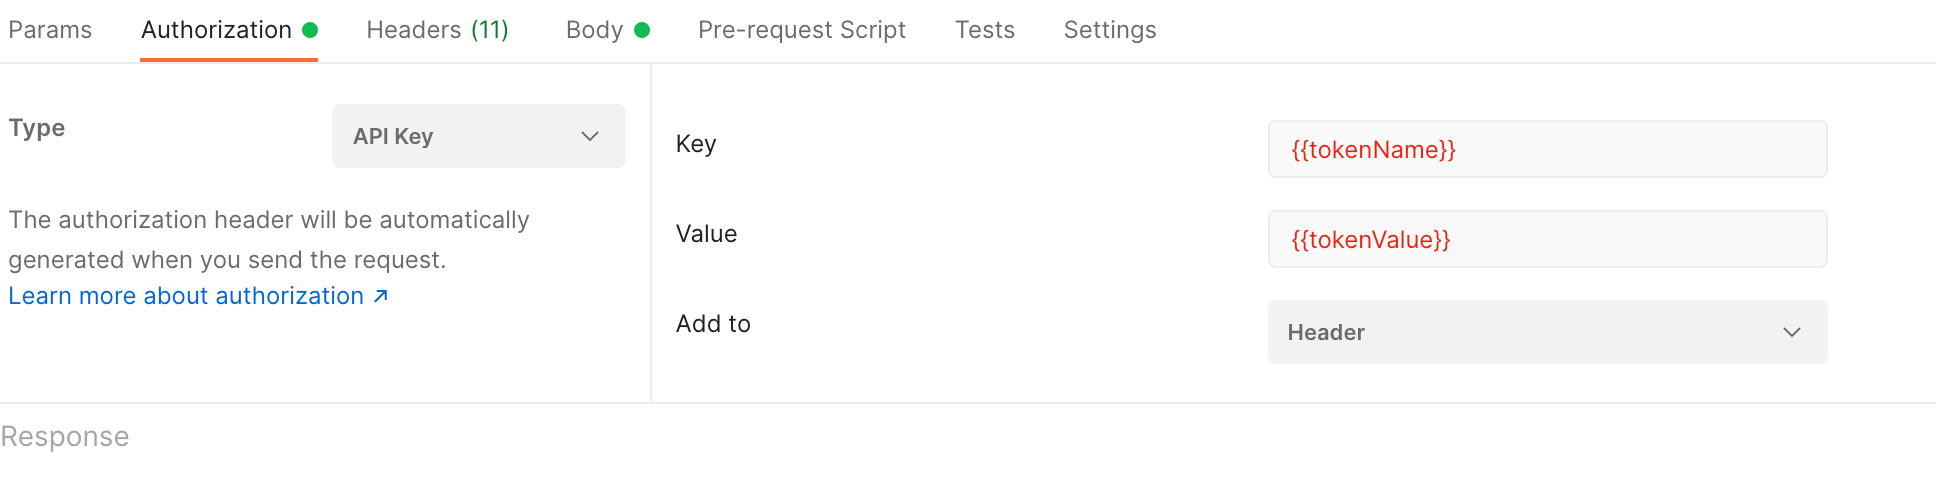
Remember that "url" variable we created when we set up the Environment? You can see that being invoked above as {{url}}.
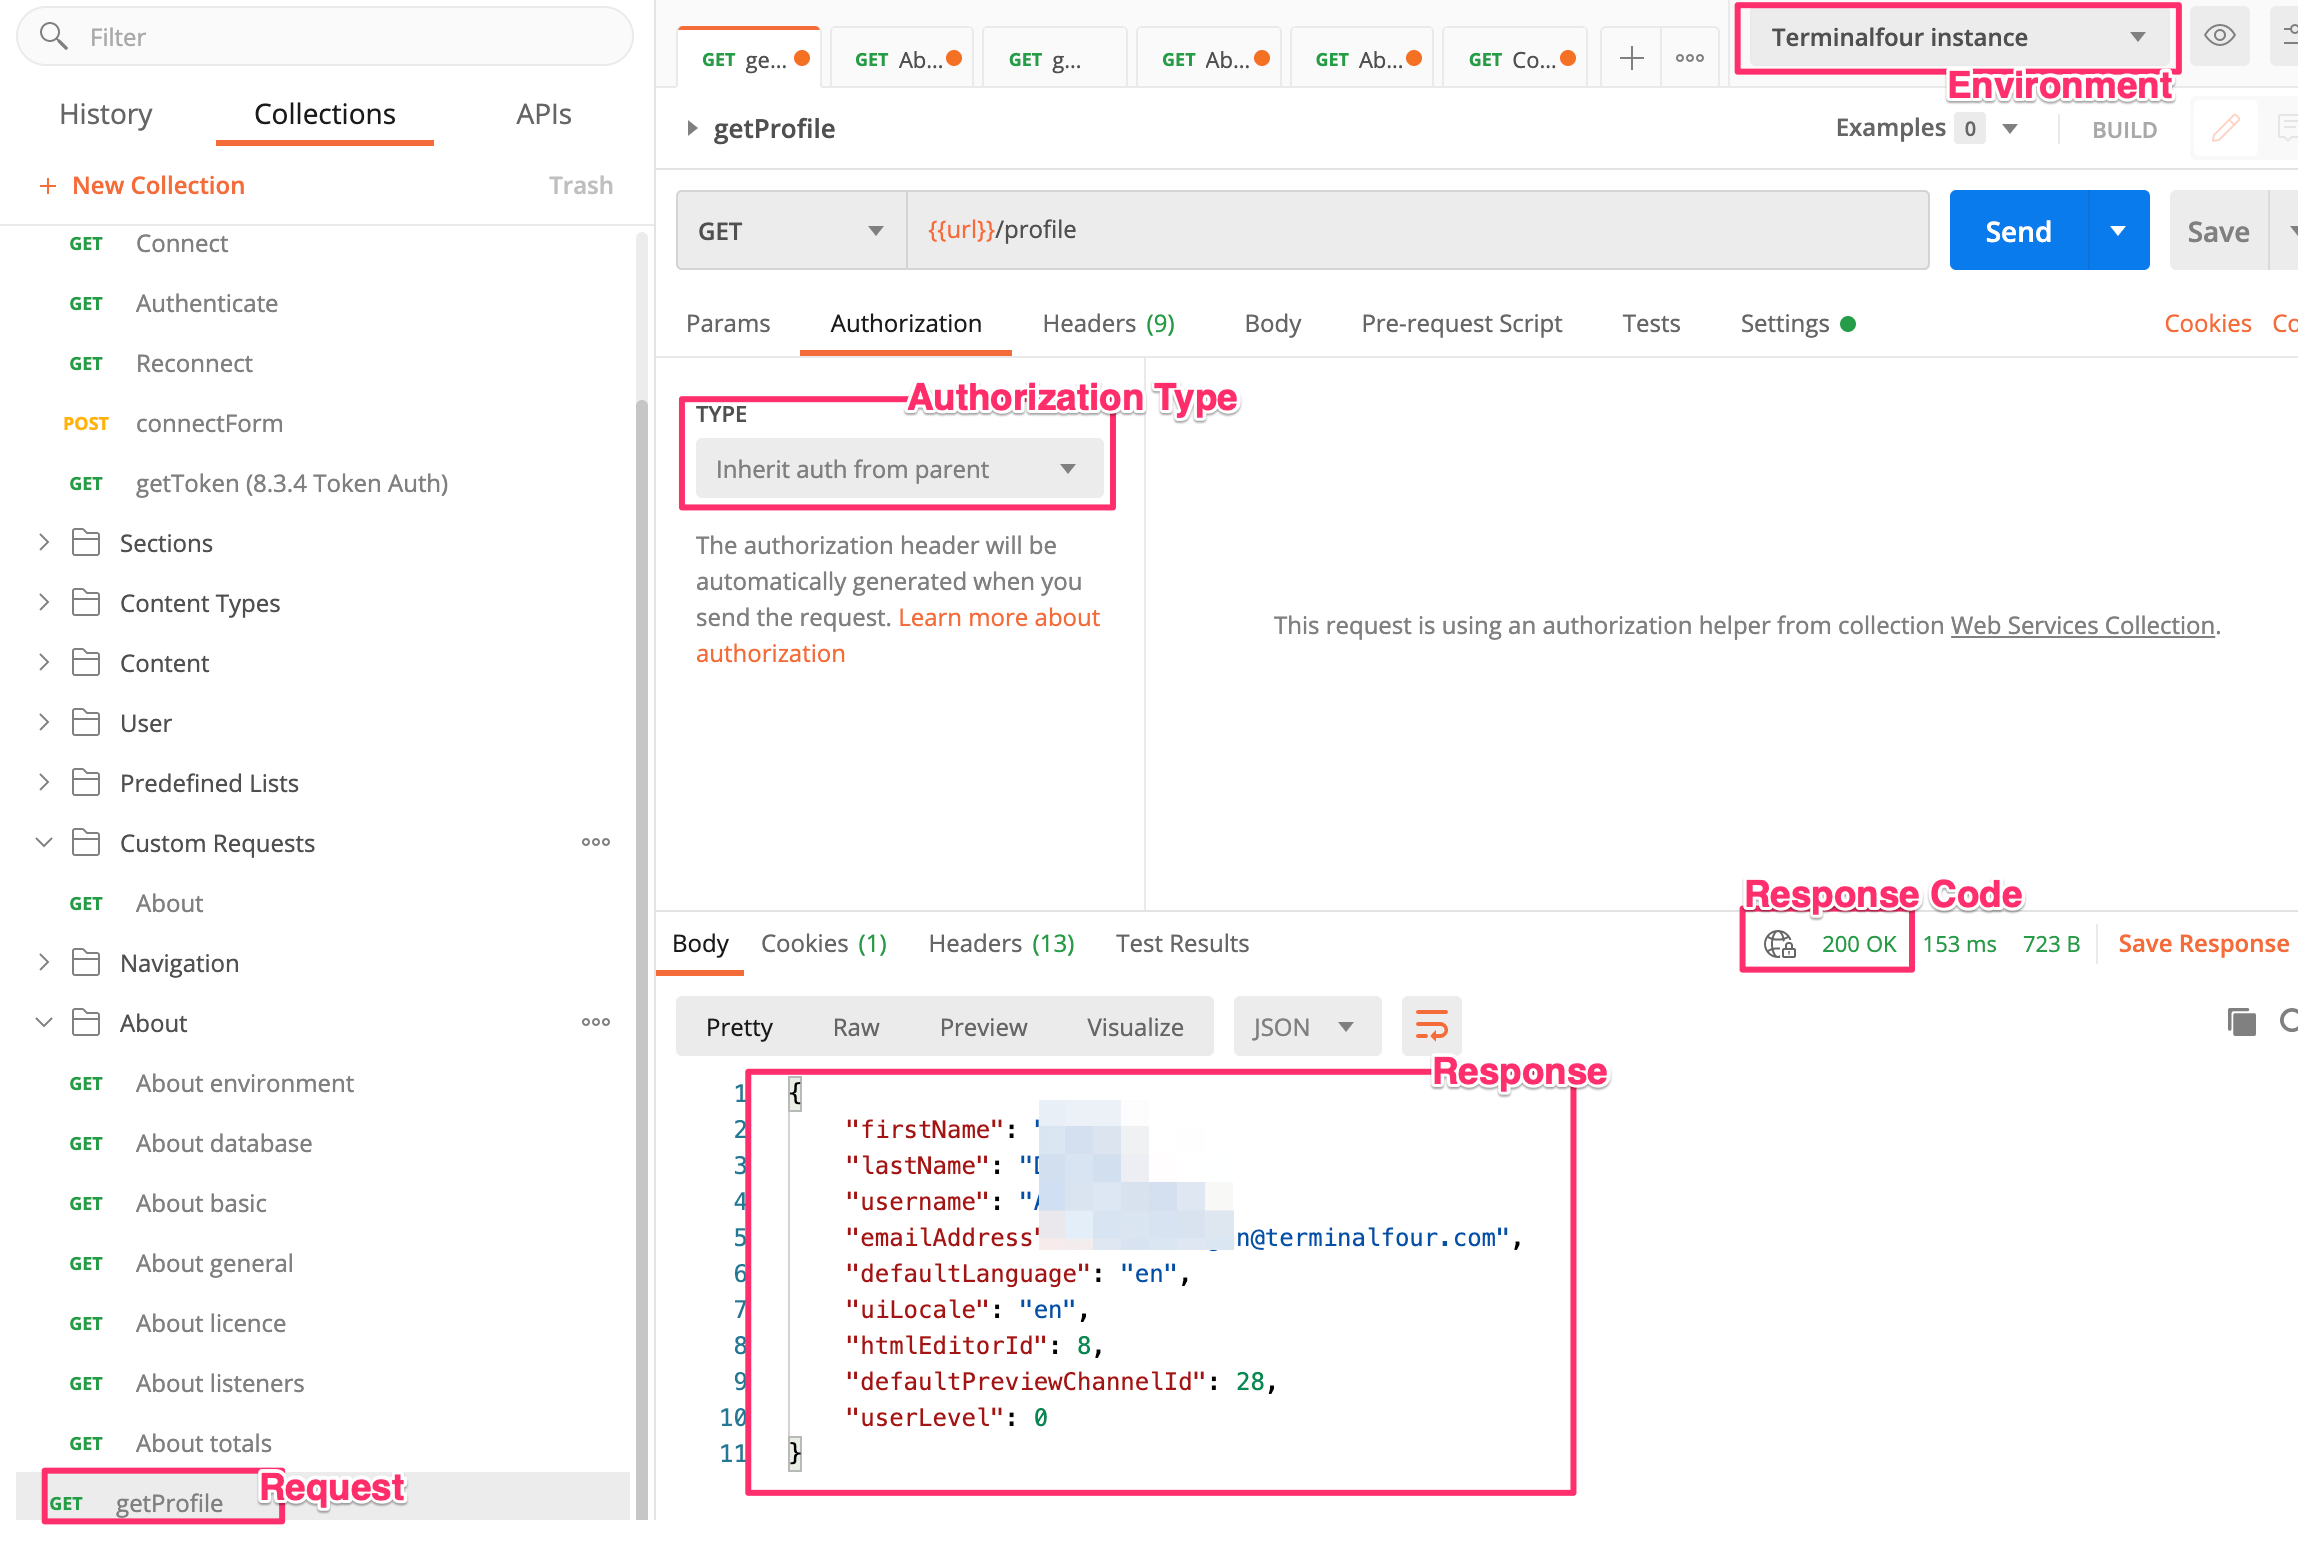
Sending the getProfile request
Now we've set up the Environment URL and the authentication method we can send a request that returns the profile information for the current user – getProfile.
Before we send the request, ensure that the Authorization setting is set to "Inherit auth from parent"; this will ensure that the API key authentication method and the API key value itself will be used to authorize the request (this saves us adding the API key to each request).
Check your Environment setting is correct and hit Send to send the request. If your instance URL and API key are valid, Terminalfour will respond with a 200 OK response containing the details of the currently authenticated user below the Body heading:
Some things to be aware of
- The Web Services API Collection (the root ‘folder’ of all the requests) has its Authorization setting set to use API Key Authorization.
- The default Authorization behavior for all the requests in the collection is to Inherit from the parent collection.
- Unless you specify an authorization type in the Authorization tab of a request, the request will use the authorization method defined at the collection level.
- To reveal the authorization settings of the parent collection:
- Right-click on the Web Services API Collection and choose edit
- Navigate to the Authorization tab
- You will see that the type is set to use ‘API Key’, the header key is set to 'Authorization' and the value is set to the variable to which we assigned the API Key you generated in Terminalfour.
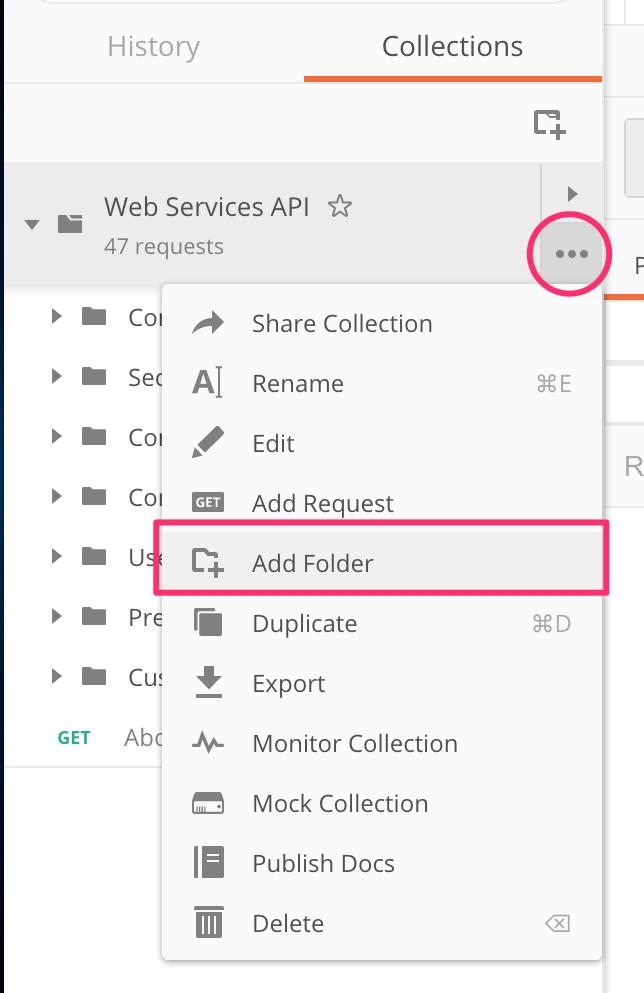
Now that we've successfully connected with our Terminalfour instance, let's create our own request. We want to create one that will return some information about the instance.
There's already a request that will do that but let's create our own. To stay organized, you can create a subfolder in the Web Services API Collection in Postman. You can call this folder 'Custom Requests'.
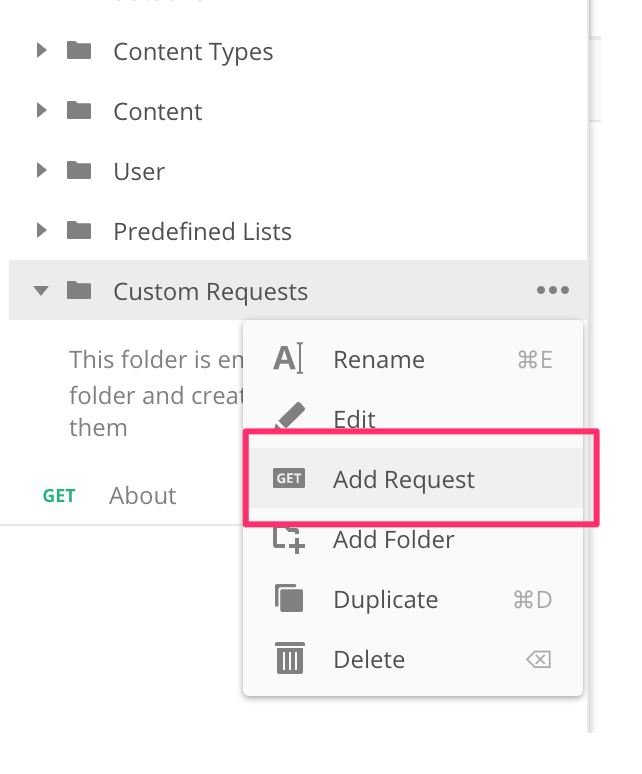
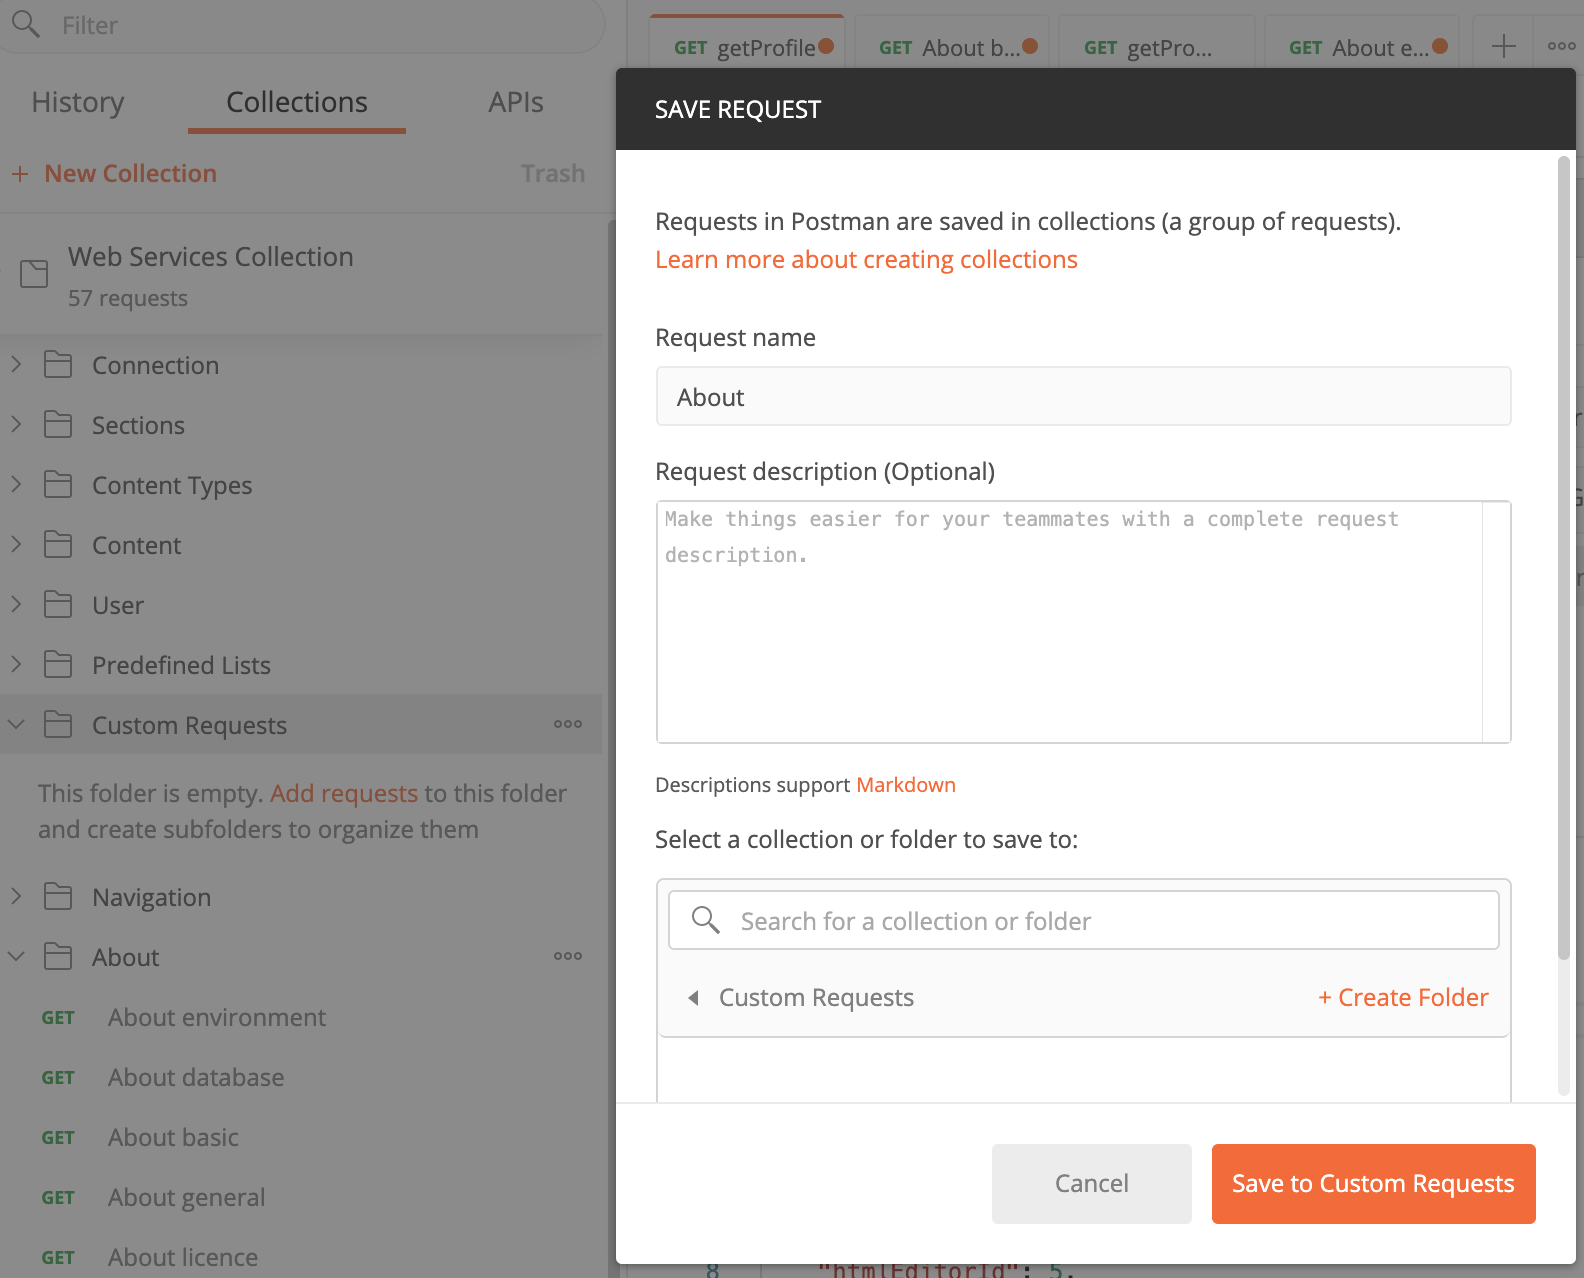
In the new folder, add a request. This one is an About request so you can call it "About":
Name the request "About" and save it:
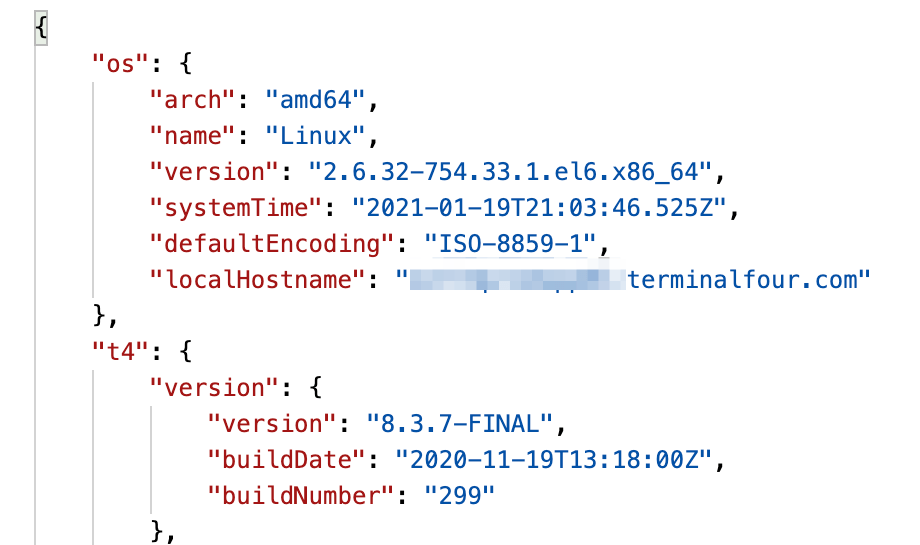
In the URL Input field add the url variable that comes from our Environment settings. Variables in Postman are enclosed in double curly brackets followed by the name of the resource we are requesting. In this case, it's /about/meta so all together it should look like this:
{{url}}/about/metaSince version 8.3.1, a single /about service is no longer used.
Check out an older version of this article if this is relevant to you.
Hitting Send will return a JSON output with Terminalfour instance details:
That's it! In this article, we've used Postman to get acquainted with the Terminalfour Web Services API. We've looked at connecting and authenticating and how to return details about the Terminalfour instance.
In the next article, we'll look at using the Web API to add and edit Sections in Terminalfour.
Back to top