
Get up and running with Terminalfour Web API - Part 2
- Last Modified:
- 09 Jul 2025
- User Level:
- System Administrator
In this article, we are going to continue using requests but we’re going to take it up a notch and make changes to the Site Structure with Terminal four. Because we are going to add and update Sections, ideally yo u should follow along on a test instance rather than one hosting a live site. If you are using your site’s live instance, then it pays to be cautious when executing these requests.
If you haven’t read Part One, then now is probably a good time to read over it.
Download the Webservices API Postman Collection (this is a JSON file so you can right-click and save it to your local machine)
The Web Services API reference docs are available here.
Connect and Authenticate
First up, you must connect and authenticate to your Terminalfour instance. If you have just recently connected you can skip this. If your session is still active but the bearer has expired, you can reconnect and authenticate to get a new bearer token. Otherwise, you can use the Connect and Authenticate requests to create a new JSESSIONID and Bearer token.
Creating a Section
To create a Section we will make use of the Hierarchy endpoint. This is used for any operations that involve Sections. Up to now, we’ve been using GET requests to receive data but this time, since we are going to make an edit within the system, we are going to use a POST request.
The Terminalfour API Documentation provides information on the format of the object that should be sent in the Request body, this can be found by following the SectionDTO link under the data type heading of the request body section.
We are going to use the Web API to create a Section in Terminalfour using a request from the library. Select the ‘Create a Section’ request from the ‘Sections’ folder, and open the Body tab and choose ‘raw’ as the Request Body type. Also, ensure that JSON (application/json) is selected from the drop-down menu on the right so JSON data can be posted:
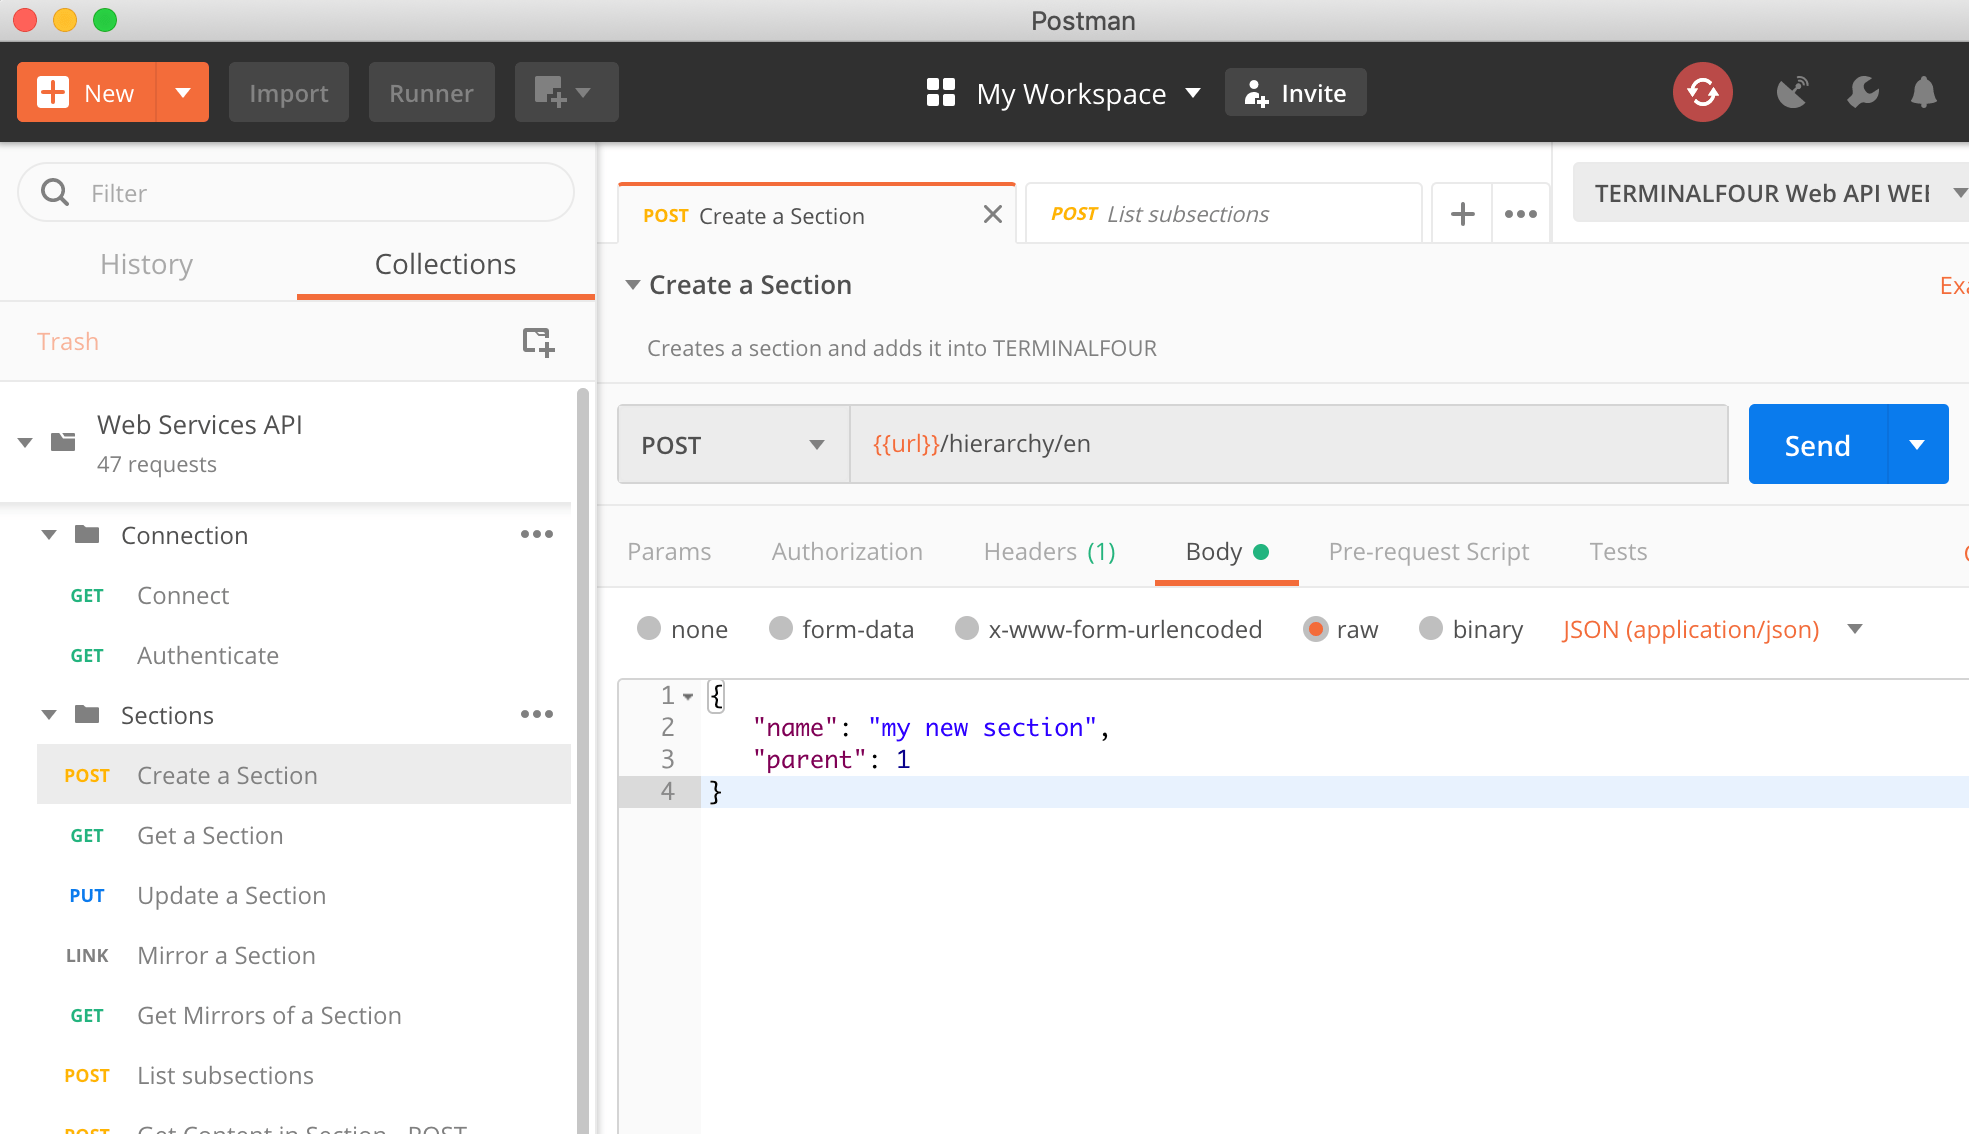
The following will create a Section called ‘my new section’ directly below the Root Section:
{ "name": "my new section", "parent": 1}
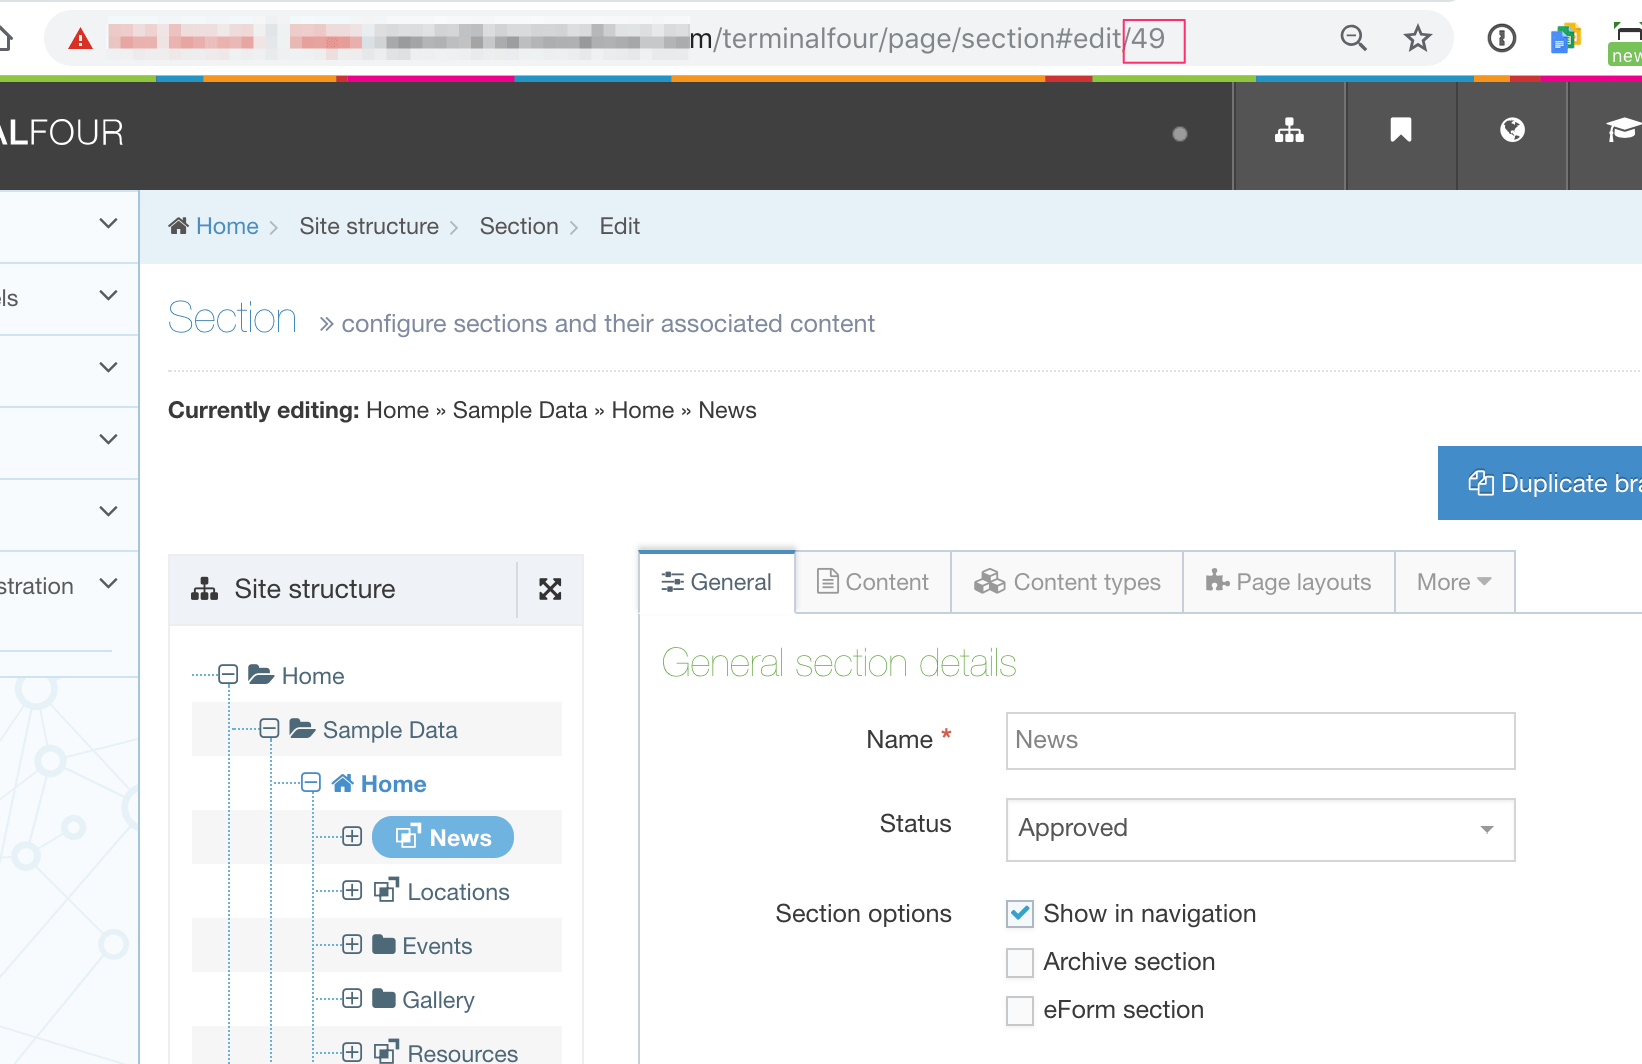
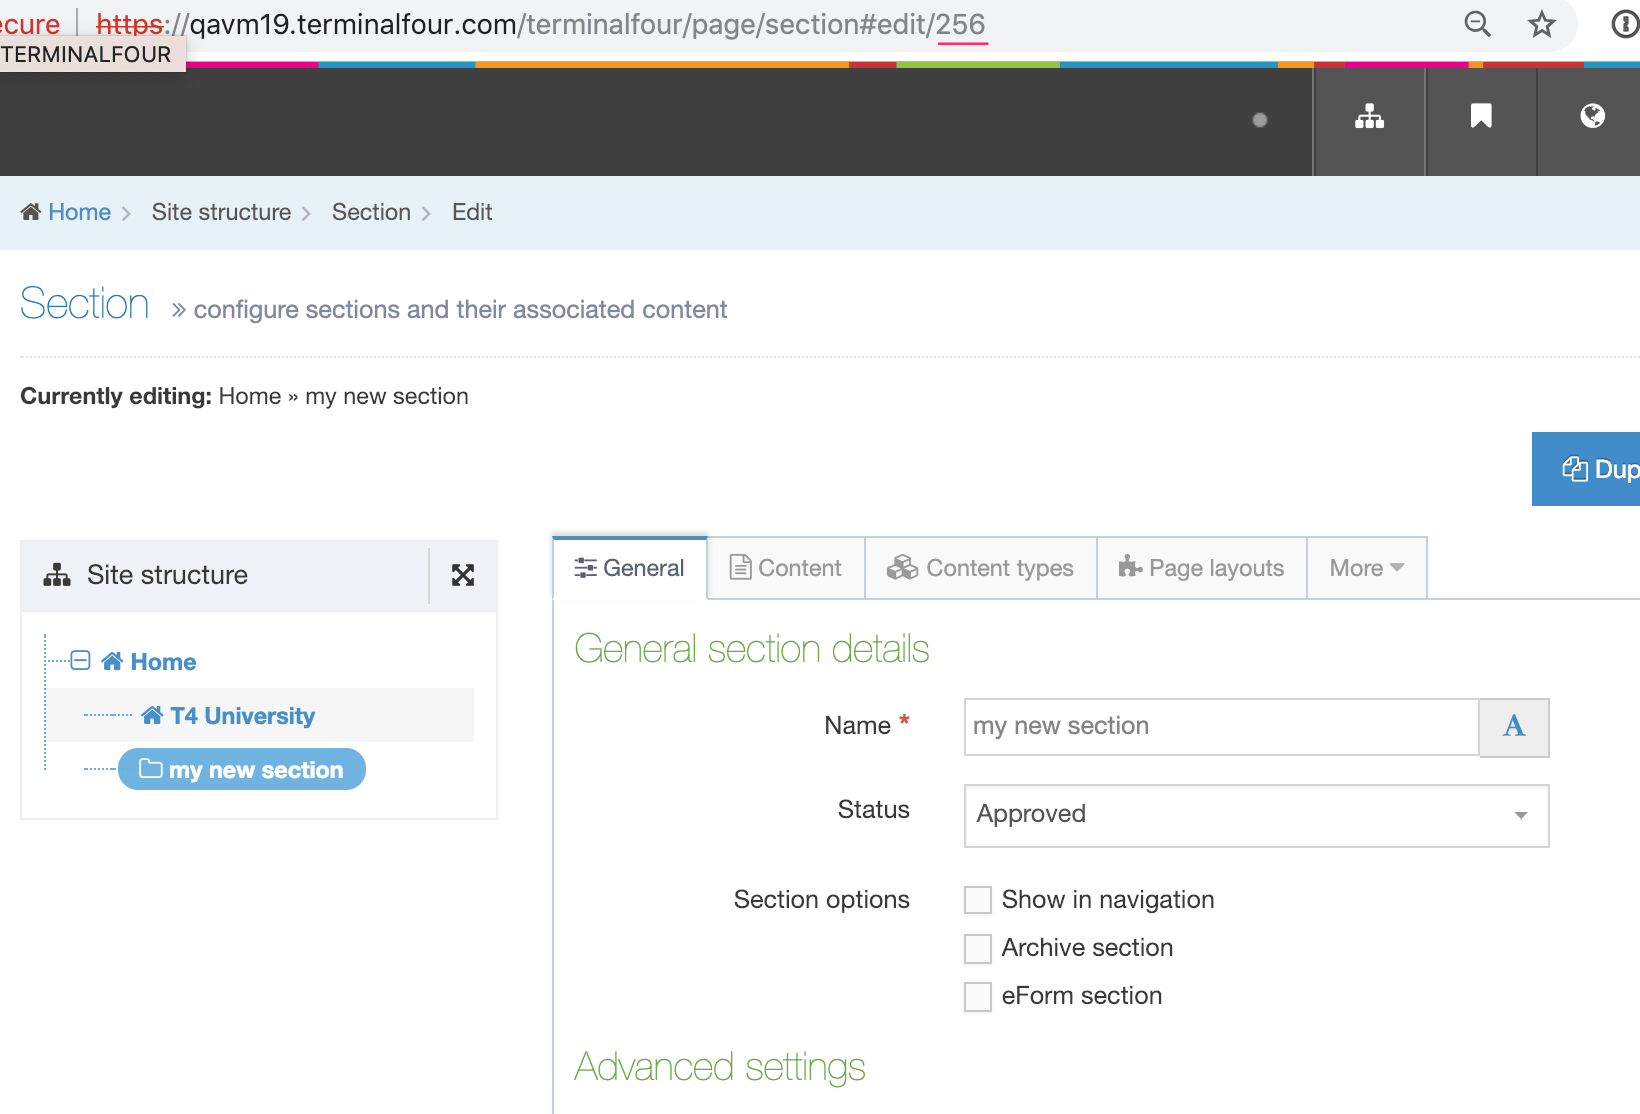
The parent field value is the id of the parent Section and, since the Root Section has a value of 1, the new Section will appear below that. If you want to add your new Section below a parent you can use a different parent id value. To get the Section id, select a Section in the Site Structure and copy the number appended to the URL:
When you click Send, a successful request will output the new Section details as a SectionDTO object in JSON format:
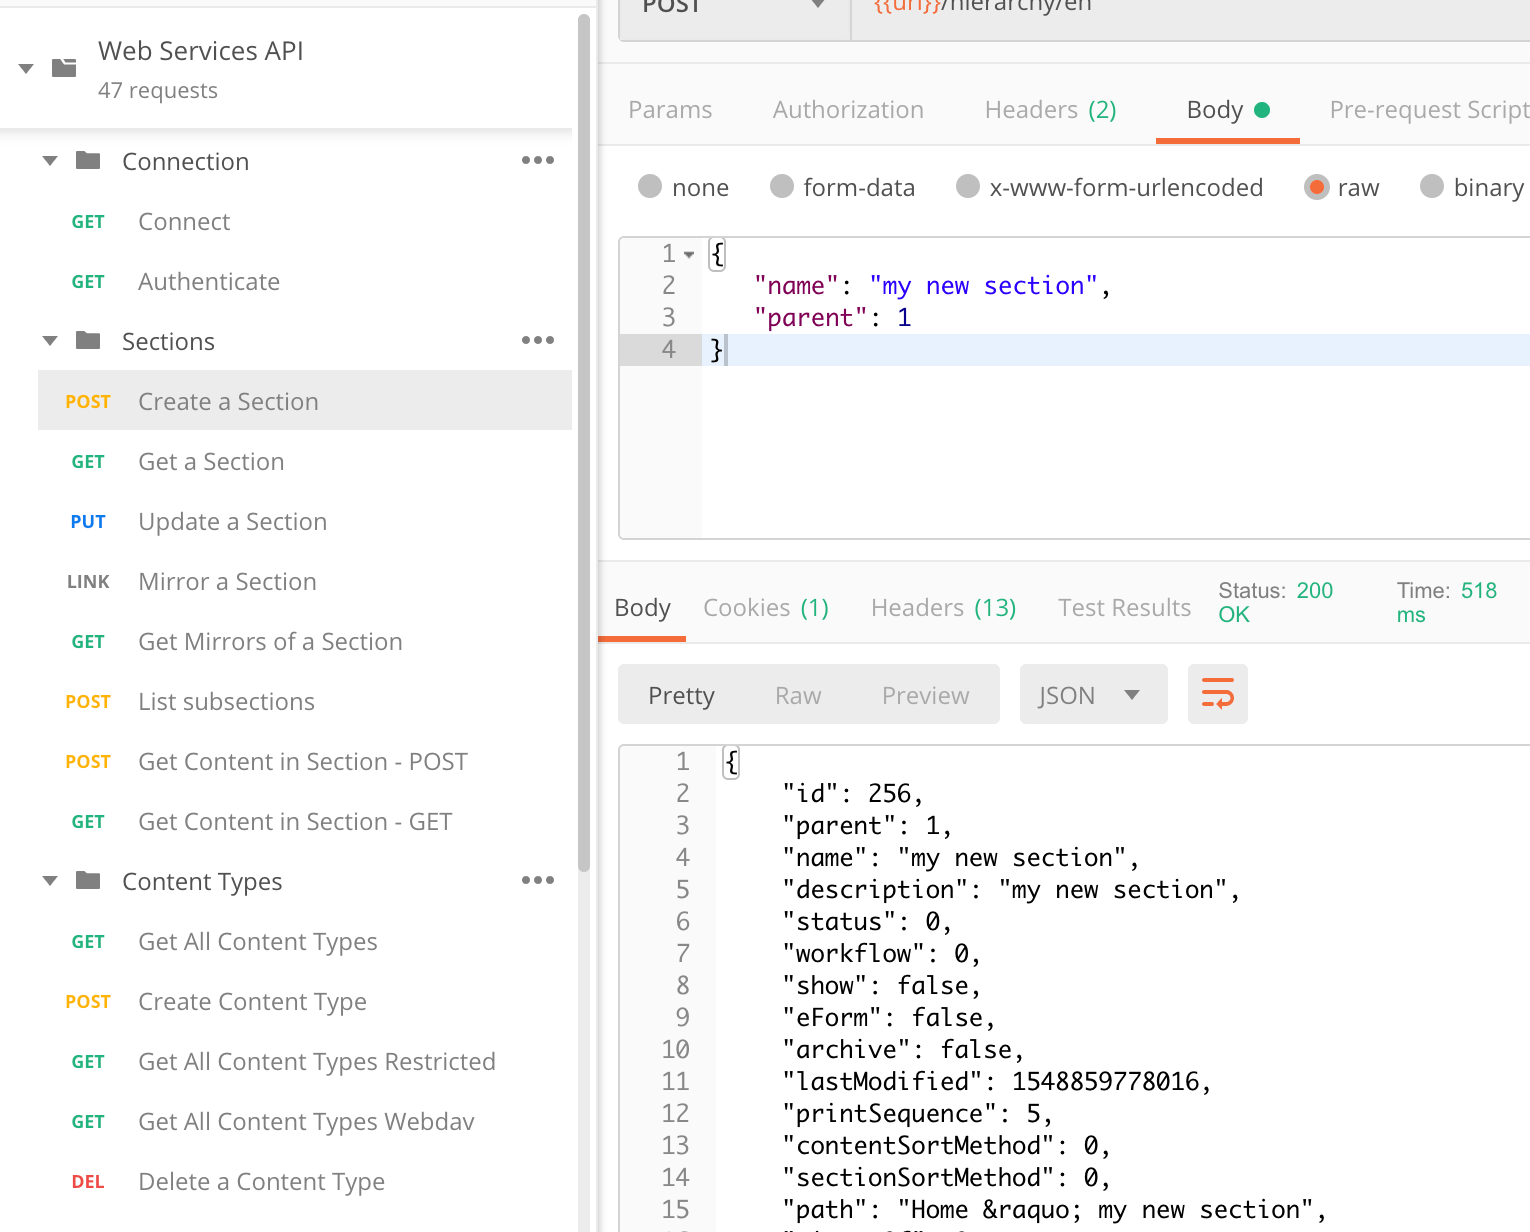
You’ll see the new Section ID and name. All other values have been given their default values.
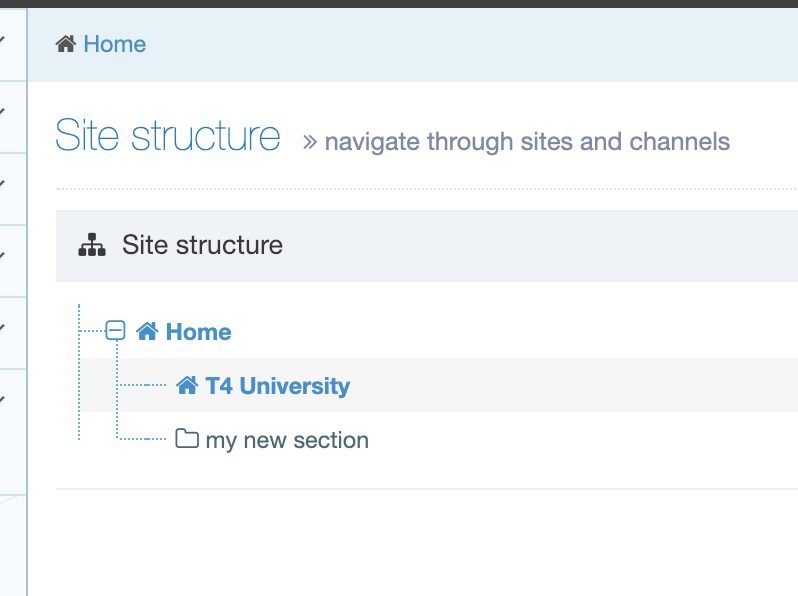
When you refresh your Site Structure, you’ll see the new Section:
When we select the Section we can see that the ID matches the one from the JSON output:
Updating a Section
You might have noticed that by default, the new Section will not show in Navigation so let’s change that. Here, we will be using the PUT /hierarchy/{id}/{language}” service to update the Section, again, with the SectionDTO object. You must provide the Section ID to identify the Section to be updated.
One thing to bear in mind is that any omitted fields will revert to their default values. The best way to deal with this is to use the "GET /hierarchy/{id}/{language}" service to return the Section details and use this as the basis of your PUT request. Using this method, you can change what you need and ensure that all other Section settings do not revert.
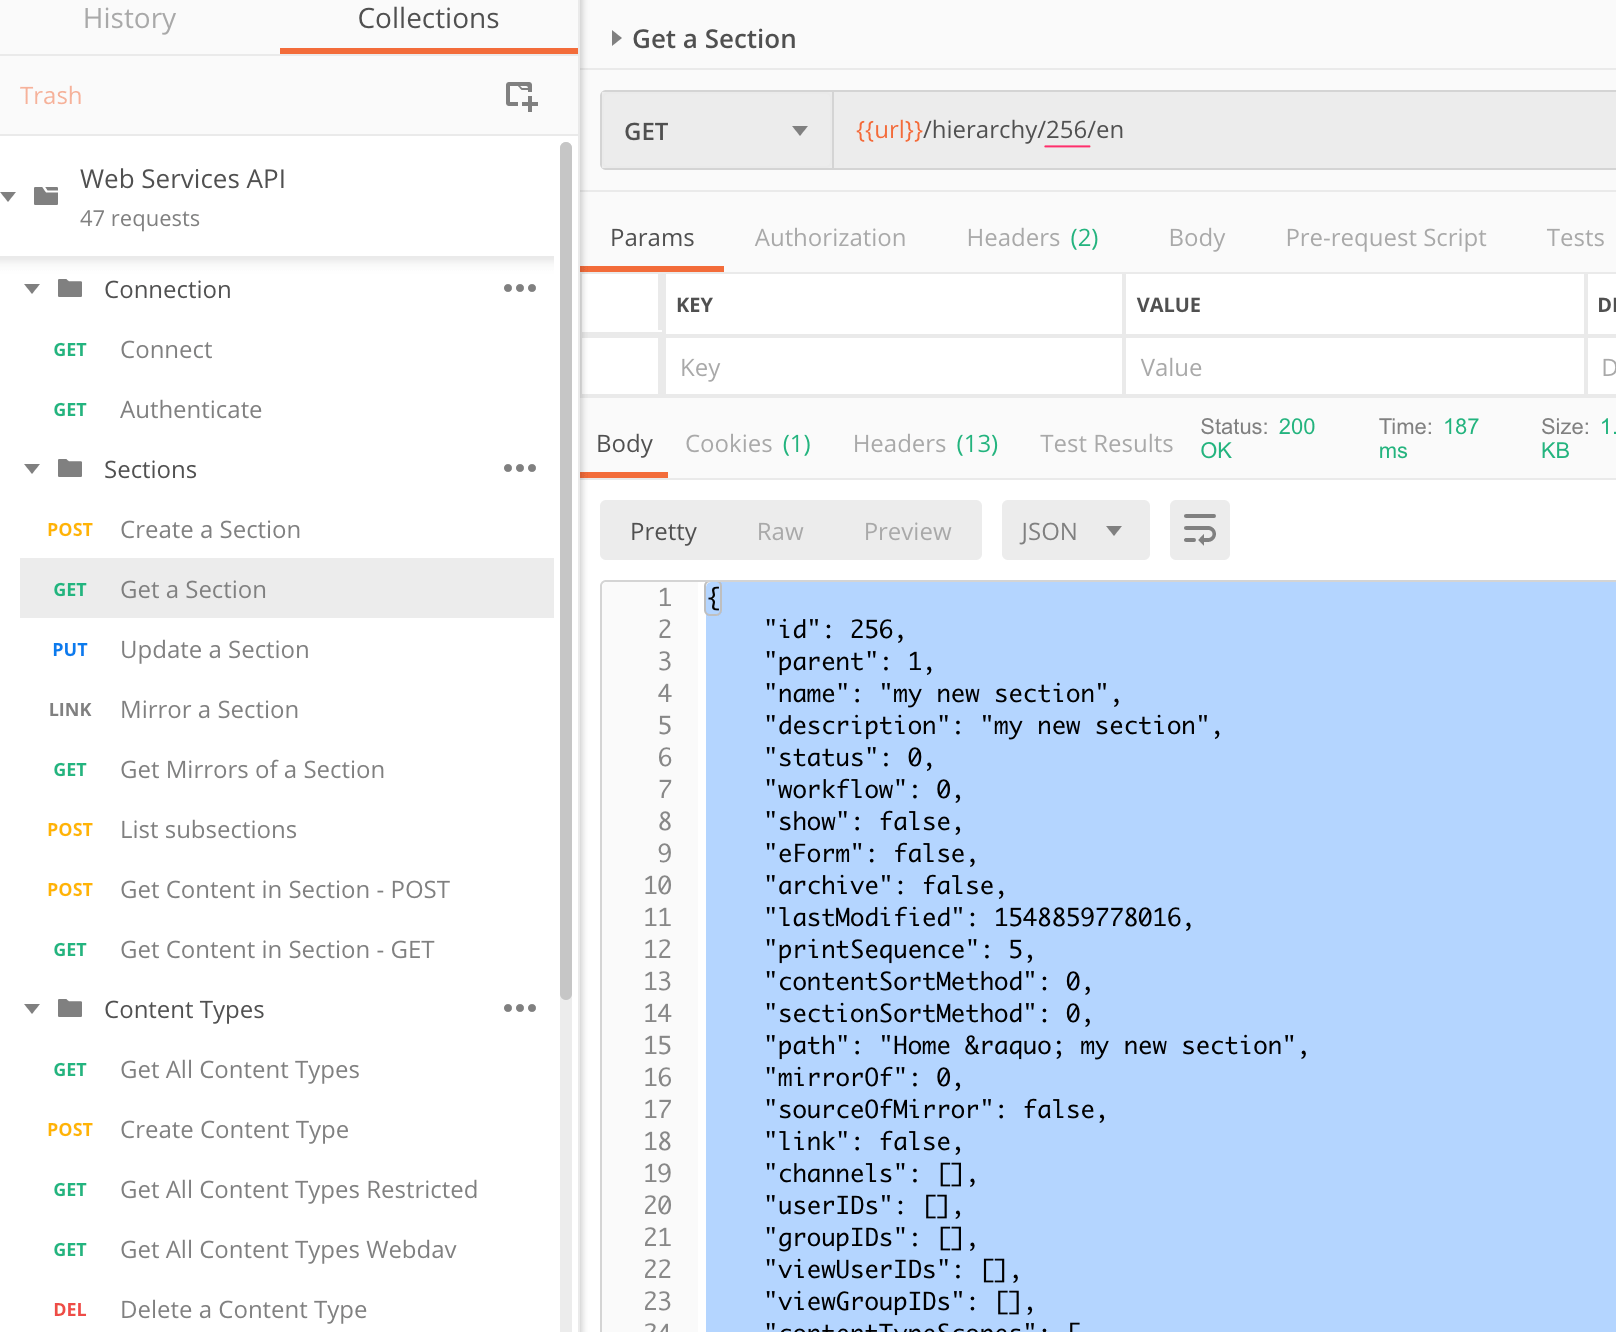
With the "Sections" Collection folder expanded select the "Get a Section" request. In the URL Input field update the URL with the id of your new Section, e.g., {{url}}/hierarchy /{section-id}/en and select and copy the JSON output:

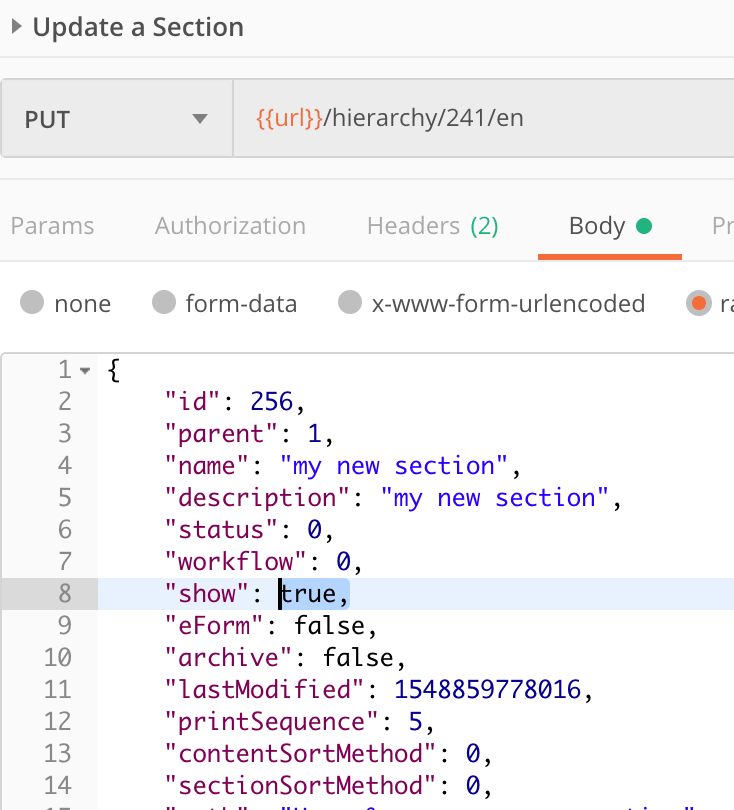
From the "Sections" Collections folder, select the "Update a Section" request. Add the Section id from the previous Section. We're not going to hit Send just yet, so go to the Body tab and paste the JSON that you copied from the previous request:
Change the value of "show" to "true" and hit Send:
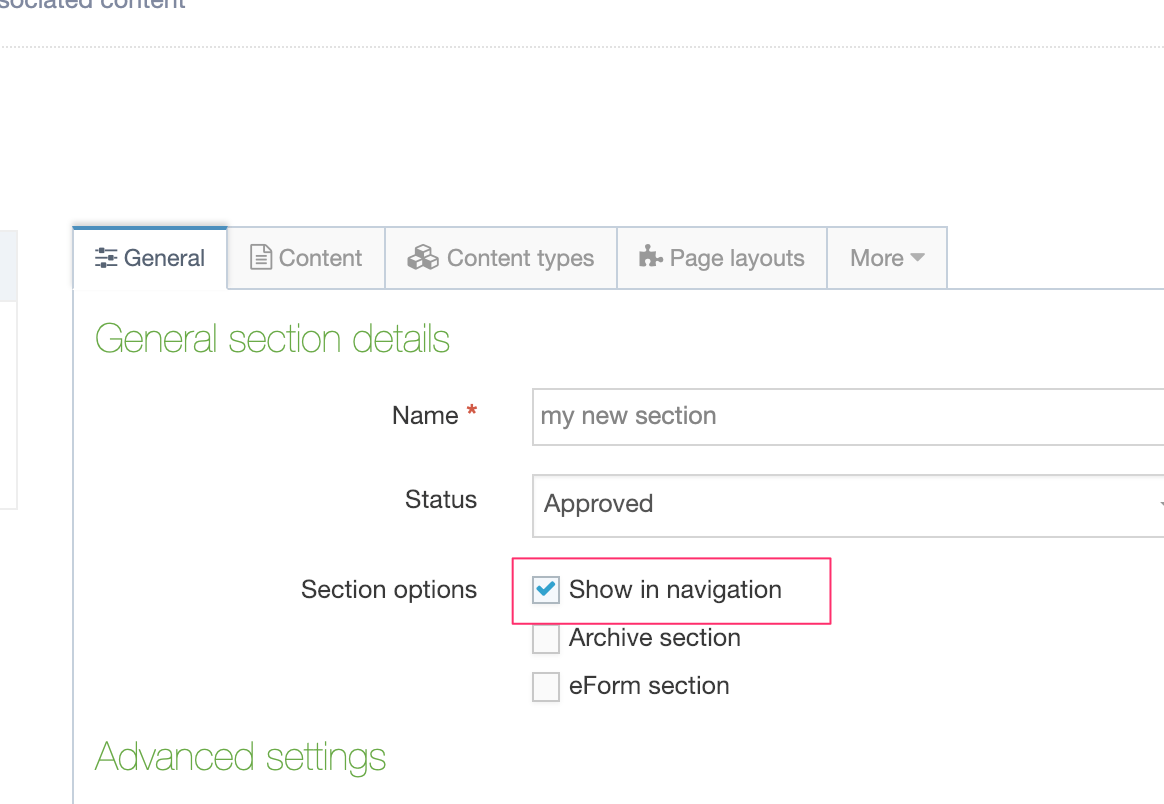
Back in Terminalfour, after a refresh, you can see that the Section is now visible:
You can change any of the Section values this way. For instance, you can also change the Section Status value. These are represented by numbers:
- Approved: 0
- Pending: 1
- Inactive: 2
So changing the "status" value to 1 will change the "Status" to "Pending". You can give it a go, but don't forget to switch back.
Not all the values are writable, some like "lastModified", "parent" and "path" are read-only.
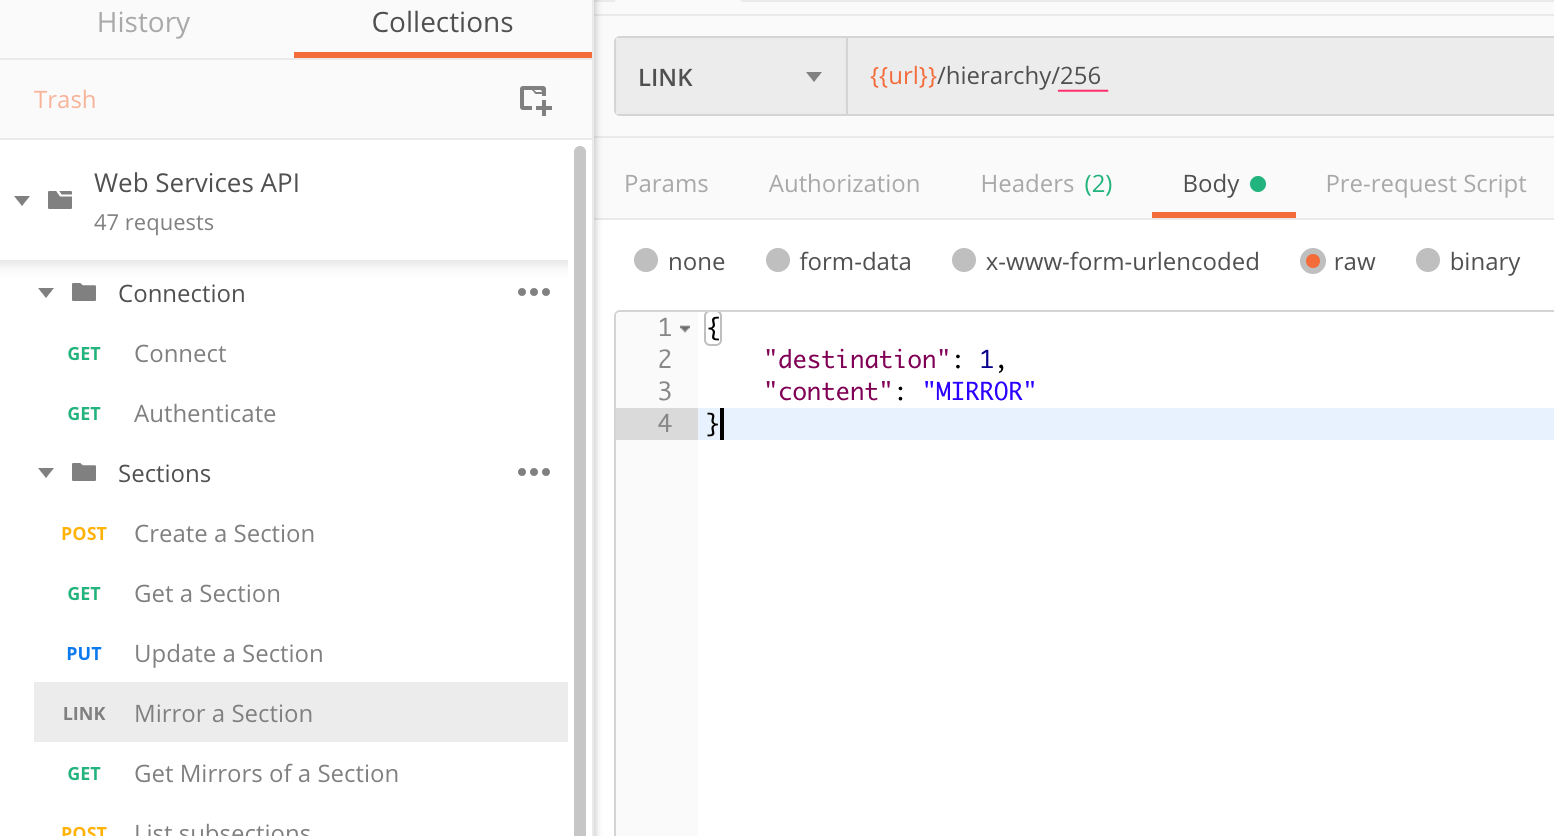
Mirroring a Section
Now that you have successfully created and updated a Section with the Web API we can mirror it.
Select the "Mirror a Section" from under the Sections folder. You'll see that the type of HTTP request is set to LINK. Enter the ID of the Section to be Mirrored. In the Body tab, you will see that two fields are required –
- "destination" - the ID of the Section that your mirrored Section will be created in. For this example, we will have it appear below the Root so we will set the "destination" to 1
- "content" – the operation to be carried out, which in this case is "MIRROR
Back in Terminalfour's Site Structure, following a refresh, you will see the mirrored Section:
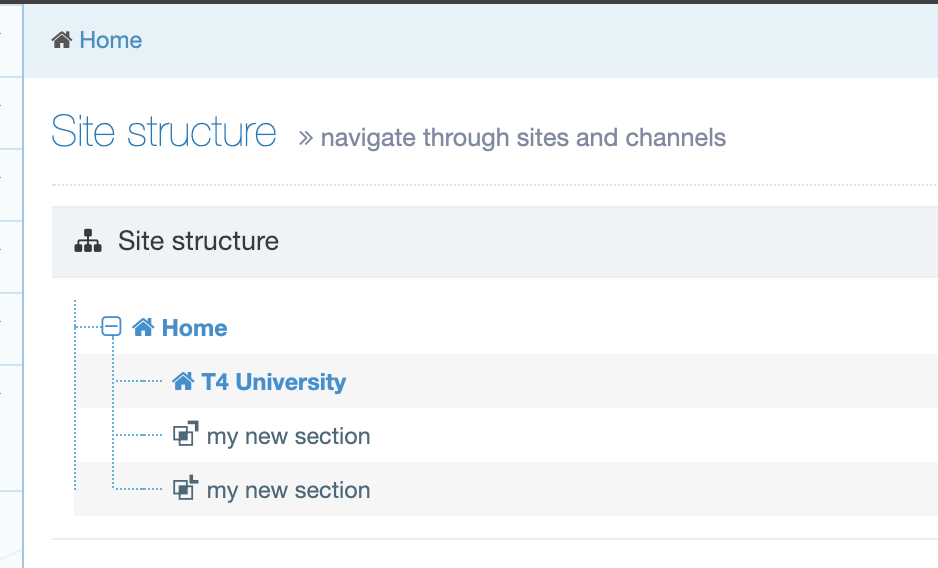
Unhelpfully, it has the same name as the original Section. Let's update the Section and change the name to "my mirrored section".
First up, select the newly created destination mirrored Section:
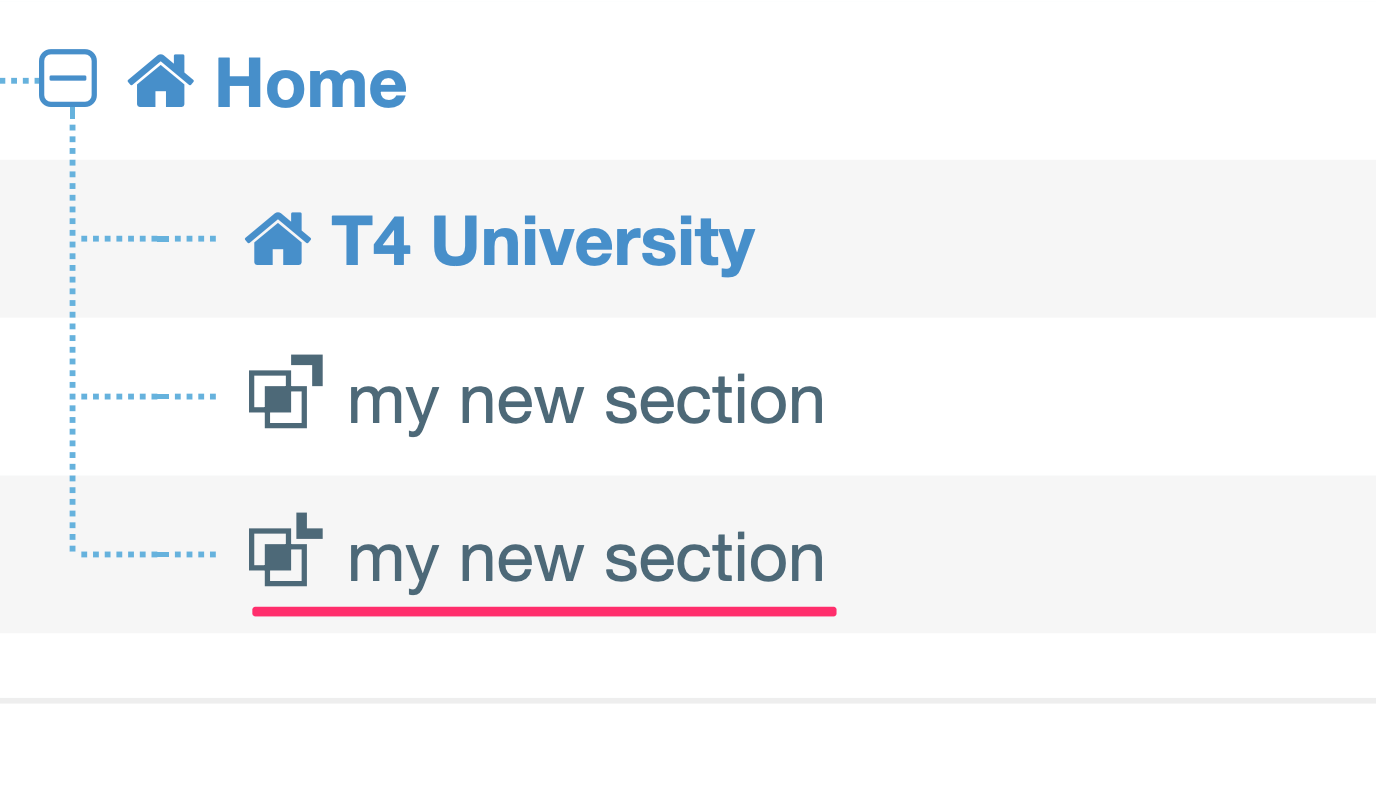
From the URL in the Settings screen, you can copy the Section ID:
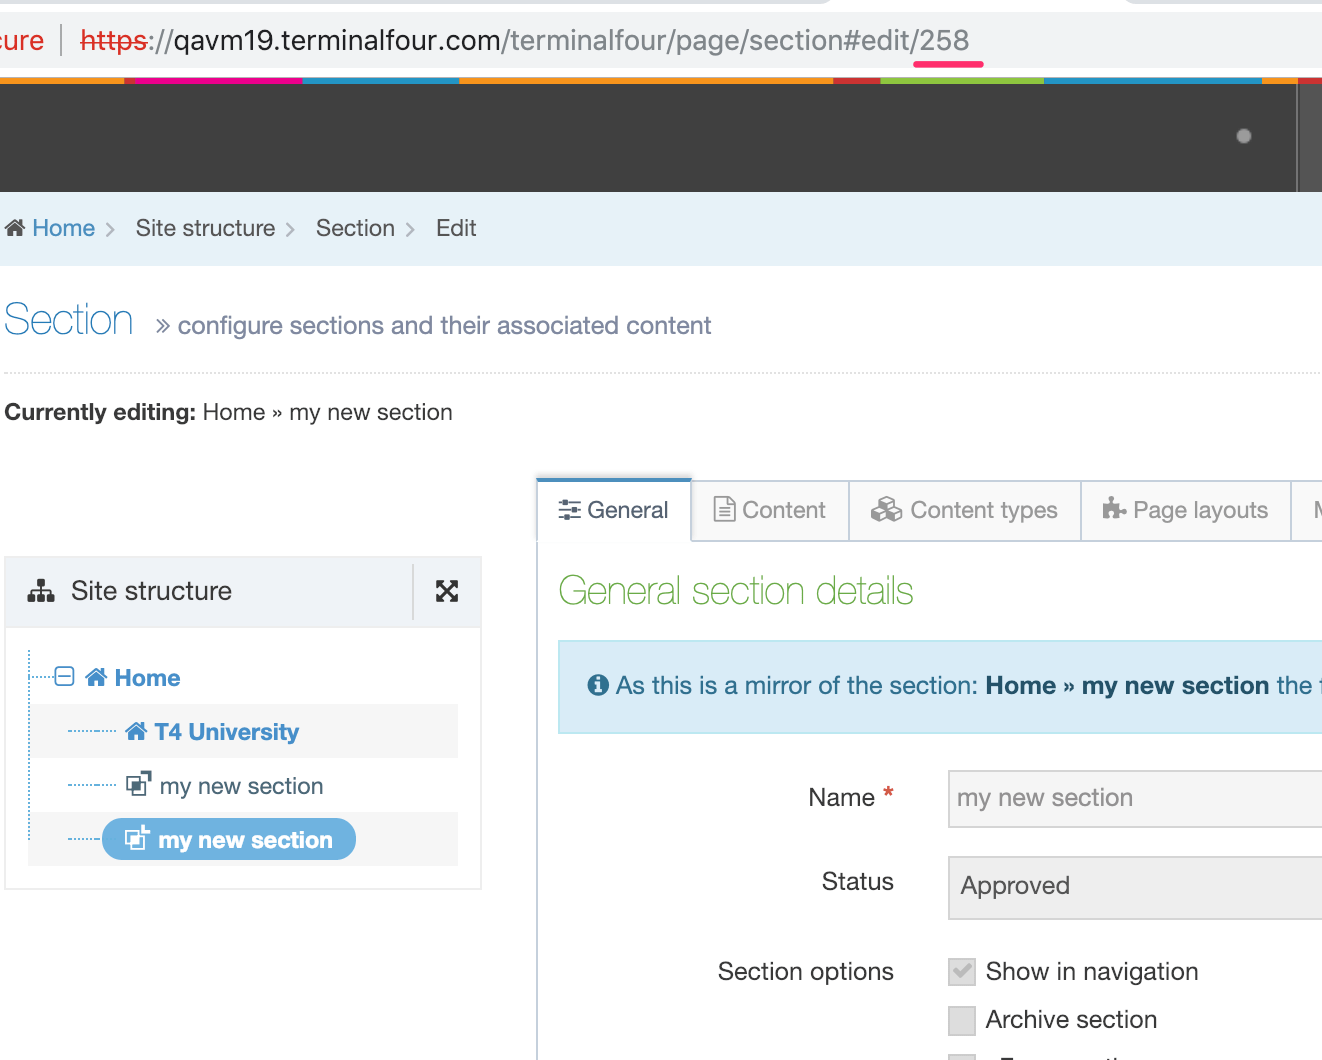
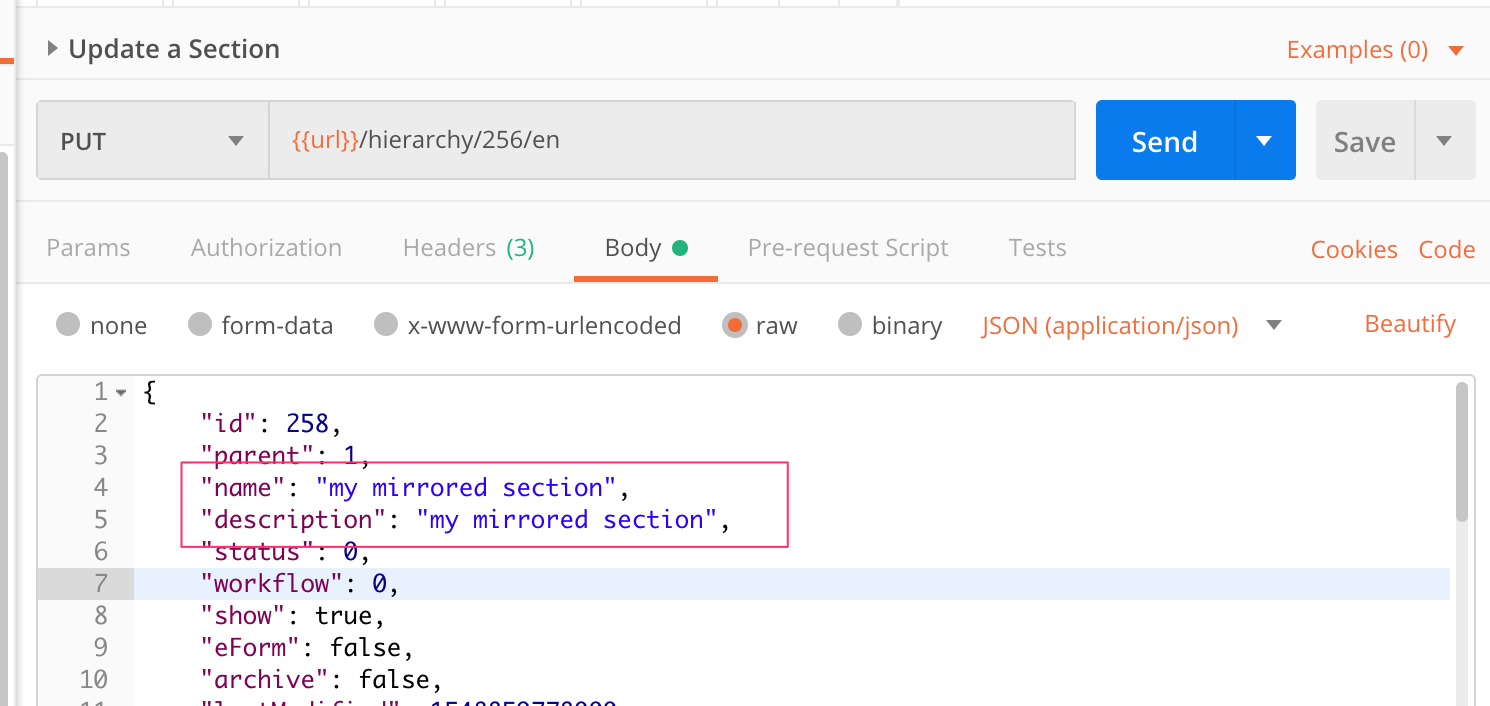
As above, we'll use the "Get a Section" request and copy and paste the JSON response into the "Update a Section" Body. Change the name and description and hit Send:
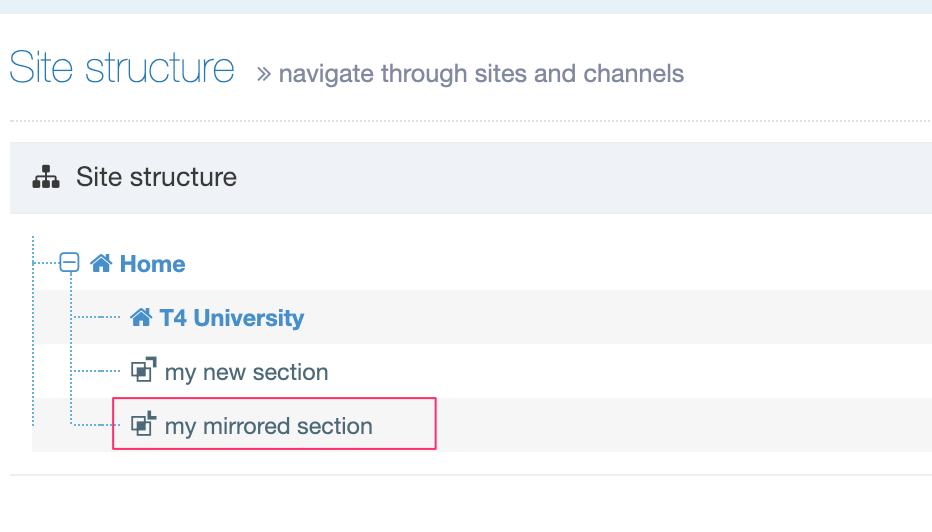
In the Site Structure, the mirrored Section will be renamed:
Listing all Mirrored Sections
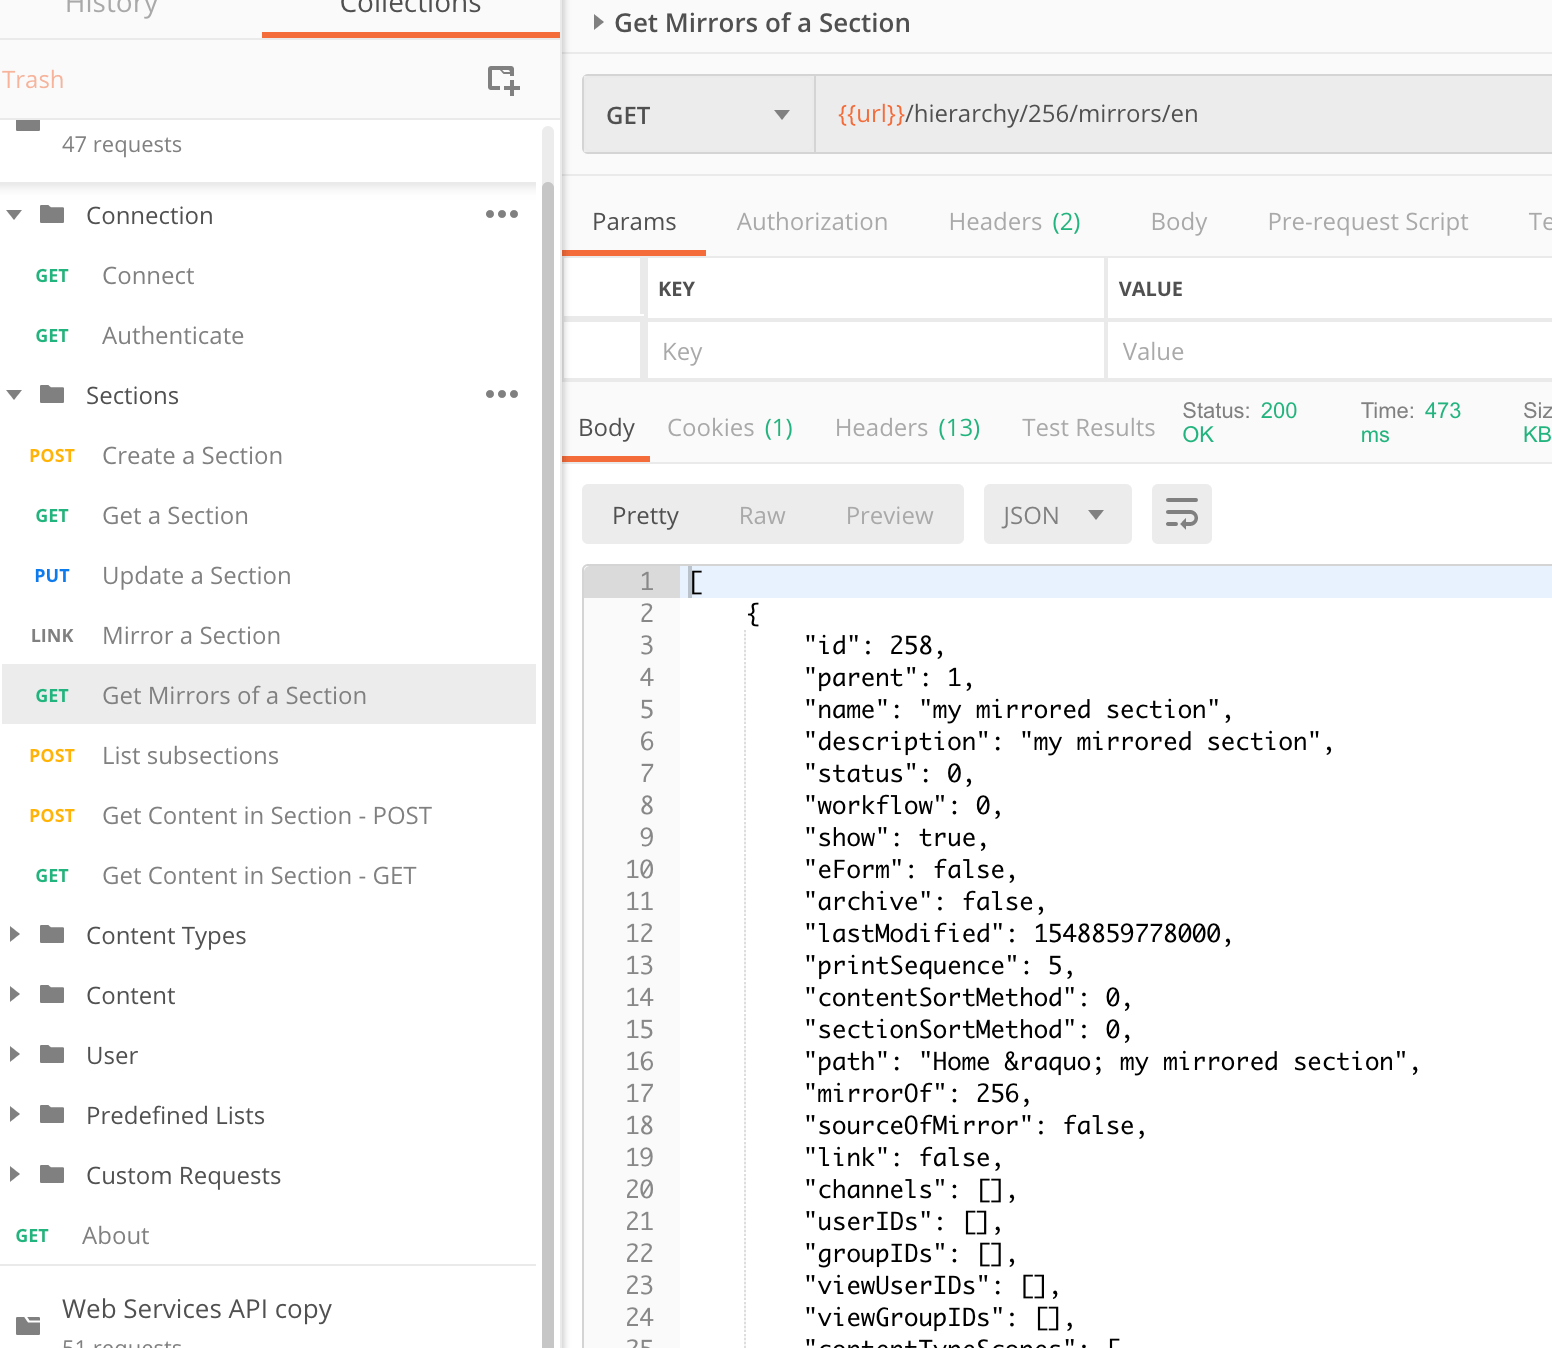
You can also list the IDs of all the Mirrors of a particular Section with the “GET /hierarchy/{id}/mirrors/{language}” service.
If you try this with your newly created Section, Terminalfour will return a JSON array containing the mirror of the Section that you have just created:
Conclusion
We've covered a lot of ground in this article – we've learned how to create, update and mirror Sections using the Web API. In the next article, we'll look at content.
Back to top