
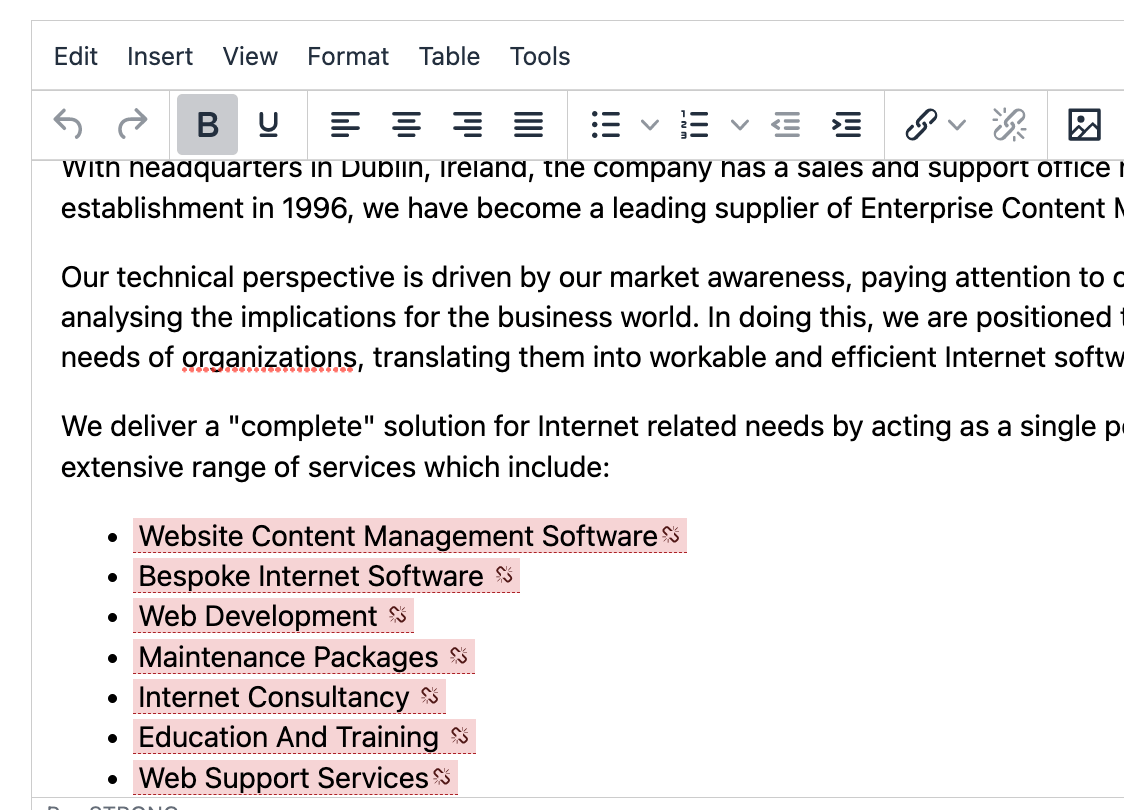
Tiny MCE Settings
Description
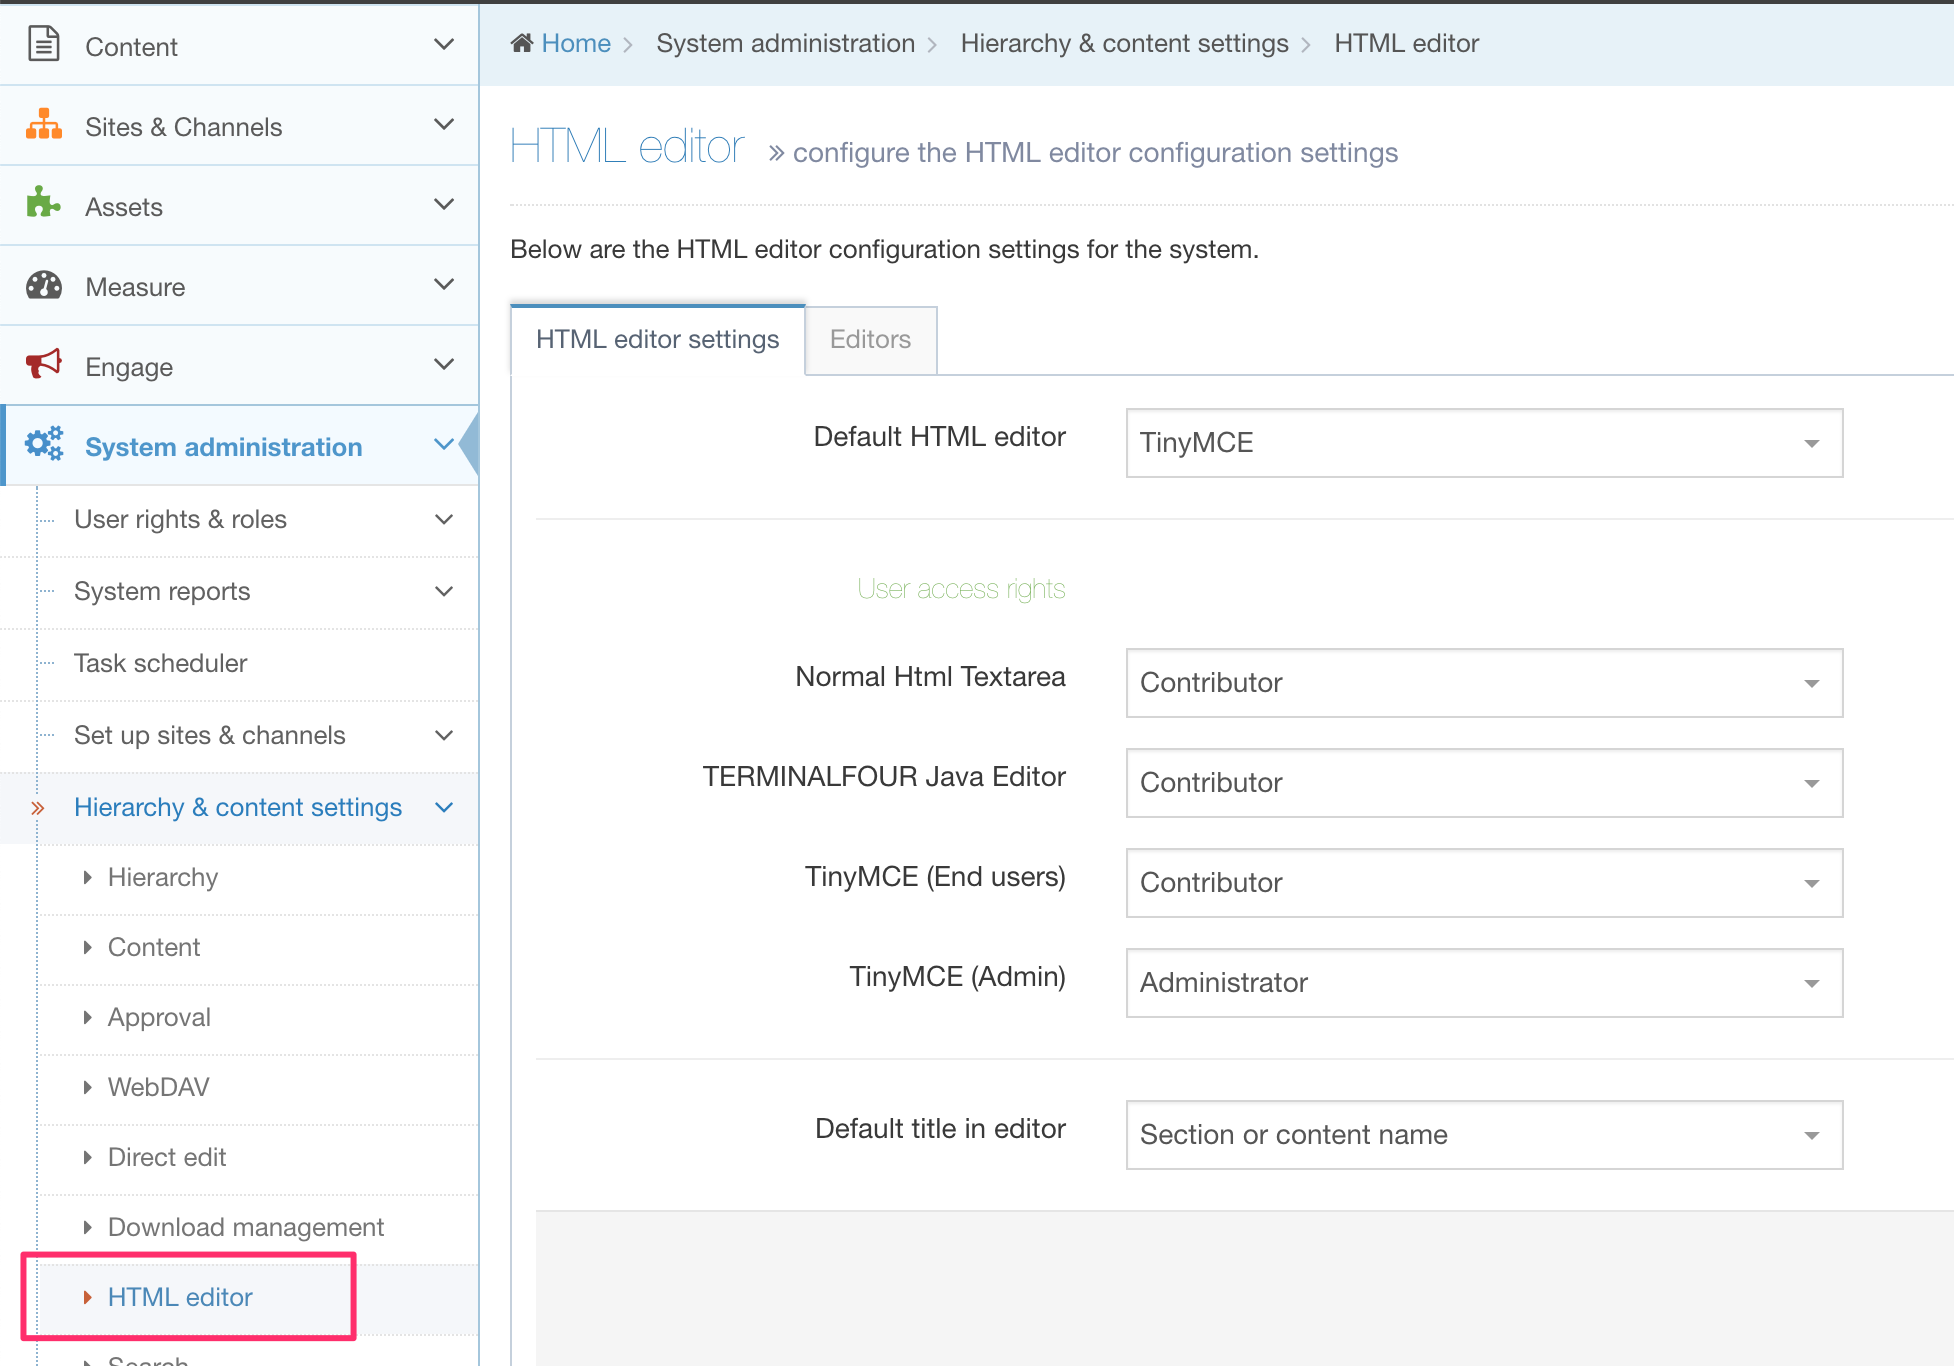
To configure the HTML editor go to System Administration > Hierarchy & Content Settings > HTML Editor.
To learn to edit content with TinyMCE have a look at the TinyMCE page.
An Administrator can use the HTML Editor feature to create more than one instance of the editor. Each instance can be customized to your user's needs whether they are content editors or end users by configuring the visibility of menu and toolbar icons.
HTML Editor
HTML Editor Settings Tab
In the HTML Editor Settings tab, you can select the default HTML editor to be used.
Below you'll see a list of all available HTML Editors on the left. The User Level required to use the Editor is selected from the corresponding drop-down menu on the right.
| Item | Description |
|---|---|
| Default HTML editor | Assigns this as the default editor for new users. It can be changed on an individual user's profile |
| User access rights | Set the minimum user level for each editor. If you, for instance, allow Moderators to have access to the Standard Textarea Editor, any user from this level and up will be able to select this editor in the User Profile. Additional editors can be configured on the Editors tab. |
| Default title in editor |
Specifies the title text used when creating a link within the editor. This is used when creating or editing content but is not visible on preview or publish. The options are:
|
Editors Tab
All HTML Editors are listed in the Editors tab. To customize one of your HTML Editors, select its name. To create a new editor, select Create new editor.

Configure the HTML editor settings
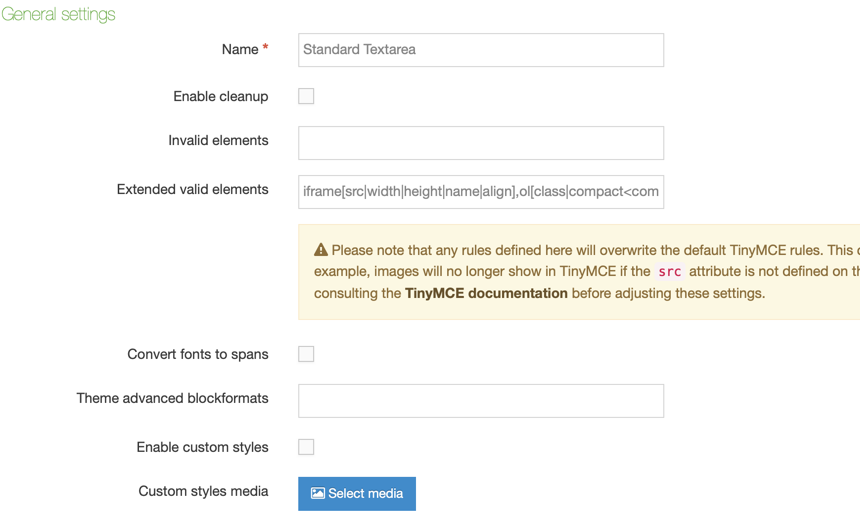
General settings
| Item | Description |
|---|---|
| Name | Sets the name used to identify the editor in the application |
| Enable cleanup | Uses TinyMCE's cleanup functionality to strip certain tags from the produced HTML and automatically add closing tags where necessary. Historically, this enabled the cleanup of code in the TinyMCE editor when content is pasted from MS Word or other sources. This feature is now enabled by default and can't be disabled. In future releases, this option will be removed from the configuration page. |
| Invalid elements | Comma-separated list of element names to be removed from your content. This allows specific code to be removed automatically from content. E.g., strong, em would remove all strong and em tags from content. |
| Extended valid elements |
Sets the permitted extended elements and attributes. Please note that any rules defined here will overwrite the default TinyMCE rules. This could cause unexpected behavior. E.g., images won't be displayed in TinyMCE if the The following is an example of the extended valid elements TERMINALFOUR recommends with your editor:
|
| Convert fonts to spans | Enables automatic conversion of font tags to span tags |
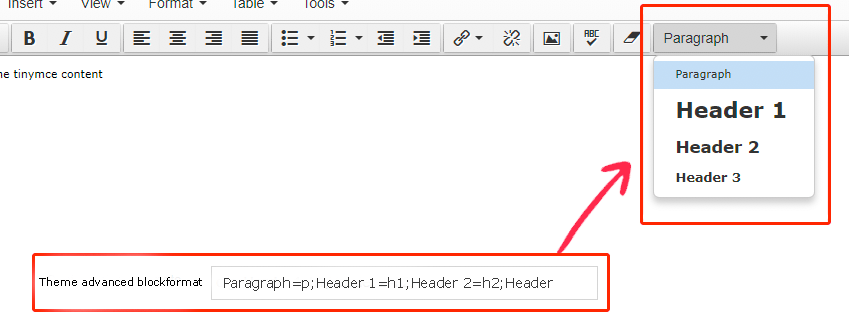
| Theme advanced blockformats |
You can make it easier for your users to apply styles by displaying a dropdown list of block-level elements in the Toolbar. You can even add your own labels so your users don't have to be familar with HTML element names. To add the elements you want to display, you can them in the following format:
e.g., to add a paragraph, h1, h2 and h3 add the following:
See more here |
| Enable custom styles |
Enables custom styles in the Format > Formats menu. Define these custom styles by selecting a CSS file below. |
| Custom styles media |
Defines the custom styles required in a CSS file in the Media Library |
Toolbars

| Item | Description |
|---|---|
| Standard toolbar icons to hide | Sets which buttons should be hidden in the toolbar |
| Additional toolbar icons to hide | Permits "extra" toolbar icons to be hidden that could be put in place by custom plugins. Enter values in plain text, separated by commas or spaces. |
Theme advanced Blockformats
The advanced block formats under the format menu are controlled by the "Theme advanced blockformats" options:
Using Custom CSS
You can list the selectors (e.g., classes and IDs) from your own CSS rules in the Formats menu. These are listed under Format > Formats. Just upload a CSS file to the Media Library, check the "Enable custom styles" option and select the stylesheet.

Plugins
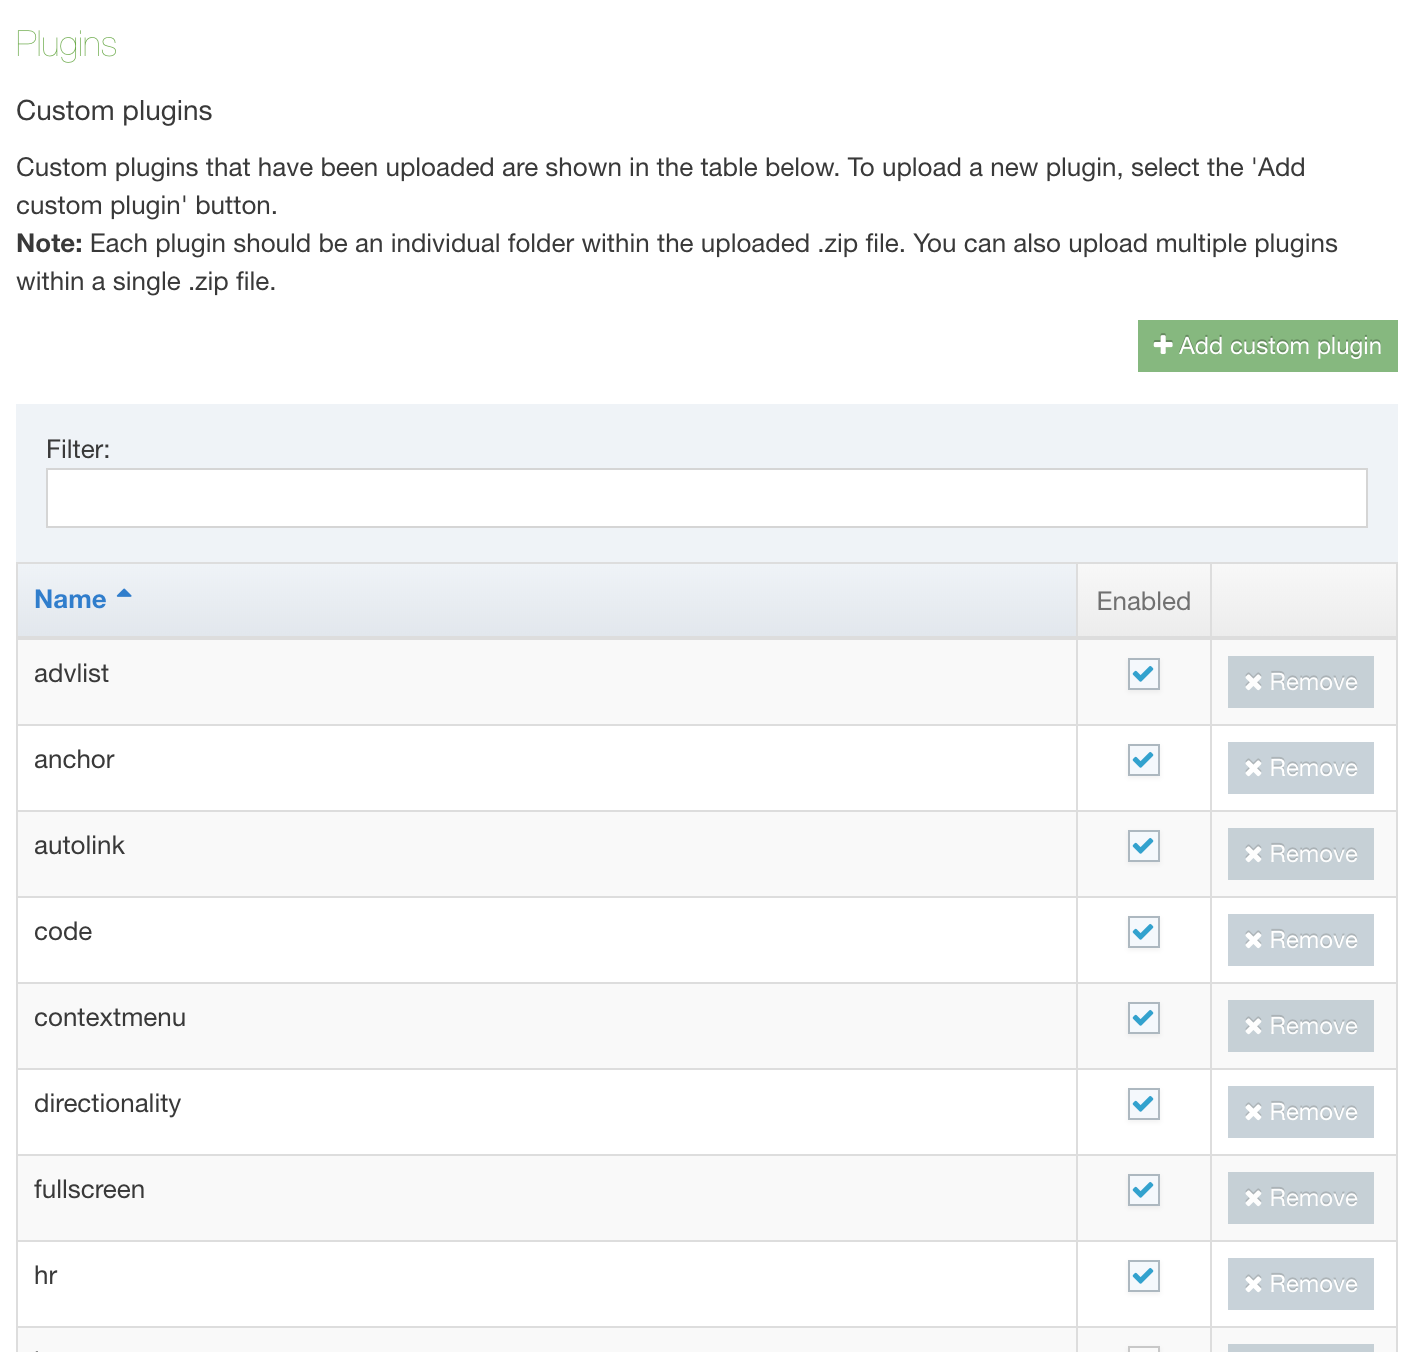
Plugins that have been uploaded are shown. Plugins can be enabled/disabled and removed.
The Add custom plugin button allows additional TinyMCE plugins to be added. Each plugin should be an individual folder within the uploaded .zip file. Multiple plugins can be added to a single .zip file.
Below is a description of the standard plugins provided.
| Plugin | Summary | Description |
|---|---|---|
| advlist | Create styled number and bulleted lists. | Extends the core bullist and numlist toolbar controls by adding CSS list-style-type styled number formats and bullet types to the controls. |
| anchor | Insert anchors (sometimes referred to as a bookmark). | Adds an anchor/bookmark button to the toolbar that inserts an anchor at the editor's cursor insertion point. It also adds the menu item anchor under the Insert menu. |
| autolink | Automatically create hyperlinks. | Automatically creates hyperlinks when a user inputs a valid, complete URL. For example, www.example.com is converted to http://www.example.com. |
| code | Edit your content's HTML source. | Adds a toolbar button that allows a user to edit the HTML code hidden by the WYSIWYG view. It also adds the menu item Source code under the Tools menu. |
| contextmenu | Right-click to perform actions in TinyMCE | Adds a configurable context menu that appears when a user right-clicks in the editable area. |
| directionality | Toolbar buttons for setting the left-to-right or right-to-left direction of content. | Adds directionality controls to the toolbar, enabling TinyMCE to better handle languages written from right to left. It also adds a toolbar button for each of its values, ltr for left-to-right text and rtl for right-to-left text. |
| fullscreen | Zoom TinyMCE up to the whole screen. | Adds full screen editing capabilities to TinyMCE. When the toolbar button is pressed the editable area will fill the browser's viewport. The plugin adds a toolbar button and a menu item Fullscreen under the View menu. |
| hr | Insert a horizontal line. | Allows a user to insert a horizontal rule on the page at the cursor insertion point. It also adds a toolbar button and a menu item Horizontal line under the Insert menu. |
| image | Insert an image into TinyMCE. | Enables the user to insert an image into TinyMCE's editable area. Note that this is not drag-drop functionality and the user is required to enter the path to the image. Optionally the user can also enter the image description, dimensions, and whether image proportions should be constrained (selected via a checkbox). Some of these settings can be preset using the plugin's configuration options. The plugin also adds a toolbar button and an Insert/edit image menu item under the Insert menu. |
| insertdatetime | Insert the current date and/or time into TinyMCE. | Provides a toolbar control and menu item Insert date/time (under the Insert menu) that lets a user easily insert the current date and/or time into the editable area at the cursor insertion point. |
| lists | Normalizes list behavior between browsers. | This list plugin Normalizes list behavior between browsers. Enable it if you have problems with consistency making lists. |
| noneditable | Prevent users from changing content within elements. Ideal for templates. | Enables you to prevent users from being able to edit content within elements assigned the mceNonEditable class. |
| paste | Standard version of features for copying-and-pasting content from Microsoft Word. | Also adds a menu item Paste as text under the Edit menu dropdown and a toolbar button. |
| Print the content in TinyMCE. | Adds a print button to the toolbar. It also adds a Print item to the File menu dropdown. | |
| searchreplace | Find and replace content in TinyMCE. | Adds search/replace dialogs to TinyMCE. It also adds a toolbar button and the menu item Find and replace under the Edit menu dropdown. |
| spellchecker | Enables TinyMCE's spellcheck functionality. | Enables TinyMCE's spellcheck functionality. It also adds a toolbar button and the menu item Spellcheck under the Tools menu dropdown. |
| tabfocus | Tab into and out of the TinyMCE control in your web form. | Adds the possibility to tab in/out of TinyMCE. |
| t4accessibletable | Table editing features. | Adds table management functionality to TinyMCE. It also adds a new menubar item Table with various options in its drop-down including Insert table and options to modify cells, rows, and columns, and a toolbar button with the same functionality. |
| textpattern | Matches special patterns in the text and applies formats or executed commands on these patterns. | Matches special patterns in the text and applies formats or executed commands on these patterns. start and end text with * applies the format 'italic' start and end text with ** applies the format 'bold' # applies the format'h1' ## applies the format'h2' ### applies the format'h3' #### applies the format'h4' ##### applies the format'h5' ###### applies the format'h6' 1. ', cmd: 'InsertOrderedList' * ', cmd: 'InsertUnorderedList' - ', cmd: 'InsertUnorderedList' The default pattern is similar to Markdown syntax, so you can type # text to produce a header or **text** to make text bold. More instructions required - see https://www.tinymce.com/docs/plugins/textpattern/ |
| visualblocks | Allows a user to see block level elements such as paragraphs. | Allows a user to see block level elements in the editable area. It is similar to WYSIWYG hidden character functionality but at a block level. It also adds a toolbar button and a menu item Show blocks under the View menu dropdown. |
| visualchars | See invisible characters like non-breaking spaces. | Adds the ability for users to see invisible characters like displayed in the editable area. It also adds a toolbar control and a menu item Show invisible characters under the View menu. |
| wordcount | Show a word count in the TinyMCE status bar. | Adds word count functionality to TinyMCE, placing a counter on the right edge of the status bar. |
| t4cleanup | T4 special | Removes attributes and html tags from the content |
| t4customstyles | T4 special | Allows you to have additional styles under formats |
| t4externallink | T4 special | This is identical to the standard 'link' plugin except for the addition of the 'insertLink:presubmit' event being fired |
| t4links | T4 special | Handles the insert section link, content link, anchors |
| t4media | T4 special | Handles insertion of media & media attributes modal |
| t4tableshim | T4 special | Handling attributes on resizing tables. comment in code: TinyMCE doesn't fire events onSubmit / onClose of its modals, so hijack onClose for the table plugin to fire our own event // The resizing of tables assigns the deprecated 'width' attribute so remove this and manually update the inline CSS that should be used. |
| t4tablestrip | T4 special | Removal of default in table cells |
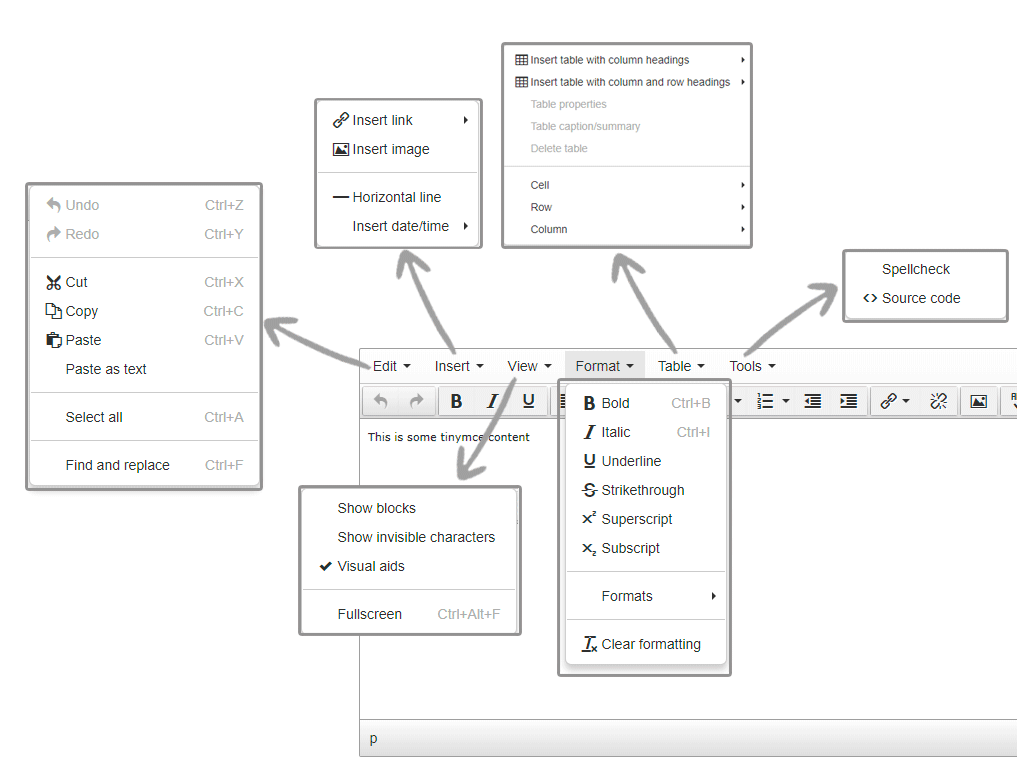
Menu and icons
The controls are made up of a menu and icons on the toolbar. The toolbar setup here shows the basic icons and menus.

Menus and corresponding icons
Not all functions have toolbar icons. Most functions are listed in the drop-down menus.
| Menu / Item | Icon | Can it be removed? |
|---|---|---|
| Edit | ||
| Undo |  |
Yes, via the Menu items to hide option and the icon can be hidden via the Standard toolbar icons to hide option. |
| Redo |  |
Yes, via the Menu items to hide option and the icon can be hidden via the Standard toolbar icons to hide option. |
| Cut | Yes, via the Menu items to hide option. | |
| Copy | Yes, via the Menu items to hide option. | |
| Paste | Yes, via the Menu items to hide option. | |
| Paste as text | Yes, via the Menu items to hide option. | |
| Select all | Yes, via the Menu items to hide option. | |
| Find and replace | Yes, via the searchreplace plugin. | |
| Insert | ||
| Insert image | Yes, via the image plugin. | |
| Insert link |  |
Yes, via the t4links plugin. The icon can be hidden via the Standard toolbar icons to hide option. |
| Insert link > Insert section link | ||
| Insert link > Insert content link | ||
| Insert link > Insert/edit external link | ||
| Insert link > Insert anchor | ||
| Insert date/time | Yes, via the insertdatetime plugin. | |
| Horizontal line | Yes, via the Menu items to hide option. | |
| View | ||
| Show blocks | Yes, via the visualblocks plugin. | |
| Show invisible characters | Yes, via the visualchars plugin. | |
| Visual aids | Yes, via the Menu items to hide option. | |
| Fullscreen | Yes, via the fullscreen plugin. | |
| Format | ||
| Bold |  |
Yes, via the Menu items to hide option and the icon can via the Standard toolbar icons to hide option. |
| Italic |  |
Yes, via the Menu items to hide option and the icon can be hidden via the Standard toolbar icons to hide option. |
| Underline |  |
Yes, via the Menu items to hide option and the icon can be hidden via the Standard toolbar icons to hide option. |
| Strikethrough | Yes, via the Menu items to hide option. | |
| Superscript | Yes, via the Menu items to hide option. | |
| Subscript | Yes, via the Menu items to hide option. | |
| Formats > Headings > Heading 1 | Yes, via the Default formats to hide option. | |
| Formats > Headings > Heading 2 | Yes, via the Default formats to hide option. | |
| Formats > Headings > Heading 3 | Yes, via the Default formats to hide option. | |
| Formats > Headings > Heading 4 | Yes, via the Default formats to hide option. | |
| Formats > Headings > Heading 5 | Yes, via the Default formats to hide option. | |
| Formats > Headings > Heading 6 | Yes, via the Default formats to hide option. | |
| Formats > Inline > Bold | |
Yes, via the Default formats to hide option and the icon can via the Standard toolbar icons to hide option. |
| Formats > Inline > Italic | |
Yes, via the Default formats to hide option and the icon can via the Standard toolbar icons to hide option. |
| Formats > Inline > Underline | |
Yes, via the Default formats to hide option and the icon can via the Standard toolbar icons to hide option. |
| Formats > Inline > Strikethrough | Yes, via the Default formats to hide option. | |
| Formats > Inline > Superscript | Yes, via the Default formats to hide option. | |
| Formats > Inline > Subscript | Yes, via the Default formats to hide option | |
| Formats > Inline > Code | Yes, via the Default formats to hide option. | |
| Formats > Blocks > Paragraph | Yes, via the Default formats to hide option. | |
| Formats > Blocks > Blockquote | Yes, via the Default formats to hide option. | |
| Formats > Blocks > Div | Yes, via the Default formats to hide option. | |
| Formats > Blocks > Pre | Yes, via the Default formats to hide option. | |
| Formats > Alignment > Left |  |
Yes, via the Default formats to hide option and the icon can be hidden via the Standard toolbar icons to hide option. |
| Formats > Alignment > Center |  |
Yes, via the Default formats to hide option and the icon can be hidden via the Standard toolbar icons to hide option. |
| Formats > Alignment > Right |  |
Yes, via the Default formats to hide optionand the icon can be hidden via the Standard toolbar icons to hide option. |
| Formats > Alignment > Justify |  |
Yes, via the Default formats to hide option and the icon can be hidden via the Standard toolbar icons to hide option. |
| Clear formatting | Yes, via the Menu items to hide option. | |
| Table | ||
| Insert table | Yes, via the table plugin. | |
| Table properties | ||
| Delete table | ||
| Cell > Cell properties | ||
| Cell > Merge cells | ||
| Cell > Split cell | ||
| Row > Insert row before | ||
| Row > Insert row after | ||
| Row > Delete row | ||
| Row > Row properties | ||
| Row > Cut row | ||
| Row > Copy row | ||
| Row > Paste row before | ||
| Row > Paste row after | ||
| Column > Insert column before | ||
| Column > Insert column after | ||
| Column > Delete column | ||
| Tools | ||
| Spellcheck |  |
Yes, via the spellchecker plugin. The icon can be hidden via the Standard toolbar icons to hide option. |
| Source code | Yes, via the code plugin. | |
Icons that don't have a menu option
The icons can be removed via the Standard toolbar icons to hide option.
| Item | Icon |
|---|---|
| bullist |  |
| numlist |  |
| outdent |  |
| indent |  |
| unlink |  |
| t4media |  |
| cleanup |  |
Broken links
When editing a Content Item, broken links are highlighted with a red border.
You can learn more on the dedicated Broken Links Checker page.
Other options
The word count is displayed in the bottom right of the status bar and can be removed via the wordcount plugin.
The menu displayed when the mouse is right-clicked can be removed via the contextmenu plugin.