
Get up and running with TERMINALFOUR Web API
Changes were introduced to the /about service and the naming of access tokens in v8.2.18 and v8.3 respectively.
If you're running an older version, have a look at the older version of this article.
This is the first in a series of articles we are writing on getting up and running with the Web Services API.
With TERMINALFOUR’s Web Services API, you can view and edit Sections, content and assets without logging into the interface. This takes the possibilities of what can be done with TERMINALFOUR beyond the features offered in the product alone. With the Web Services API, you can integrate TERMINALFOUR with your own or other services in a custom web or native mobile application.
The full Web Services API reference docs are available here
The purpose of this article is to let you connect to your TERMINALFOUR instance and using a GET request, view the About details of your instance. In future articles, we'll take this further by using requests to edit content, assets and Sections and then look at creating our own requests in NodeJS.
To get up and running, we’re going to use Postman, a free application that lets you test and develop Web APIs, so to follow along you should download and install this. All screengrabs in this article are from Postman v6.3.0.
To follow along with this you should have a user level of Administrator.
We've also created a collection of requests for you to download and follow along here.
Postman can only authenticate local users so if you are using a directory service like LDAP for authentication you should set up a local one to follow along here.
Connect Request
When using Postman, you’ll first set up an Environment. This is a set of key/value pairs we’ll initially populate with just the URL of our instance. The advantage of using Environments is that we can move between instances without changing our requests – so we could test our requests on a local or test instance and then, by just switching the Environment context, can use those same requests on our live instance.
To set up the Environment, select the cog icon on the upper right-hand side of the interface:

From the window that appears select the orange Add button.
The variable name we are going to set is url and both the Initial and Current Values are the url for your TERMINALFOUR instance with an /rs (RESTful API) appended to it.
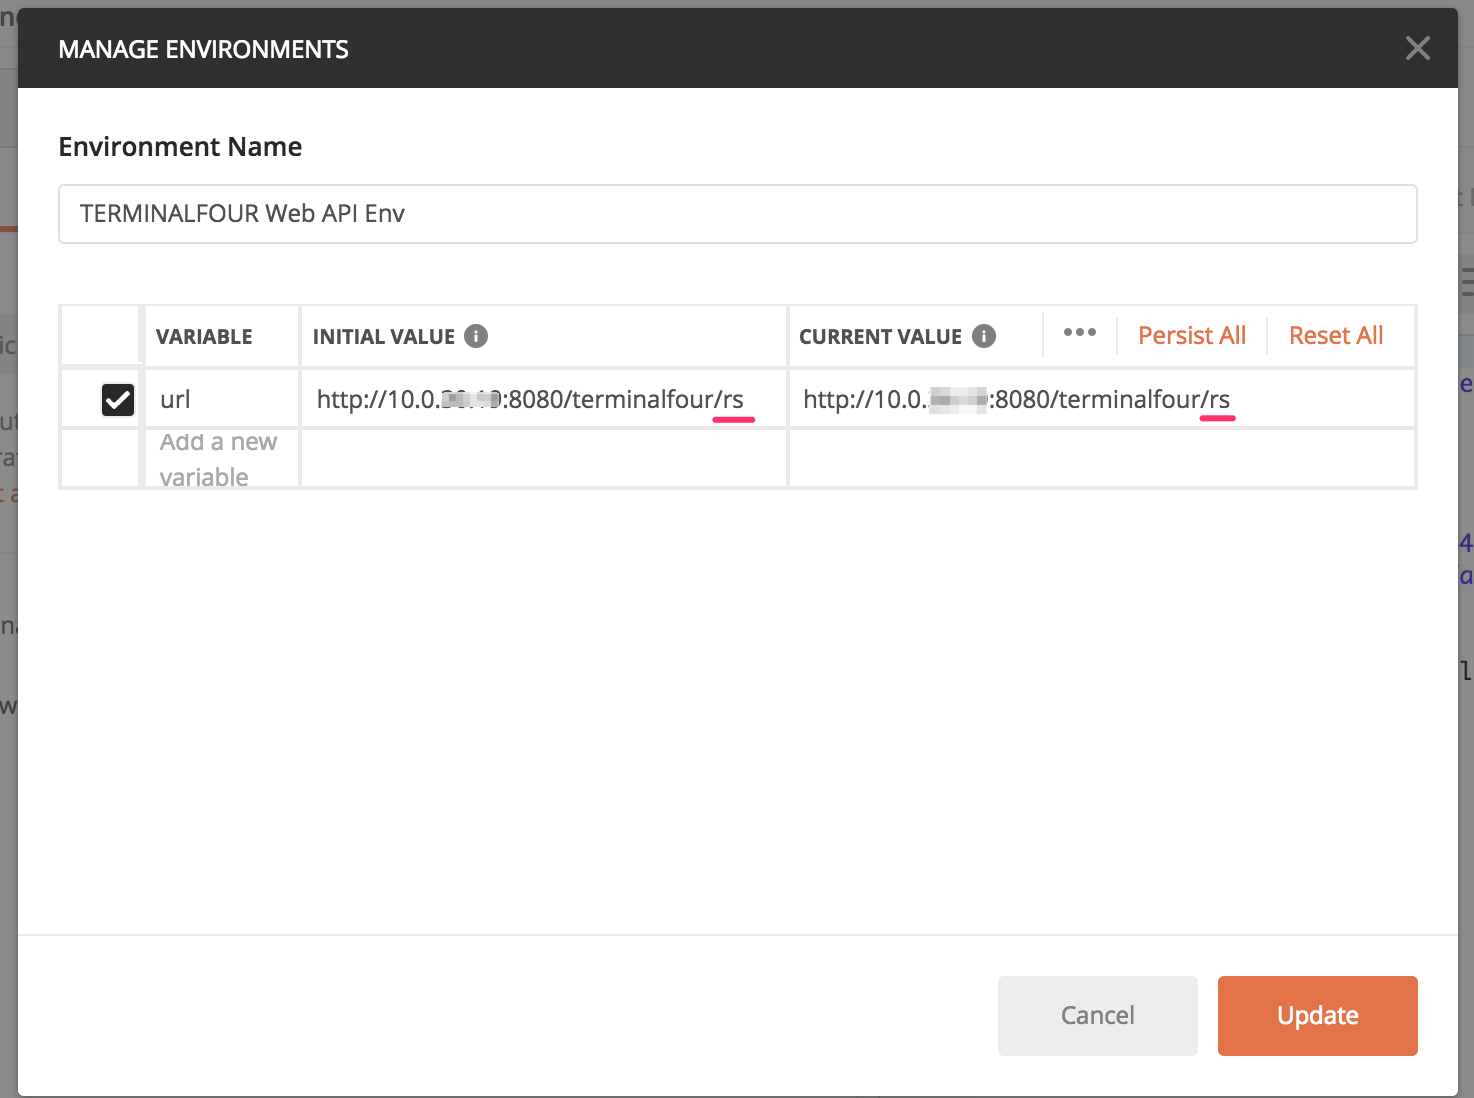
Once that’s done, hit Update and close the Manage Environments window.
Now, we want to import the Collection of TERMINALFOUR requests that you’ve downloaded. These are a set of pre-written requests we’ve created to help you get familiar with the Web API. In Postman go File > Import and select the collection file.
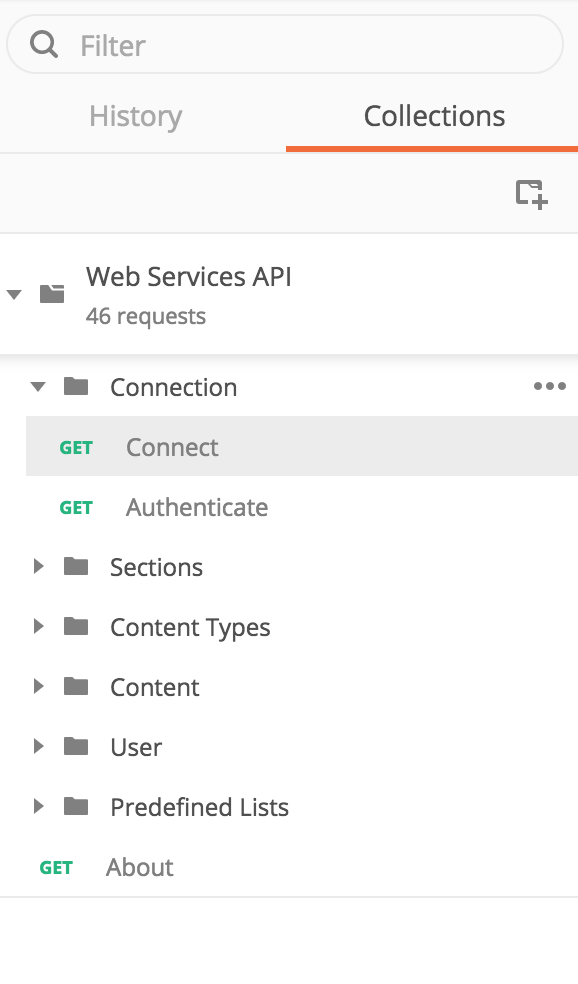
On the left, in the Collections tab, you’ll see an organized folder structure of requests. The first one we are going to use is Connect.
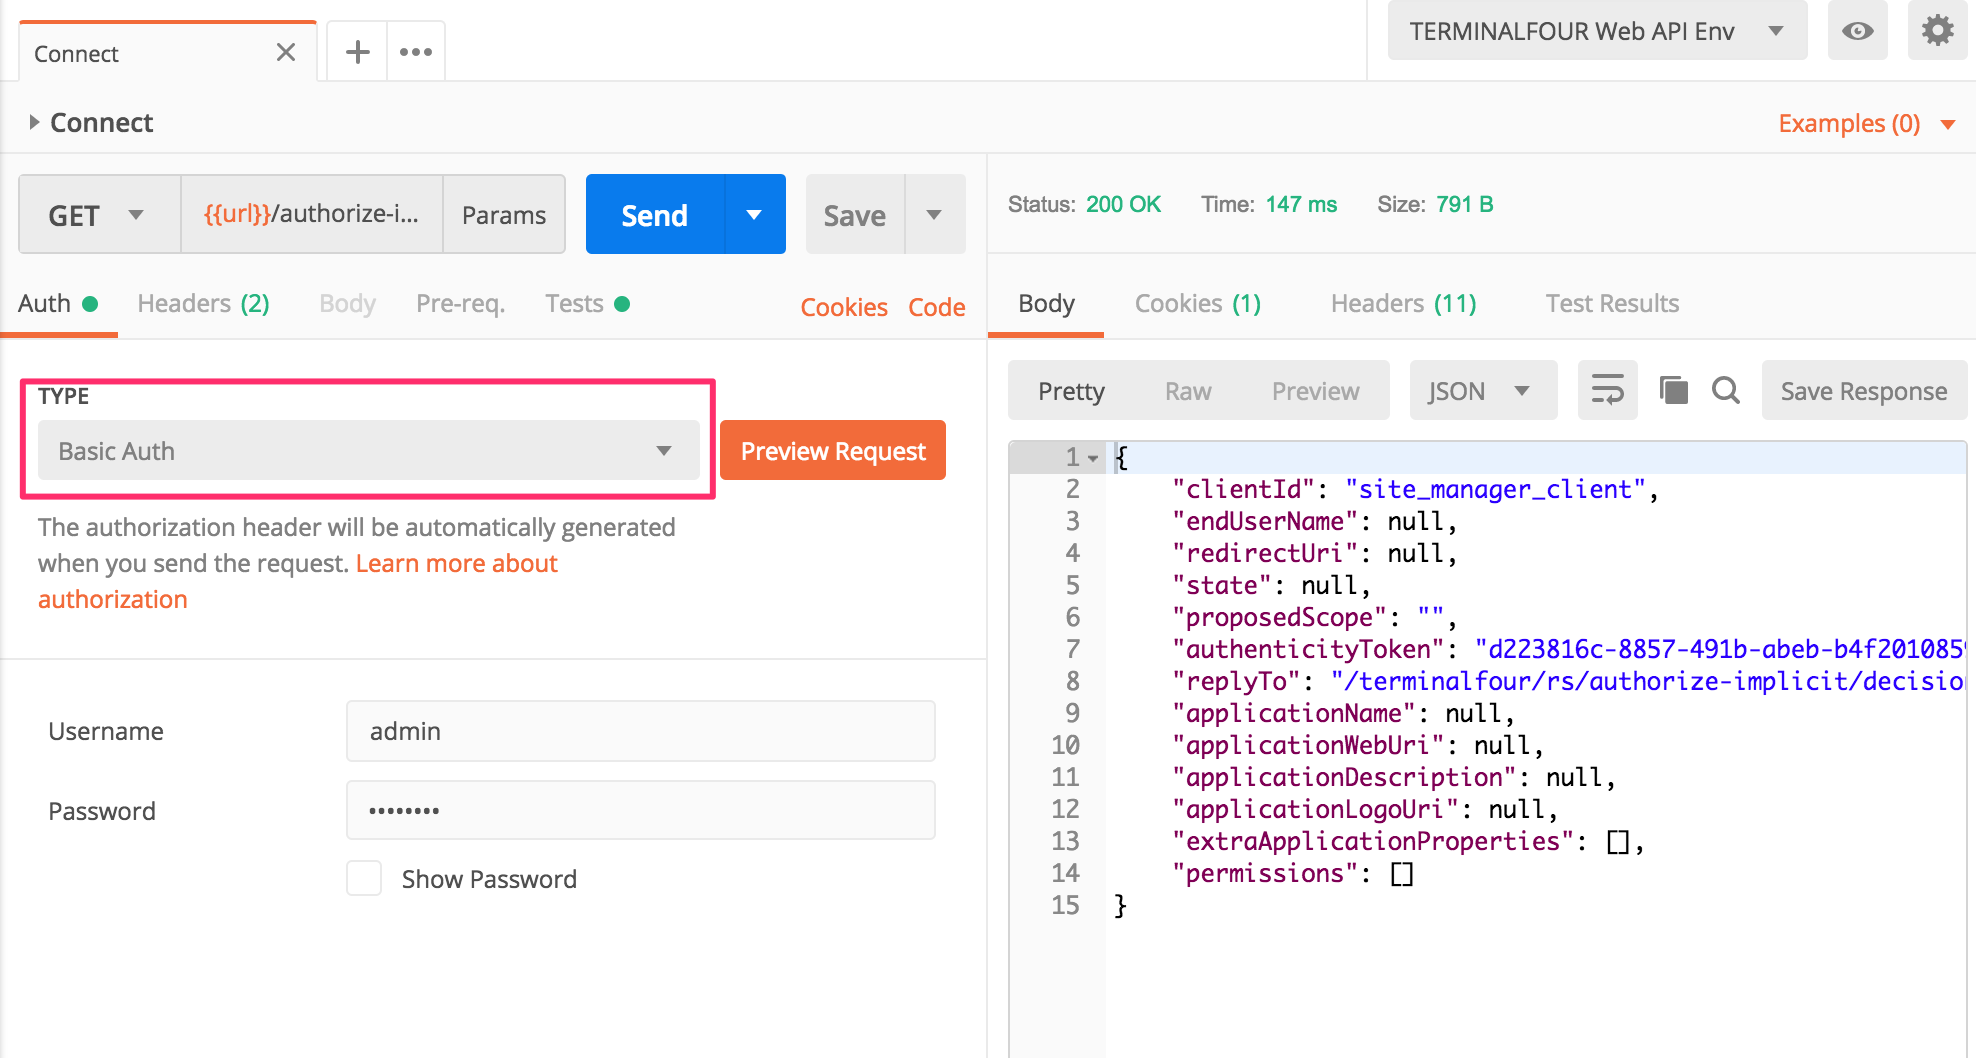
When we select the Connect request the HTTP Request Selection Box will show GET as the request type because the request is just reading the resource.
You'll also notice that in the URL input field, the URL specified in the Environment variables has been appended with two parameters. You can toggle these parameters with the button highlighted to see them a little clearer.

Before you hit Send, set the Authorization type to Basic Auth and enter your username and password (remember, you'll need to log in using a TERMINALFOUR local account instead of one that uses a directory service).
If the log-in details are correct when you Send, a status of 200 OK is received and an authenticityToken is generated. Because the Accept header requested the response as JSON (have a look at the value of the Accept key in the Headers tab), you'll see the JSON output on the right when authentication is successful.
The authenticityToken value is stored by Postman in a variable named session_auth_token. You can see this and the url value in the Environment variables window by clicking on the Environment quick look button (that's the one with the eye icon).
A Cookie named JSESSIONID is also created with a unique string as its value.
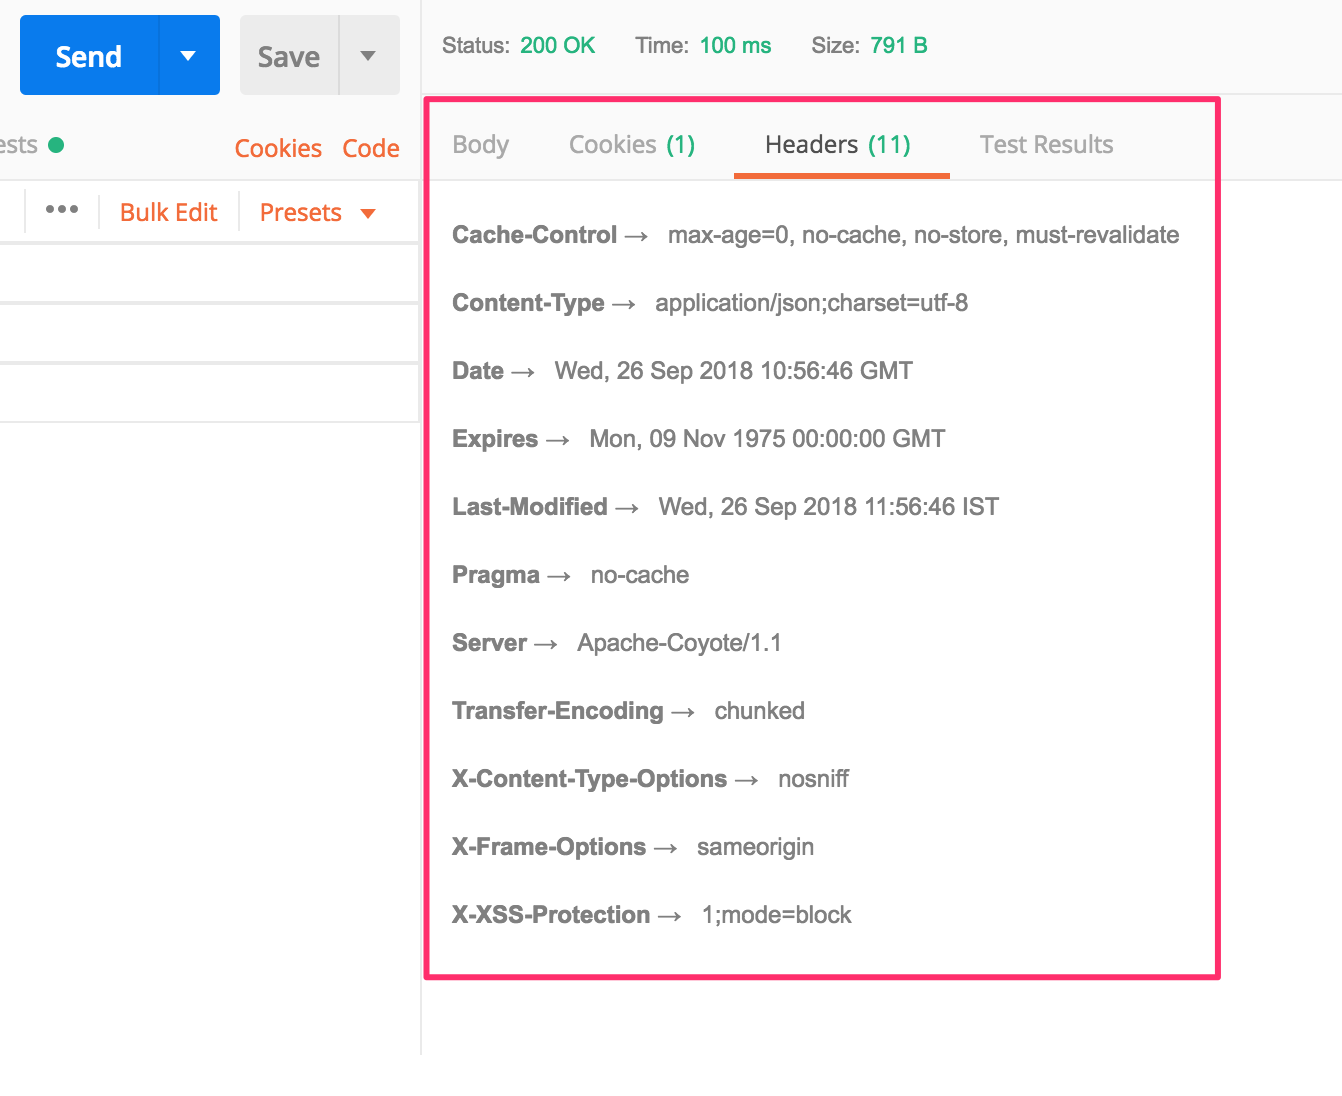
You can see the Cookies and Headers values that were returned from your TERMINALFOUR instance by selecting the tabs on the right:
Authenticate Request
Now that we've connected, there's another authentication step required before we can use the TERMINALFOUR Web API. In addition to the JSESSIONID cookie, TERMINALFOUR also needs a bearer token. Let's get that.
Select the Authenticate request, and you'll notice that the Parameters include the session_auth_token variable that was derived from the authenticityToken:
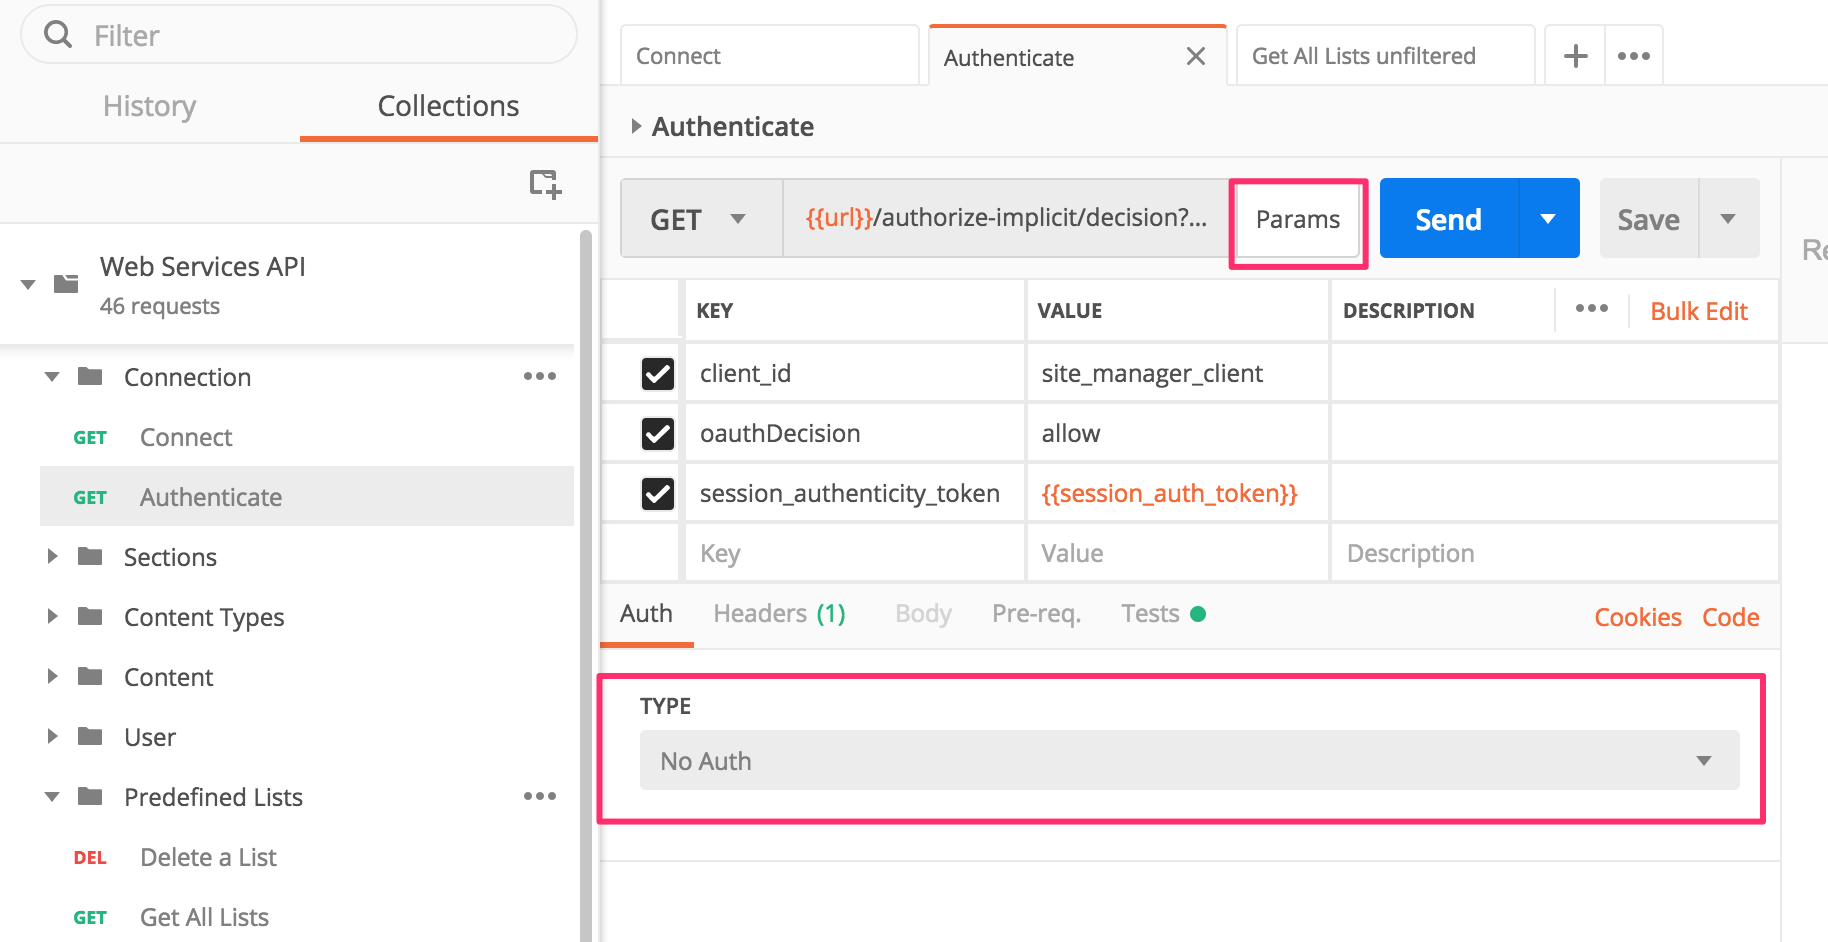
You might also notice that the Authorization is set to 'No Auth'. No authorization is needed for this request, all that's required is the authenticity token as a parameter and the JSESSIONID as a cookie.
Hit Send and the response returned shows the accessToken, which is the bearer token used for subsequent requests and is saved by Postman as a variable. TERMINALFOUR expires bearer tokens after 30 mins (1800 secs). After this time, you will need to reconnect.
In versions prior to 8.2.18, "accessToken" was named "access_token". have a look at the older version of this article if this is relevant to you.
- The Web Services API Collection (the root ‘folder’ of all the requests) has its Authorization setting set to use Bearer Token Authorization.
- The default Authorization behavior for all the requests in the collection is to Inherit from the parent collection.
- Unless you specify an authorization type in the Authorization tab of a request, the request will use the authorization method defined at the collection level.
- To reveal the authorization settings of the parent collection:
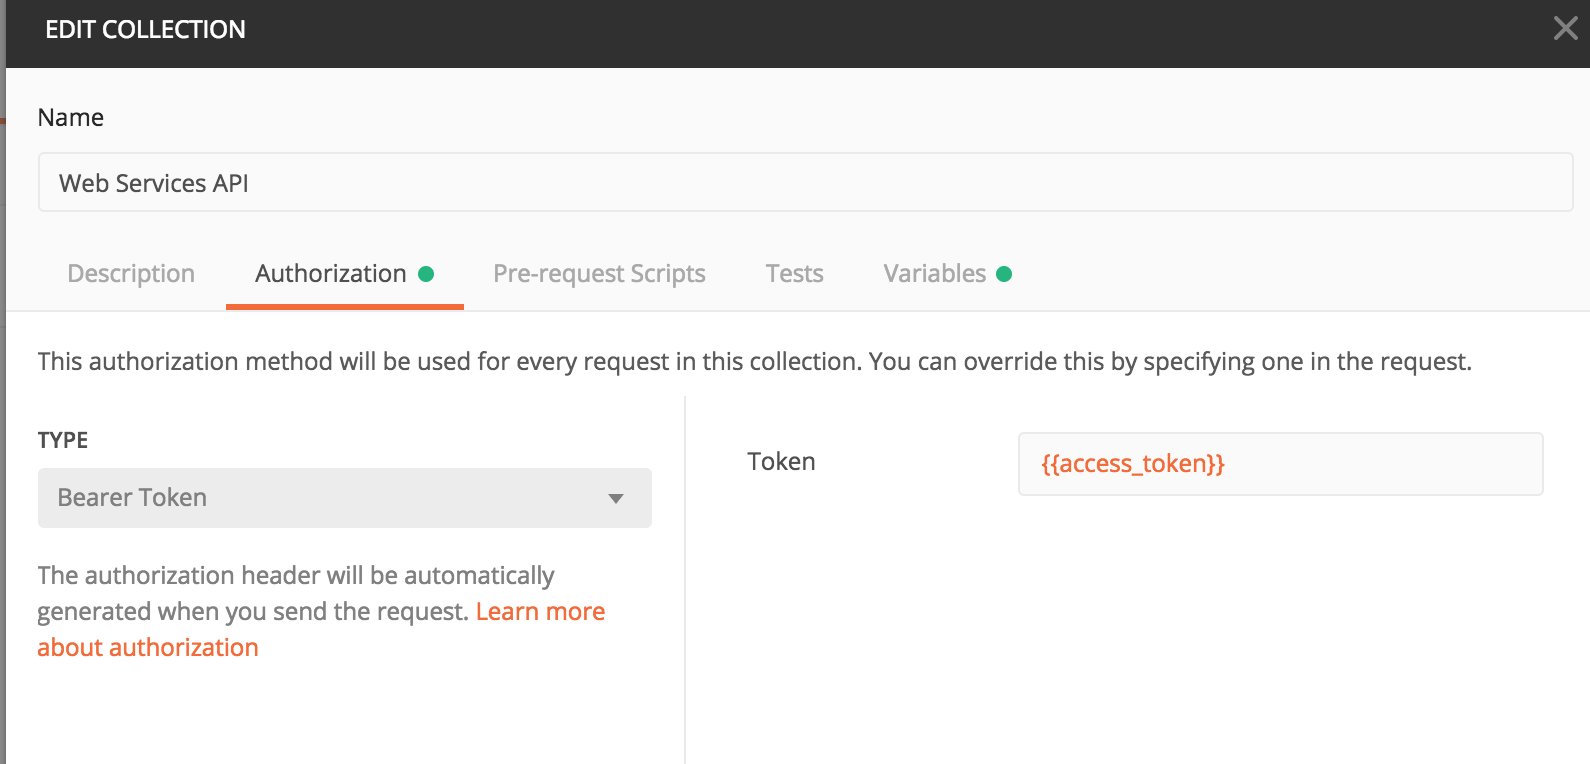
- Right-click on the Web Services API Collection and choose edit
- Navigate to the Authorization tab
- You will see that the type is set to use ‘Bearer Token’ and the Token is set to the variable to which we assigned the value of the ‘accessToken’ field to.
About Request
Now that we've successfully connected and while our bearer token is still valid, let's create our own request. We want to create one that will return information about our TERMINALFOUR instance.
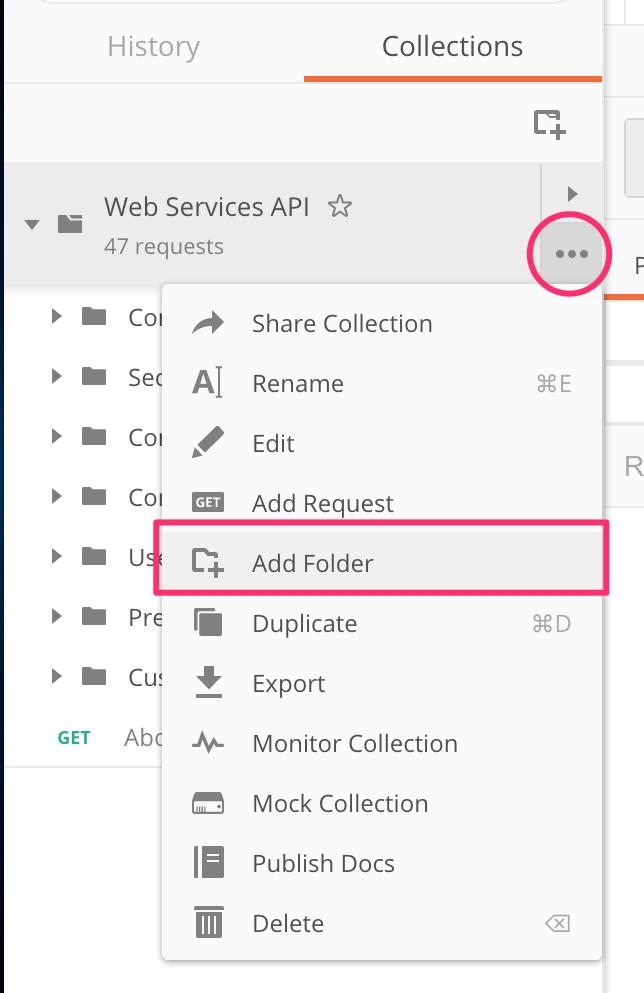
There's already a request that will do that but let's create our own. To stay organized, you can create a subfolder in the Web Services API Collection in Postman. You can call this folder 'Custom Requests'.
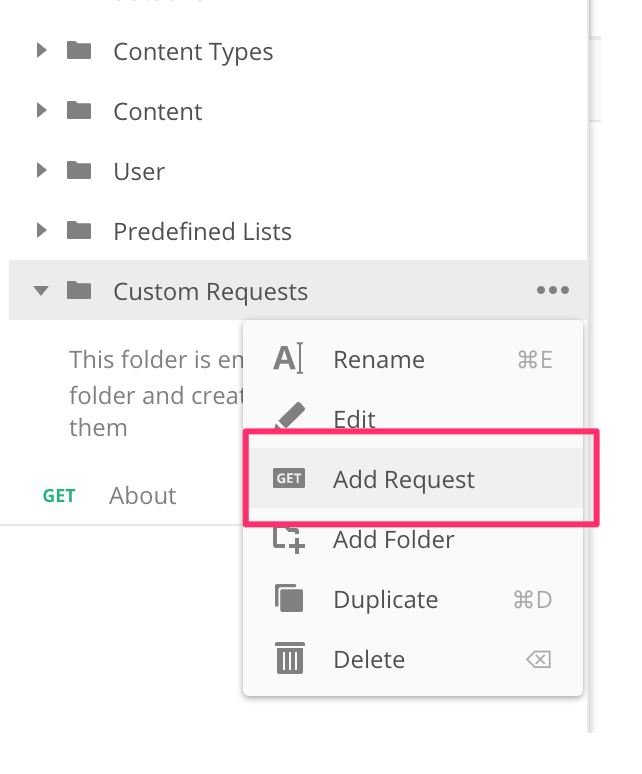
In the new folder, add a request. This one is an About request so you can call it 'About':
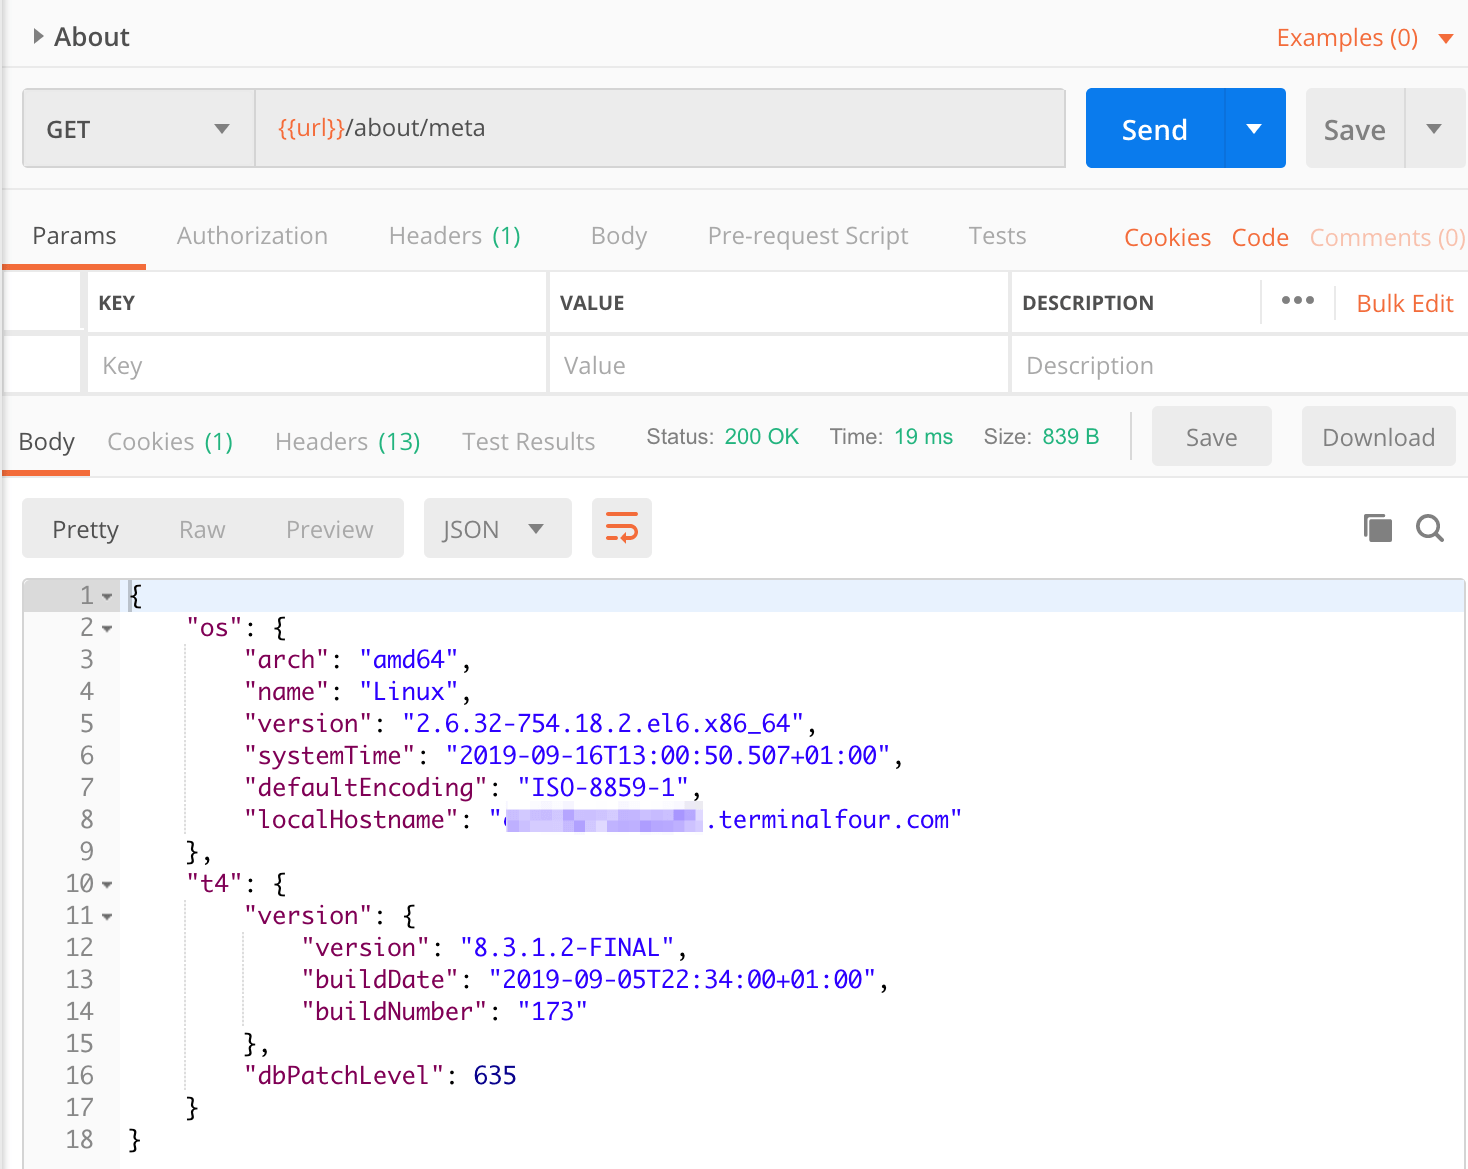
In the URL Input field add the url variable that comes from our Environment settings (variables in Postman are enclosed in double curly brackets) followed by the name of the resource we are requesting. In this case, it's /about/meta.
Since version 8.3.1, a single /about service is no longer used.
if this is relevant to you.
Hitting Send will return a JSON output with TERMINALFOUR instance details:
That's it! In this article, we've used Postman to get acquainted with the TERMINALFOUR Web Services API. We've looked at connecting and authenticating and how to return details about the TERMINALFOUR instance.
In the next article, we'll look at using the Web API to add and edit Sections in TERMINALFOUR.
Back to top