Packages
Description
HTML Packages are a type of Package that is used to import content from HTML files into Terminalfour. It uses the DOM structure of the HTML page to determine the Site Structure, content area of the page, and the Content Type to be used for the content. On import, all documents and images that are referenced are imported into the Media Library, and any internal links between the HTML files are converted into Terminalfour Section Links.
HTML Packages Functionality and Options
Site Structure
The order of the Sections created in Terminalfour will match the order that they are identified by Packages. This ordering can be manually changed post migration if required.
All Sections are migrated as visible in navigation. Those that need to be hidden can be updated post migration.
If the site navigation contains links to external URLs or links to other folders on the site, these will not be imported and will not be visible on the new site structure. These should be created post migration.
Where pages exist on multiple URLs (e.g. a friendly/short URL for a page) or the same content appears on multiple pages, those pages will be imported multiple times. The import application will not identify any duplicates or copies of content/pages.
The Site Structure can either be based on the folder structure of the source HTML or on a breadcrumb.
Folder Structure
The Site Structure that will be created in Terminalfour will be constructed in the same hierarchical file/folder structure of the source files that are provided for the migration. A Terminalfour Section will be created for each folder, and the index.html file within that folder will be evaluated for any matching content. Where there are multiple files within a folder, the index.html file is used as the source of content for the Section, and a sub-section is created for each other file.
It is possible to configure the Default Filename if it is not index.htmlFor example, if the about-us folder contains:
- index.html
- more-about-us.html
- locations.html
Packages will create a folder structure as:
- about-us (contains content from index.html)
- more-about-us (contains content from more-about-us.html)
- locations (contains content from locations.html)
Breadcrumb
The Site Structure that will be created in Terminalfour can be based on the breadcrumb that appears on each page by configuring the Selector for structure. If the page has no breadcrumb, the page will only be created if there are child pages, and the name of the page created will be based on the link text within the breadcrumb.
Section Name
The name of the section created in Terminalfour can be derived from an HTML node in the page by configuring the Section name option.
Media Library
Any linked media files associated with the HTML pages will be automatically imported into the Media Library in the same hierarchical structure as they are found in the local folder structure. For example, a media file that is found at /directory 1/directory 2/directory 3/filename will be migrated into the following Category in the Media Library:
- directory 1
- directory 2
- directory 3 - {filename}
- directory 2
The filename will be used to name the piece of media that is created in the Media Library.
When creating the Package, it is possible to configure the Media Types that are imported. The type of the media item created in Terminalfour will be automatically determined based on the file extension of the file. If a file extension matches two media types, the importer will use the first media type for that media item. It may be necessary to update the permitted file extensions for each of the above Media Types before migration to ensure that all relevant media is imported.
The maximum file size that will be allowed to be migrated is an installation-wide configuration option that is configurable in the Advanced Configuration (Max upload size (KB)). Any files that exceed this limit will note migrate and any references to those files will not be updated to a Media Item tag.
Where a media item (e.g. an image) is used on multiple pages, it will only be imported into the Media Library once, but referenced from each page. While the description and keywords fields of the media item will not be set by Packages, image alt attribute values will be imported into the “Description” attribute within content (i.e. not into the Media Library). If an image is used multiple times, the alt tag could be different on different pages. The existing content will have alt attribute values for each instance of the image from the Media Library (provided they are set in the source HTML), but any new instances/uses of the imported image (for new content) will have a blank alt tag, unless an alt tag is set by the author or updated in the Media Library.
Metadata
When importing an HTML Package, there is the option to populate metadata. If checked, any metadata in the source HTML that matches the meta tags configured in Terminalfour, will migrate the content into the Section metadata that can be accessed in the Metadata tab when editing a Section. The metadata in the source HTML should be in the format
<meta name="description" content="description of my current page" />
Create a HTML Package
To create an HTML Package, go to Content > Content Migration > Packages and select Create new package.
Select "HTML" from the Package Type list and click Next.
Enter the following details:
| Item | Description |
|---|---|
| Name | Give the Package a name. This is displayed in the listing on the main Packages page. |
| Descrption | Give the Package a description. |
| Language | Select the language into which the content is imported, |
| Location |
|
| Url |
Enter the URL that should be used to crawl the site. Terminalfour recommends using a sitemap page, that contains links to all other pages and that the sitemap is within the root of the Package. It is possible to point to a http:// reference (e.g. http://www.terminalfour.com) or a file path to a file on the server (e.g. file:///tmp/import/index.html for Linux or file:///C:/temp/import/index.html for Windows). If using a file on the server, all links within that sitemap need to be absolute links to file paths on the server e.g. <a href="file:///tmp/import/about-us/index.html">link text</a>) If using a file on the server, note that the path has a triple-slash at the start. |
| Crawl depth | The crawl depth controls how far to crawl from the initial URL. If left blank the crawler continues until all links from the entered URL run out. If 0 is entered only the entered URL is used for content. Only links that match the domain of the entered link are crawled. For example, if http://www.terminalfour.com is entered only links starting with http://www.terminalfour.com are followed. |
| Select | If the Location is Upload from my local computer, select the zip file of HTML. |
| Index filename | Enter the path to the HTML file that should be used as the start of the crawl. Packages will follow all links on that page to find other pages. It is recommended to use a sitemap for this e.g. sitemap.html or /about/this/site/sitemap.html |
| Advanced | Check this option to view the Advanced import options. |
| Default Filename | Enter the default index filename that exists within each folder (e.g. index.html). |
| Section name | An element from the index file can be used for the Section name, enter a selector value to extract this information. Enter an HTML selector for the element. If this element is left blank the title of the page will be used (i.e. the value within the <title> element). |
| Selector for structure |
If left blank, the folder structure is used. A Section will be created for each folder. The "Default filename" file within each folder is used as the source of content for the Section, and a SubSection is created for each other file. Alternatively, the structure could be based on an HTML element on the page, for example, a breadcrumb. Where this option is used, if a page does not contain the breadcrumb, the page will only be created if there are child pages, and the name of the page created will be based on the link text within the breadcrumb. |
| Remove from Section name | When creating the Section, the Section name option determines the text to use. Where this consistently contains a string of text that should be ignored, enter that string of text. For example, if the <title> is being used, and the tag is <title>About us | Terminalfour</title> or <title>News | Terminalfour</title>, then enter " | Terminalfour" to be ignored. |
| Exclusion rules | To exclude URLs from the crawl, select Add exclusion and enter the URL. Regular expressions can be used to exclude a group of pages e.g. www.terminalfour.com/blog/* will exclude all URLs that start with www.terminalfour.com/blog/; or asp$ will exclude all URLs that end with asp. |
| Media types | Select the type of media that will be uploaded. If the file extension of the uploaded files does not match the allowed file extension for the selected type, the media will not be created. |
Map Content Types
For each Content Type that is being used, a mapping is provided to map specific HTML tags to the Content Type and to each element that is being used. For each Content Type, select the Content Type from the dropdown, and enter:
| Item | Description |
|---|---|
| Mapping type |
|
| Selector | If using a Selector, enter the HTML selector that contains the content to be imported into the selected Content Type. For each instance of this selector on the page, a Content Item will be added using the selected Content Type. |
| XPath | If using XPath, enter the XPath to specify the content that would import into the selected Content Type. As above, for each instance of this selector on the page, a Content Item will be added using the selected Content Type. |
| Default value | This can be left blank when mapping a Content Type. |
| Content |
For the selector specified, what content should be selected:
|
Map Content Elements
After entering the Content Type Mapping, click Next element and map each element that will be used for the import:
It is not possible to map Image or File elements.
| Item | Description |
|---|---|
| Mapping type |
|
| Selector |
If using a Selector, enter the HTML selector that contains the content to be imported into the selected element. This is relative to the selector used for the Content Type. For example, if the selector for the Content Type is div.content, the selector used for the element does not need to contain the div.content (and if the Content Type is using Inner HTML, the selector for the element cannot contain the div.content). If multiple instances of that selector exist for the current Content Item, all instances are returned and migrated into the one element. For example, if the selector is h2 and the Content Item contains multiple h2's, all h2's will be concatenated and imported into the element. |
| XPath | If using XPath, enter the XPath to specify the content that would import into the selected element. As above for the Selector, this is relative to the selector for the Content Type, and multiple instances of the selector will be concatenated. |
| Default value | If no value is found using the Selector or XPath specified, enter an optional Default value that can be used to populate the element. This is recommended for the Name element. |
| Content |
For the selector specified, what content should be selected:
For List elements (e.g. Radio button, Multi-select List), the content in the source HTML should match either the List entry name or List entry value for the element. If it does not match, the element is not populated. If the list allows for multiple values to be selected (e.g. checkbox), the Separator for the values can be specified. If the list contains sub-lists, the content in the source HTML should match either the List entry name or List entry value for the sub-list entry. For Media elements, the content needs to be an anchor tag (e.g. <a href="/path/to/document.doc">Text for link</a>) or an image tag (e.g. <img src="/path/to/image.png" />). For Section/Content Link elements, the content needs to be an anchor tag (e.g. <a href="/path/for/link/">Text for link</a>). |
| Separator | For list elements, it is possible to specify the expected Separator in the source content. For example, if the content in the HTML is "News; Events; Release", where each item matches a separate list item, the separator would be "; ". This should include space character, if there is one. For Radio buttons and Select box elements, this can be left blank (since they are single-select lists and do not need a Separator). |
| Date format | For date elements, it is possible to specify the expected date format in the source content. For example, if the date in the source content is 31/12/2018 then the date format is dd/MM/yyy. For more information on date formats, refer to the page about formatting dates. |
| Parse for media | Check this option to parse the content for Media within the content (images and documents), to import those files into the Media Library, and to convert the content to use the Media Item. |
| Must be populated |
Check this option to treat the content element as Compulsory for the Package migration. If checked and the content does not have a value for the element, the content will not be added. The Compulsory / Non-compulsory option on the Content Type definition are not used for migration, and a compulsory element can be migrated as blank if this option is not checked. |
| Preview |
To test the mapping, you can add a link to a page/path that contains a matching content item, and click "Preview" to see the content returned by the mapping. Similar to the Sitemap option above, it is possible to point to a http:// reference (e.g. http://www.terminalfour.com) or a file path to a file on the server (e.g. file:///tmp/import/index.html for Linux or file:///C:/temp/import/index.html for Windows). |
Repeat this for each element within the Content Type that is being used for migration. Once all elements for a Content Type are mapped, click Save changes.
To map another Content Type, select the Content Type, and configure the mappings.
Once all mappings are complete, click Next and allow the Package to complete Resolving.
Selectors
HTML selector
The HTML selector uses 'selectors' to match elements in the Package. Below is a table listing the APIs, what it matches, and an example:
| Selectors | Matches | Examples |
|---|---|---|
| * | Every element | * |
| tag | Specific tag | div |
| #id | Elements with an ID attribute | #container |
| .class | Elements with a class attribute | .left |
| [attr] | Elements with an attribute | a[href] |
| :it(n) | Elements whose index is less than n |
td:lt(3) |
For more information on the selector API http://jsoup.org/apidocs/org/jsoup/select/Selector.html
XPath selector
the XPath selector uses 'selectors' to match elements in the Package. Below is a table listing the selectors, what it matches, and an example:
| Selectors | Matches | Examples |
|---|---|---|
| //tag | Each tag on the page | //p |
| /tag/tag | Specific tag | /html/head/title |
| /tag[@attr="value"] | Select tags where attr = value | //div[@class="content"] |
For more information on xpath http://msdn.microsoft.com/en-us/library/ms256086(v=vs.110).aspx
Package Information
Once the Package is resolved, the Package information is displayed.
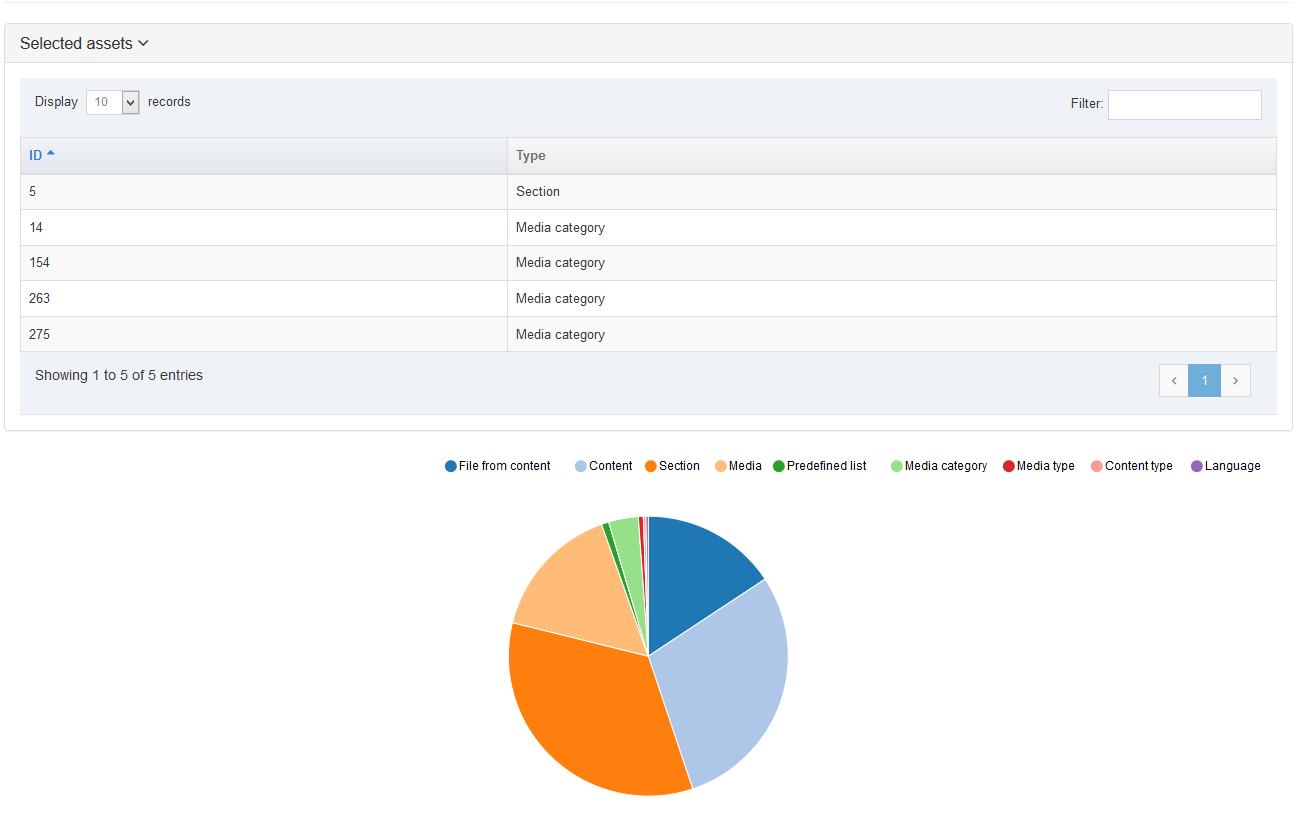
Selected Assets
This displays the assets that will be imported, with a graph to visualize the number of items of each asset that will import.

All Assets
This Section shows the Assets assigned to the package. You can use the Display list to increase the items displayed. or Search within this list. The head row titles are:
- ID: this is the ID assigned to the asset information in the row.
- Name: this column lists the names, the languages, and the details for the information in this row.
- Type: this column lists the Type of assets associated with the information in the row.
- From Section: where the Section asset is located.
- From content: where the content asset is located.
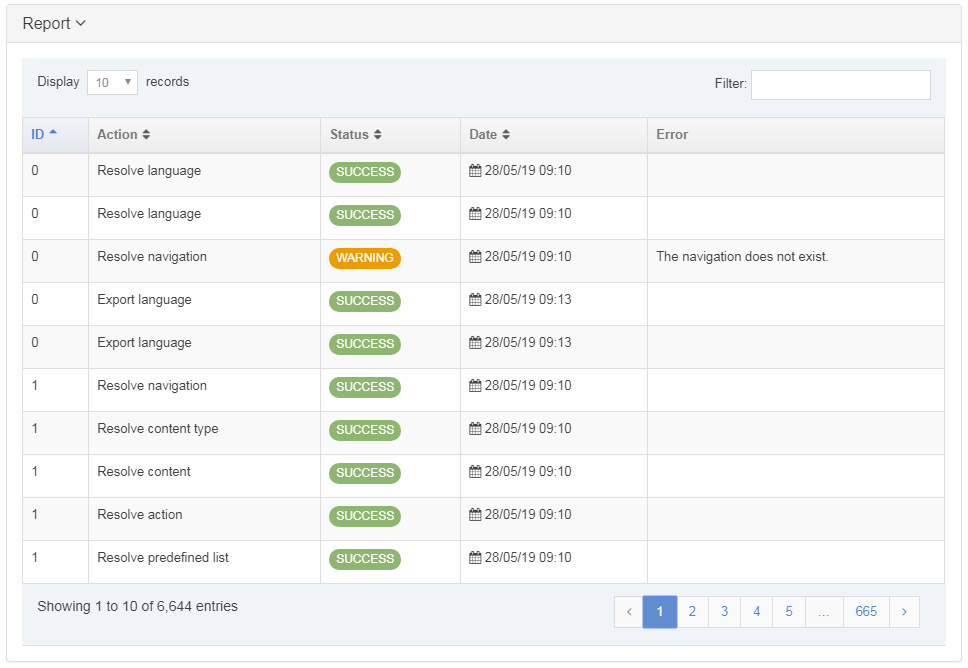
Report
The report contains information about the Package and lists any Warnings or Errors (filter for the word Warning or Error to see them).

Each row lists the following information for the record by column:
- ID: reference ID of the associated asset.
- Action: the action taken on the asset identified.
- Status: either an Error, Warning or Success
- Date: the date of package created
- Error: description of the error causing the Warning label
If you are satisfied with the entries, you can click Next to create your package. Alternatively, click Prev to return to the previous page and fix any errors.
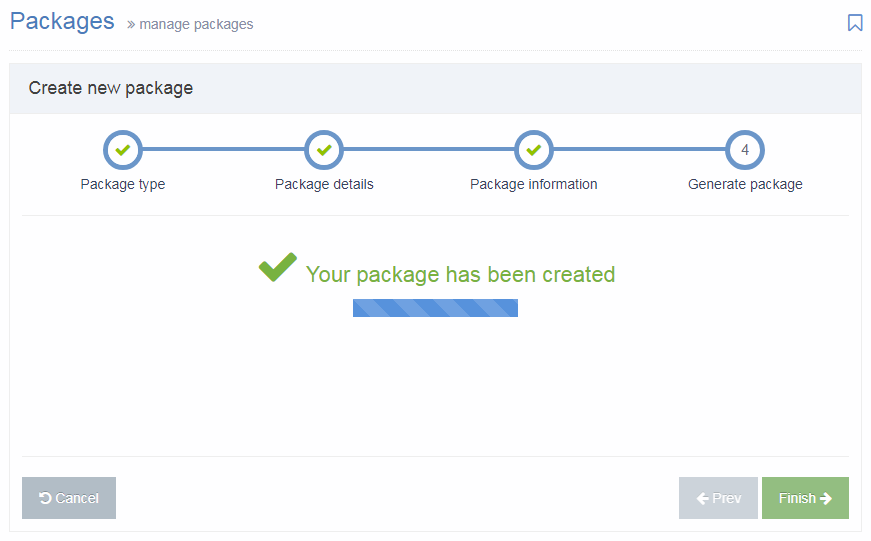
Generate package

The Package has been created and is listed as "Pending", and is now ready to Import or Download (to import into another instance of Terminalfour).
Import a HTML Package
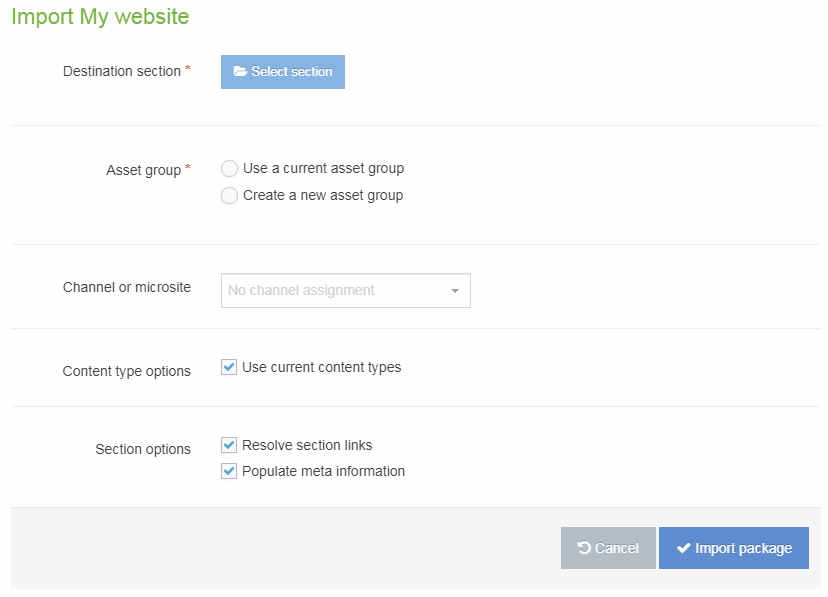
Once the Package has been created, it is ready to Import. On the Packages listing, select Import from the Actions menu:

| Item | Description |
|---|---|
| Destination section | Select the Section that you would like to import the Package contents to. |
| Media category | If there is Media within the Package, select the Media Category into which to import. |
| Asset group |
|
| Channel or microsite |
Select the Channel that will be associated with the content that is imported (if content is included in the Package). Following import, it is possible to Reset Content on the channel, if preferred. |
| Content type options |
Check the Use current Content Types option to re-use existing Content Types. |
| Section options |
|
Select Import Package. Once imported, select All Packages and the Package will now have a status of "Imported".
Navigate to the Site Structure to see the imported Sections and content.
